How to create custom filtering reports in Freshdesk?
How to create custom filtering reports in Freshdesk?
You'll create a custom report to export Freshdesk tickets with specific filters. This is essential if you want to transfer tickets based on criteria like status or date. Our team can't use advanced custom filters due to Freshdesk's API limitations.
Follow these steps to create a custom report:
1. Go to your Freshdesk account.
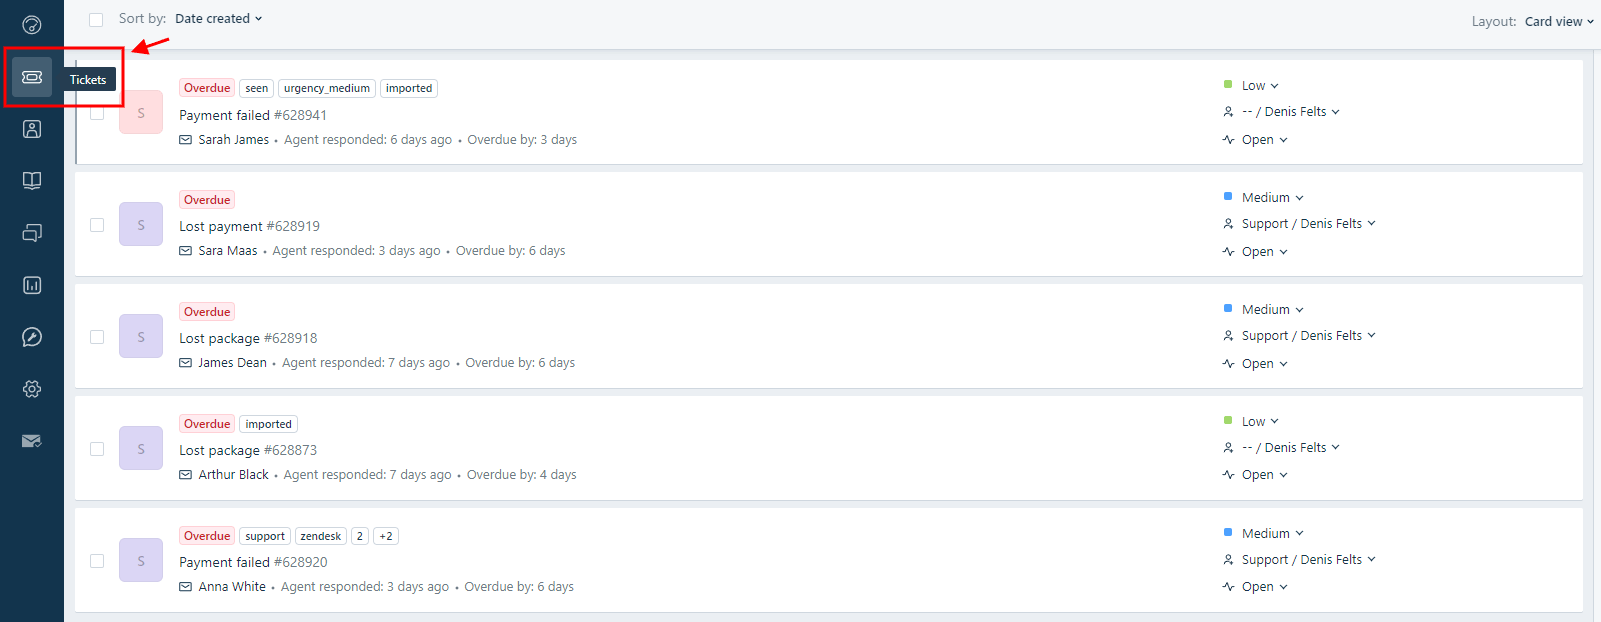
2. Select “Tickets” in the left navigation.
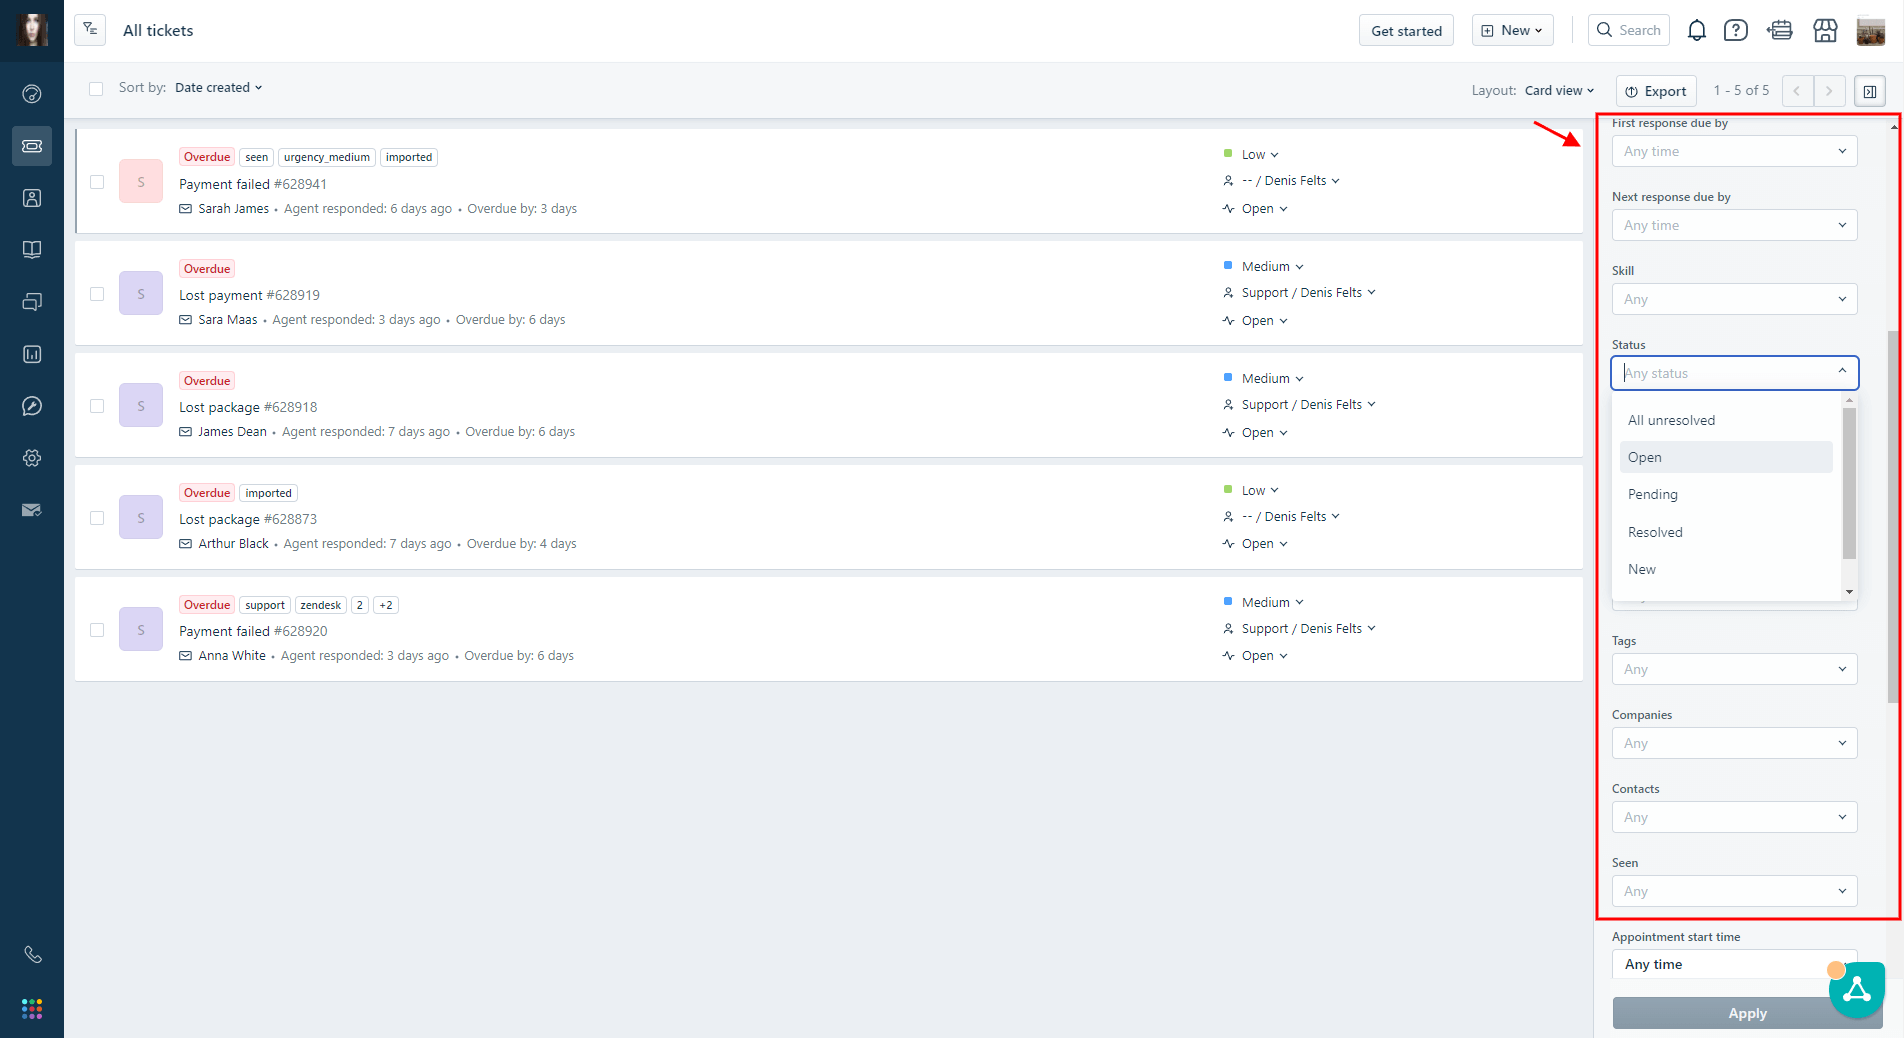
3. On the right-hand side, navigate to the "Filters" menu, choose the desired parameter you want to use as a filter, and then click “Apply.”
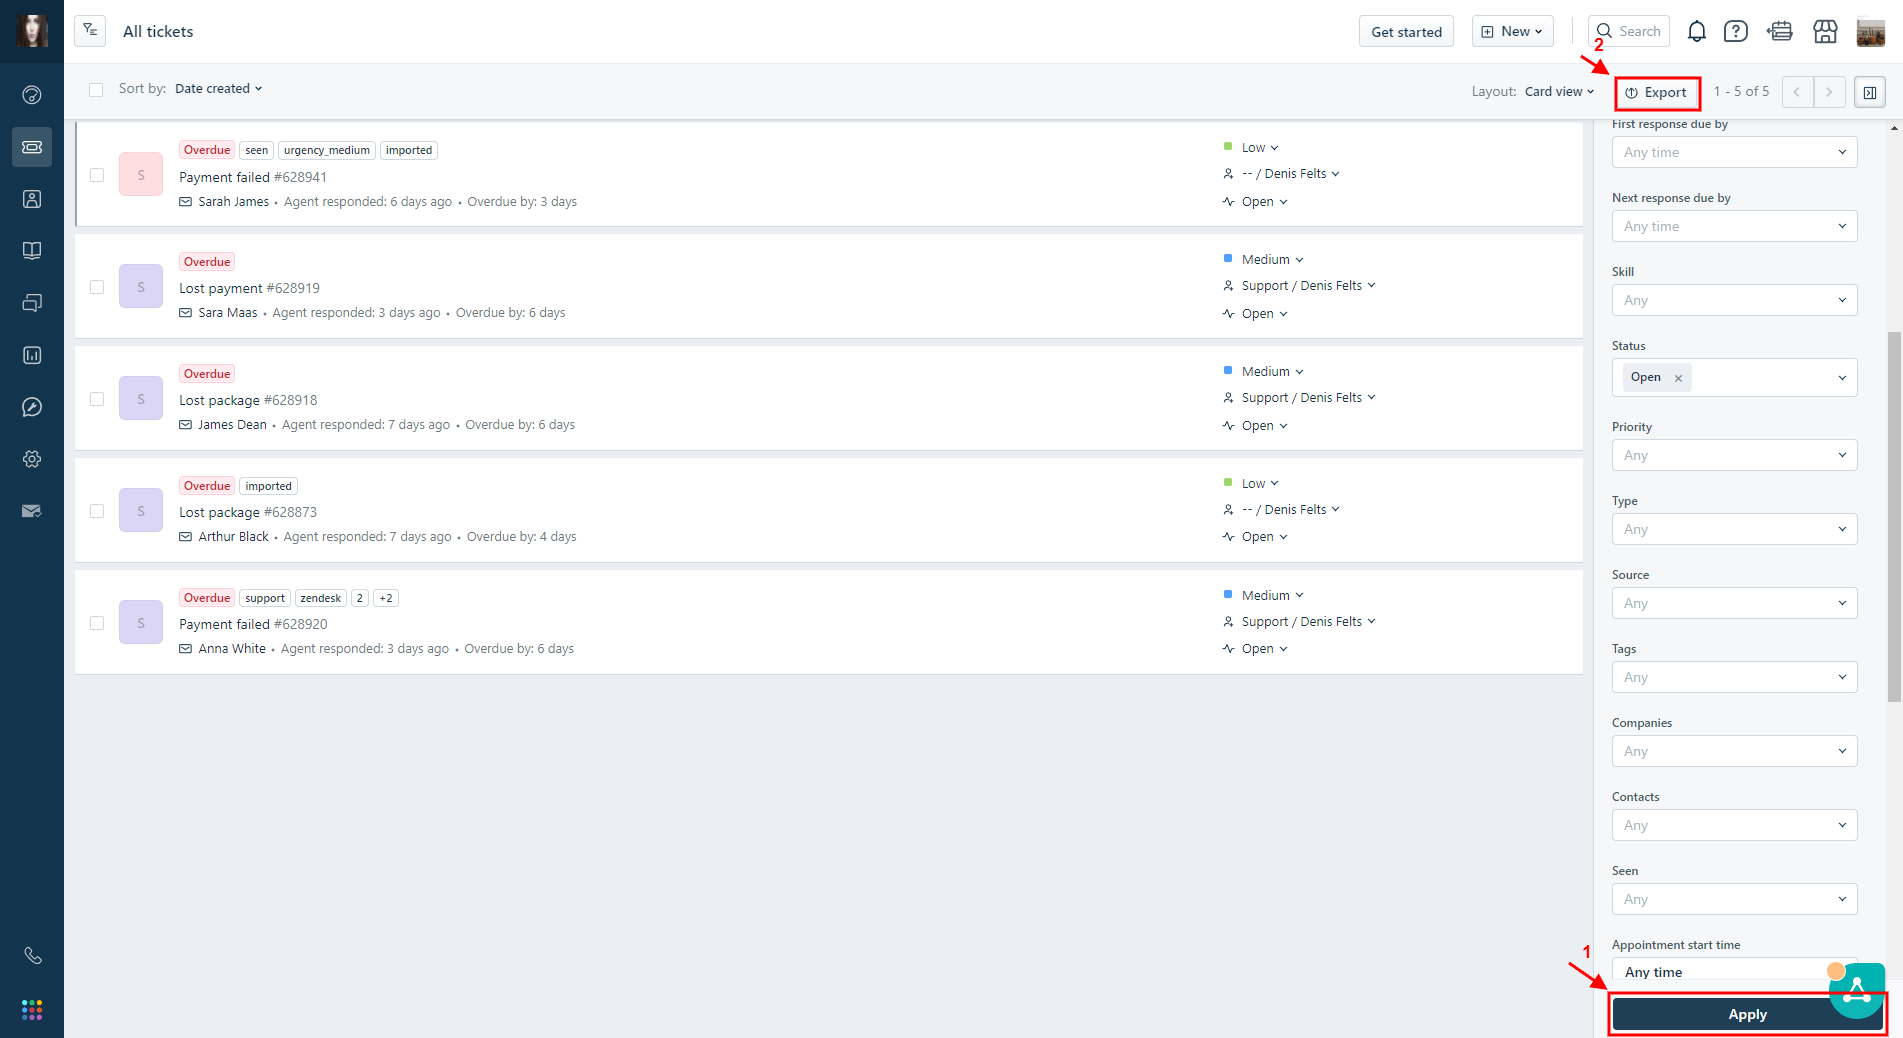
4. After applying the filter, click the "Export" button.
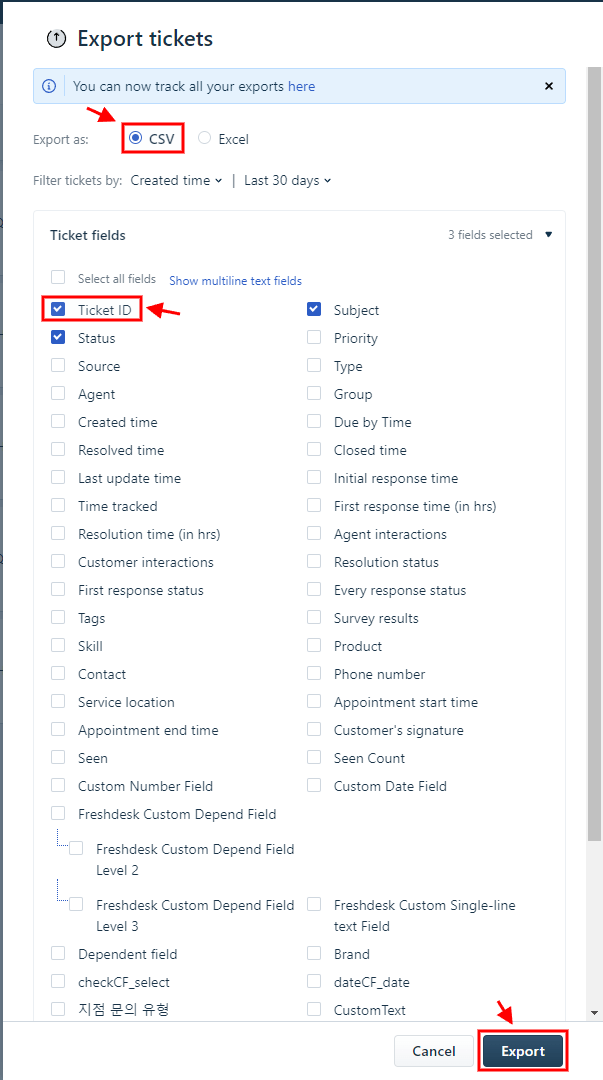
5. In the export menu, choose "CSV."
6. Select the required ticket fields, like "Ticket ID" and your filter criteria.
7. Click "Export," and the file will be sent to your email.
8. Forward the exported CSV file to our migration experts.
Following this step, our team will handle the ticket filtering process. If you have any questions, don't hesitate to contact our support team.
Looking for more data migration details?