SQLite Migration Guides
How to migrate data to and from a database?
With Help Desk Migration you can:
- export help desk data to a database
- import your database to a help desk
Currently, our Migration Wizard supports the following database management systems: SQLite.
Check the SQLite import guide for detailed instructions.
How to Import Data from Help Desk to Database?
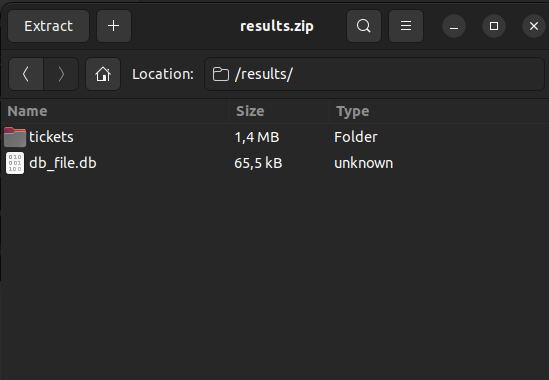
By default, Migration Wizard supports importing data into SQLite databases. During the migration process to an SQLite database, our migration tool transfers all your customer data in a standardized format. So, once a data migration is complete, you’ll receive an archive with a .db file that contains all your information.
What Is a .DB File?
A .db file is used to indicate that the file stores information in a structured database format. Here’s what a .db looks like in an SQLite database:
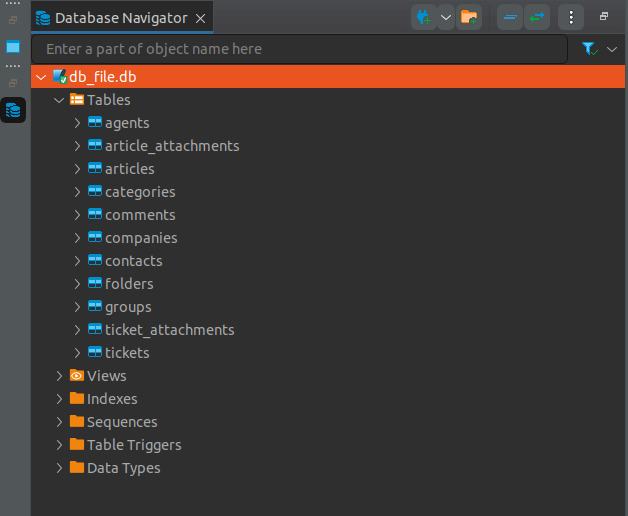
Depending on your source platform, the .db file includes tables for all migrated data like tickets, ticket attachments, comments, contacts, groups, articles, article attachments, folders, and categories.
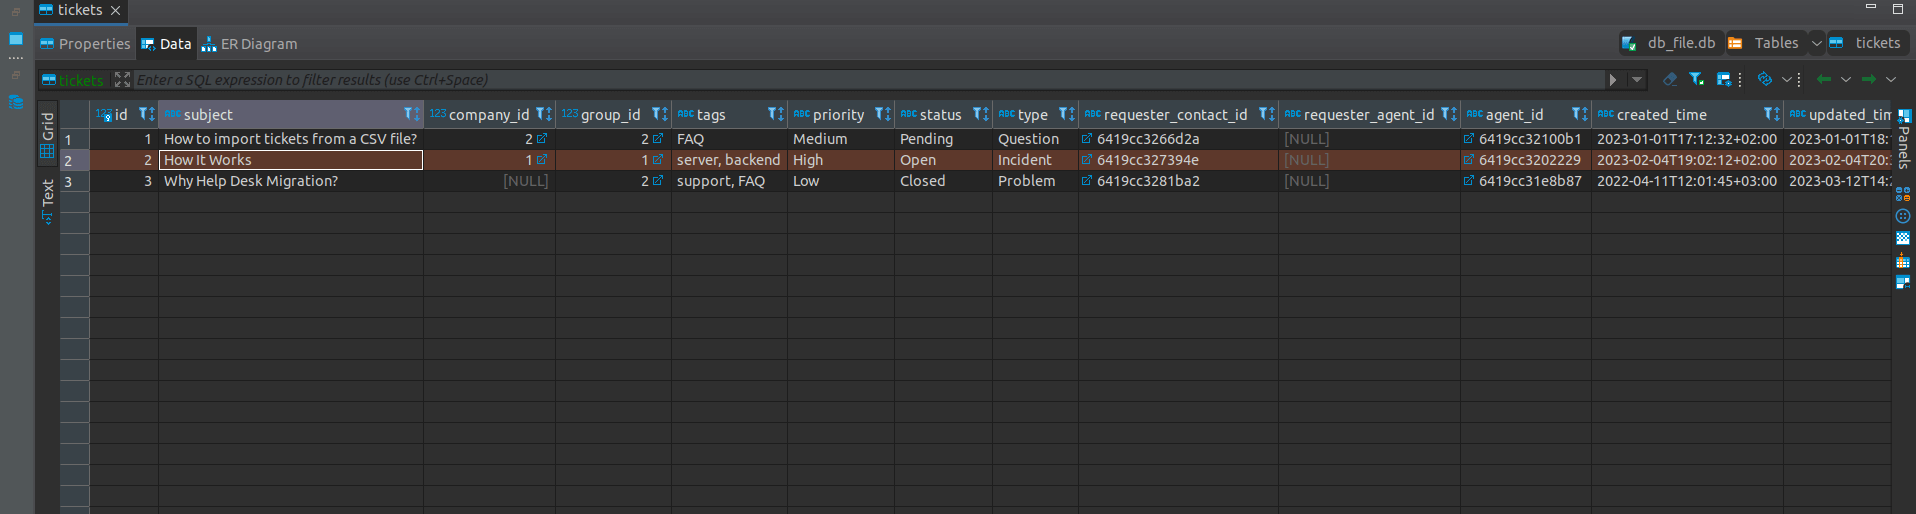
Each table will contain columns with related data. For instance, the table for tickets includes columns like subject, company_id, group_id, tags, priority, status, type, requester_contact_id, etc.
How to Open a .DB File?
To open an SQLite file, you can use a web tool or application that facilitates viewing and editing SQLite files. For instance, you could access SQLite Viewer through Google Drive in the Chrome browser.
How to Import Data to SQLite?
Here’s how to import customer records to an SQLite database:
- Go to and sign up.
- Choose your source platform. Then fill in the access credentials.
- Select SQLite as your target platform.
- Click Continue and proceed with the rest of the steps.
How to connect and export a SQLite database?
To connect and export a SQLite database using Help Desk Migration, follow these steps:
1. Go to and start the migration process. Sign in to your account and click Start new migration.
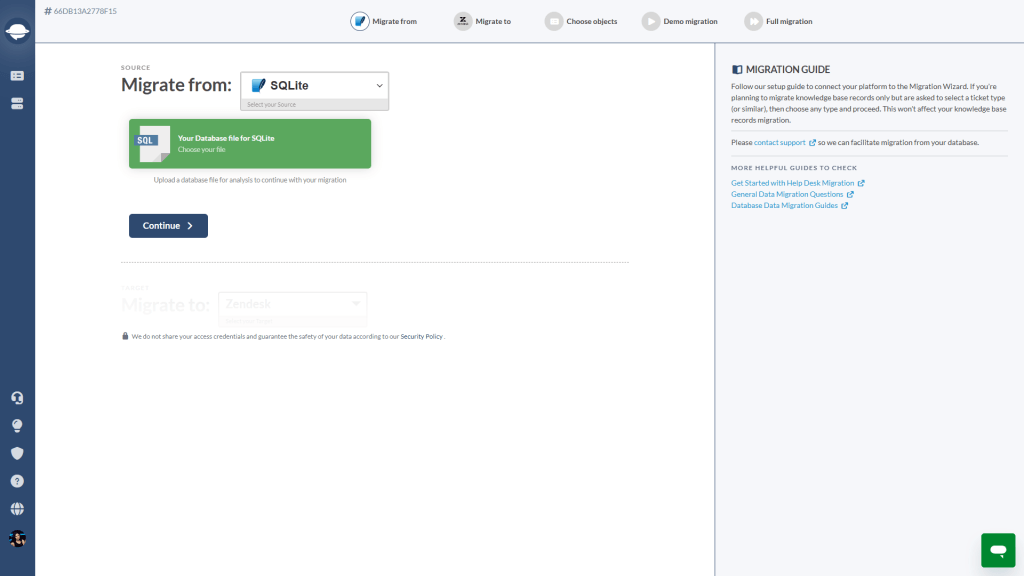
2. Choose SQLite as your Source and upload a .db file.
3. Connect your target platform by filling in the needed credentials.
4. Choose what SQLite records to export to Zendesk.
5. Match staff profiles and set up a default agent.
6. Set up field mapping for companies contacts, tickets, and articles.
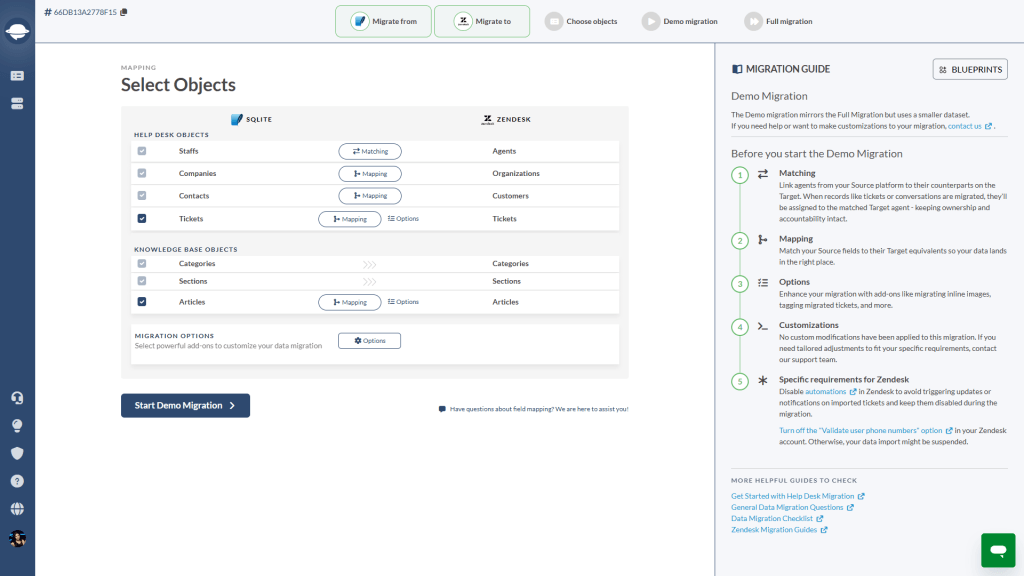
7. Choose all the necessary automated options.
8. Click Start Demo Migration to test how SQLite export works.
How to download a .db file in SQLite?
SQLite doesn't require an export step; your database already lives as a single .db file on disk. To get a copy ready for upload to your help desk migration:
a) Find the file directly
- Locate the .db file on your system (check the folder where you created or last opened the database).
- Copy that file to wherever you need it. That's your export.
b) Or save a copy through DB Browser for SQLite
- Open your database in DB Browser for SQLite.
- Click File in the top menu.
- Save Database As or Export to save a copy to a new location.
Can I migrate my database configuration/settings?
Help Desk Migration Service can migrate all of your data (Users, Contacts, Comments, Groups, Notes, Attachments, etc).
However, our service does not migrate any configuration of your database (macros, rules, reports, etc.)
Looking for more data migration details?