Autotask Data Migration Guides
How to Create an API User in Autotask PSA?
To run an Autotask data migration, you need to create an API user in Autotask PSA with a corresponding security level. Below are the steps to create a security level for an API user in Autotask PSA:
How to Create a Security Level for API User in Autotask PSA
1. Go to Admin and select Account Settings & Users / Client Settings & Users within the Admin Categories section.
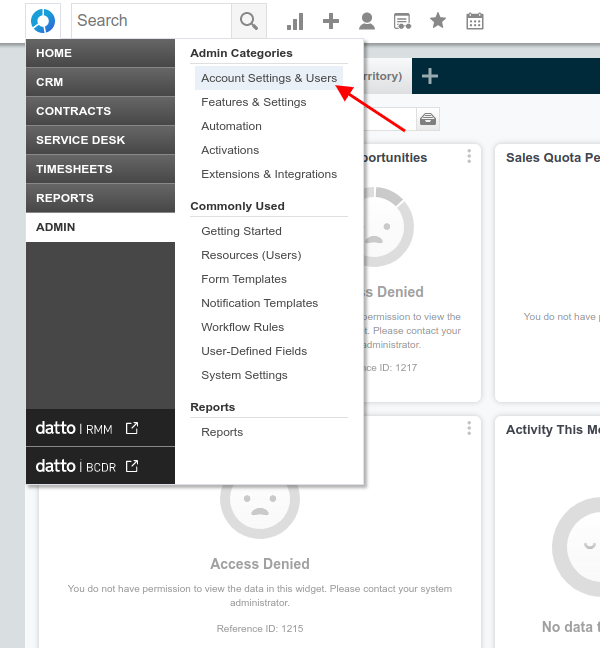
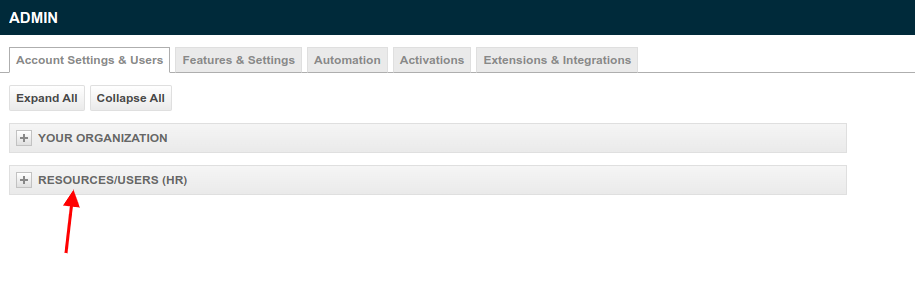
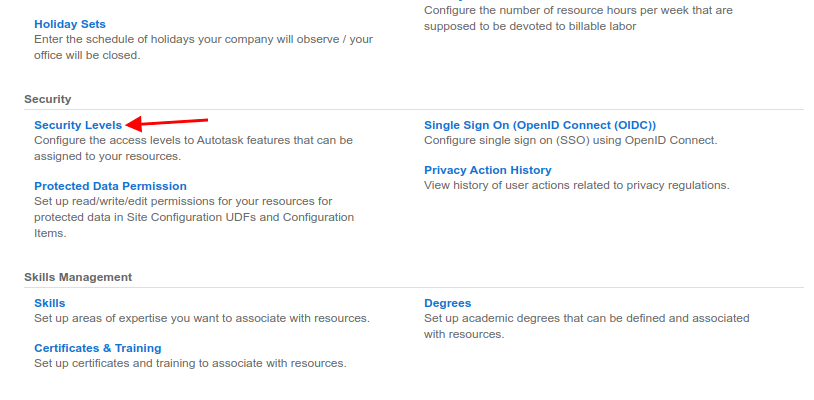
2. Expand the Resources/Users (HR) settings and select Security Levels in the Security section.
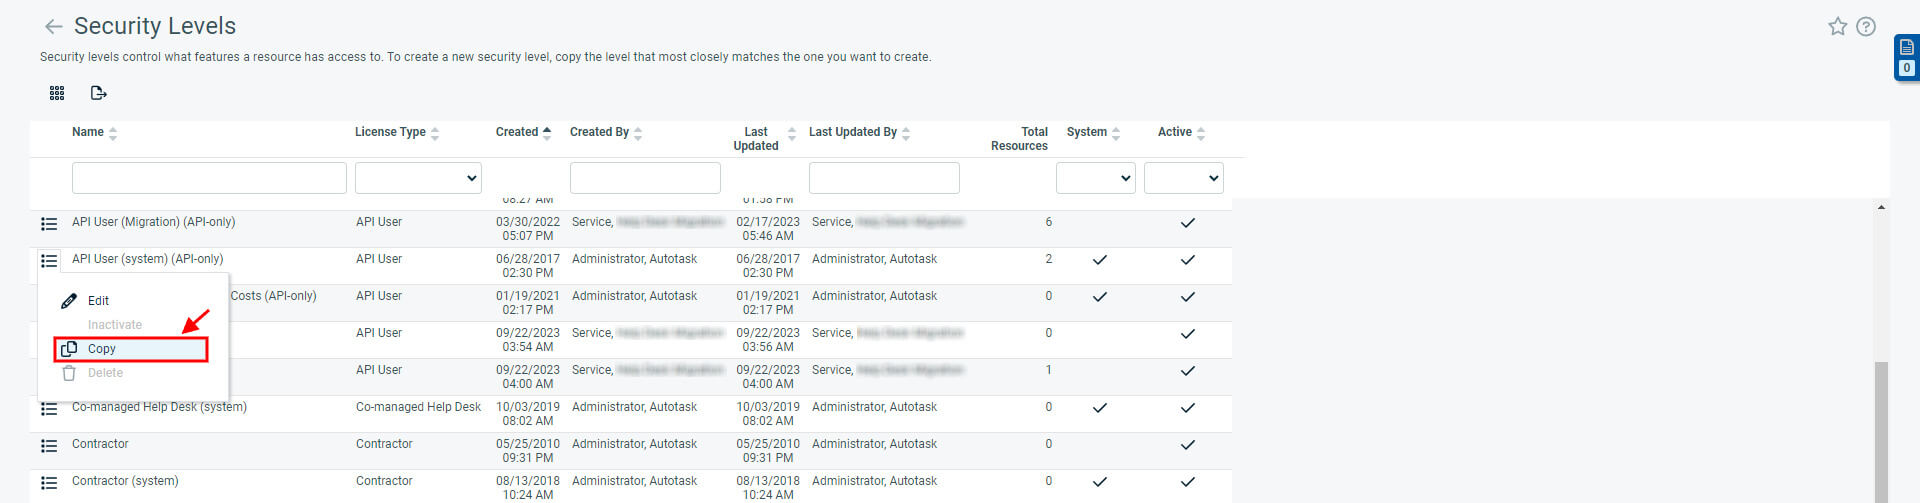
3. Locate the bullet list icon next to the API User (system) (API-only) record and select the Copy action.
4. Name the security level and click Full Permission in the Web Service API section.
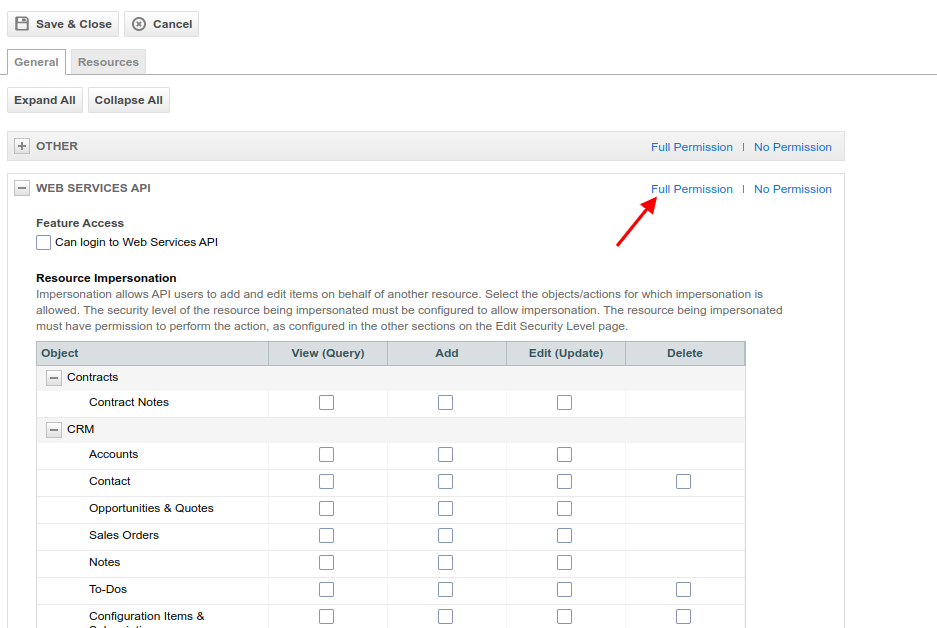
5. Tap Save & Close at the upper left corner.
How to Create an API User in Autotask PSA
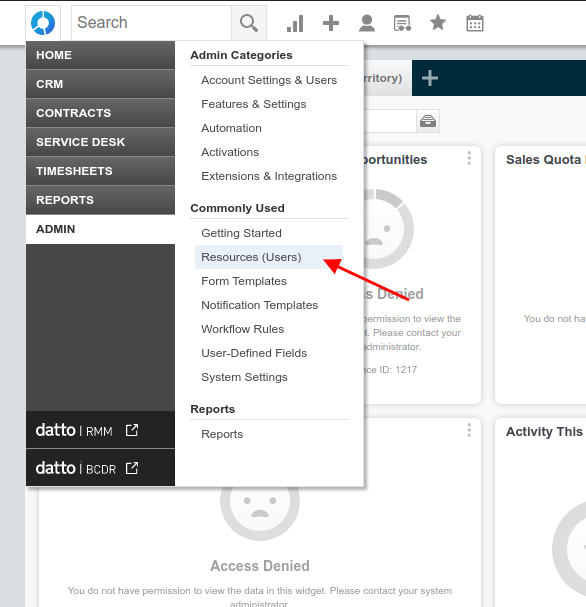
1. Hover over Admin and select Resources (Users) in the Commonly Used section.
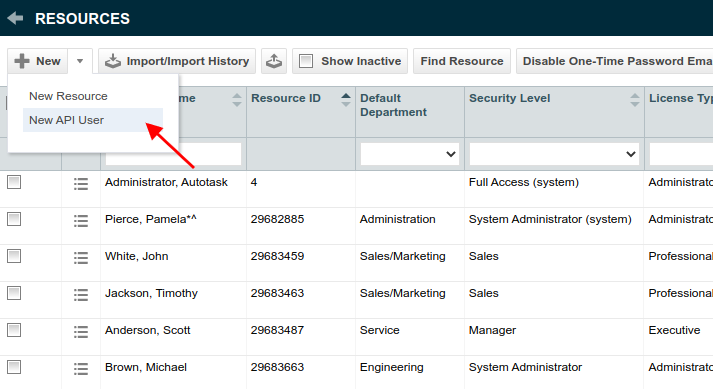
2. Hover over New and select the New API User option.
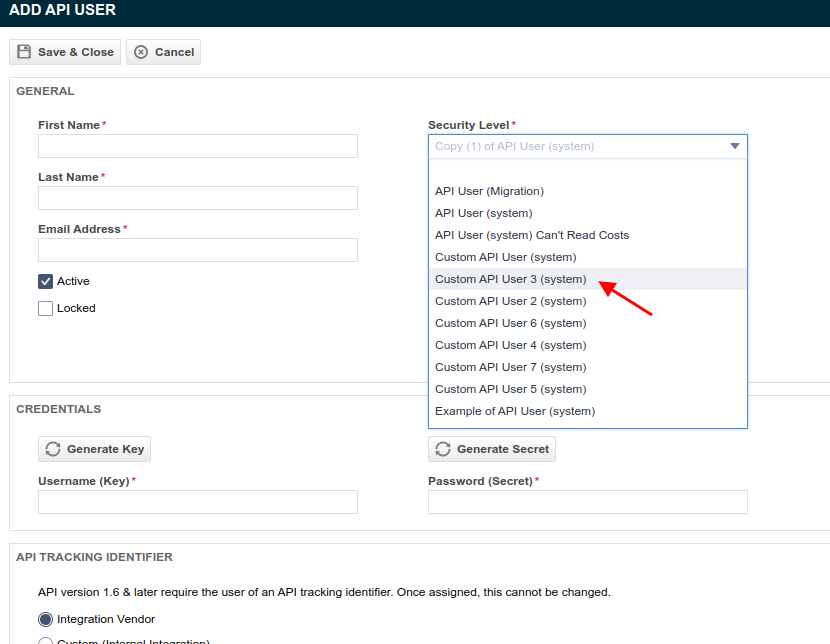
3. Fill in the General fields. Expand the Security Level options and select the one you’ve recently created. You can generate the Username and Secret or write them manually.
4. Scroll down to the API Tracking Identifier and pick Relokia - Data Migration as Integration Vendor.
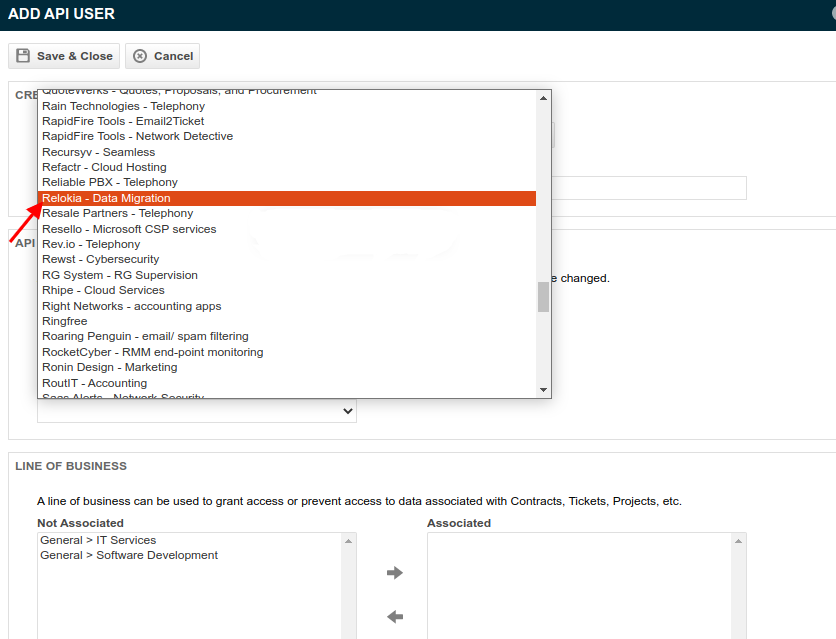
5. Click Save & Close.
Once you’ve created an Autotask API user with the necessary security level, you can proceed to automated data migration.
How to configure a user security level in Autotask
During an Autotask migration, there might sometimes occur a problem with comments import – the comments you try to transfer cannot be created on this platform. This happens because of the security level discrepancy.
To eliminate the error, upgrade the security level of an agent who wrote the comment. This way they will have permission to comment on tickets assigned to an agent running the migration.
Do this in a few easy steps:
- Choose the Admin category on the left-side Autotask dashboard.
- Open the Account Settings & Users section.
- Click on Resources/Users (HR) → Pick Resources/Users from the tab.
- Find the agent, let’s say their name is Sadj, whose comment is not displayed during the transfer and check & remember their security level (it’s indicated in one of the columns on the right, quite predictably called Security level).
Then:
- Go back to the Account Settings & Users -> Resources/Users (HR) section and choose Security Levels.
- Find the security level associated with your agent.
- Click on the 3 horizontal lines icon (≡) on the level's left → Pick Edit.
- Scroll down to the Web Services API and click on it.
- Find the Resource Impersonation from the drop-down menu and check the “Allow impersonation of resources with this security level” box → Save the changes.
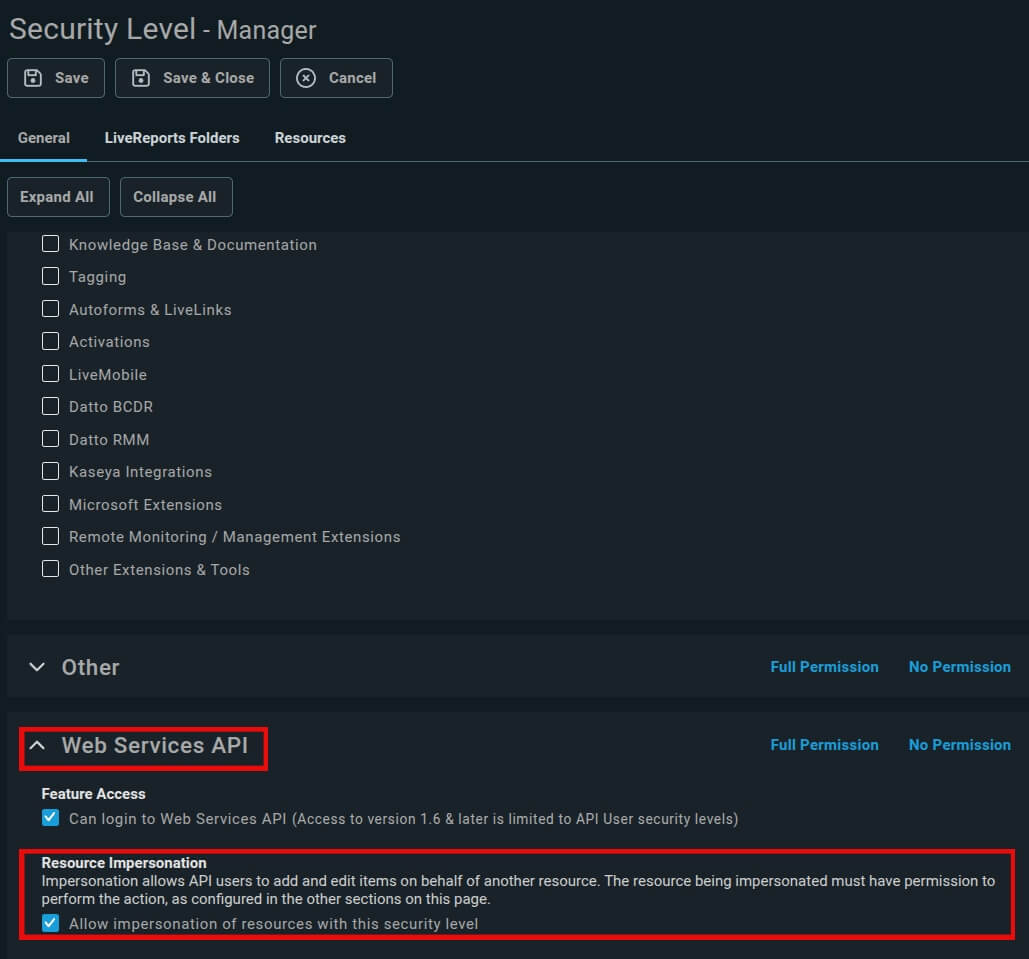
The steps above should do the job – unless it’s a system level issue. Those tend to throw an error: “This security level is not editable”.
But no worries. There is a way to untie this knot as well:
- Click on the three-line menu next to the required security level again and choose Copy (you can choose a name for your copy and use it for the next steps).
- Go down to the Web Services API and check the box next to “Allow impersonation of resources with this security level” → Save the changes.
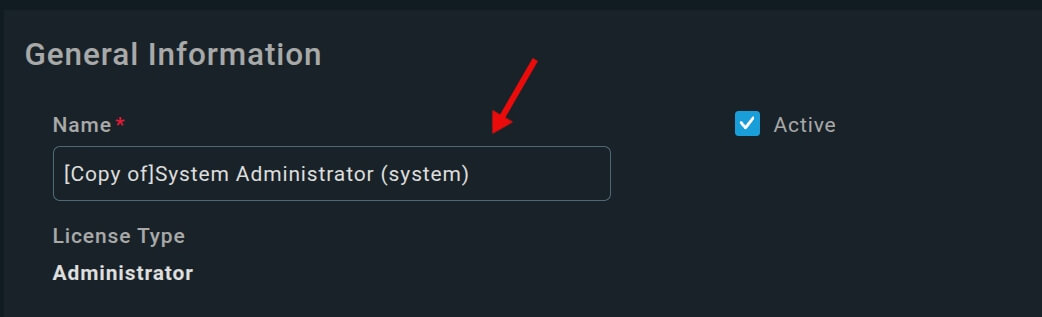
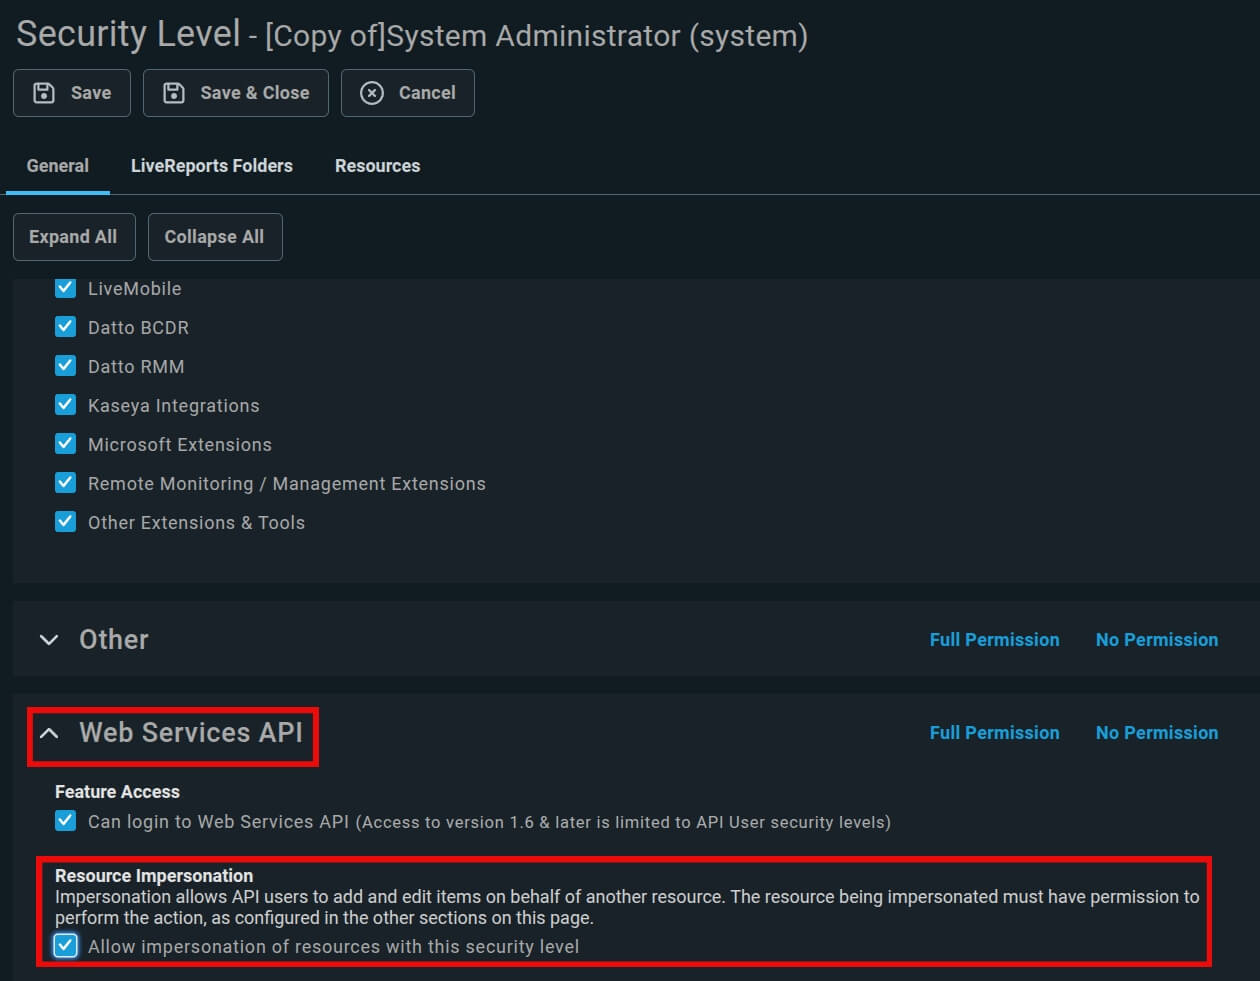
Done! The box is checked. But these changes will not be recognized by Autotask — because you edited a copy, not the original security level. That is why you also need to take the following steps:
- Go back to Resources/Users → Pick an agent with the same security level you just copied (the same as the one belonging to the agent who wrote your migrating comments).
- Click on the agent’s name in the Resource Name column so that the Resource Management tab opens thus revealing the agent’s profile
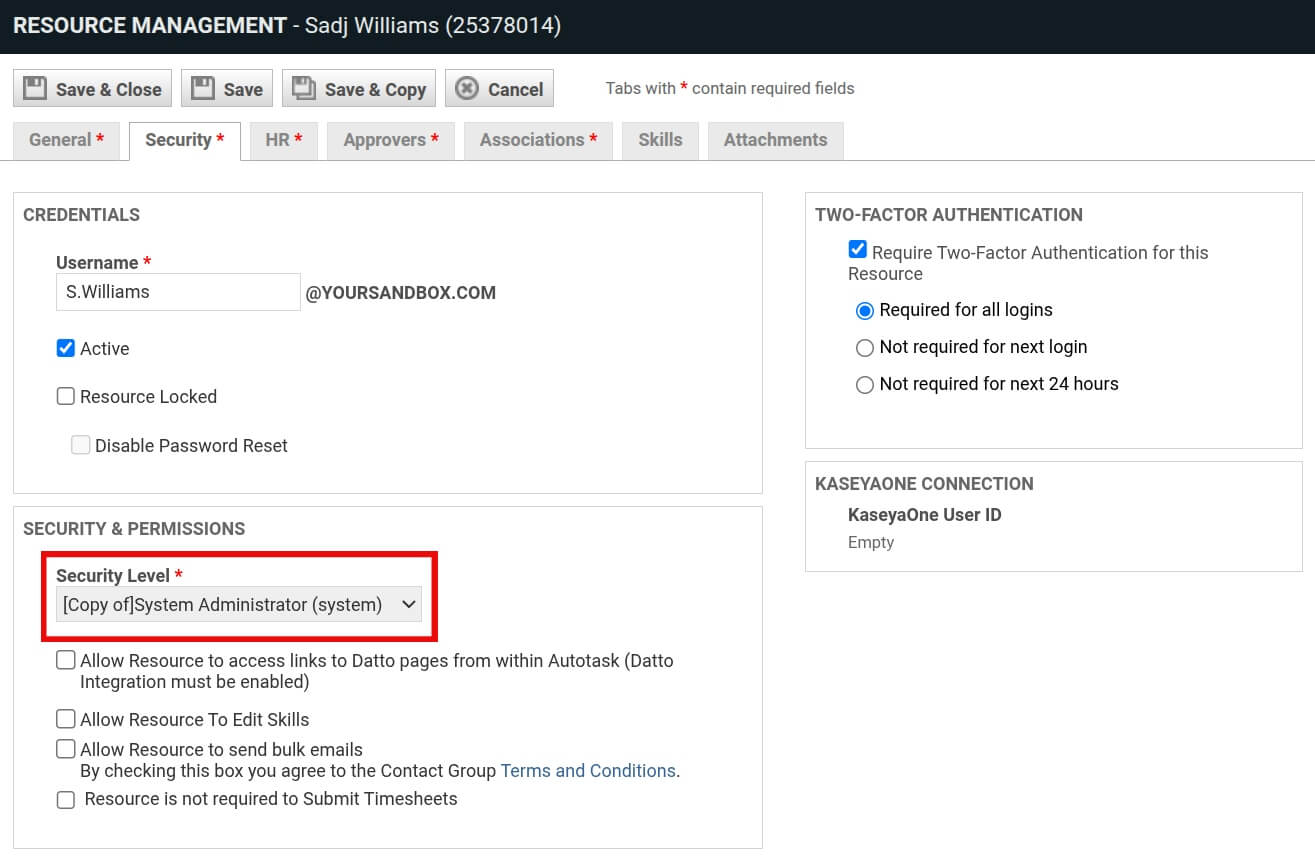
- Navigate to their Security section → Find the Security level drop-down in the Security & Permissions section;
- From the drop-down list, choose the copy of a security level from the previous step – the copy to which you just allowed impersonation. → Save the changes.
How to search all tickets in Autotask?
To search all tickets in Autotask, you have a couple of options:
- Main Autotask Search: You can use the main Autotask search located in the top navigation bar. This search functionality allows you to search for various entities within Autotask, including tickets. Simply enter your search query in the search bar and click Enter to retrieve relevant results.
- Service Desk > Ticket Search Page: Another option is to navigate to the Service Desk > Ticket Search page within Autotask. This page provides access to all tickets in your Autotask instance. Here, you can utilize various ticket fields to filter and refine your search. Autotask offers numerous System and User-Defined Fields, giving you the flexibility to create powerful search queries tailored to your specific needs.
Here are some additional tips for filtering tickets in Autotask:
- Filter by Ticket Status: Use the "Open (Status not Complete)" checkbox in the Filter Chooser to easily limit search results to open tickets. This option filters out tickets with a status of "Complete," helping you focus on tickets that are still active or in progress.
- Filter by Tag: If you want to narrow down search results based on the content of the ticket, consider filtering by tag. Tags can help you categorize and organize tickets, making it easier to find relevant ones based on specific criteria.
- Parent Organization Filter: When using the Parent Organization filter, keep in mind that it returns tickets created for sub-organizations of the selected parent account. To include tickets for both the parent account and all its sub-organizations, select the parent organization in the Organization filter and enable the "Show sub-organization items" checkbox located below the filter.
- Search for Tickets with Inactive Tags: If you need to search for tickets with inactive tags, use the tag selector in the search field and add the "Active" column as a filter. This allows you to specifically identify tickets associated with inactive tags, helping you manage them more effectively.
Looking for more data migration details?