Awesome Support Migration Guides
How to create an API password in Awesome Support?

To create an API password in Awesome Support, follow these steps:
1. Log into your Awesome Support account.
2. Click on the "Profile" icon, and select "Application Passwords" from the menu.

3. In the "New Application Password Name" field, enter a name for your new application password, and click on "Add New Application Password."

4. Once the password is generated, copy it and store it securely. You won't be able to access it again.
5. Use this API password when setting up your migration in the Migration Wizard on the Help Desk Migration website.
Before starting the migration process, ensure that you have enabled REST API in Awesome Support.
How to enable REST API in Awesome Support?

To enable the REST API in Awesome Support, follow these steps:
- Log into your WordPress account.
- Navigate to the "Tickets" tab on the left side of the screen and click on it. Then select "Settings."
- Among the settings options, find "REST API" and check the box next to "Enable the Awesome Support API."
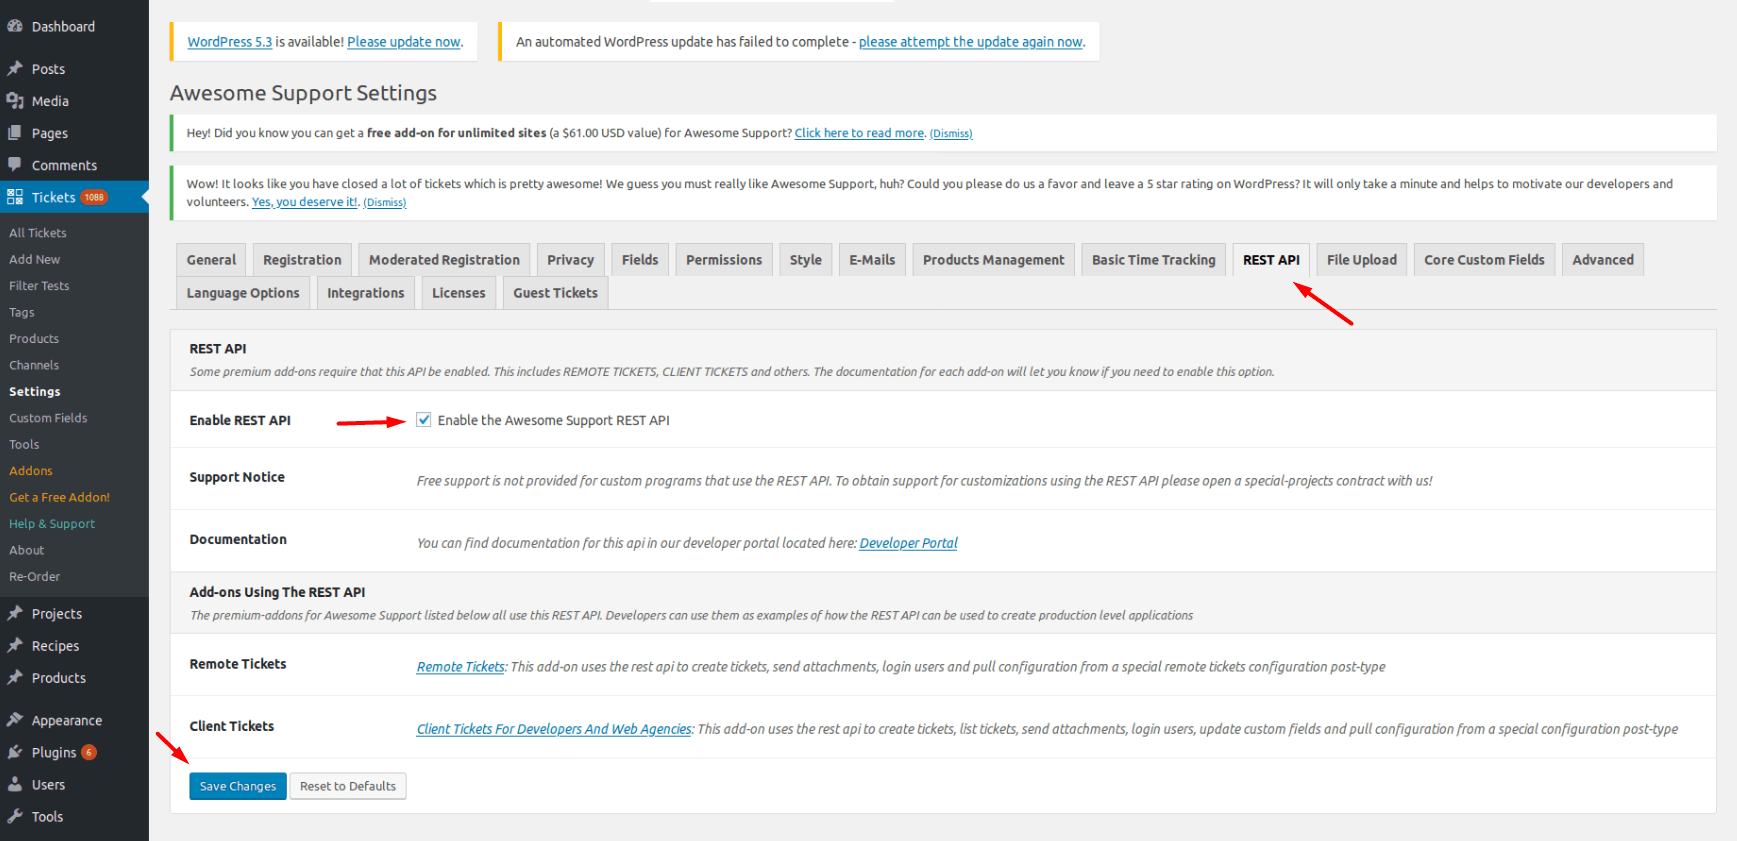
After enabling the REST API, make sure to save your changes. Once the REST API is enabled, you can begin your migration process using the Help Desk Migration tool.
How to calculate Awesome Support tickets?
To calculate the number of tickets in Awesome Support, follow these steps:
Log in to your WordPress admin dashboard by going to the URL: https://www.yourdomain.com/wp-admin.
Once logged in, navigate to the TICKETS menu option located in the main menu on the left side of the dashboard.
Click on "All Tickets" under the TICKETS menu. This will take you to the console where you can view all tickets.
On the tickets console, you will see a list of all tickets, including their status, subject, date, and other relevant information.
To calculate the total number of tickets, simply count the number of rows or entries in the tickets list.
Additionally, you can use any filtering or search options available in the tickets console to narrow down the list and count specific types of tickets or tickets within a certain date range.

reate an API passw