Database Migration Guides
How to migrate data to and from a database?
With Help Desk Migration you can:
- export help desk data to a database
- import your database to a help desk
Currently, our Migration Wizard supports the following database management systems:
- SQLite
- MySQL
- PostgreSQL
You can import data to SQLite in an automated way. Check the SQLite import guide for detailed instructions.
Migrate from MySQL
Before exporting data from MySQL, you should create a read-only database user for this IP address: 18.198.164.195.
Afterward, go to Migration Wizard to set up a Free Demo:
1. Choose Database from a list of supported platforms.
2. Then select MySQL.
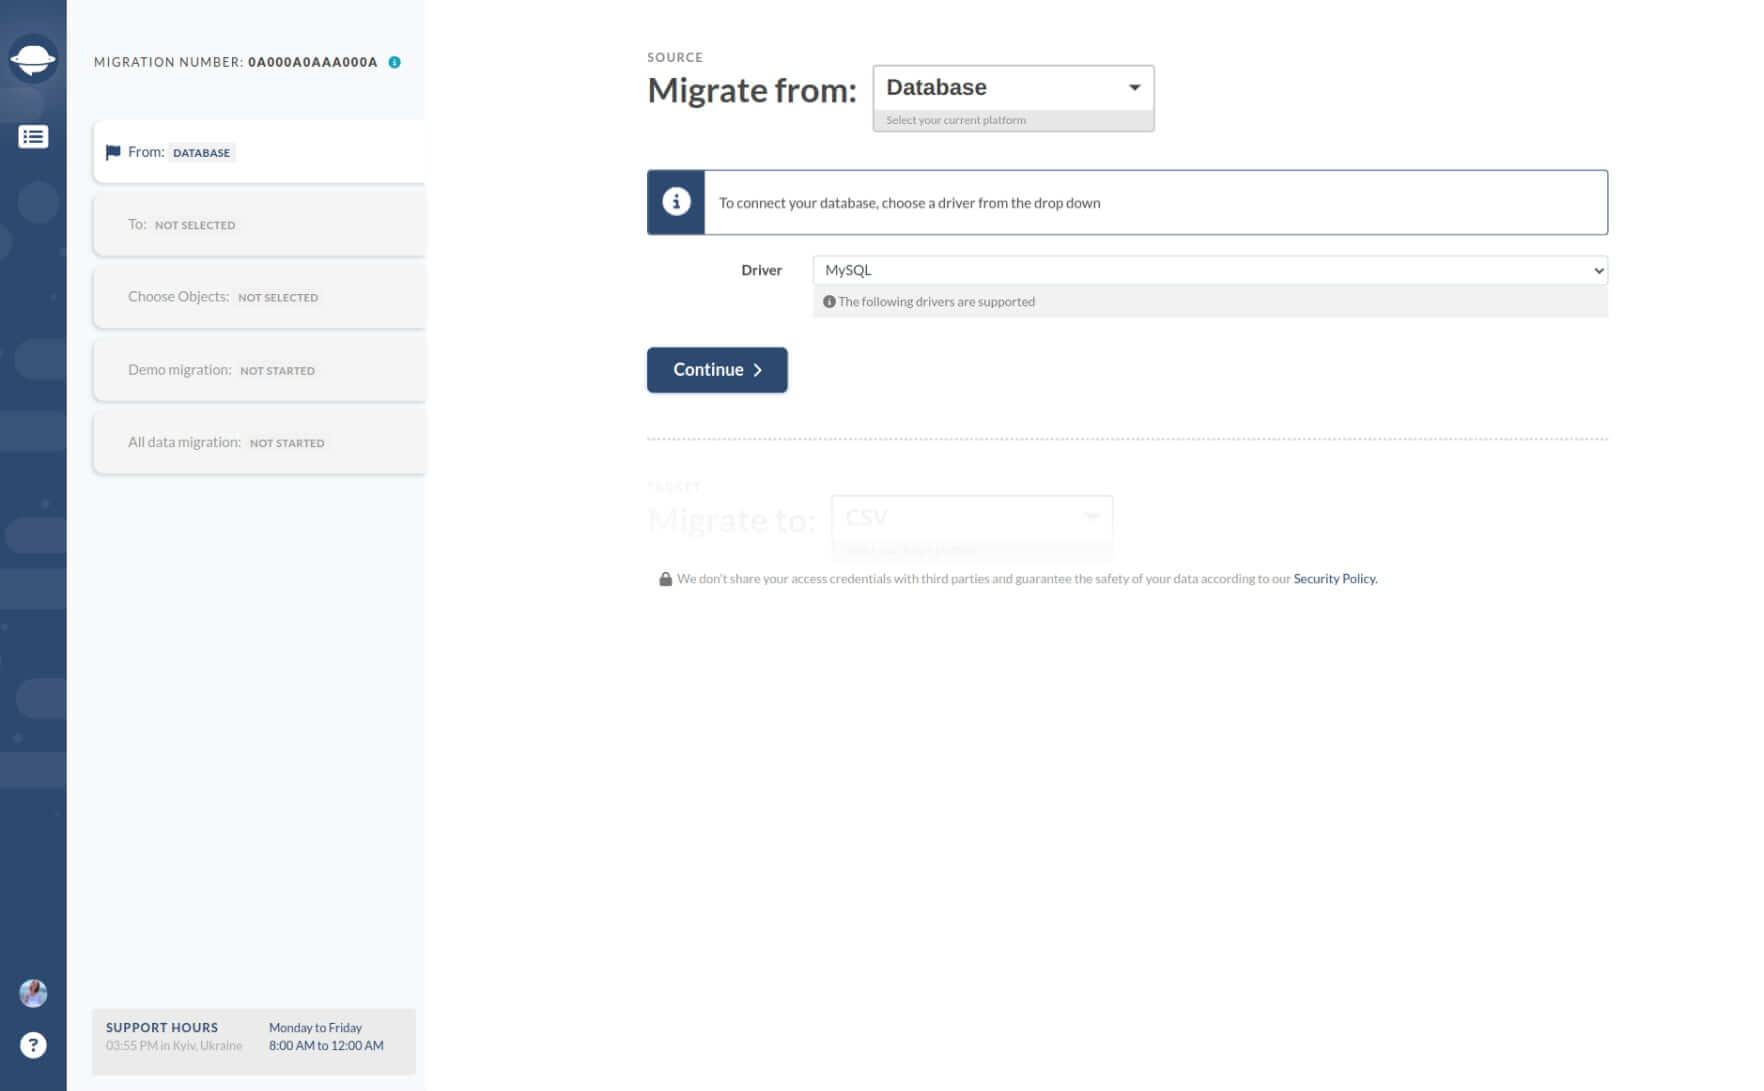
3. To establish a connection with MySQL, input the following parameters:
- The hostname of the server where your helpdesk database is located.
- The port number assigned to your helpdesk database.
- The name of the database that contains your helpdesk data.
- The username that was used during the installation of your helpdesk to access the database server.
- The password required to access the database server.
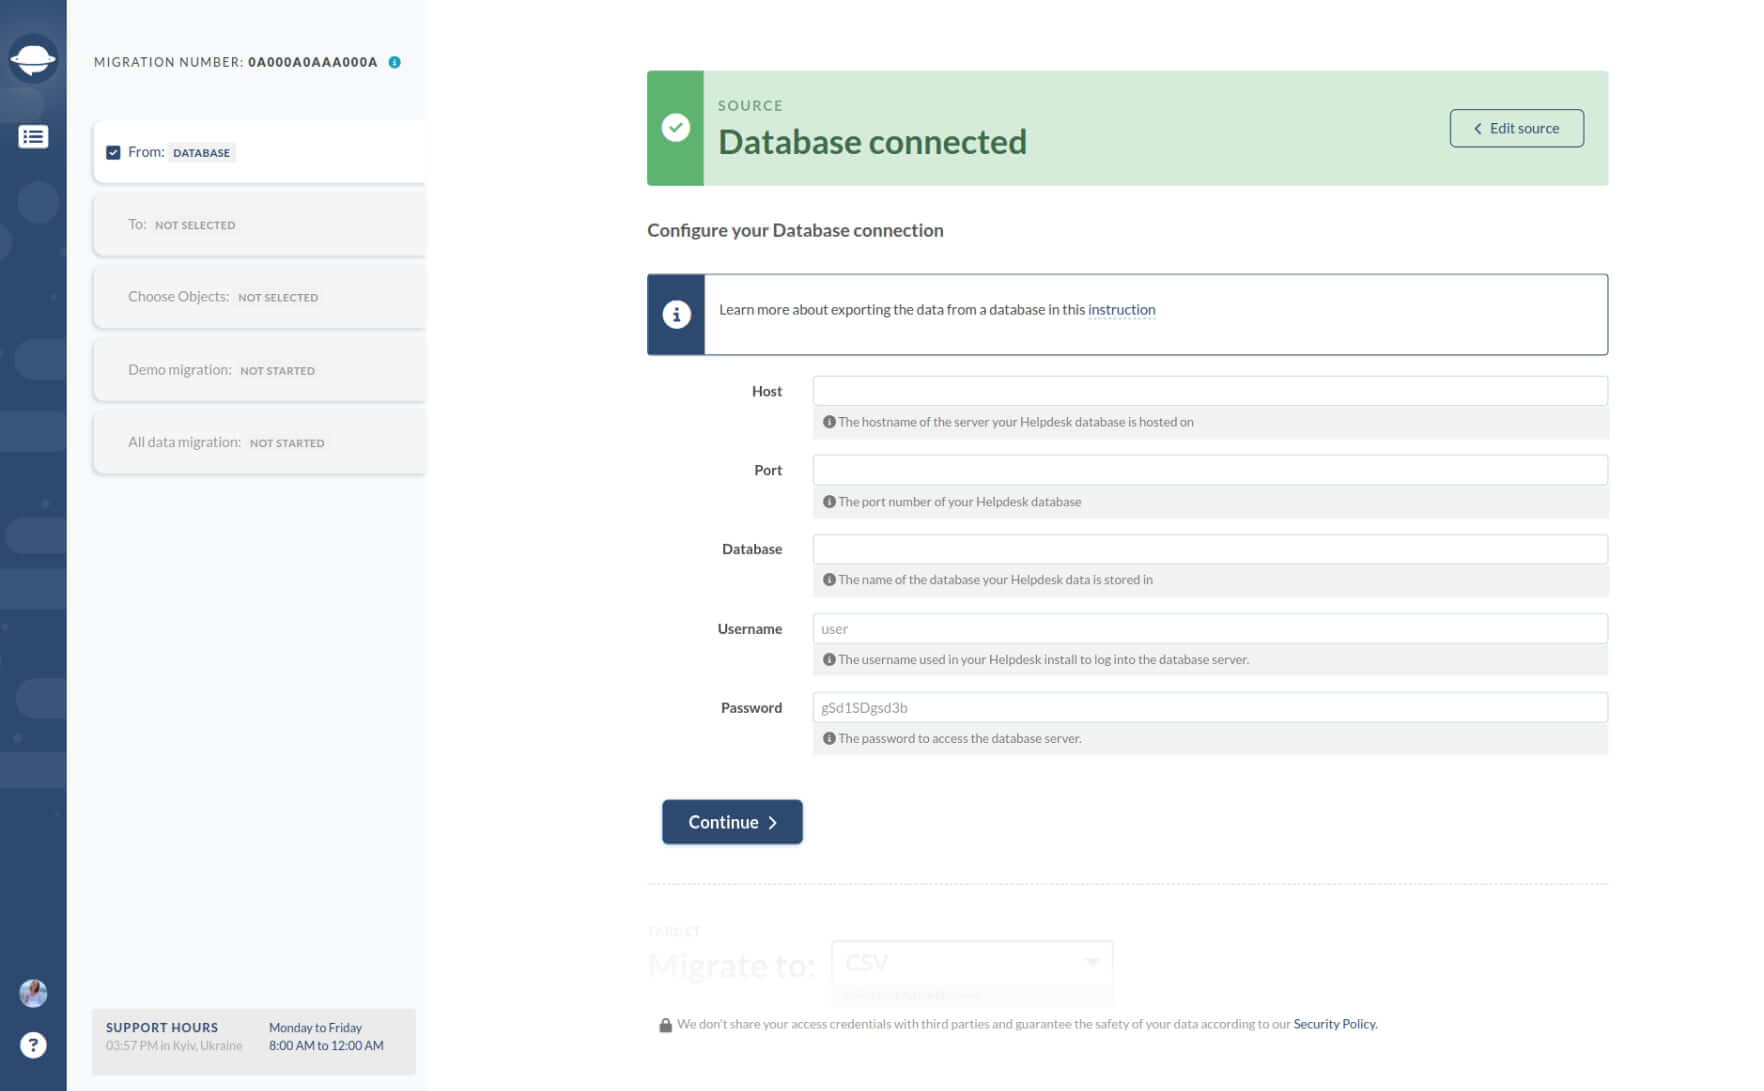
4. Click Continue.
Migrate from PostgreSQL
To transfer your PostgreSQL data to a new system, follow these simple steps:
1. From the list of options, choose "Database."
2. Then select "PostgreSQL" as your driver.
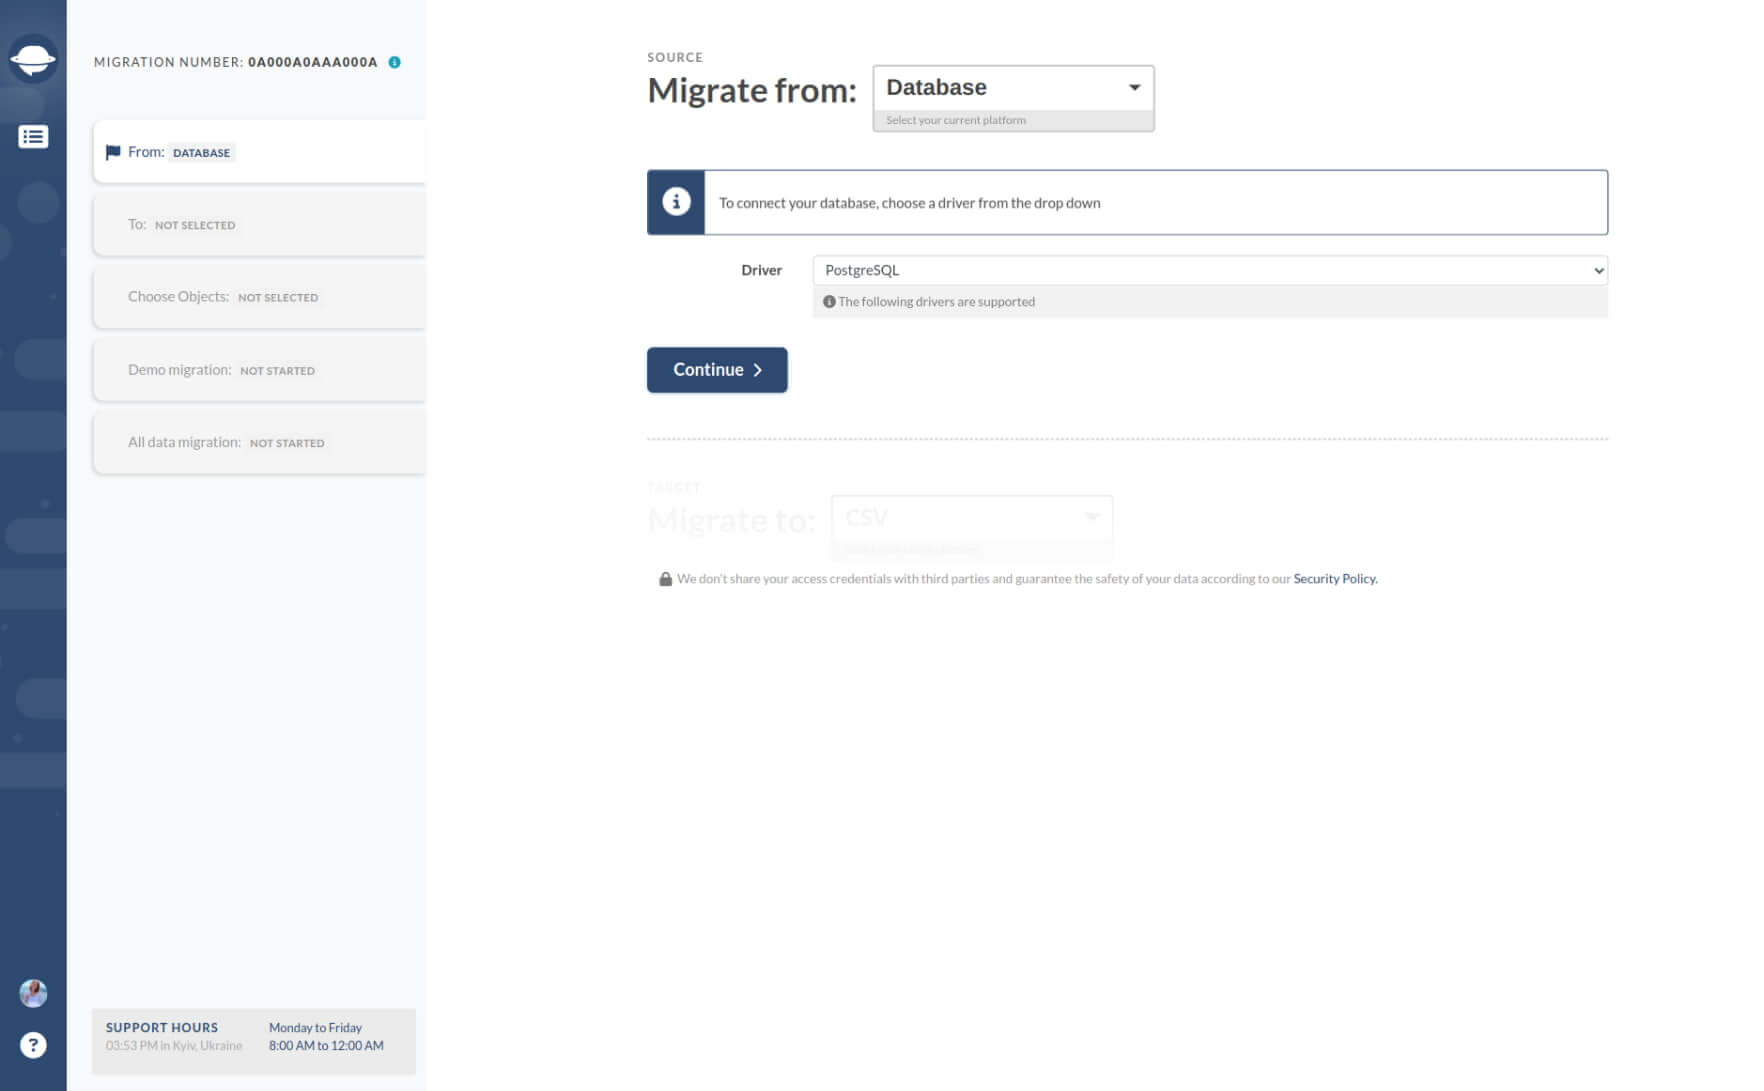
3. Provide the necessary details such as the server hostname, port number, database name, username, and password to establish a connection to the database. Click on "Continue."
How to Import Data from Help Desk to Database?
By default, Migration Wizard supports importing data into SQLite databases. During the migration process to an SQLite database, our migration tool transfers all your customer data in a standardized format. So, once a data migration is complete, you’ll receive an archive with a .db file that contains all your information.
What Is a .DB File?
A .db file is used to indicate that the file stores information in a structured database format. Here’s what a .db looks like in an SQLite database:
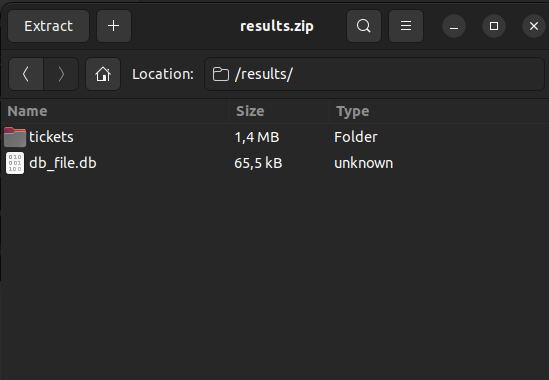
Depending on your source platform, the .db file includes tables for all migrated data like tickets, ticket attachments, comments, contacts, groups, articles, article attachments, folders, and categories.
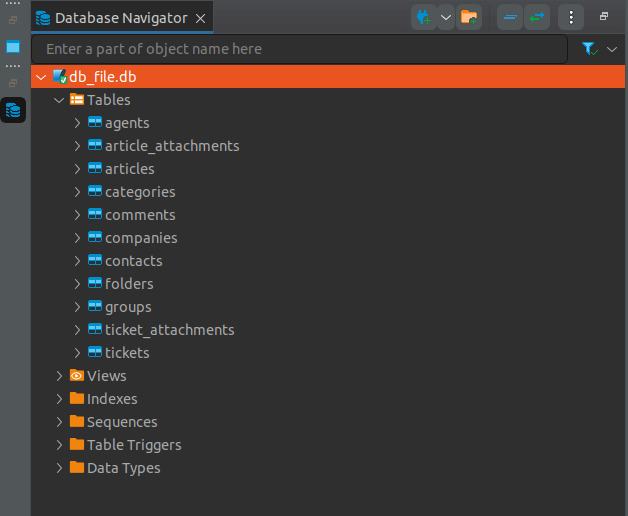
Each table will contain columns with related data. For instance, the table for tickets includes columns like subject, company_id, group_id, tags, priority, status, type, requester_contact_id, etc.

How to Open a .DB File?
To open an SQLite file, you can use a web tool or application that facilitates viewing and editing SQLite files. For instance, you could access SQLite Viewer through Google Drive in the Chrome browser.
How to Import Data to a Database?
Here’s how to import customer records to an SQLite database:
- Go to Migration Wizard and sign up.
- Choose your source platform. Then fill in the access credentials.
- Select the database as your target platform.
- Click Continue and proceed with the rest of the steps.
How to connect and export MySQL database?
To connect and export a MySQL database using Help Desk Migration, follow these steps:
1. Begin by creating a read-only database user for for this IP address: 18.198.164.195. Follow the steps in the guide to create a read-only user.
2. Go to Migration Wizard and start the migration process. Sign in to your account and click Start new migration. Choose Database from the list, then MySQL.

3. Input the following parameters to connect to the database:
- Hostname: The server where your helpdesk database is hosted.
- Port number: The port number of your helpdesk database.
- Database name: The name of the database containing your helpdesk data.
- Username: The username used to log into the database server during your helpdesk installation.
- Password: The password required to access the database server.
Can I migrate my database configuration/settings?
Help Desk Migration Service can migrate all of your data (Users, Contacts, Comments, Groups, Notes, Attachments, etc).
However, our service does not migrate any configuration of your database (macros, rules, reports, etc.)
How to convert SQLite to other databases?
There are several ways and converters to convert your SQLite to another. We don’t suggest you use scripts instead we’ve collected a shortlist of tools that convert databases. Here is the list of different convectors.
Converter Tools | Conversion options |
| SQLite-to-MySQL | Migrate SQLite database to MySQL, MariaDB, or Percona. |
| Full Convert | Convert SQLite into Microsoft Access, Fox-Pro, Firebird, MySQL, dBase, Microsoft Excel, Interbase, MySQL, Microsoft SQL, Oracle, SQL Server and others via ODBC. |
| ESF Database Migration Toolkit | Migrate data from SQLite to MySQL, SQL Server, Oracle, MS Access, and others. |
| SQLite Data Wizard | Export data from SQLite Database to popular formats. |
| dataPro | Convert SQLite into MySQL, SQL Server, Oracle, and Microsoft Access. The convector has an integrated SQL editor. |
| Kexi | Import/export database between SQLite, PostgreSQL, MySQL, and MS Access (with MDB Tools). |
Note: there is no guarantee that any of these converters will switch types, keys, or the whole information to another database correctly.
How to enable remote access to MySQL Database server?
1. Connect to the machine with MySQL server (usually through SSH)
2. Find the main configuration file of the MySQL server - my.cnf:
- Debian/Ubuntu -
/etc/mysql/my.cnf - RedHat/CentOS/Fedora -
/etc/my.cnf - FreeBSD -
/var/db/mysql/my.cnf
3. Open this file (using admin rights) to edit it with any text editor (for example nano or vi/vim).
4. Go to MySQL daemon settings section (starts with [mysqld])
5. Comment or delete row with skip-networking.
6. Check and if needed update bind-address (default value - 127.0.0.1)
- Change to the IP address of the main machine interface (you can find out the IP address using
ip addr showorifconfigrequest)
OR
- set
0.0.0.0- allows connecting from any address and machine interface
7. Save changes and reboot MySQL server:
- Debian/Ubuntu:
systemctl restart mysqlOR/etc/init.d/mysql restart - RHEL/CentOS/Fedora:
systemctl restart mysqldOR/etc/init.d/mysqld restart - FreeBSD:
service mysql-server restartOR/usr/local/etc/rc.d/mysql-server restart
8. On the firewall (usually iptables), allow incoming connections via TCP port 3306 (MySQL) from our IP address - 18.198.164.195:
- If the machine is available on the Internet (has a public IP address), please make the following request
iptables -A INPUT -i eth0 -p tcp -s 18.198.164.195 --dport 3306 -j ACCEPT - If the machine is using NAT:
- Allow incoming connections on the machine with MySQL server using request:
iptables -A INPUT -i eth0 -p tcp --dport 3306 -j ACCEPT - Set up the ports redirection for your NAT (please check the documentation of your NAT)
- Allow incoming connections on the machine with MySQL server using request:
eth0 is the name of the machine network interface (often: enp2s0)9. Set up the connection to the necessary database:
- Connect to MySQL server using admin credentials (by default it is -
root) -mysql -u root -p - Create a new MySQL user and grant access to the needed database:
- for full rights:
mysql> GRANT ALL PRIVILEGES ON database.* TO ‘user’@’18.198.164.195’ IDENTIFIED BY ‘StrongPassword’; - for read-only rights:
mysql> GRANT SELECT, SHOW VIEW ON database.* TO ‘user’@’18.198.164.195’ IDENTIFIED BY ‘StrongPassword’;
- for full rights:
- database - database name to which you want to grant the access
- user - username
The user will be created automatically by request:
GRANT SELECT, SHOW VIEW ON database.* TO ‘user’@’18.198.164.195’ IDENTIFIED BY ‘StrongPassword’;