
Suppose you are one of those people that recently discovered the wonders of the Intercom but can’t move your data to it, worry not. We took the time and effort and compiled a list of functional import methods you can use to move your data. Now, as a small heads-up, we didn’t include the convoluted methods but instead listed the ones that are the easiest to execute. Thus, let’s not waste more time and dive into the methods.
The Methods
To keep this article within reasonable lengths, we identified two core methods that you can use to move your data. The methods themselves are via the CSV file and/or using an automated migration wizard. Let’s discuss each of them separately.
Using a CSV File
Let’s start with the file method as it is the one that is more lengthy. So, the first thing you want to do is head over to the Intercom import menu. There you’ll see two options: Import Users or Import Leads, as seen below.
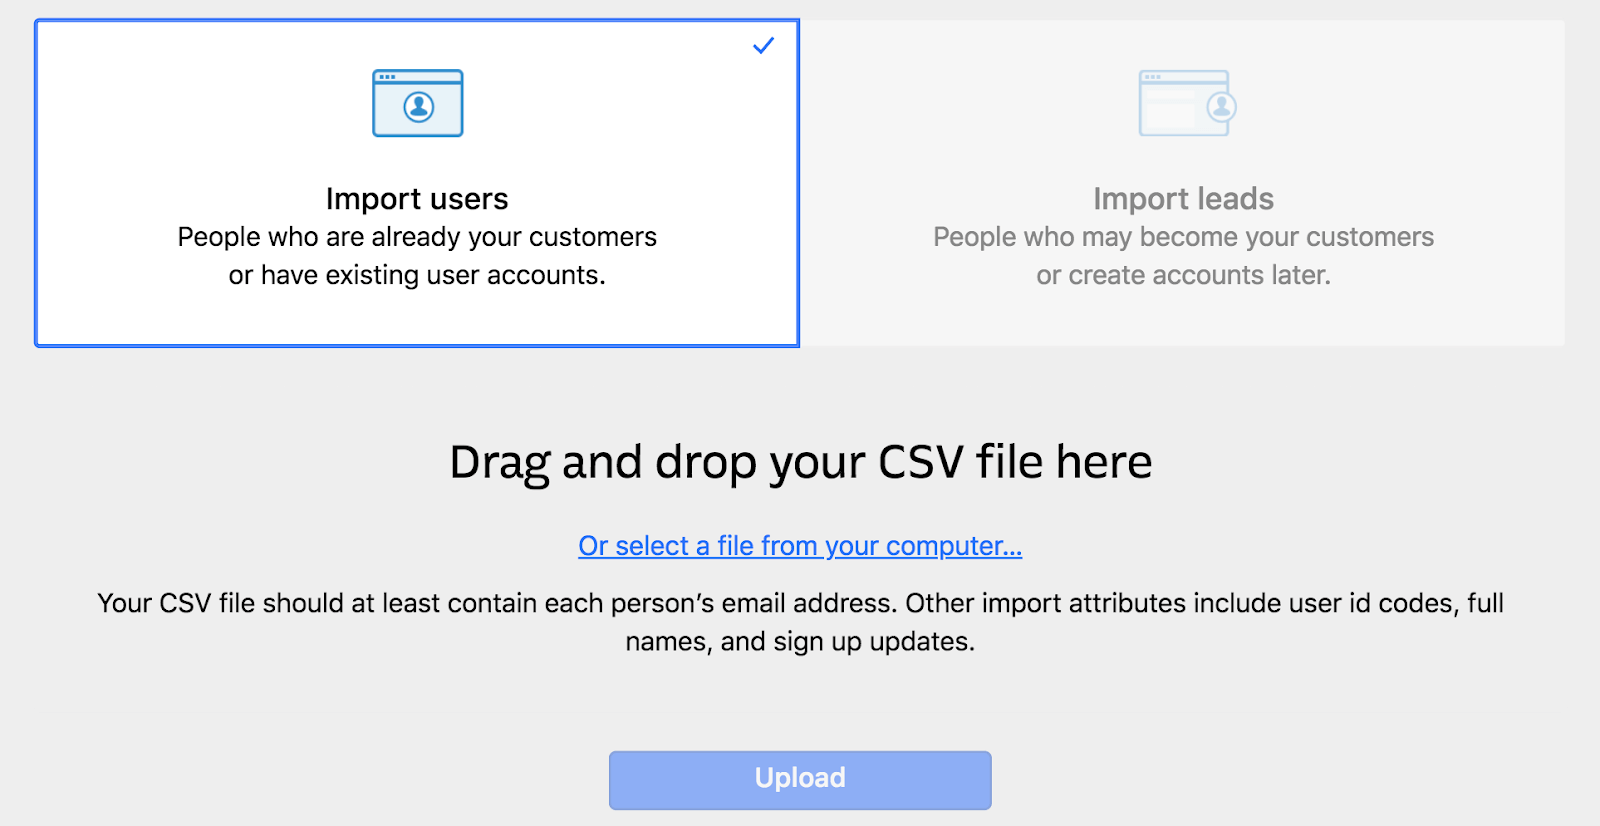
Image Sourced From Intercom
Select whichever you need, then drag and drop the CSV file and hit the Upload button. Remember that the maximum file size should not exceed 20 MB. In case you have a larger file, we suggest that you split them into two by dividing the data. Once you are done with the file, the system will ask you what kind of column you would like to import (i.e., your email field, your ID, or address, etc.) but make sure each contact has an email address. Pick the ones you want and hit the “Confirm” button. Also, if you, by any chance, have a few custom columns, the system will most likely ask you to give these custom columns a specific name.
Migration Wizard
And now for the second method. Unlike the previous one, this method is not free but does not involve any file shenanigans. Essentially, all you have to do is visit our migration page, and once you are there, you will need to select the source platform (it can be anything, from a file to an email to a help desk system) and the target platform which in our case is Intercom.
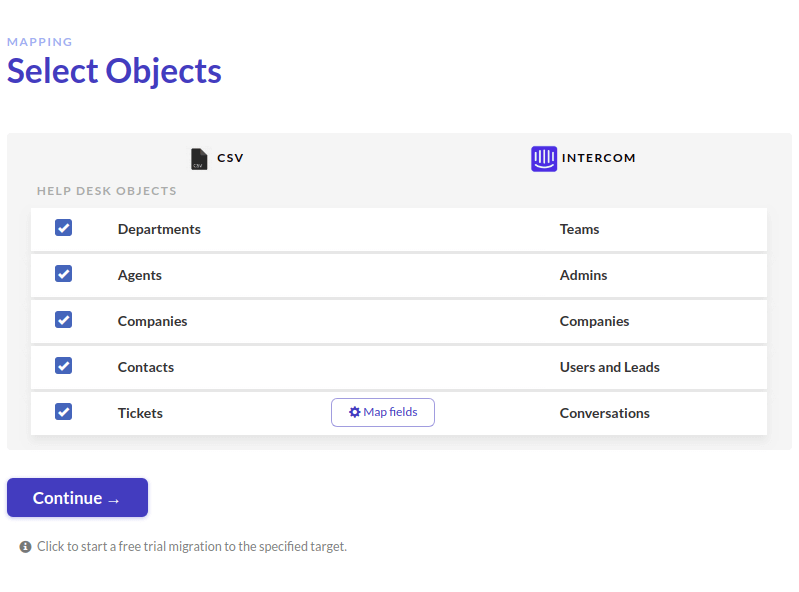
After selecting the plans, you need to provide the credentials (either your source or target or both platforms); otherwise, the migration is impossible. Don’t worry; your data will be safe and sound with the system, so there are no troubles here. After you do that, you will be asked what kind of data you need to move. Once you’ve specified, the system will perform a short test migration where a couple of records are transferred. This is done to ensure no future issues are possible.
If everything goes well, you will be asked once again whether you want to move your data. As for the pricing, you pay only for the number of transferred records meaning no labor fees or hidden expenses. Just the records.

Core Benefits
Now that you’ve learned the methodologies let’s look at what kind of benefits you can expect from each. After all, they are different and will not be suited for everyone, so this info should be laid out flat out.
Benefits of Each Method
| Migration Wizard | CSV |
|
|
There is more to each method, but the general idea is that using the migration wizard means getting a high-quality service. We understand that not everyone can stomach the price, but you can be sure that we protect your data from corruption, losses, and mismatch. Yet, on the flip side, if you have only so much data to move and don’t see the point in paying, the CSV file is for you. Of course, you lose guarantees that your stuff will be safe and sound, but at least it’s free.
Which One Is for You?
Each method has its ups and downs, and there is no definitive answer to which one you should use. However, taking points from experience, if you are worried about your data and want stuff to be fast and ready, using our is the way to go. You get the necessary support and can have peace of mind knowing that the process will be completed on time.
However, if you are not in a hurry, or maybe you are a freelancer that wants to move a couple of things without a hurry, the CSV file just might be the proper method for you. It is free and not as complex as it might seem, as it does not necessitate any coding or tampering with the file system.
Bottom Line
And that’s our answer to the ever-increasing need to move stuff to the Intercom platform. If you don’t know which one is for you or maybe you need technical advice on things we didn’t cover here, contact our support for additional details. We will do our best to solve your issue and answer all your questions. But for now, thanks for joining, and we’ll see you in our next piece.


