Front Data Migration Checklist
Want to migrate to Front? Say no more. Help Desk Migration offers an automated service to seamlessly migrate tickets, contacts, requesters, attachments, comments, and related records. Match and map records without downtime and import data to Front effortlessly. Check if you have admin rights on your source and Front accounts and run a pain-free migration in just a few clicks!
Migration Wizard will transfer to Front:
- Tickets (conversations)
- Created date
- CCs
- Tags
- Requesters
- Attachments
- Comments (Author, Created dates, and Visibility)
- Public notes
- Private notes
- Customers (contacts)
- Agents (teammates)
- The Default Agent is first from the list of agents. This option helps you to keep data of unassigned, inactive, or deleted agents.
What Won’t Be Migrated
- Organizations
- Custom fields
- Inline images
- Knowledge base data
- Macros
- Triggers
- Automations
- Other settings
Before You Start a Migration
Migration Planning and Strategy
When it comes to data migration strategy, there's no one-size-fits-all approach. Based on our extensive experience of handling data migrations for clients, we've discovered two reliable methods that consistently yield excellent results:
- Automated or custom data migration. This method involves using Migration Wizard and built-in custom options or tailoring the migration process to meet the specific needs of the business.
- Combined Approach. Another approach is to combine automated or custom data migration with Delta migration. By migrating only the changes made since the last migration, you can reduce the risk of errors and save valuable time.
To determine the best approach for your unique situation, you need to consider several factors, such as the size of your data and the complexity of your systems. Take the time to carefully evaluate your needs and choose the method that works best for you.
Pre-migration Settings on Front Account
To ensure a seamless transition to Front, there are a few important settings you'll need to take care of. Here are the steps you should follow:
- To connect your Front account, please disable two-factor authentication (2FA) in your Frontapp settings. If you need help with this, please refer to Front’s help center article or contact our support team.
- After disabling 2FA, you'll need to generate an API token in Front. This will allow us to securely transfer your data to Frontapp. You can find detailed instructions on how to generate an API token in our help center, along with a helpful video tutorial.
- Next, you'll want to make sure that all agents who need to be transferred to Front are added to your account, and that they've accepted their invitation to join your team. To make this process as easy as possible, we recommend following the simple guides on adding new teammates to Front and inviting new teammates.
If you have any questions or issues with these steps, don't hesitate to reach out to our support team for assistance.
Setting Up Data Migration to Front
To ensure a seamless migration, we recommend running a free Demo migration using our Migration Wizard. This allows you to test the migration settings and make any necessary changes before starting the Full migration. Plus, you can rerun the Demo as many times as you need to get things just right.
However, it's important to note that each Demo migration will create a new set of tickets, and the previous set will not be deleted. To avoid ticket duplicates, we recommend deleting the tickets migrated during the Demo before starting the Full migration.
Here's how to get started with setting up your data migration to Front:
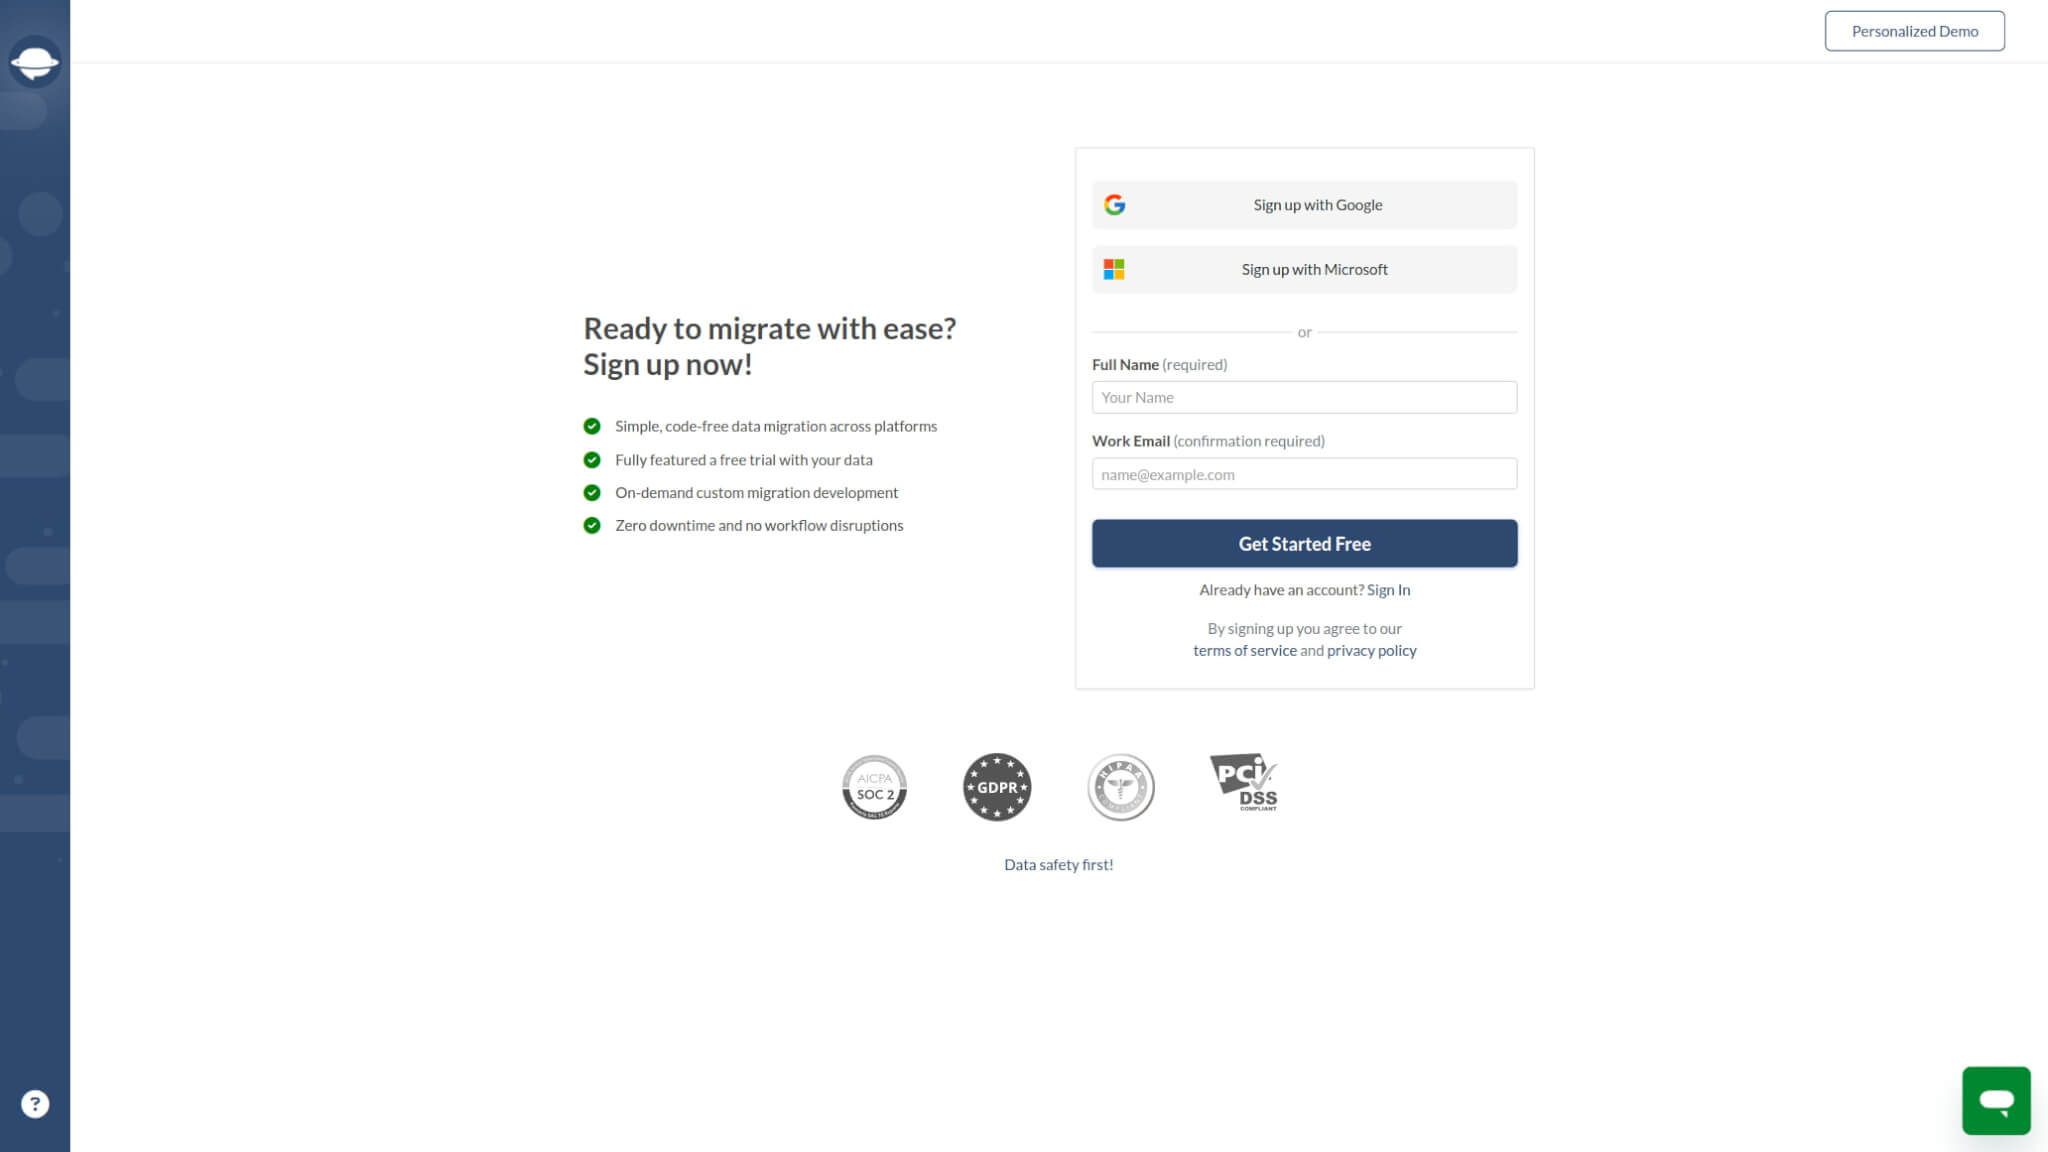
Step 1. Sign Up for Help Desk Migration Account
Sign up for a Help Desk Migration account using either your Google, Facebook, LinkedIn account or work email. If you choose the work email option, you'll need to provide your full name, work email, and choose a secure password.
Step 2. Connect Your Source and Target Platforms
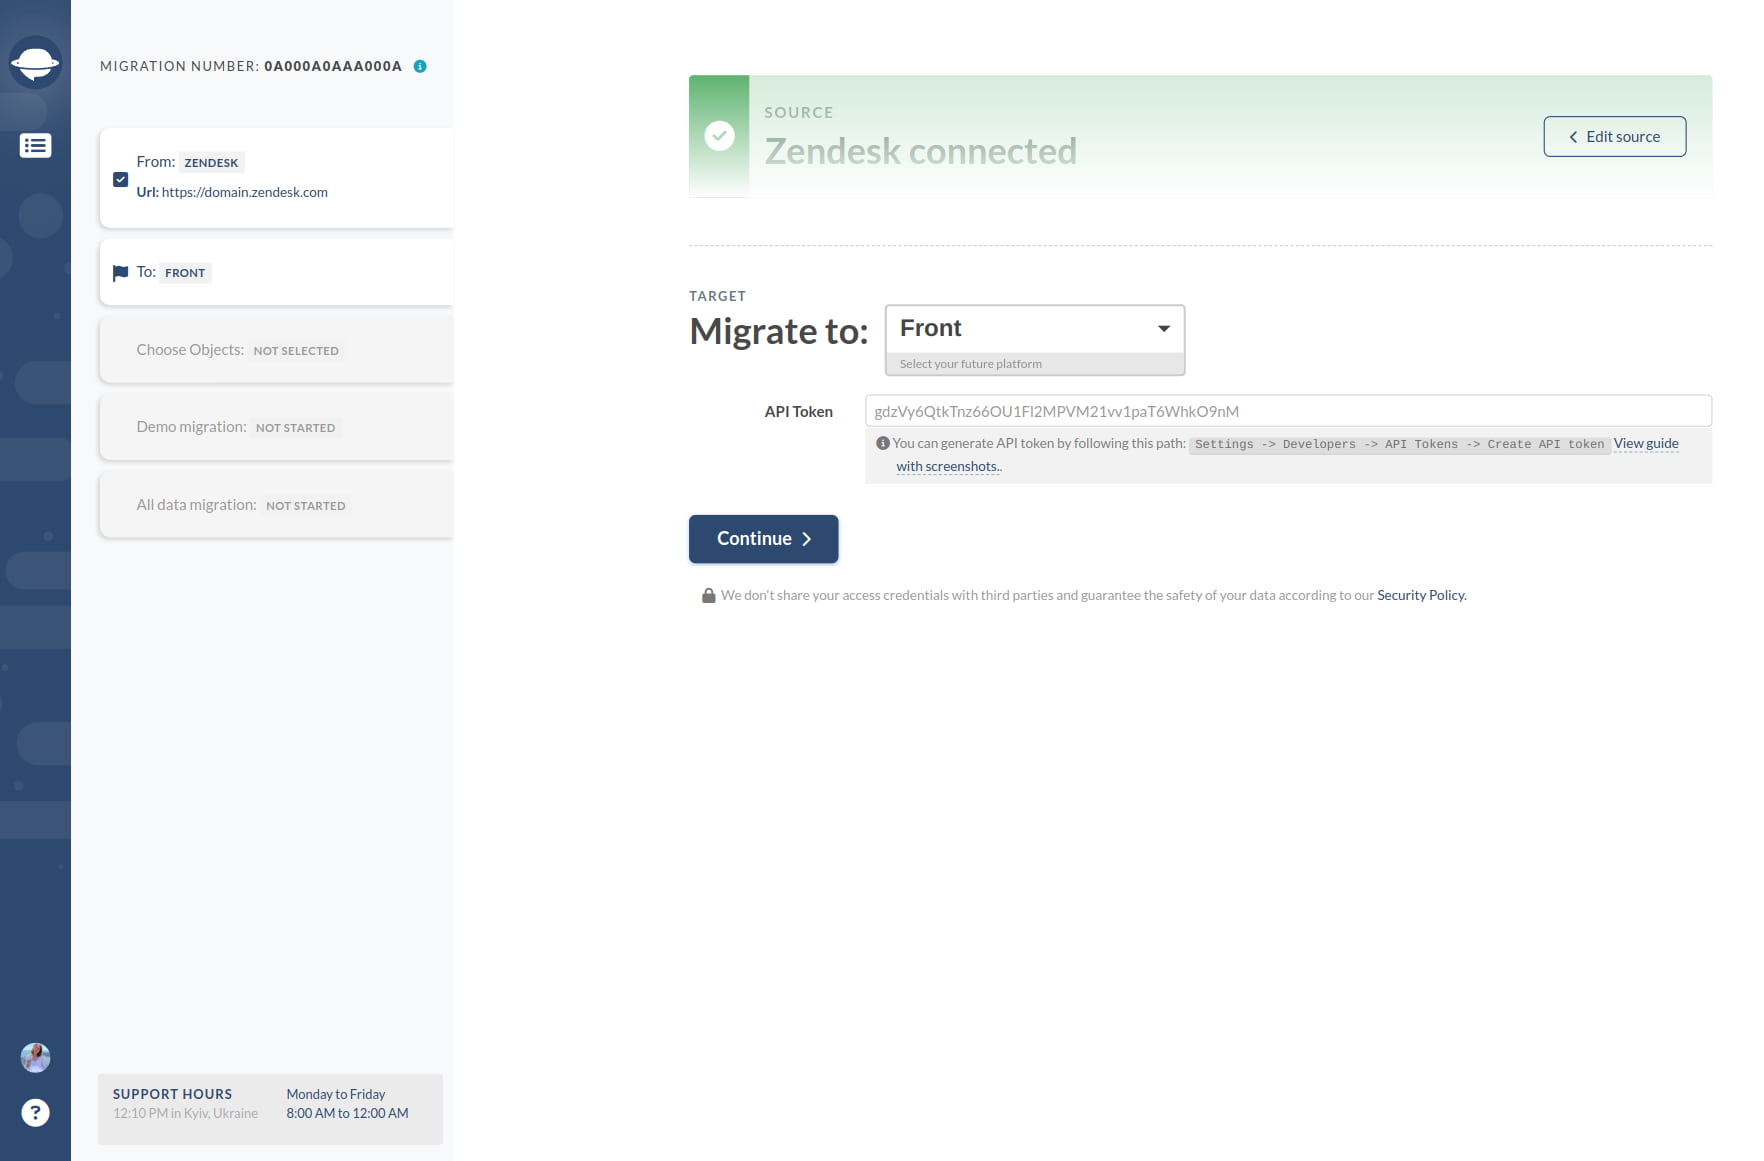
The required access credentials vary depending on the customer service platform. This can include a URL, API token, or signing in with your source platform account and granting permission.
The Migration Wizard provides helpful tips to ensure you enter all required information in the correct fields.
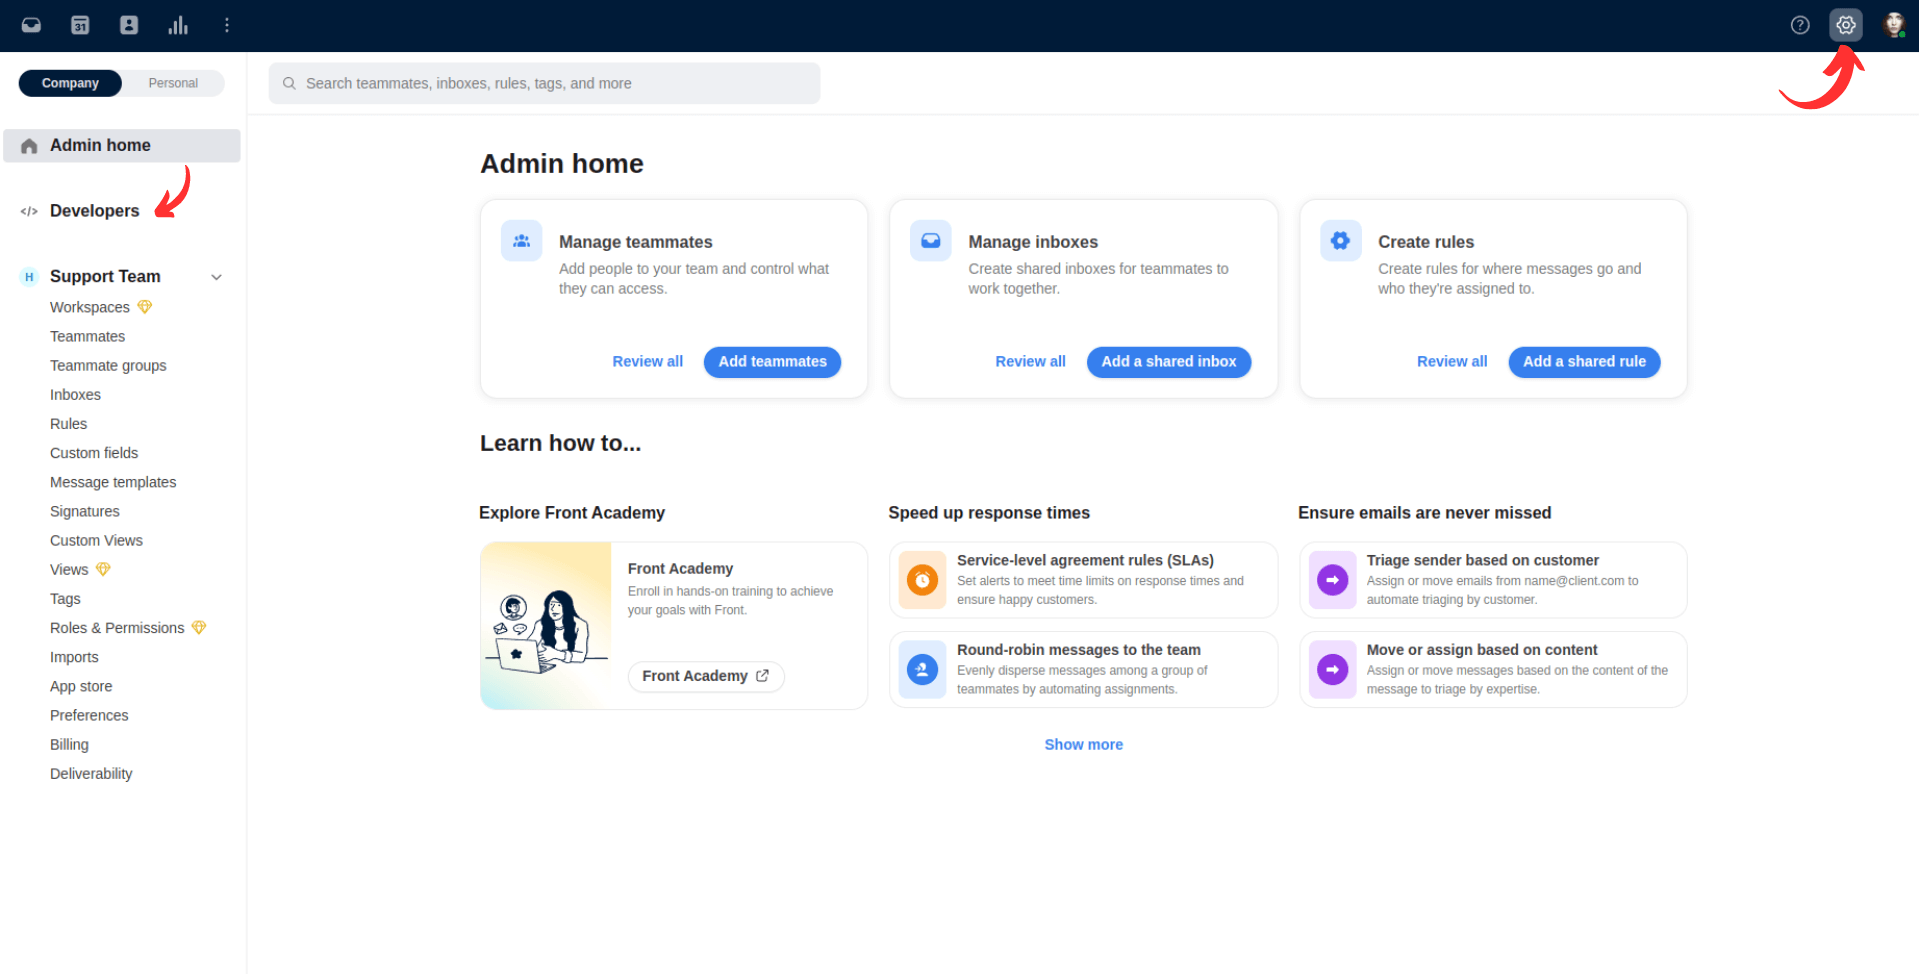
To get your Front API token, navigate to Front Settings > Developers.
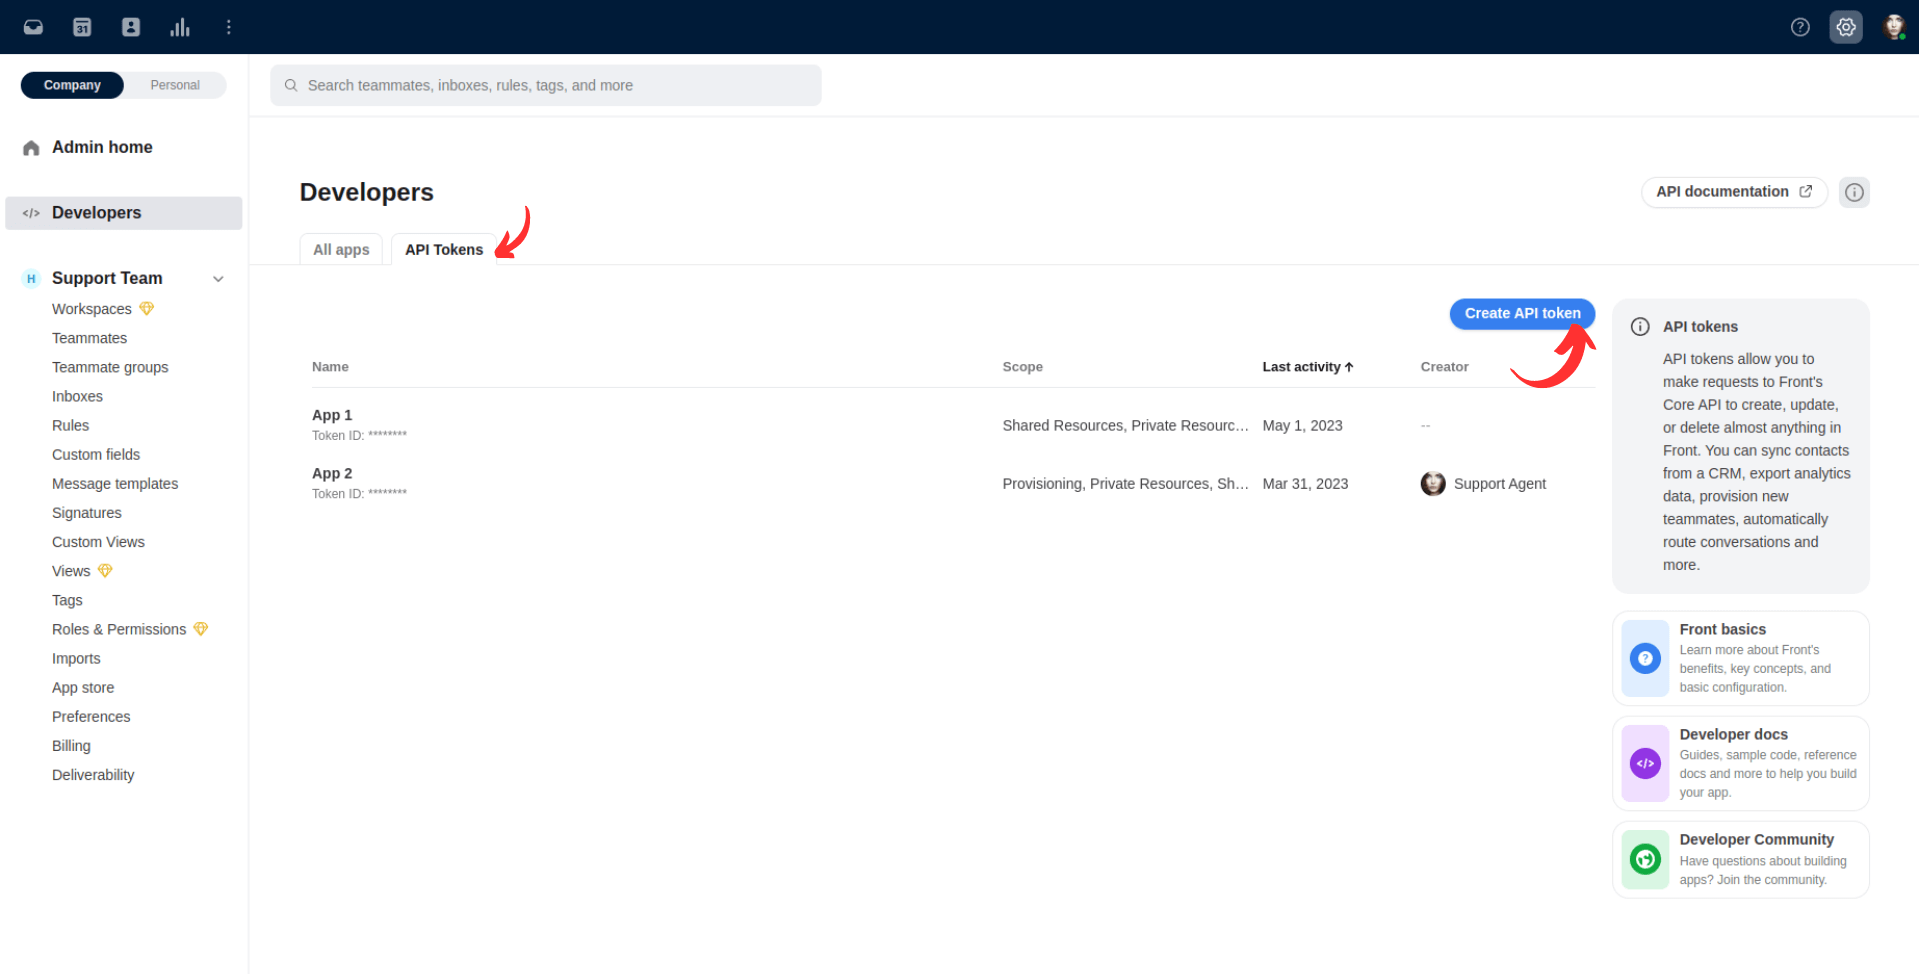
From there, go to API Tokens and click the Create API Token button.
Fill in the API Token name and check both Shared and Private scopes options before clicking create.
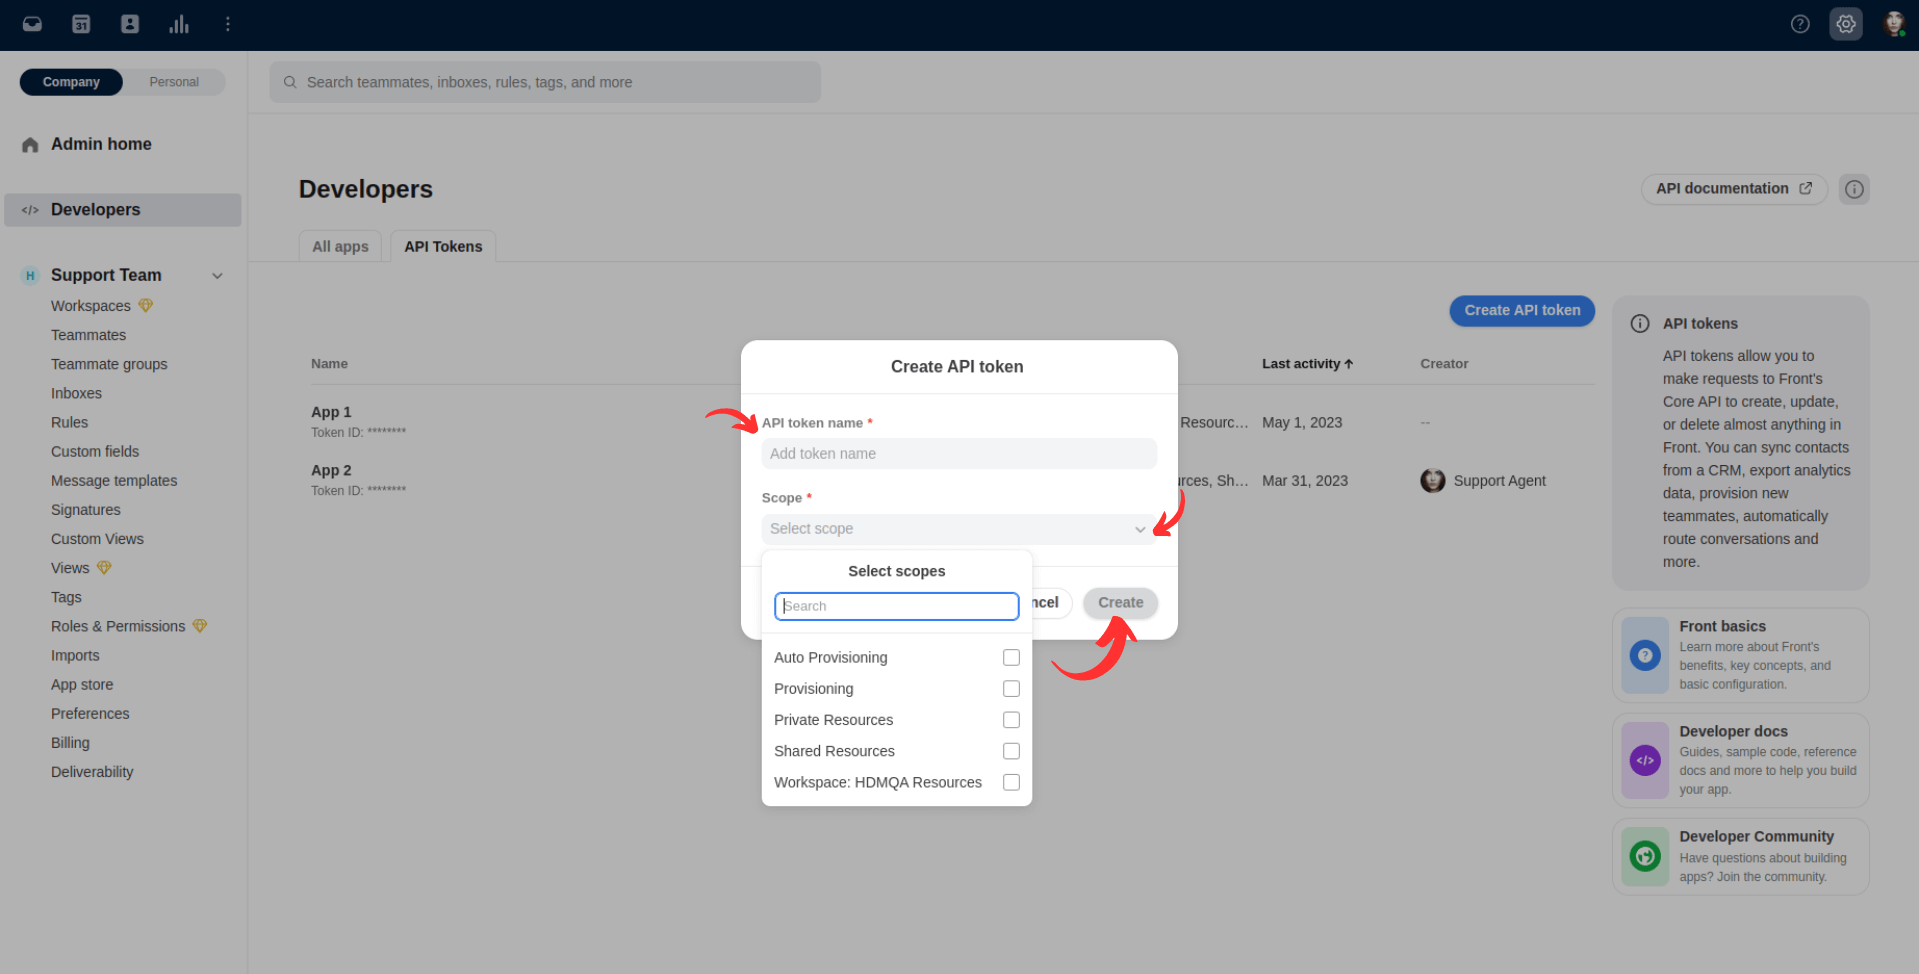
Your newly created API token will appear in the list of all available tokens. Click on it to view and copy the token, and then return to the Migration Wizard to continue the setup process.
Step 3. Select Front Inbox and Knowledge Base
Choose the Front inbox and knowledge base to which you want to import data from your source platform.
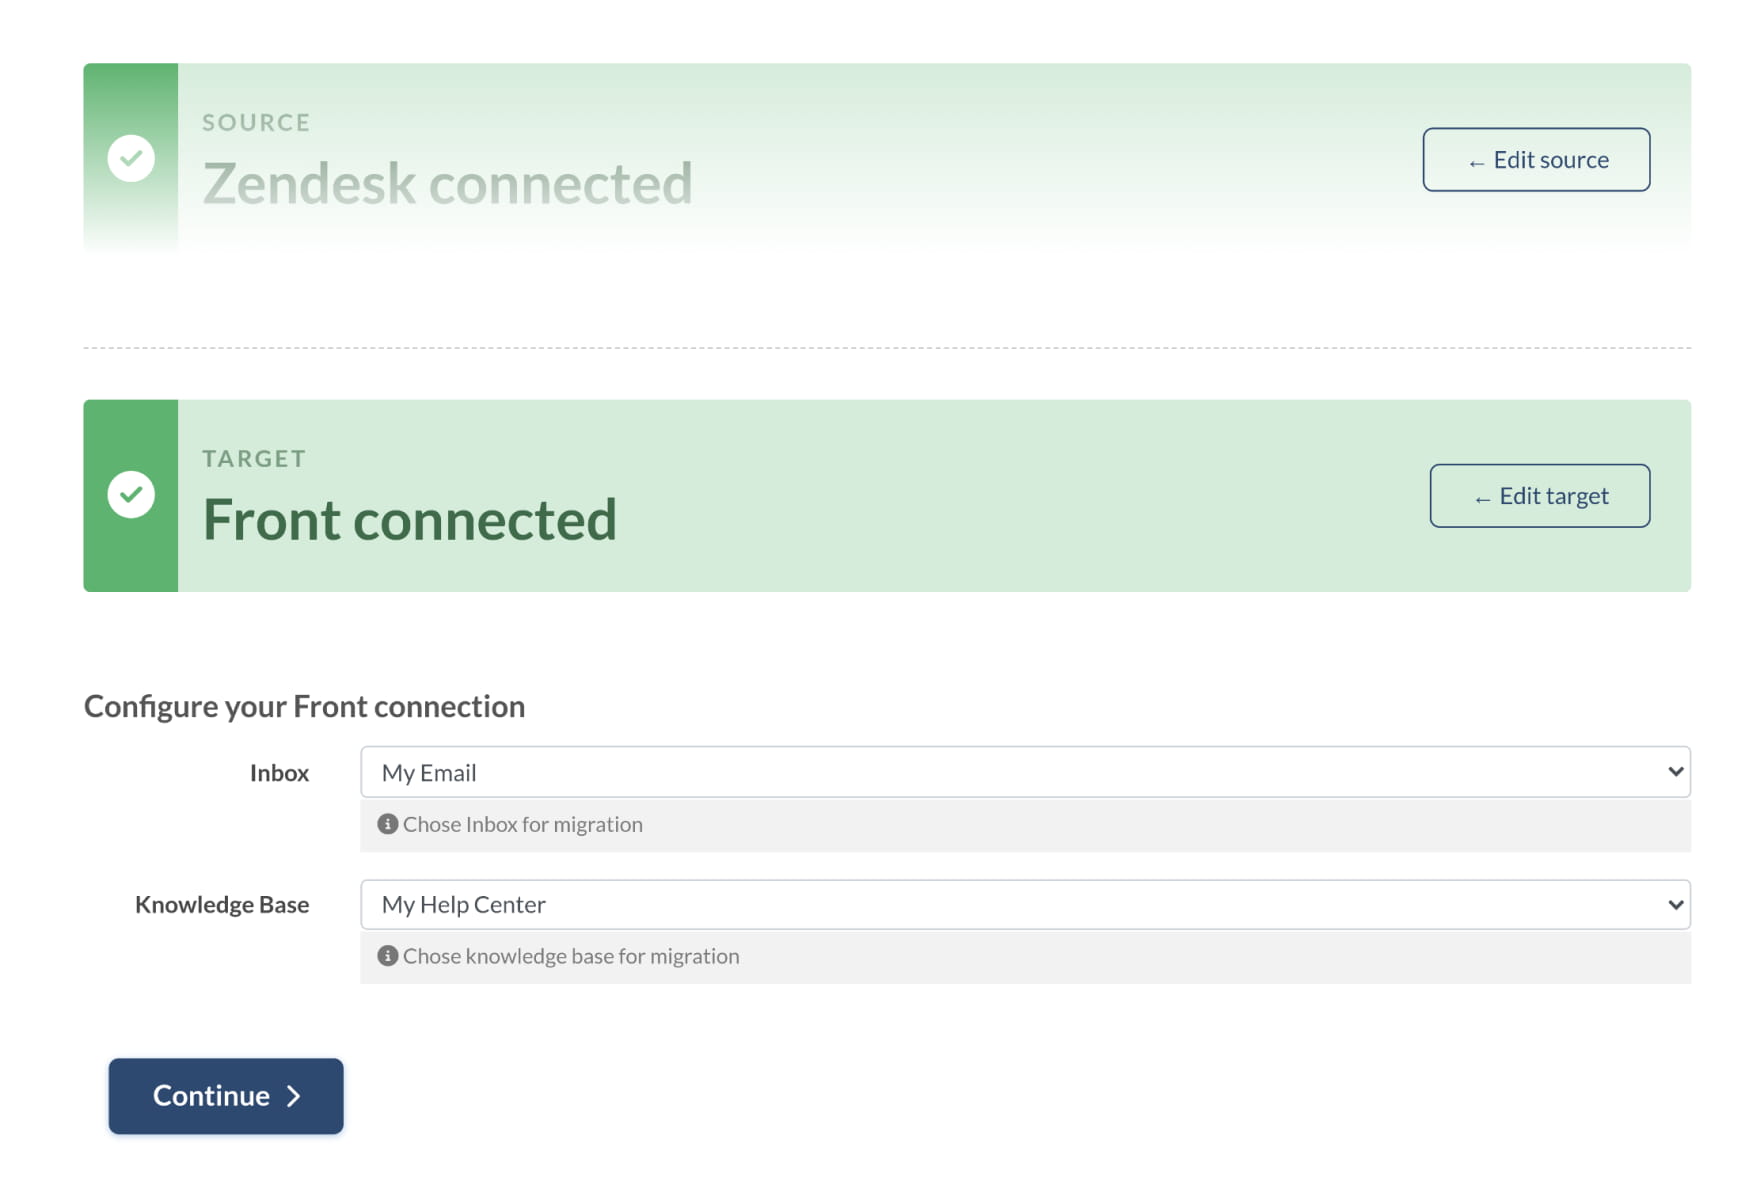
Keep in mind that you can only run one Full Migration per workspace/mailbox/inbox. If you need to migrate data to different inboxes, you'll need to set up as many Full Migrations as you have mailboxes.
Depending on the source platform, you may need to filter the data on the source account and direct different data batches to different inboxes.
For instance, if you're migrating from Help Scout to Front, you won't need to filter the data to migrate tickets from one Help Scout mailbox to one Front inbox. The number of Help Scout inboxes equals the number of Full Migrations you'll need to run.
However, if you're migrating from Zendesk to Front and want to move tickets from different Zendesk Brands into different inboxes, you'll need to request custom data filtering to sort out your tickets by Brands. Our team can assist you with this process.
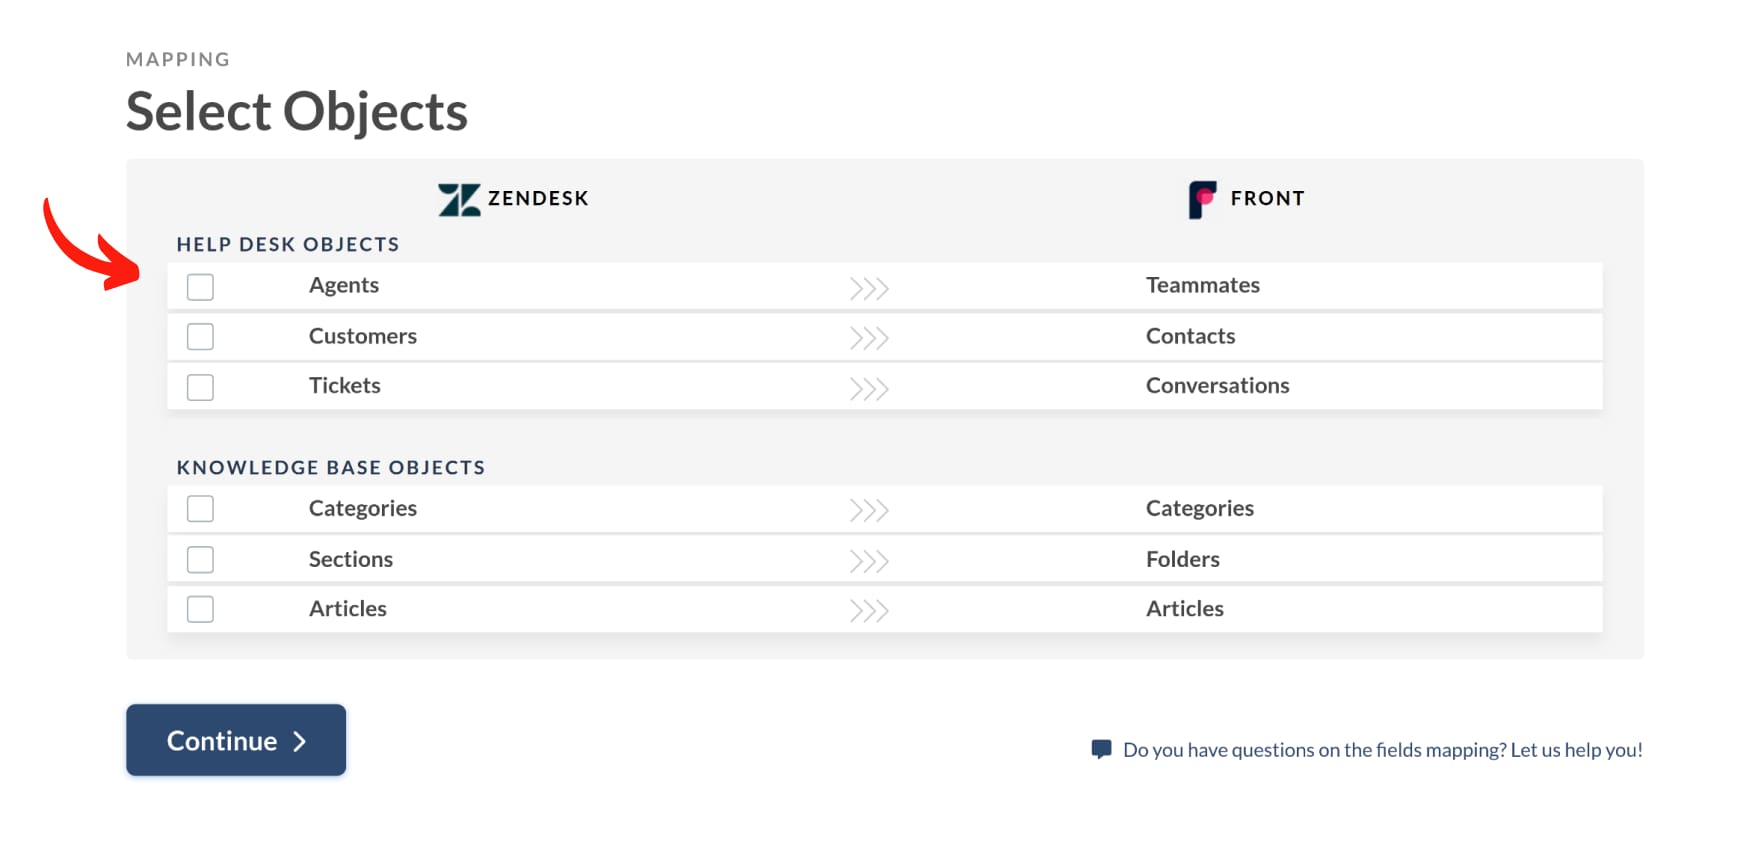
Step 4. Choose Migration Objects
Select the data entities you wish to migrate to Front, and proceed to match teammates and map fields between your source platform and Front.
Step 5. Match Teammates
Clicking ‘Match items’ between Agents and Teammates will display all the available agents for matching. If you have unassigned, deleted, or inactive agents, you can choose from available teammates the one who will serve as the default teammate and be associated with all the data.
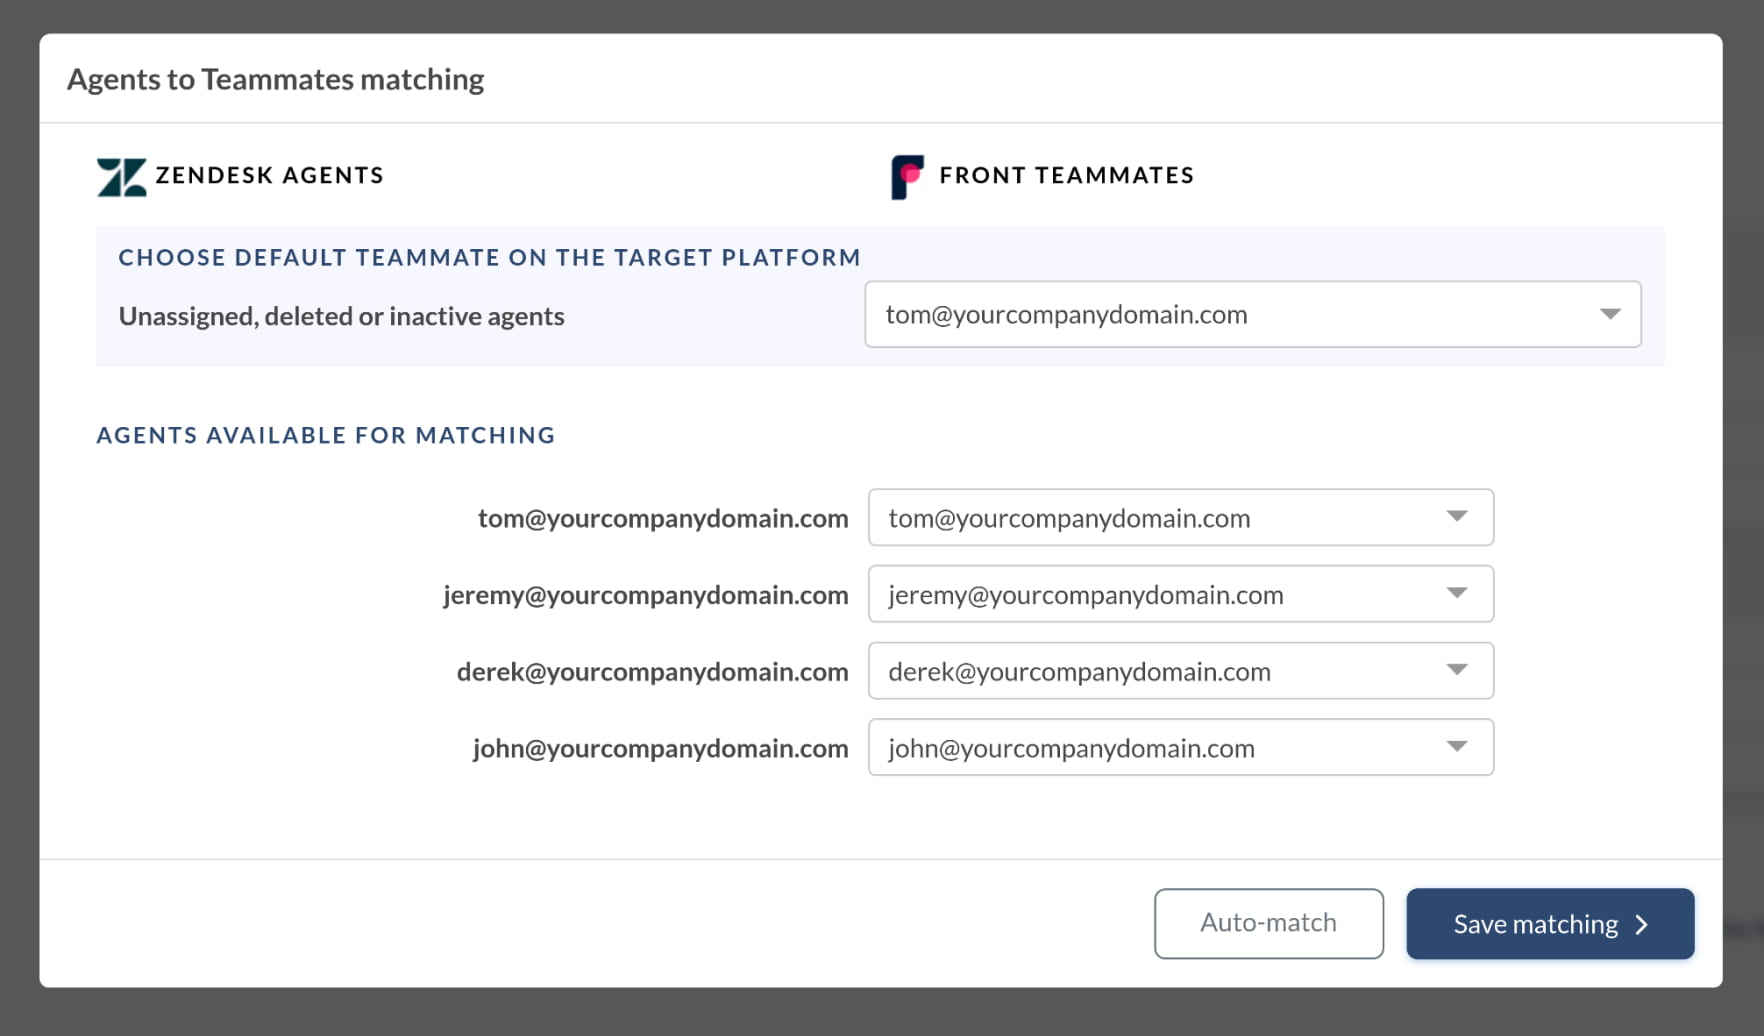
Click ‘Save matching’ to continue with the data mapping step.
In case you have made changes while re-running your Demo, use the ‘Auto match’ button to match teammates according to their names.
Step 6. Mapping Tickets
Selecting the ticket checkbox for migration will prompt a window for mapping ticket fields. Note that there are system fields that cannot be mapped differently, such as subject, tags, assignee, contact, comments, created, updated, and closed dates. Additionally, all private comments will bear the creation date identical to the migration date, resulting in the loss of original creation dates during the migration process.
You can map the ticket status field and choose from available statuses, such as assigned, open, or archived. After mapping the fields, click ‘Save mapping’ to proceed.
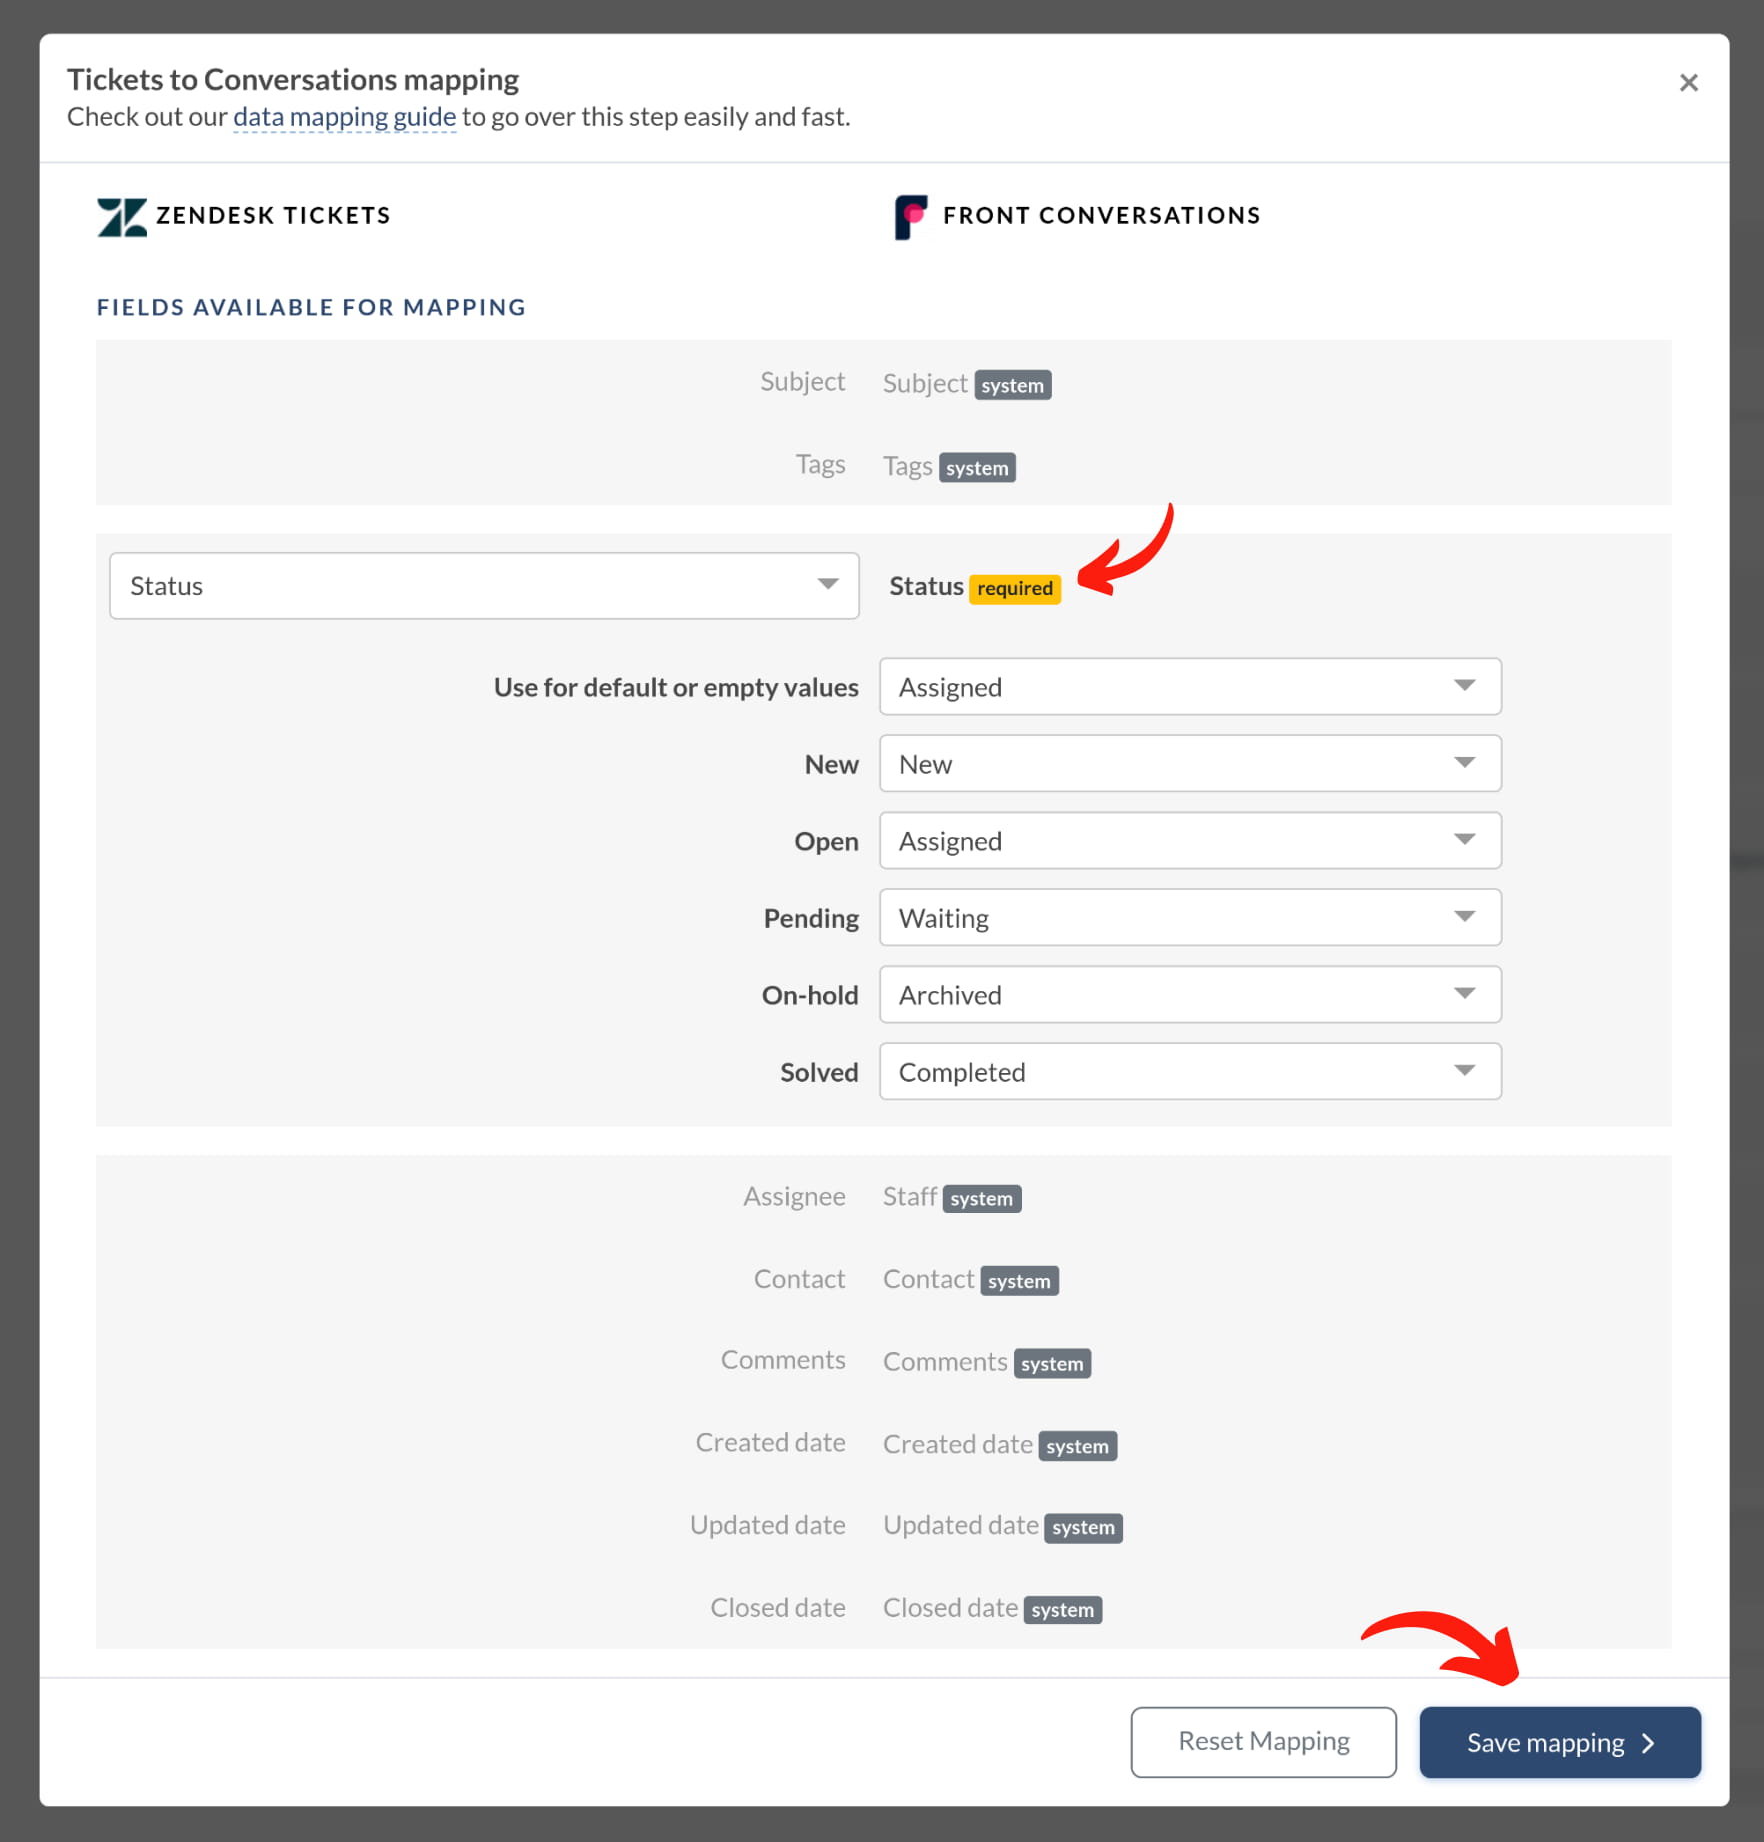
If you prefer to migrate tickets as unassigned, you will need to request customization to do so. To preserve the original statuses used in the source platform, we can add a tag with the status name. For instance, if there are tickets with a “Snoozed” status in the customer platform, we can add the tag “Snoozed” to those tickets during migration in a custom way.
To import information from ticket custom fields, we can migrate it to an additional internal comment. This way, all information from source custom fields will appear in internal comments, including the field name and the saved information.
Reason for contact: Quote request;
Price:
Technical assistance required: No
Step 7. Customization: Contact Custom Fields Import
The data entity of contact does not have a mapping option available. However, if your platform allows retrieval of information from custom contact fields, our team can migrate that information. To check if this is possible, please contact us at contact@relokia.com.
Step 8. Out-of-the-box Customization Options
Customize your migration process using the built-in options for ticket customization. The number of customization options available will depend on your source platform.
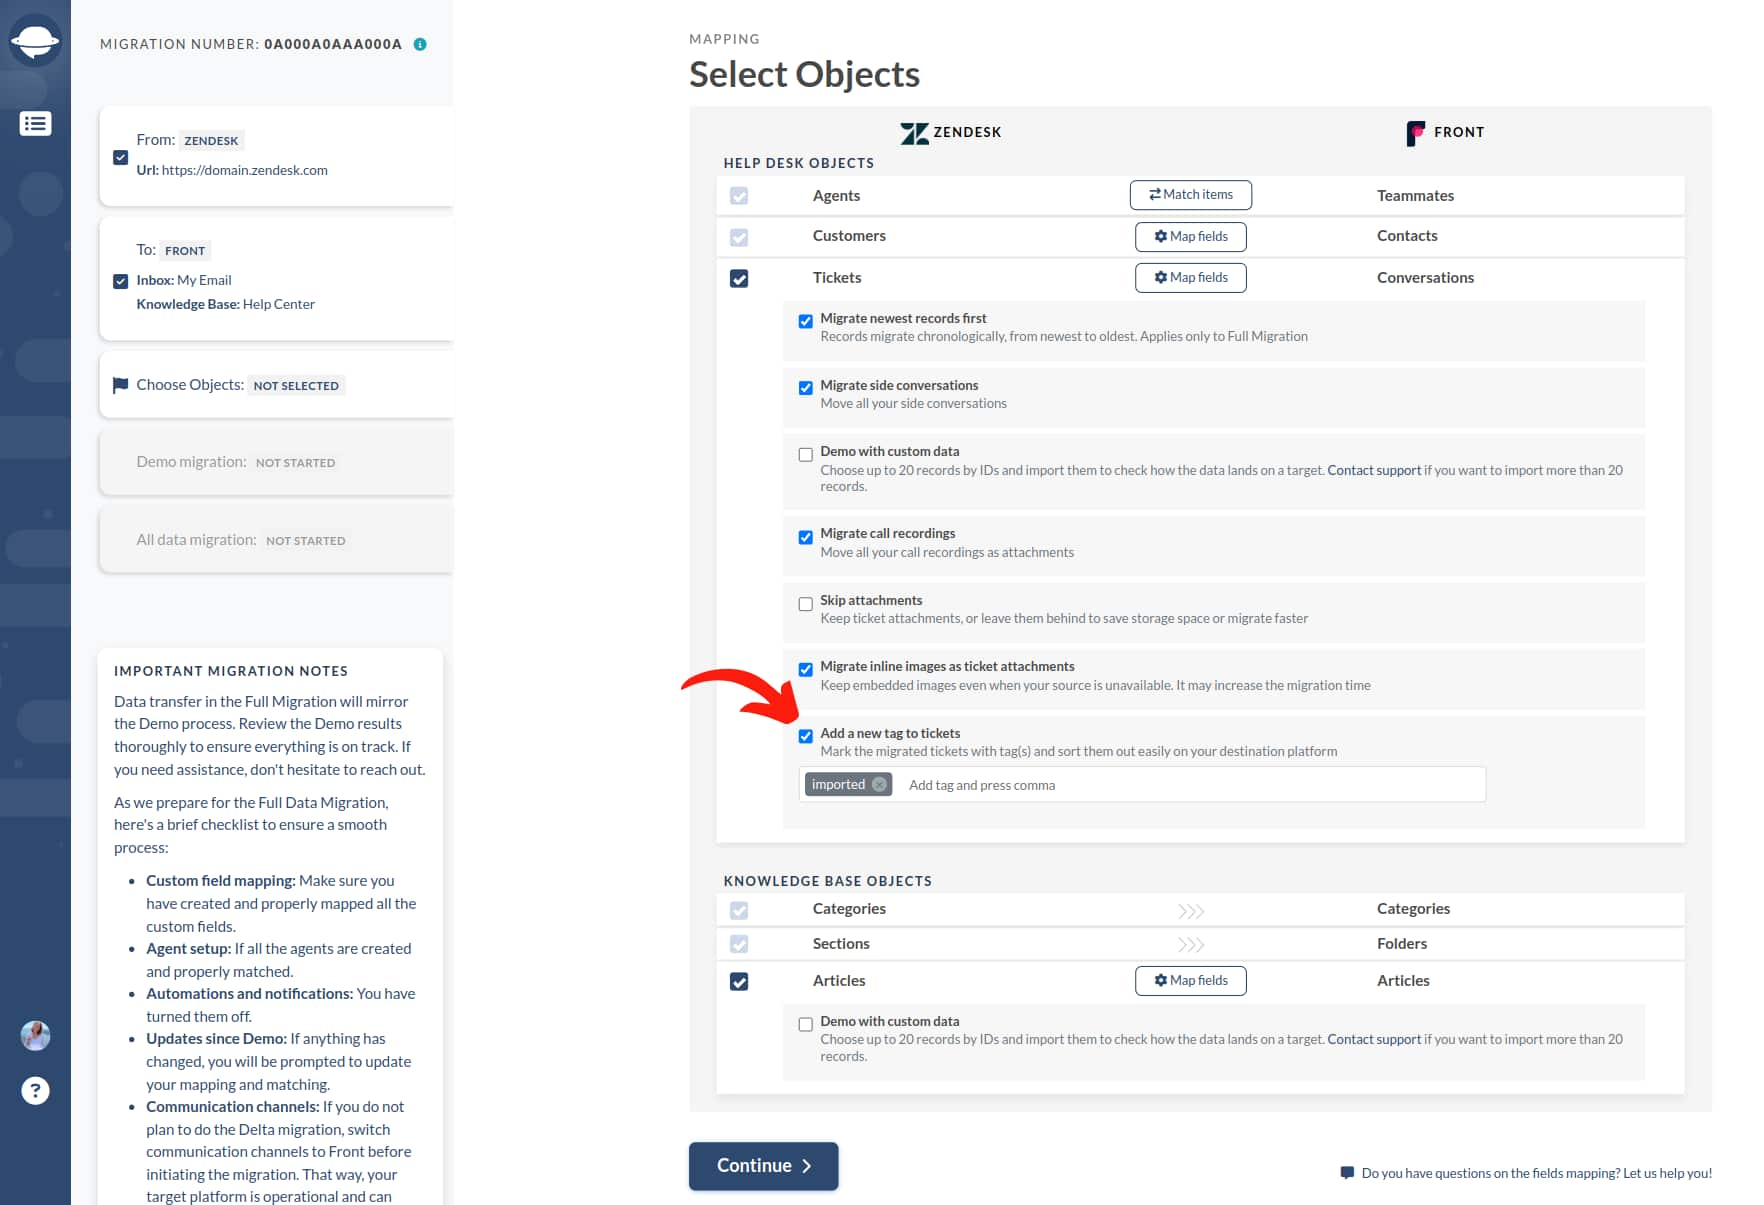
To better organize your migrated tickets, add a relevant tag to easily locate them within your Front inbox.
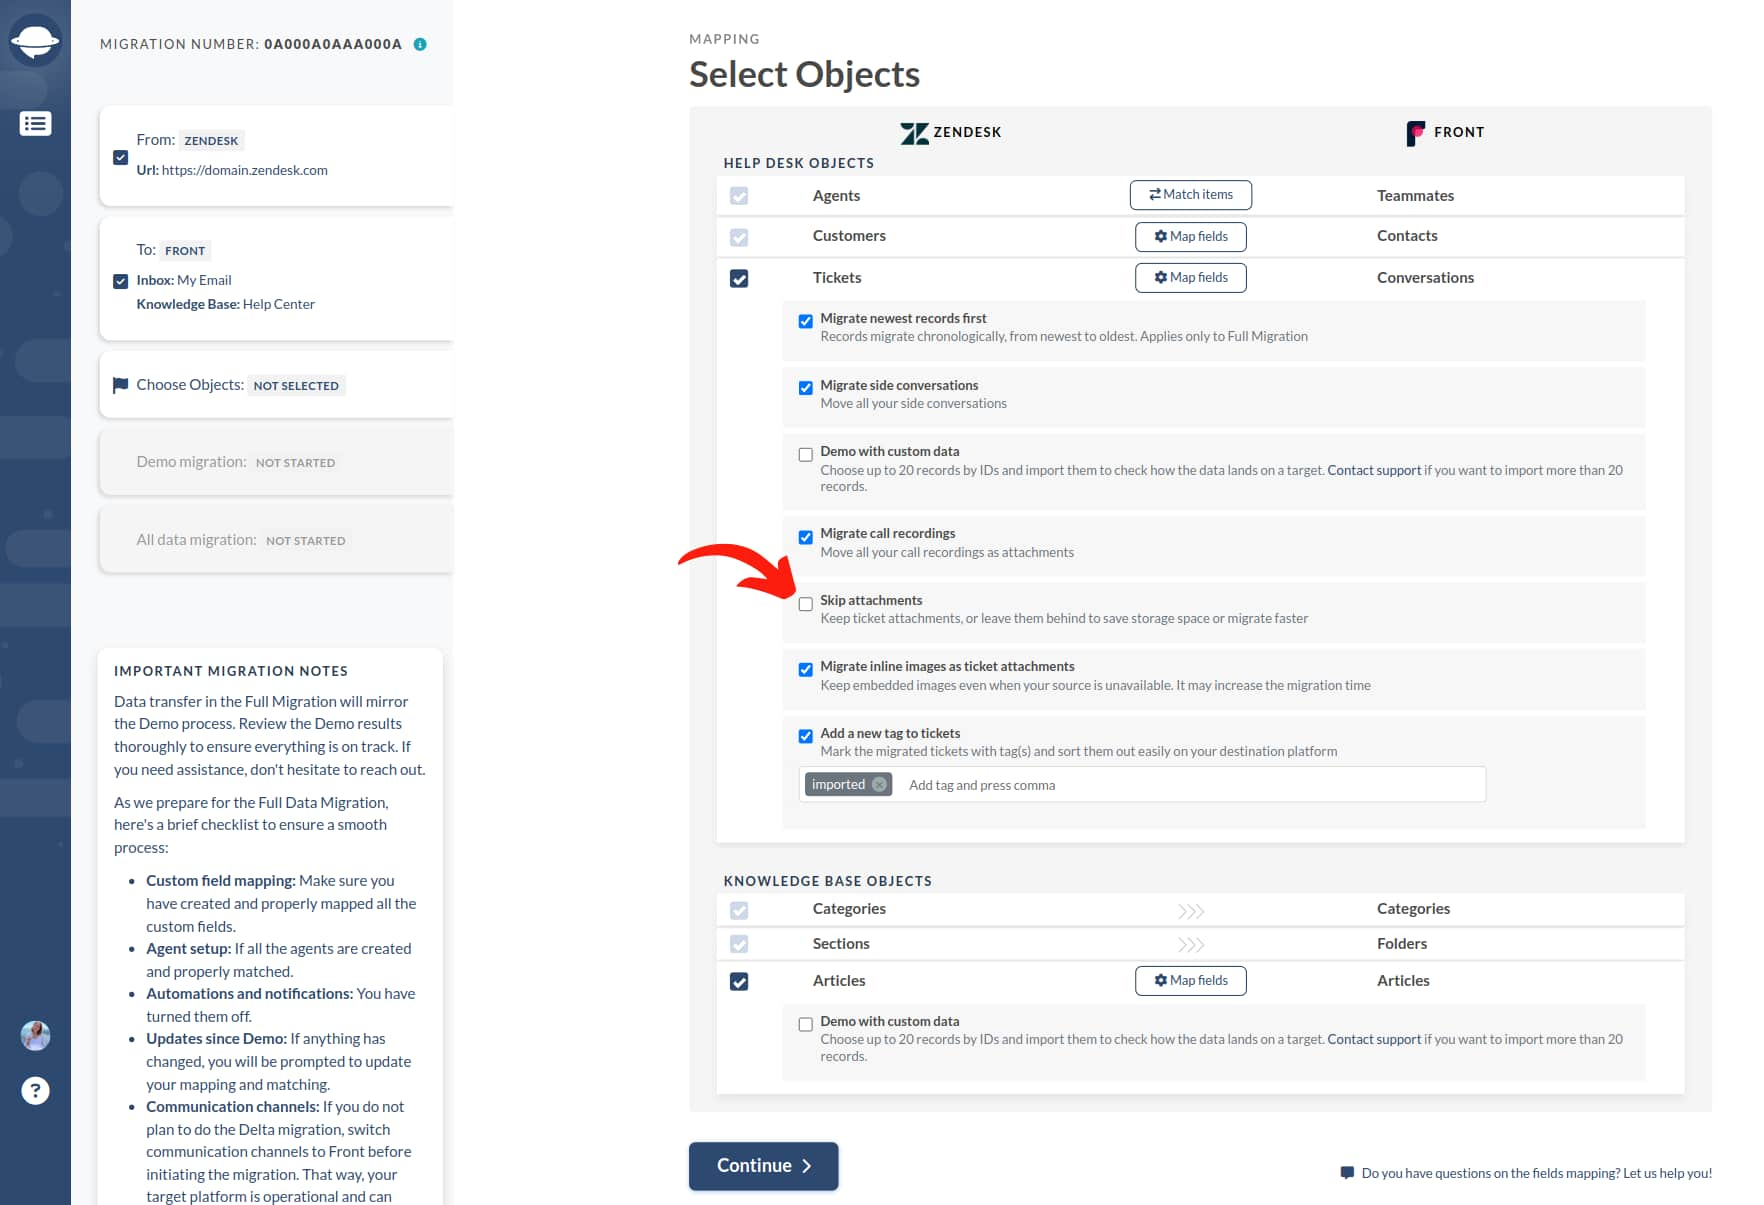
Optimize your migration: By default, we migrate all attachments, but if you want to save on storage or migrate faster, you can choose to leave them behind.
Inline images from most source platforms can be migrated as attachments, but cannot be saved as inline images. To determine if inline images can be transferred as attachments, check the objects mapping page.
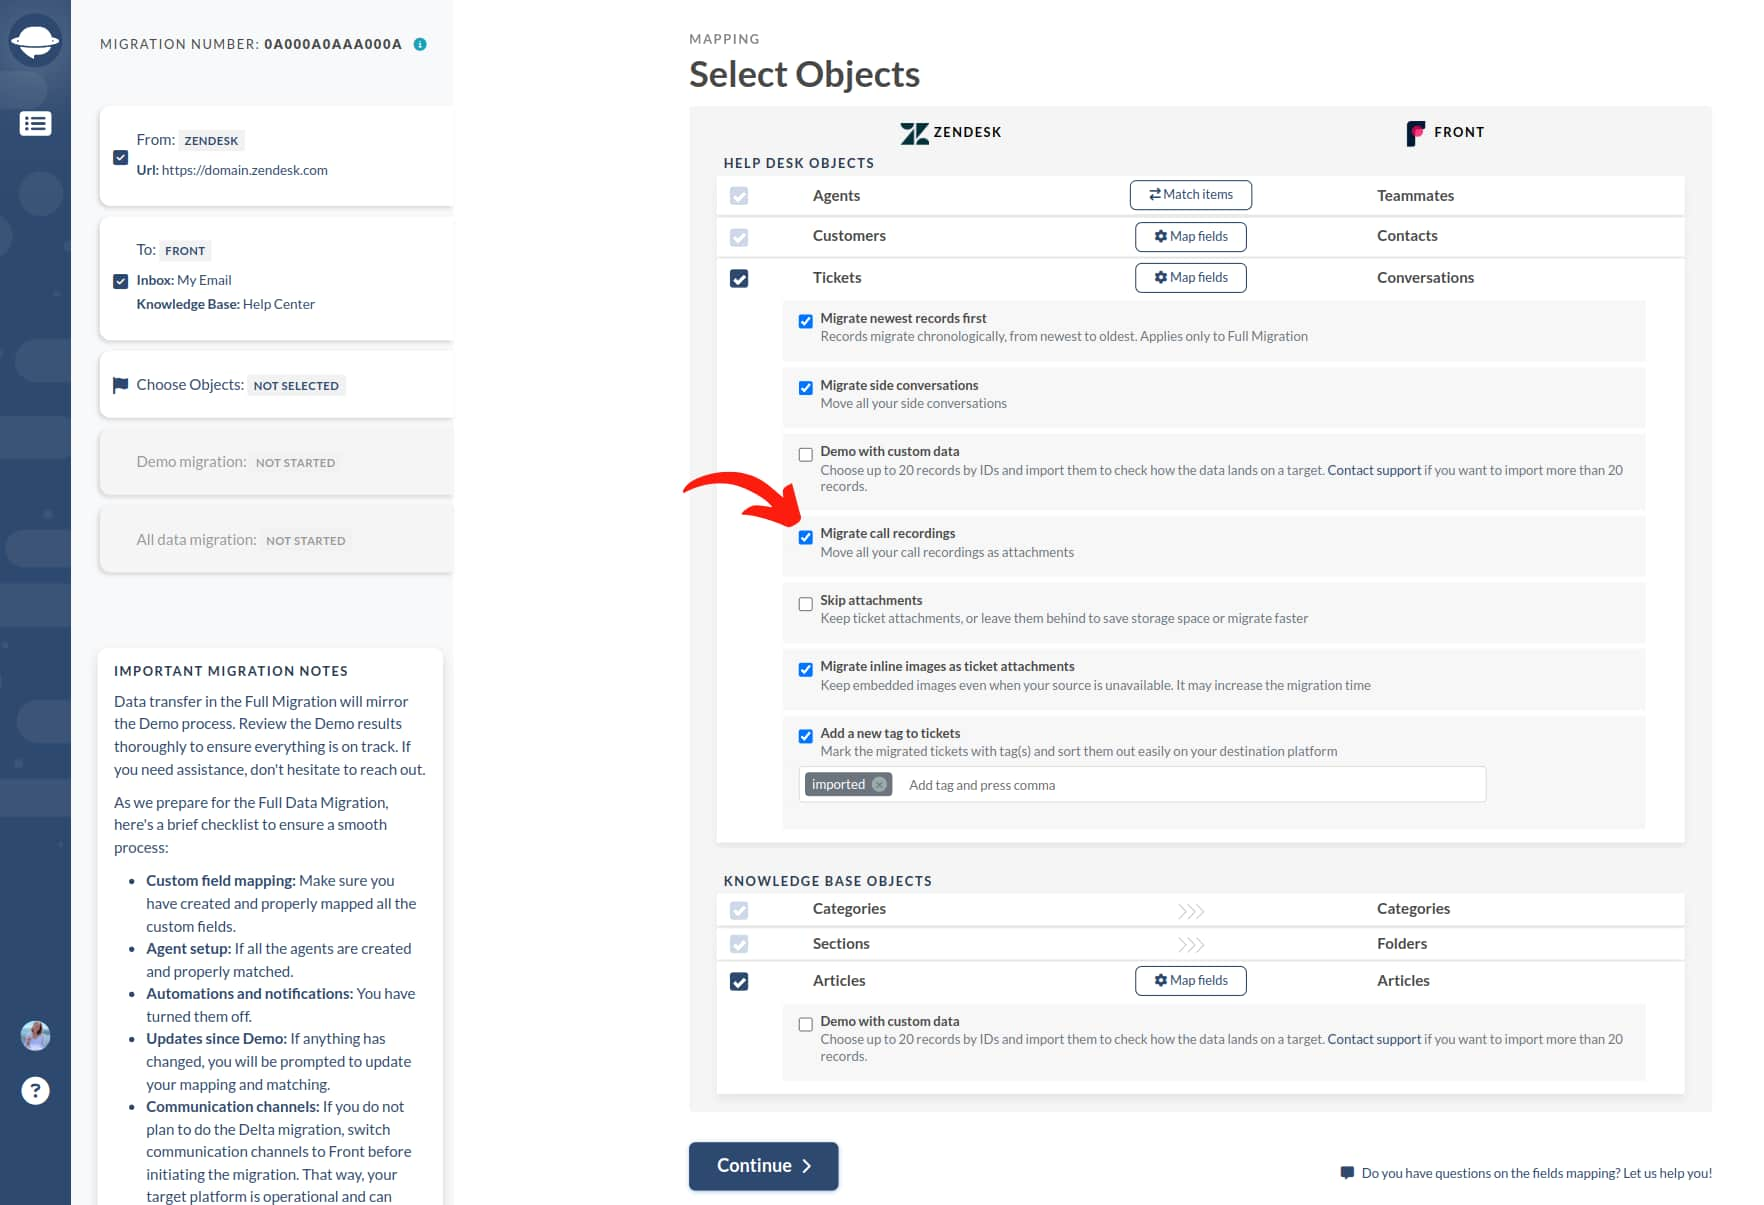
Access call recordings: Migrate your call recordings as attachments, making them easily accessible for future reference.
Customize your migration: Use our "Demo with custom data" option to choose up to 20 records by ID to import and see how the data appears on Front. You are in control!
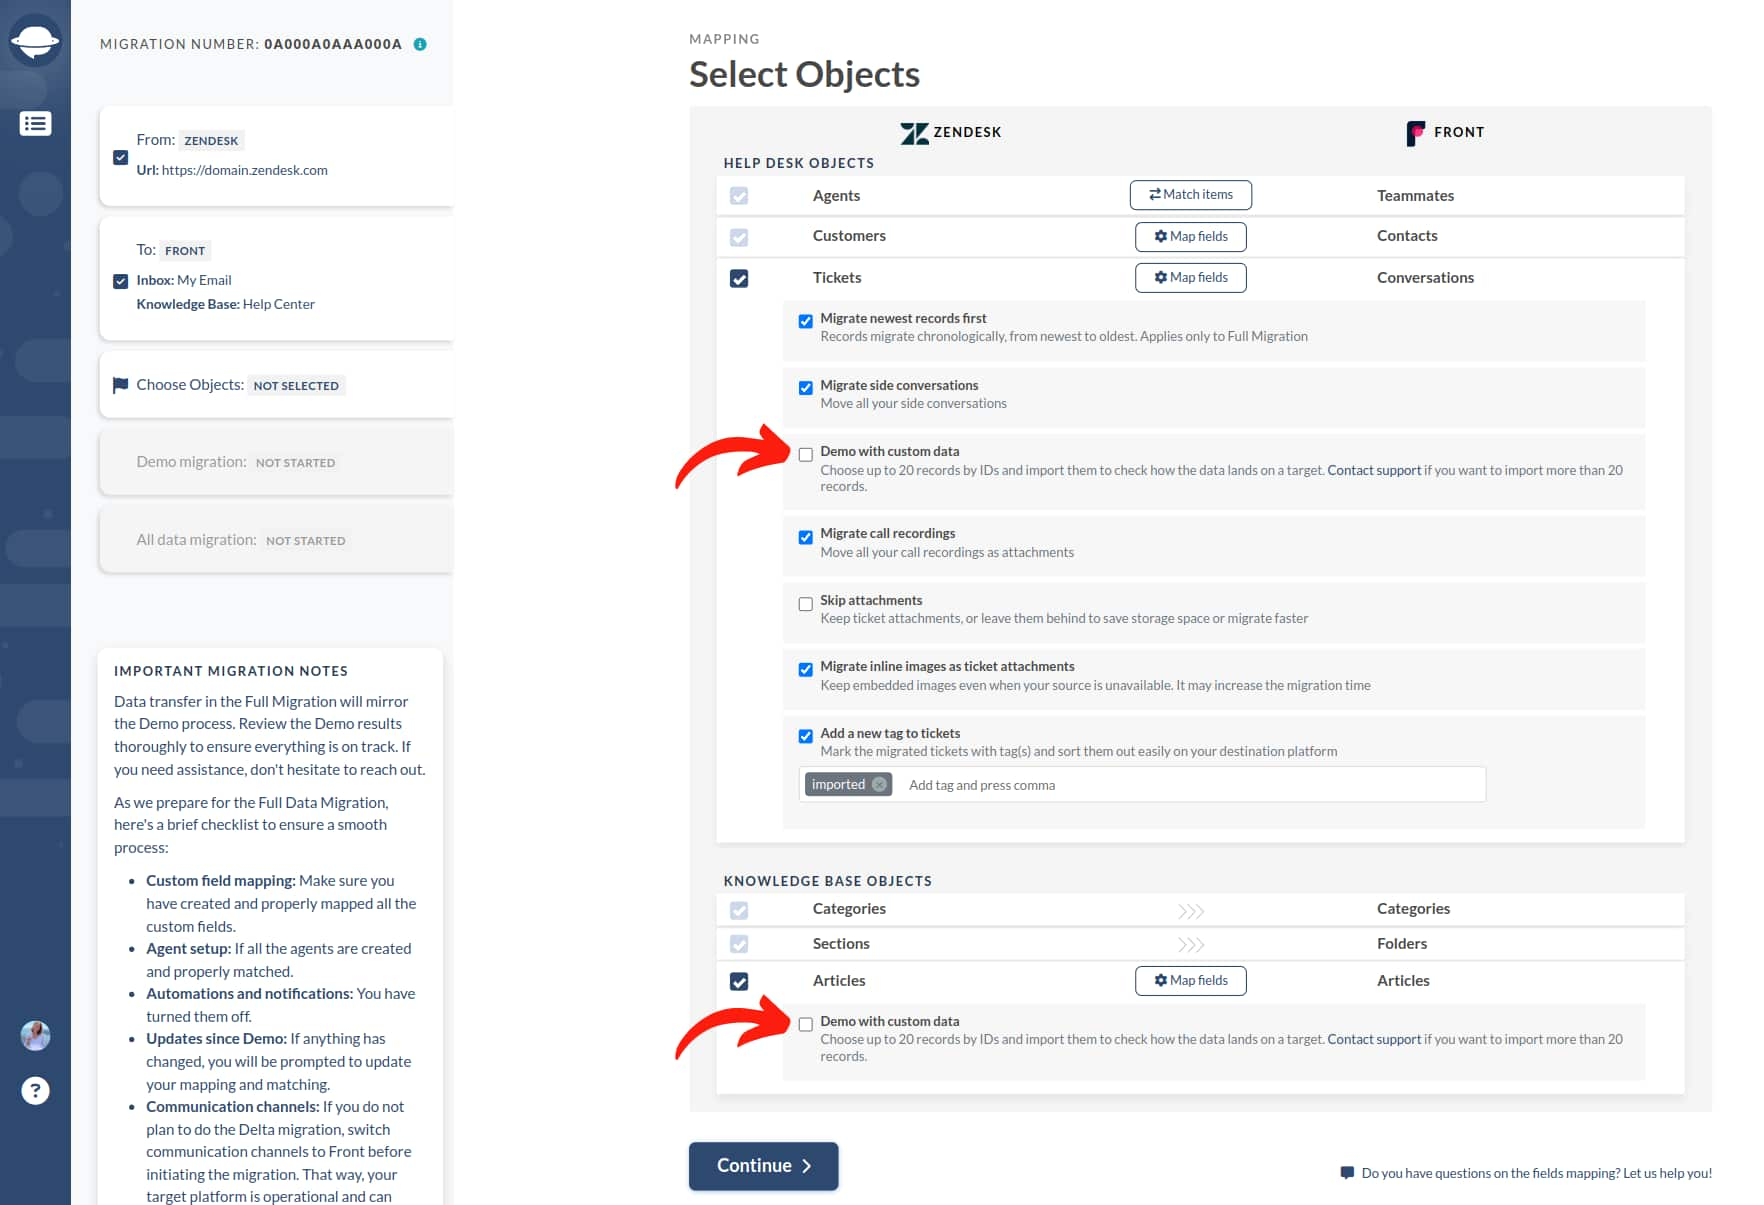
Once you have finished matching and mapping, click the ‘Continue’ button. If you have any unsaved mapping or matching information, the Migration Wizard will show you the mapping window to review and save it.
Actions to Take After the Demo Data Migration
Assessing Demo Results
It's essential to examine the results of your Demo migration because the data that appears in the demo will also migrate during the full migration. To ensure accuracy, check the records available for migration to Front in the table.
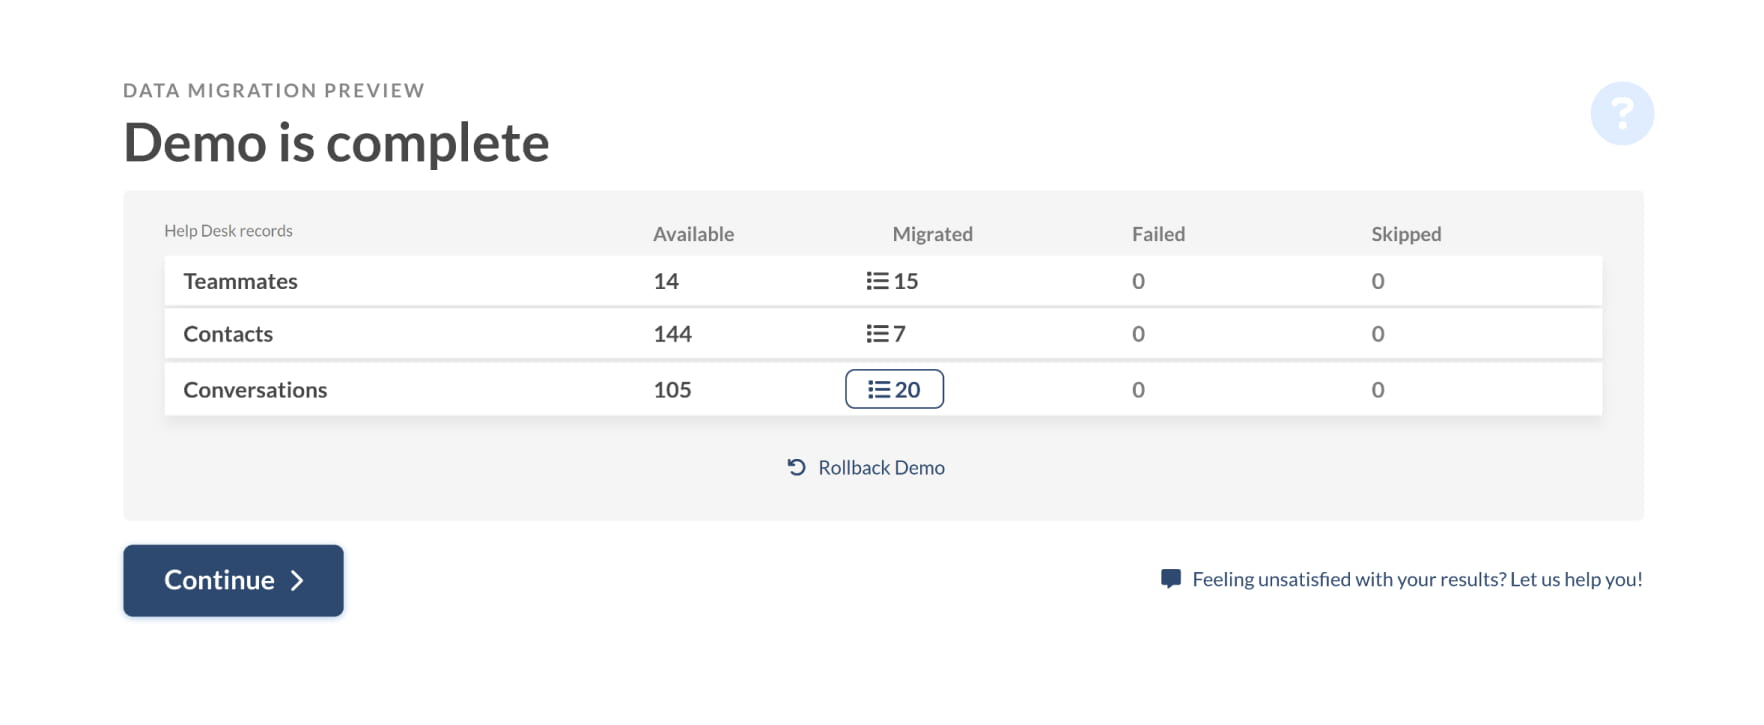
Open the report for each entity and verify that the migration is correct on both the source and Front instances by reviewing the records by IDs.
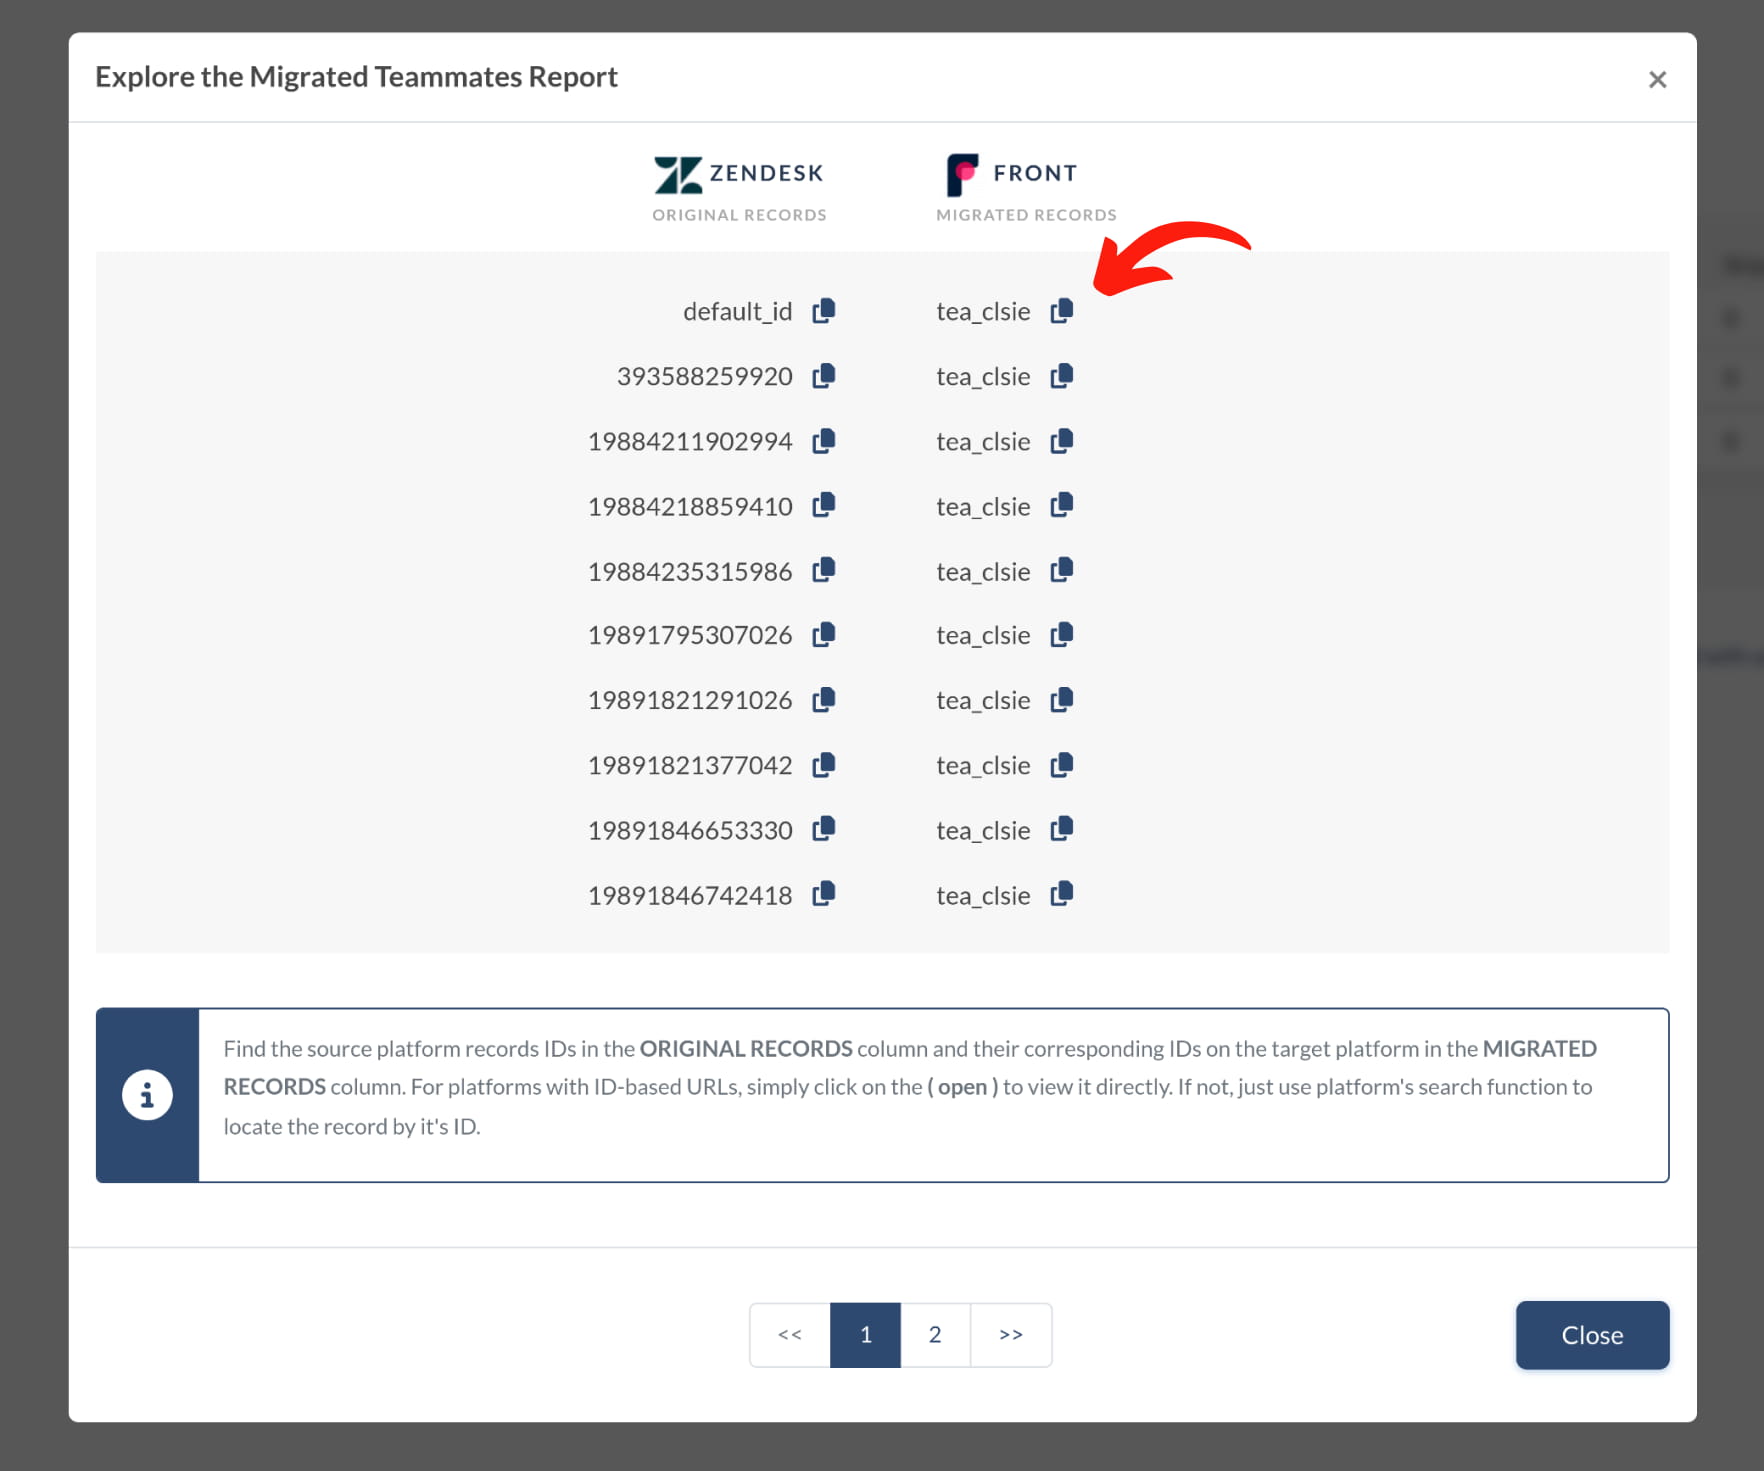
What to Look for When Checking Migrated Records
- All comments got migrated, and if the authors of the comments are the same
- The tickets are assigned to the correct teammates
- The contacts migrated correctly
- Attachments migrated along with the labels
- The automation rules did not update any of your Demo data
Handling Suspended Demos
If your Demo migration is suspended, there are two possible reasons: failed and/or skipped records.
For skipped records, it's best to wait for our support team to reach out and assist you in resolving the issue.
If you notice failed records in your Demo migration, review the record IDs to identify the reasons for the suspension and take the necessary action to fix the problem.
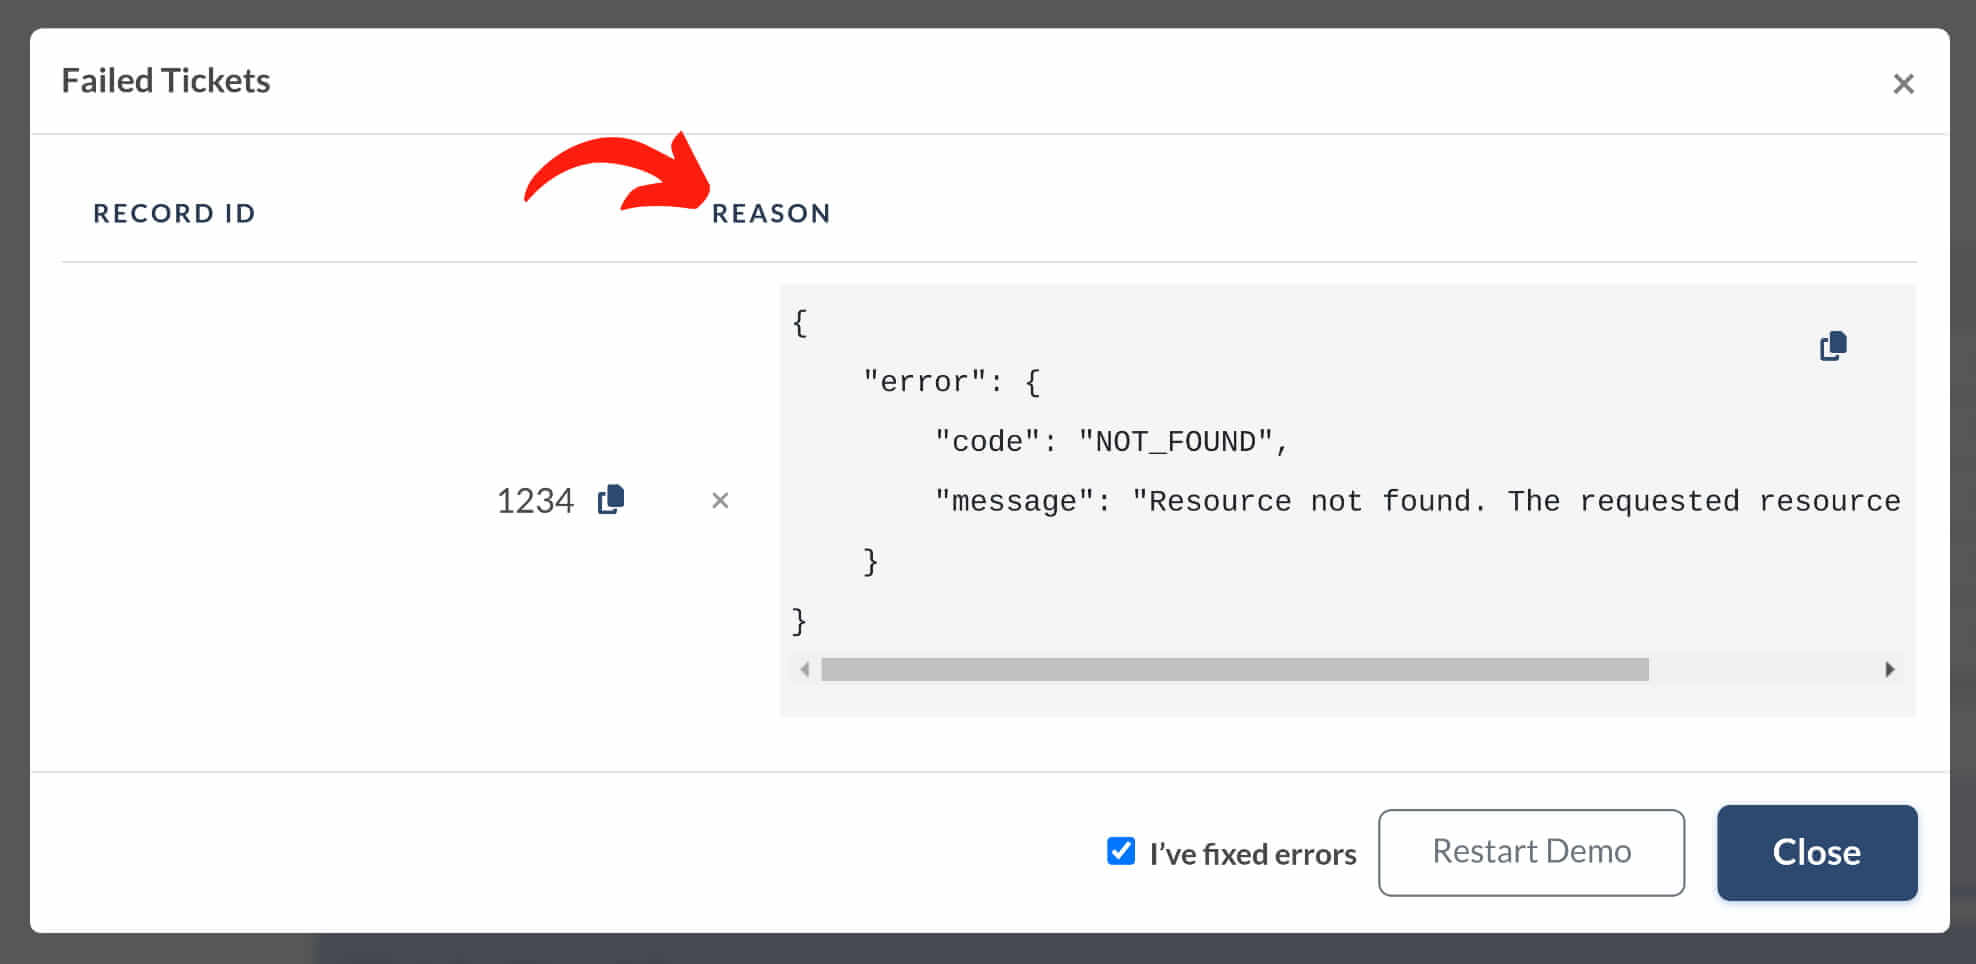
Once you've addressed the errors, check the box labeled 'I've fixed errors' and hit the 'Restart Demo' button to get your migration back on track.
Choosing the Right Support Package
Personalize your data migration to Front by selecting a fitting support package that best suits your needs.

Among the benefits of the Signature package that need more detailed explanation are
- Data remigration within 10 days after your Full Migration was completed.
- Interval migration which allows you to pause your help desk data migration during the workweek and resume on weekends or any other scheduling that best complies with your business needs.
-
Delta migration which allows you to remigrate the tickets that were updated and also migrate those that were created during the Full migration. If you continue working on the source platform and then do the Delta migration right after the switch, there will be duplicates of the tickets that were migrated in the first migration and updated in the source platform.
Delta migration allows you to update your existing data in Front without deleting previously imported tickets. Once the delta migration is complete, however, you will need to manually delete the outdated tickets. Migration Wizard doesn’t remove any tickets during the delta migration; it simply updates their status to Deleted.
That's why our Help Desk Migration team will provide you with a list of these tickets for easy removal. This streamlined process ensures that your data remains up-to-date and clutter-free, saving you time and effort in the long run.
- Skipped/failed records check for custom migration.
Price Breakdown and Payment
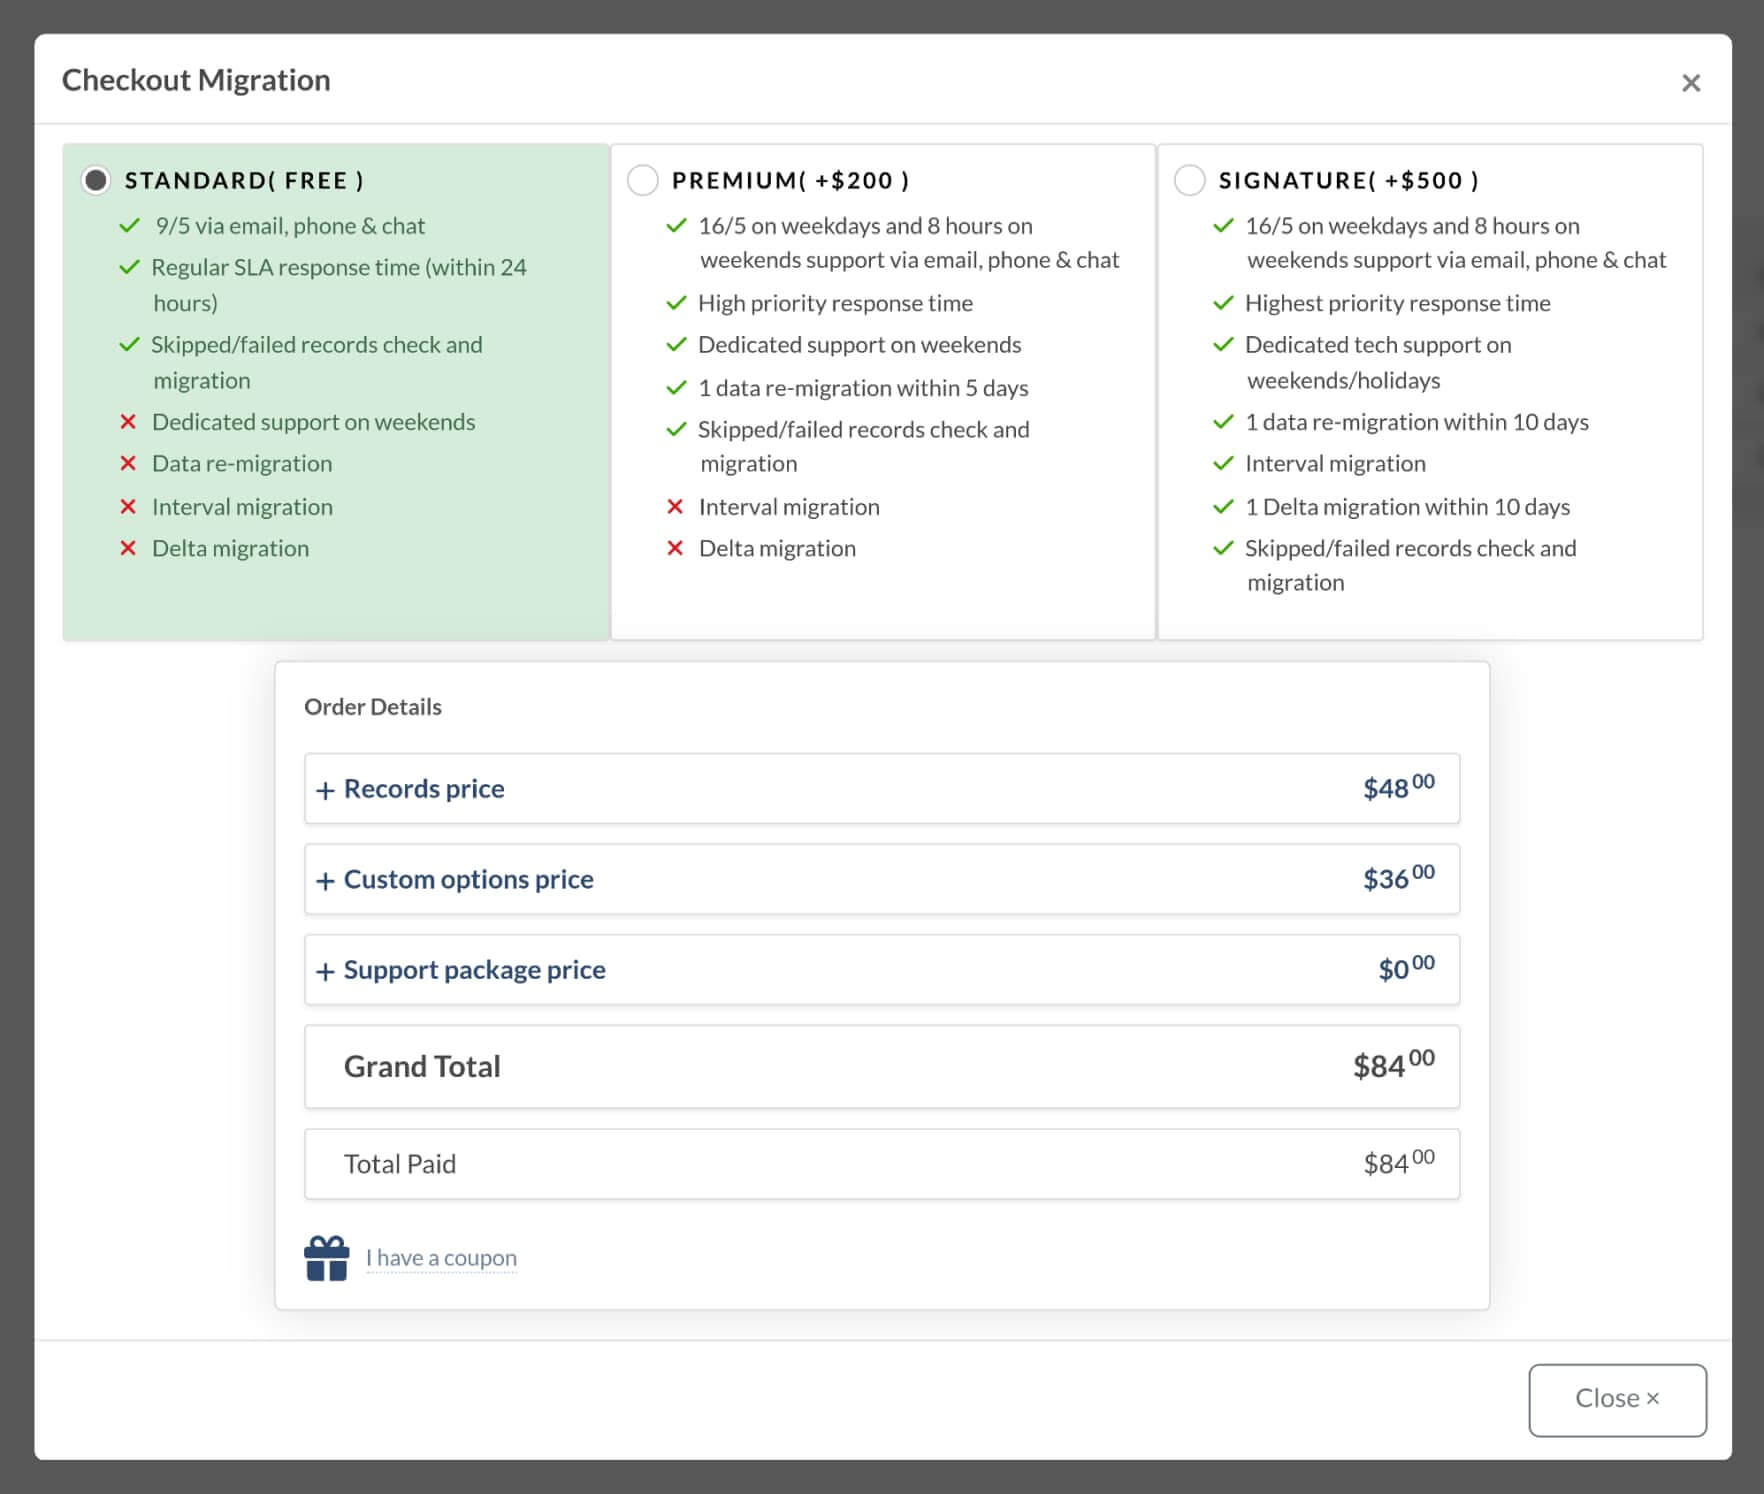
If you have any questions about the Full migration price, be sure to check the price breakdown for a detailed and transparent explanation.
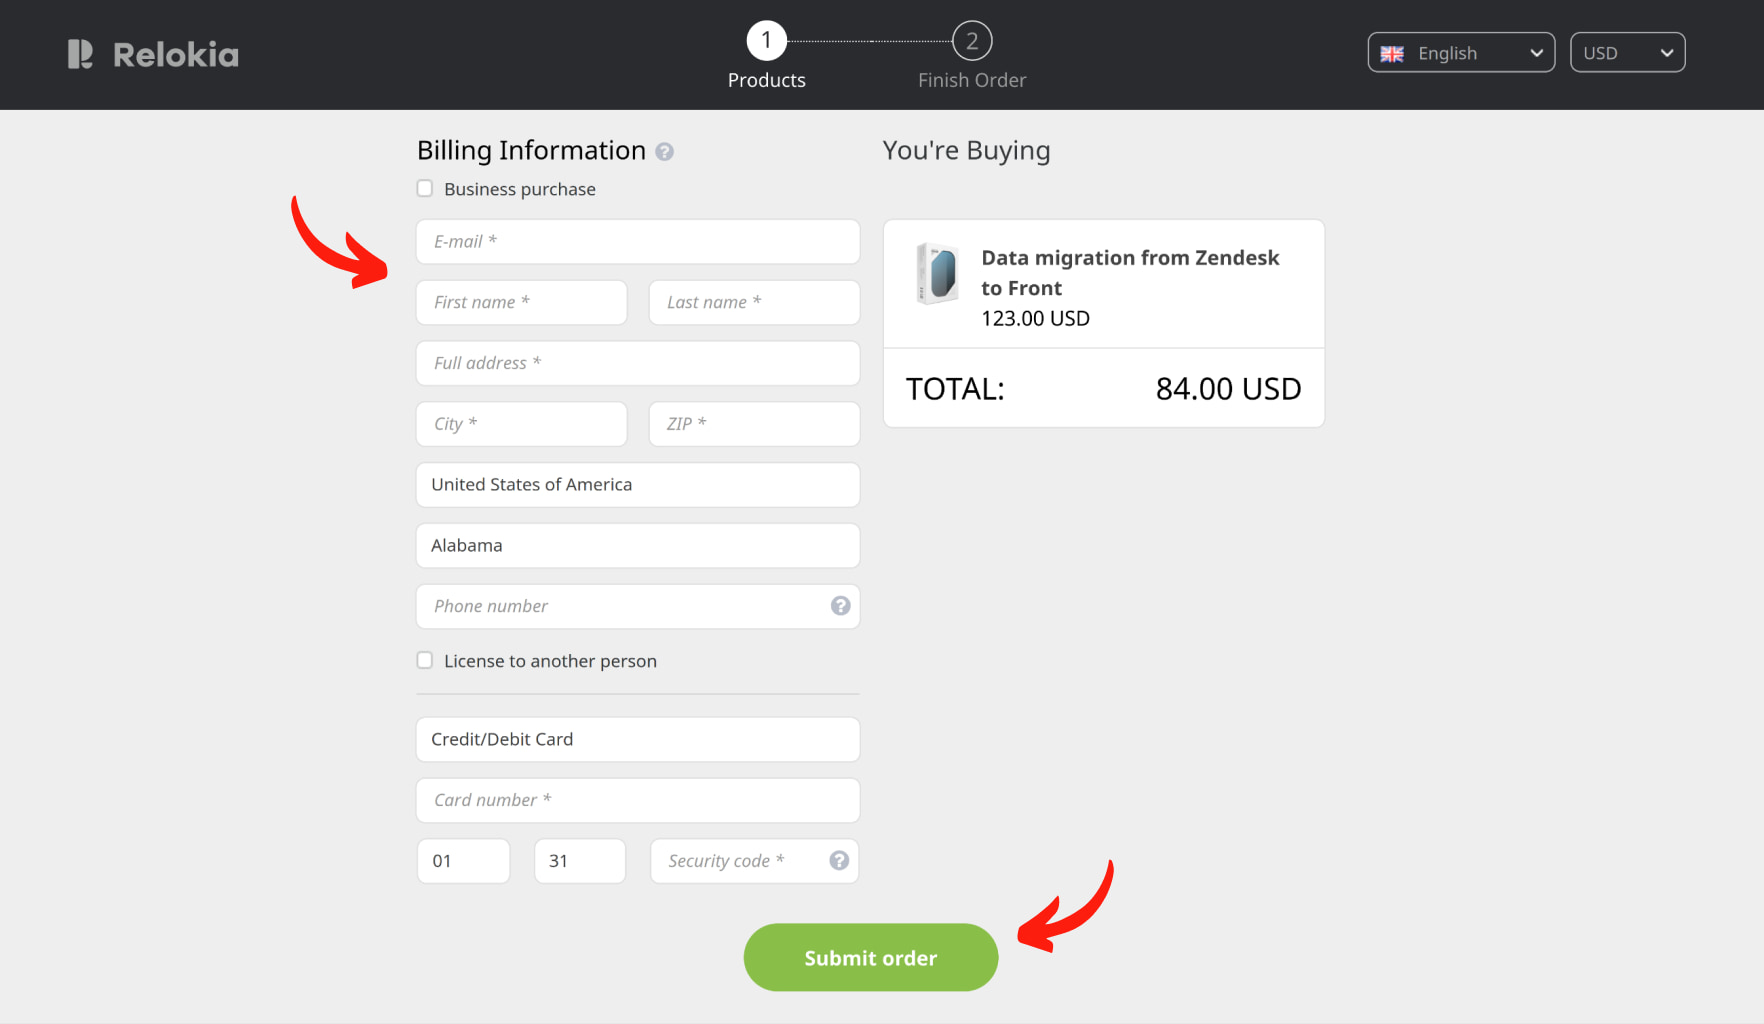
When you're ready, proceed to payment by filling in your billing information and clicking ‘Submit order.’
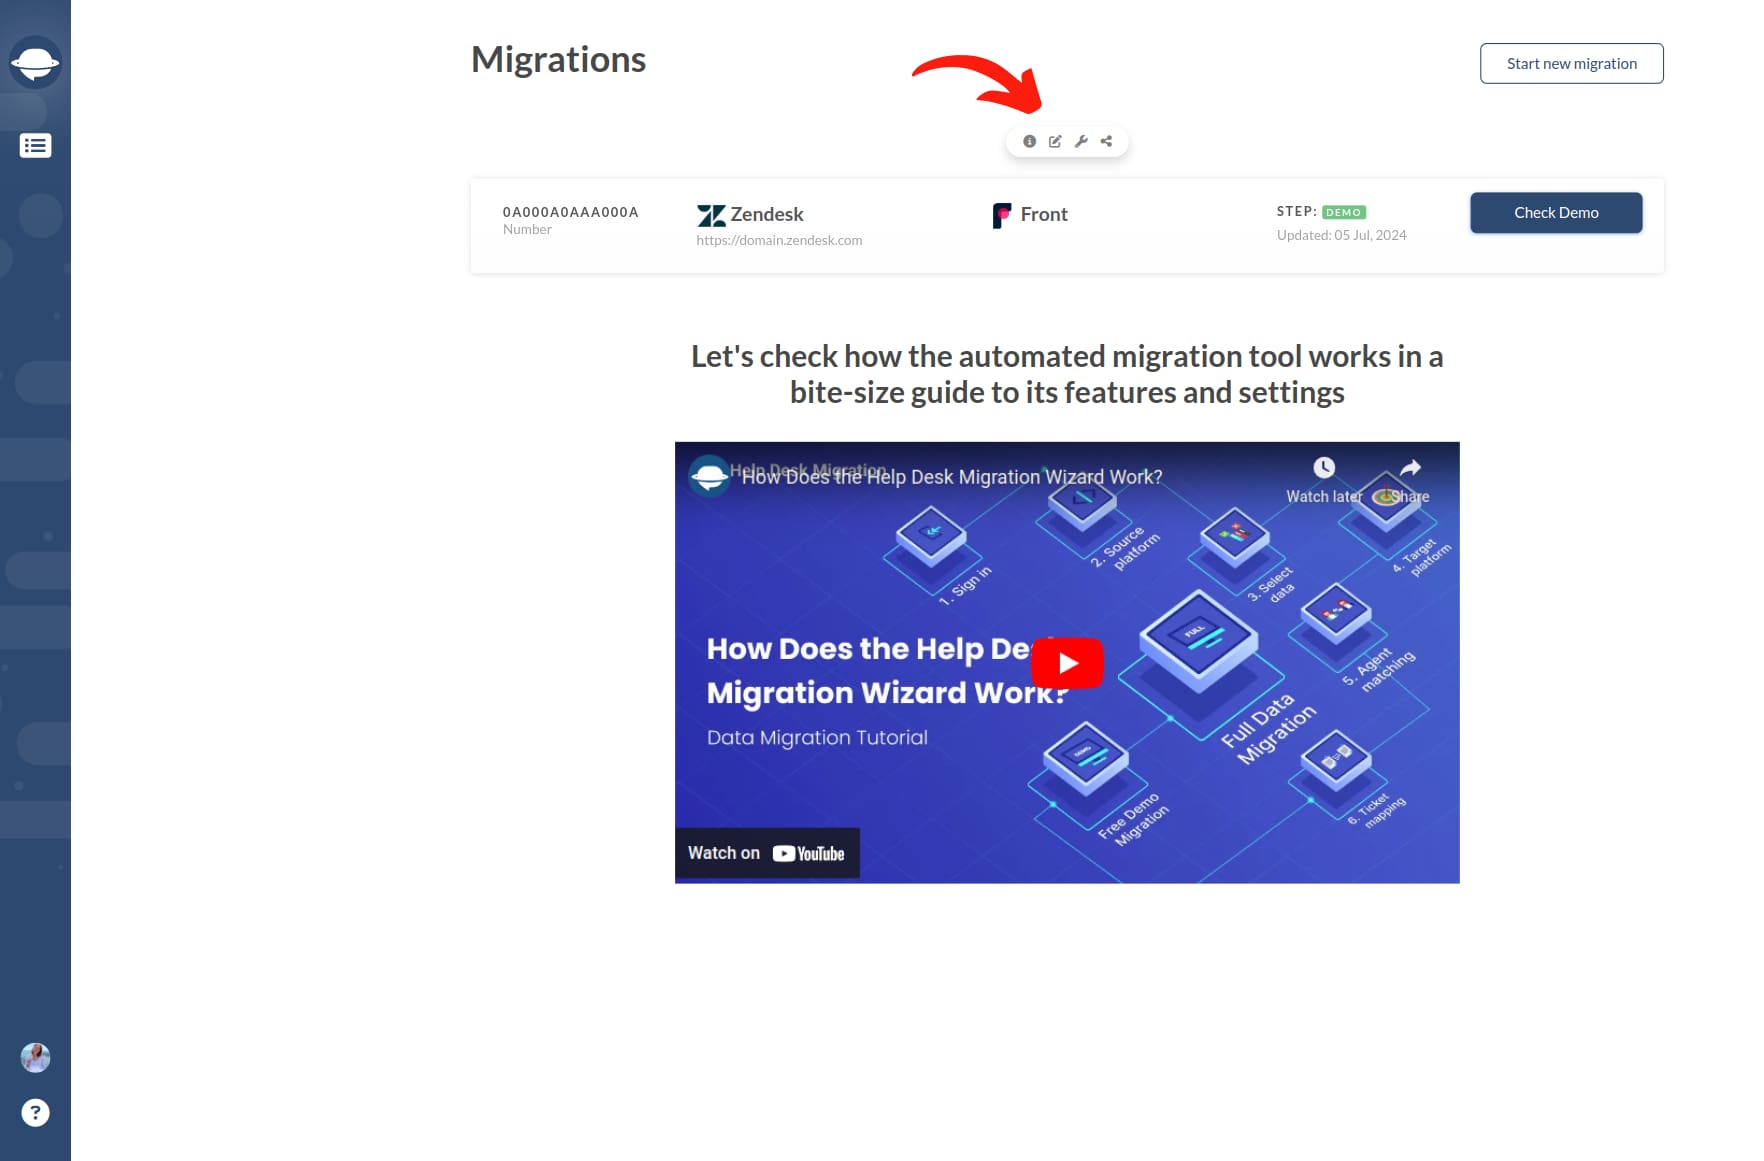
Grant Access to Your Colleague and Customize the Migration Name
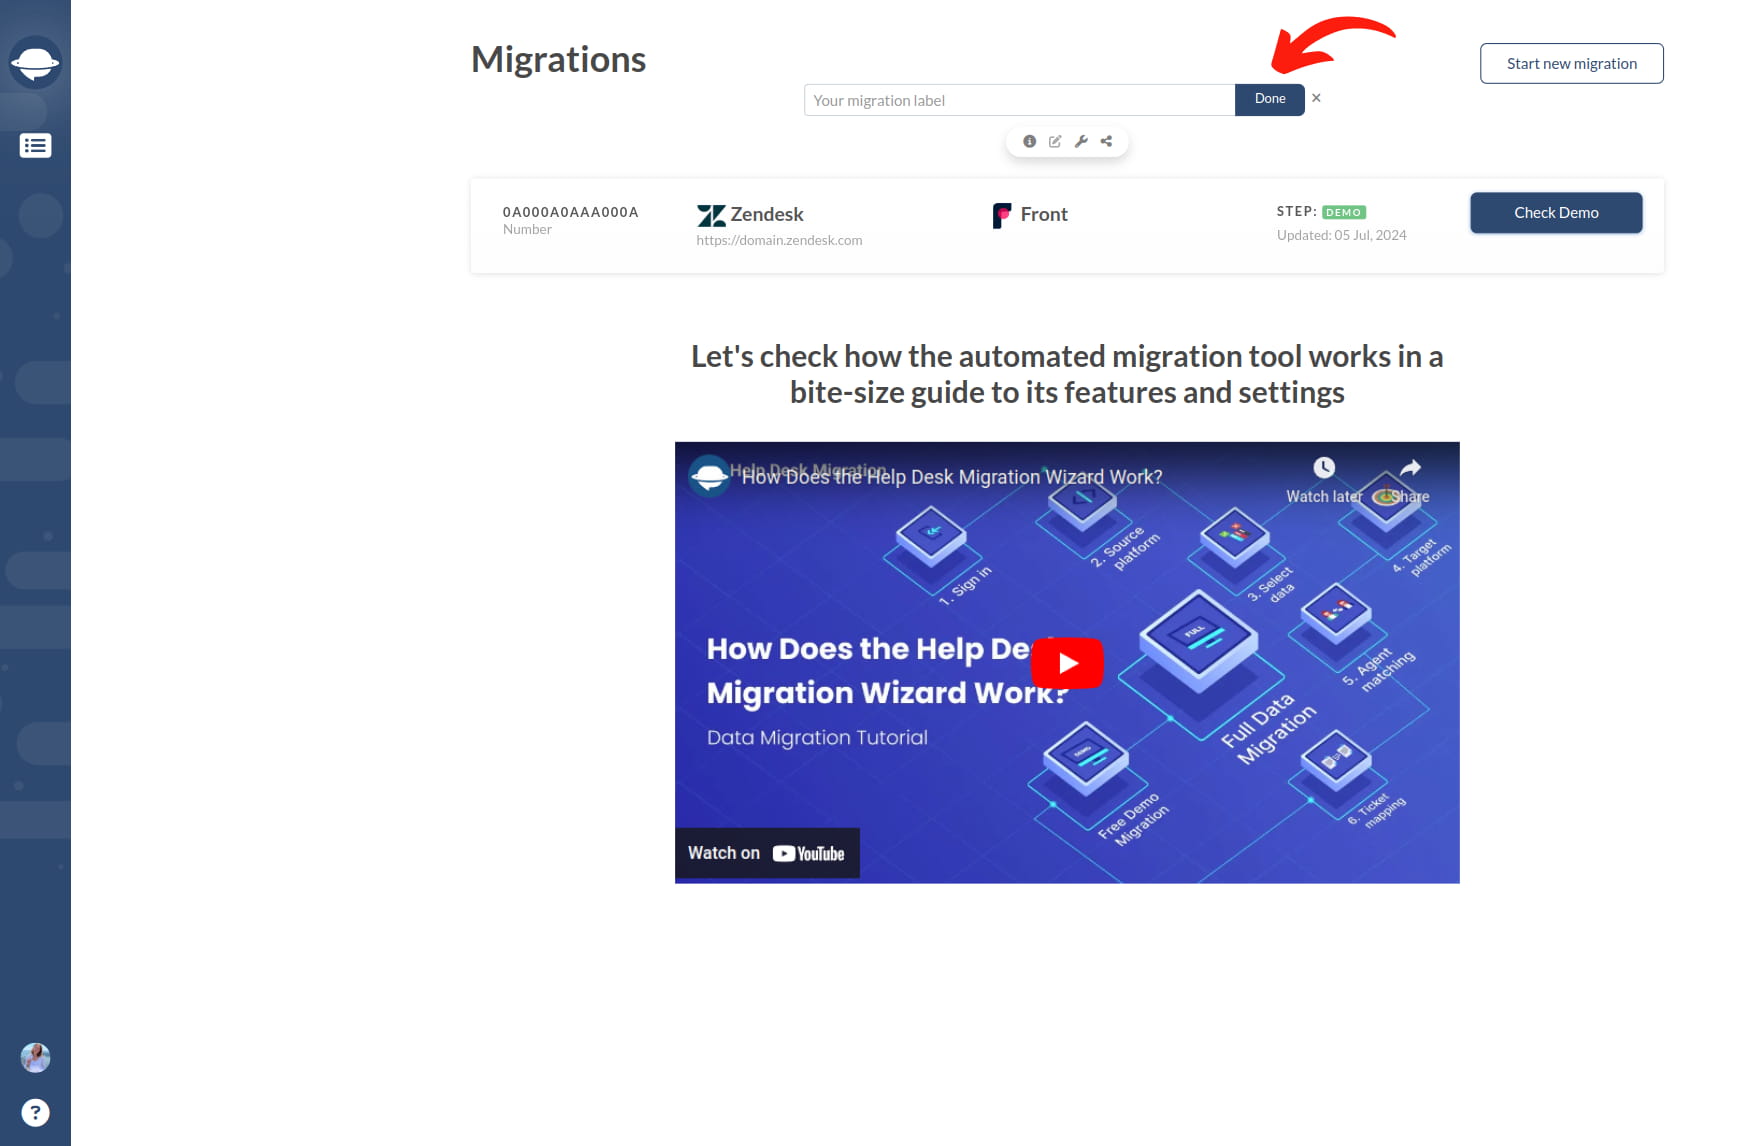
If you need to make changes or want a quick check-up from a colleague, you can share your migration.
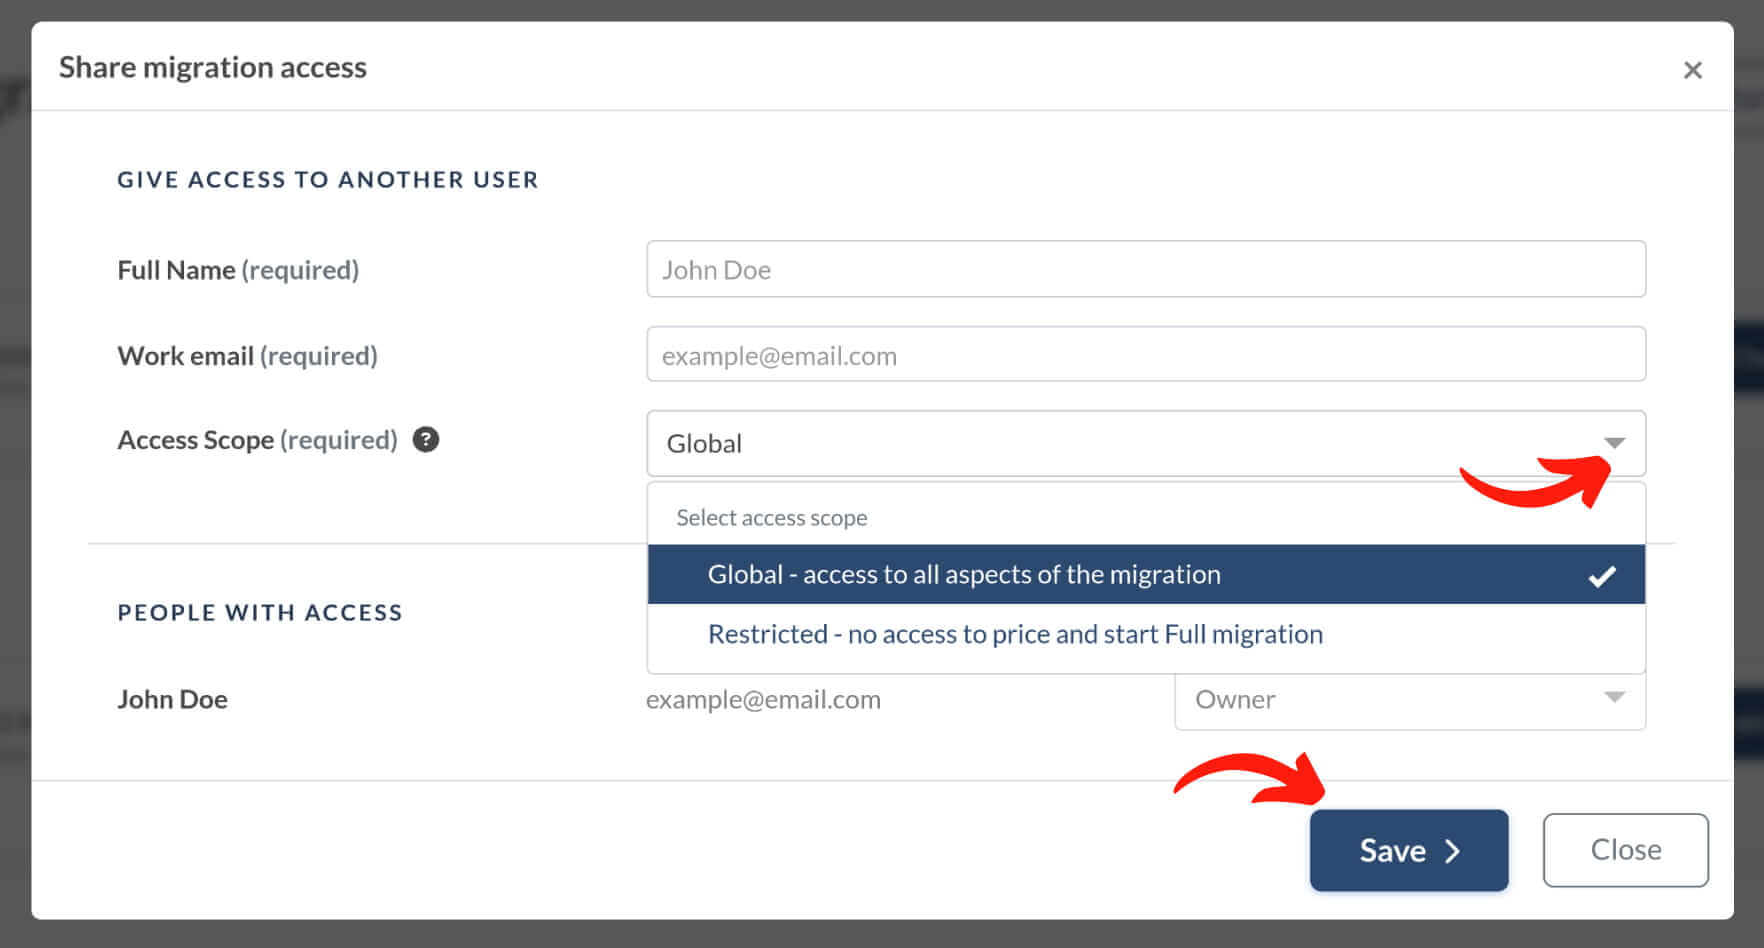
You can grant access to your colleague and choose the level of access they will have.
If you have multiple Full Migrations, consider giving a custom name to each data migration for easy identification.
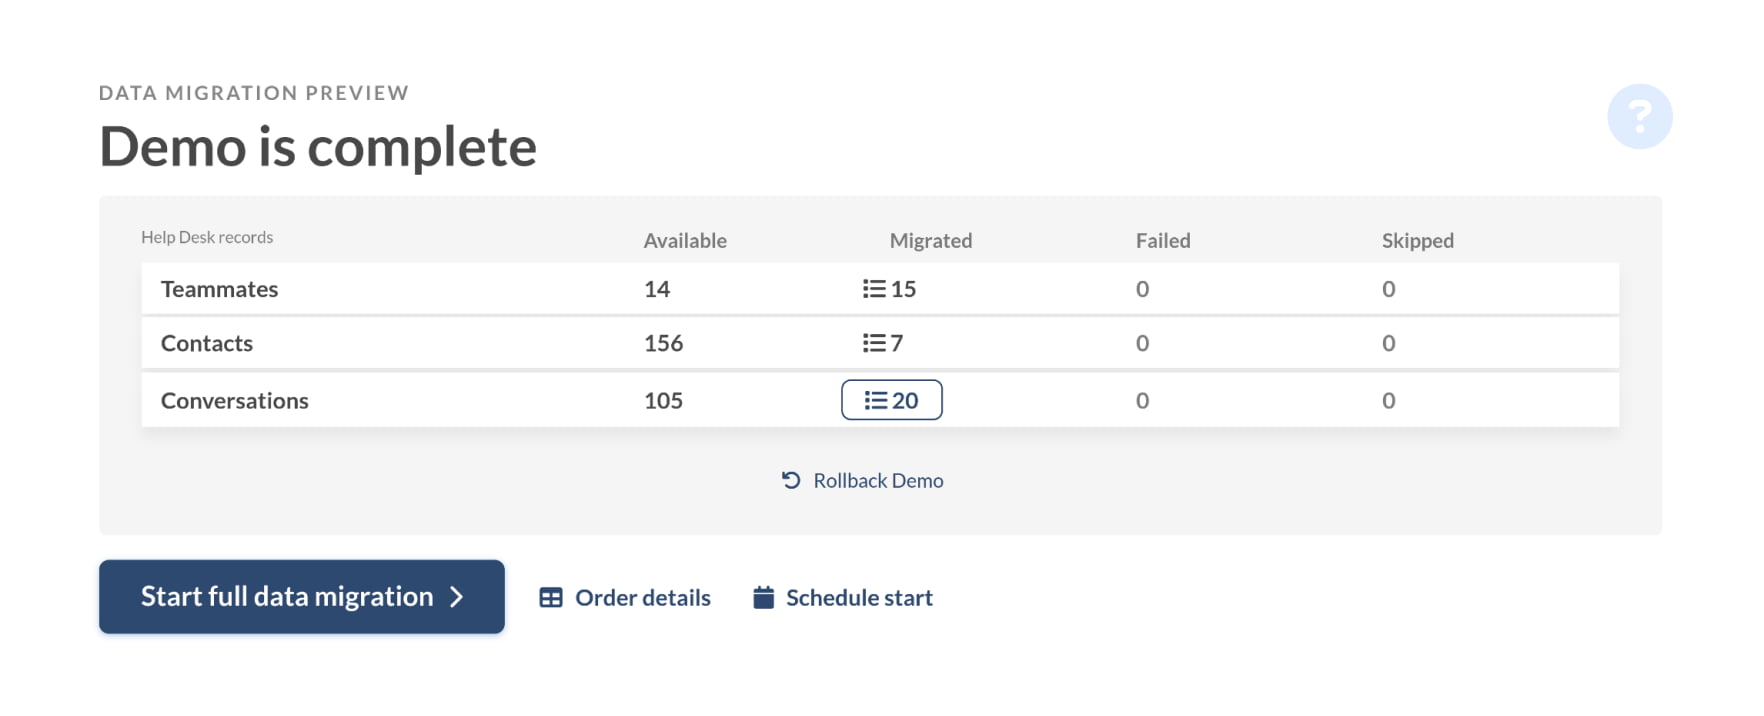
Start Full Data Migration
Once your payment is confirmed, you will be redirected back to the Migration Wizard. Avoid making last-minute changes to prevent any suspension of your migration and delay in the process.
If you are ready to initiate your Full Migration to Front, you may do so immediately.
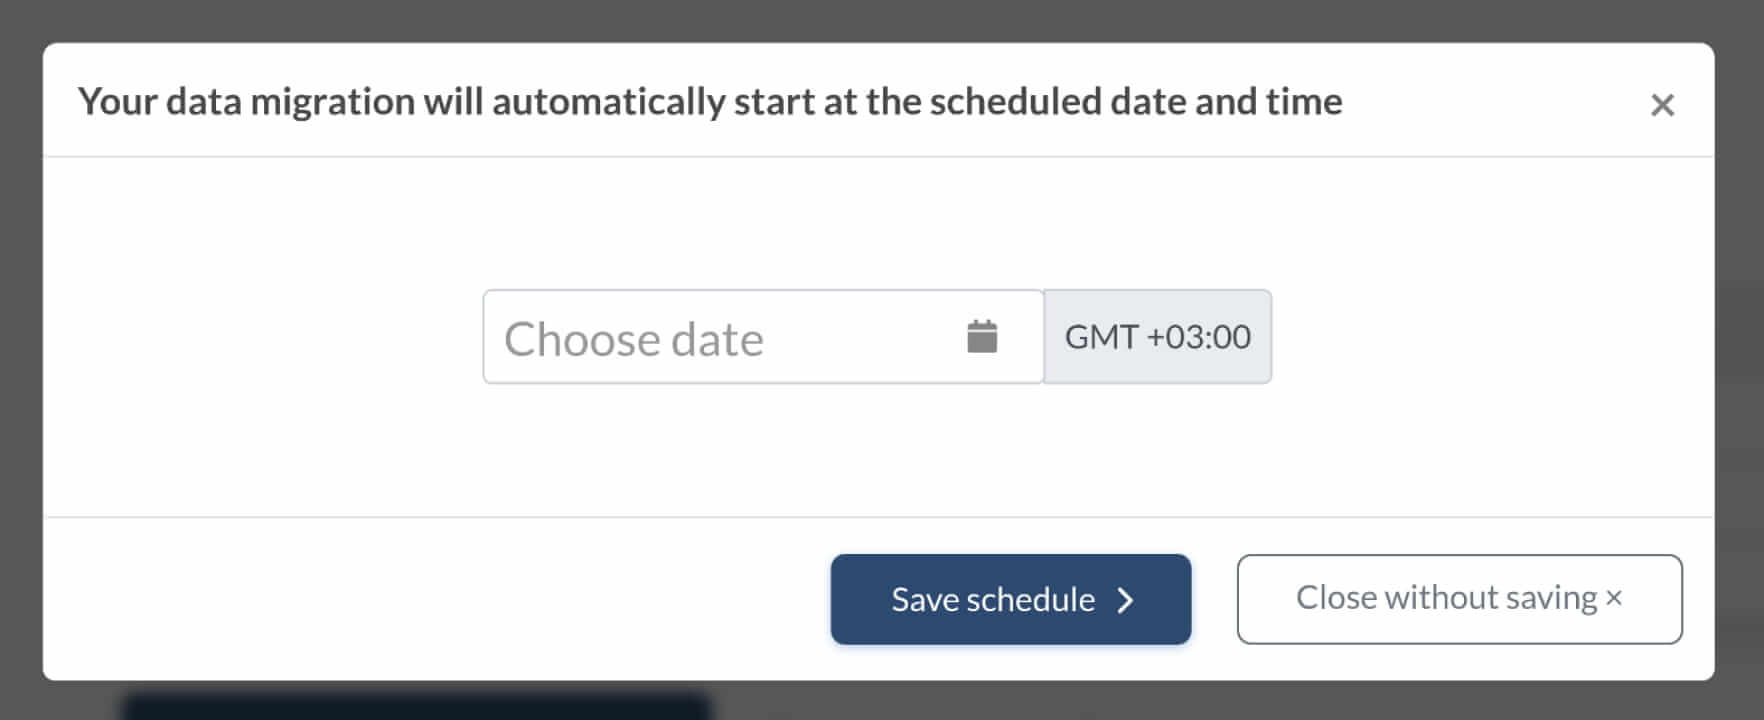
Alternatively, you can schedule it for a convenient time by selecting the date and time and clicking ‘Save schedule.’
The duration of your Full Data Migration will depend on the number of records being imported. Typically, 2000 tickets can be imported per hour. If you wish to expedite the process, request an increase in the number of API requests from both your source vendor and Front. Please notify us before starting your Full Data Migration of any changes to ensure a seamless transition.
Our dedicated support team is always available to assist you should you encounter any issues or have any questions.
After the Full Data Migration is Done
Once your Full Data Migration is complete, go through the following steps.
Check the Results
After the Full Data Migration, take a close look at your Front account to ensure all records transferred correctly. You have five days for this check, and the duration may vary depending on your support package.
By default, Front shows all the tickets in the Inbox where you’ve imported all your data. To view them, go to the Inbox. There you’ll view tickets divided into tabs by the status: Open, Archived, Trash, and Spam. Plus, you can filter every tab by Tags and Assignee.
If you're missing something, ensure your ticket filters and time settings are correct. If the issue remains, contact our support team.
Set up Front
- Activate two-factor authentication (2FA) in Front.
- Turn on all communication channels.
- If you were using your old platform during migration, re-forward emails to Front. If you switched to Front during migration, you're all set.