Freshdesk Migration Guides
How to get the Freshdesk API key?
To obtain your Freshdesk API key, follow these steps:
1. Click on your profile picture in the top right corner of the screen:

2. Go to Profile settings:

3. There, you will find your API key:

4. Copy the API key and continue your migration.
How to check the result of Demo Migration in Freshdesk?
To check the result of your Demo Migration in Freshdesk, follow these steps:
1. Once your Free Migration to Freshdesk is complete, you'll see a table with the test portion of migrated data. Each record type includes migrated, failed, or skipped data reports. Additionally, every report contains the exact IDs of transferred entities.
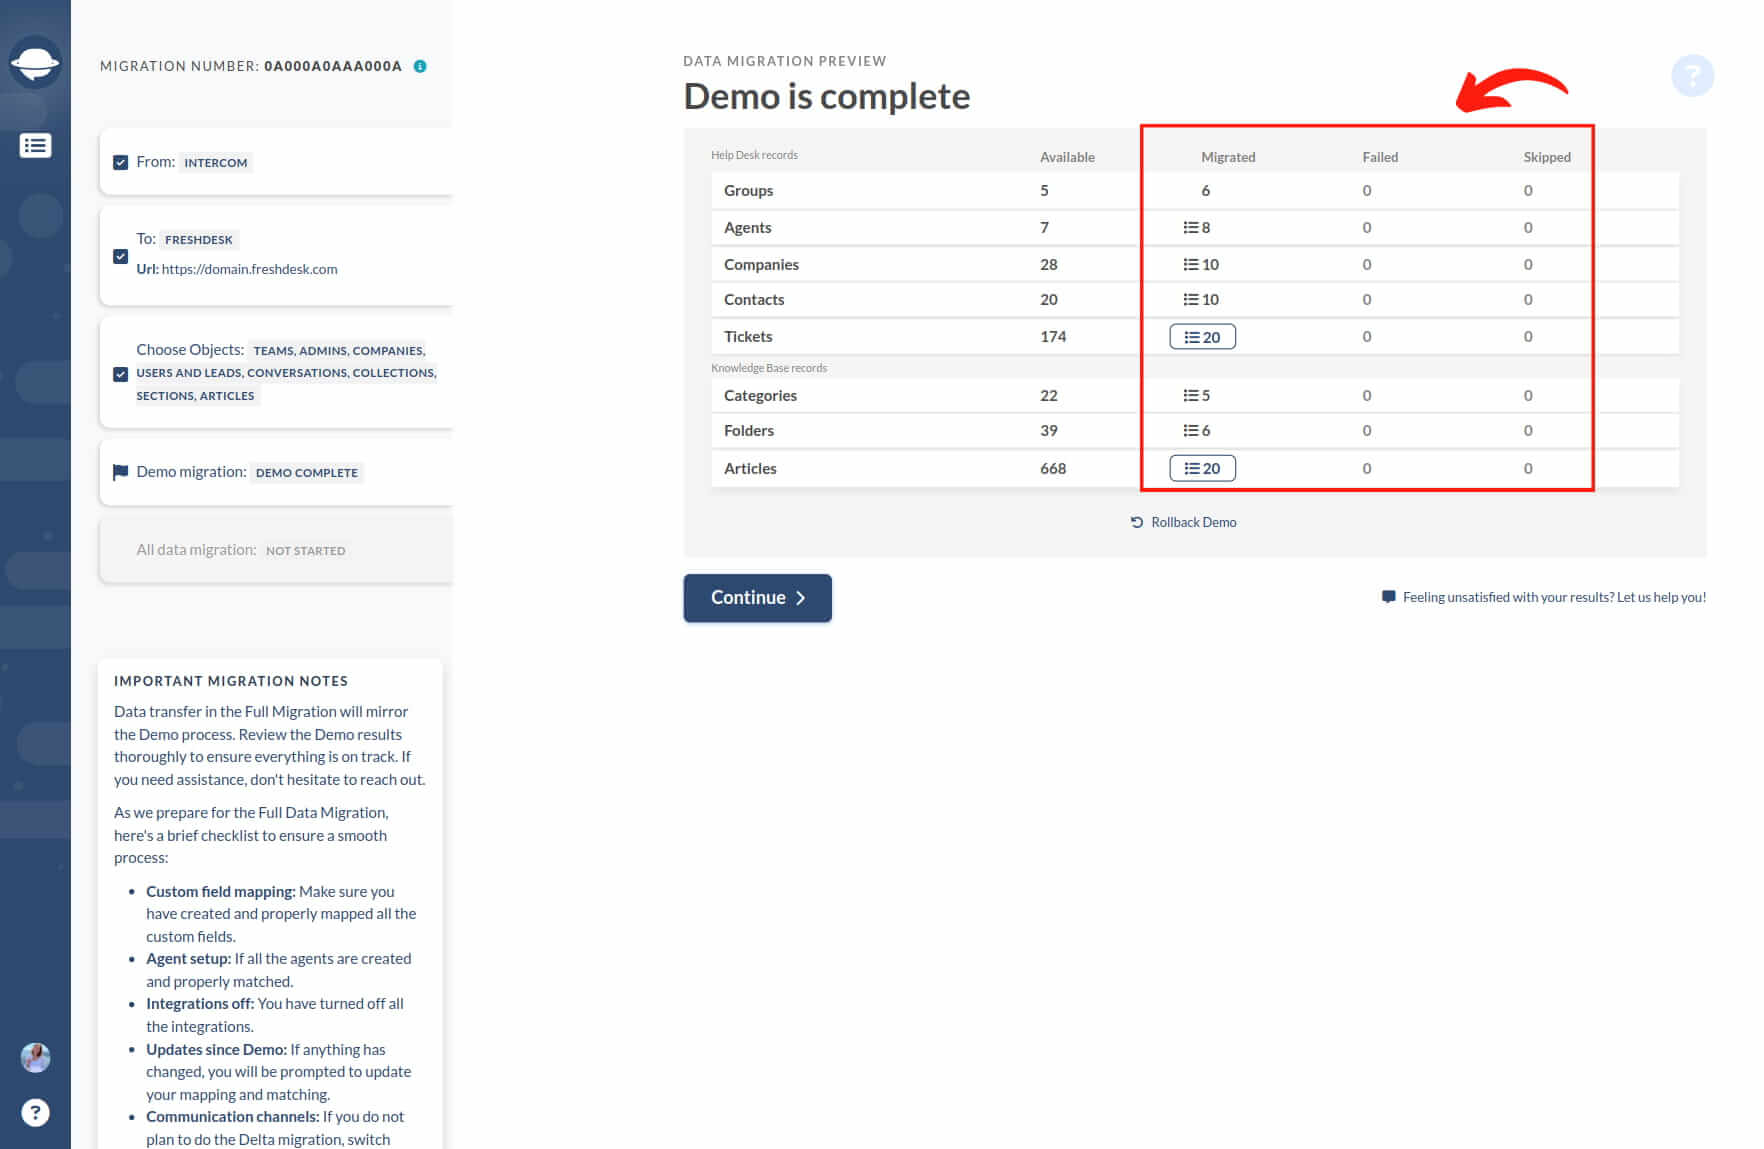
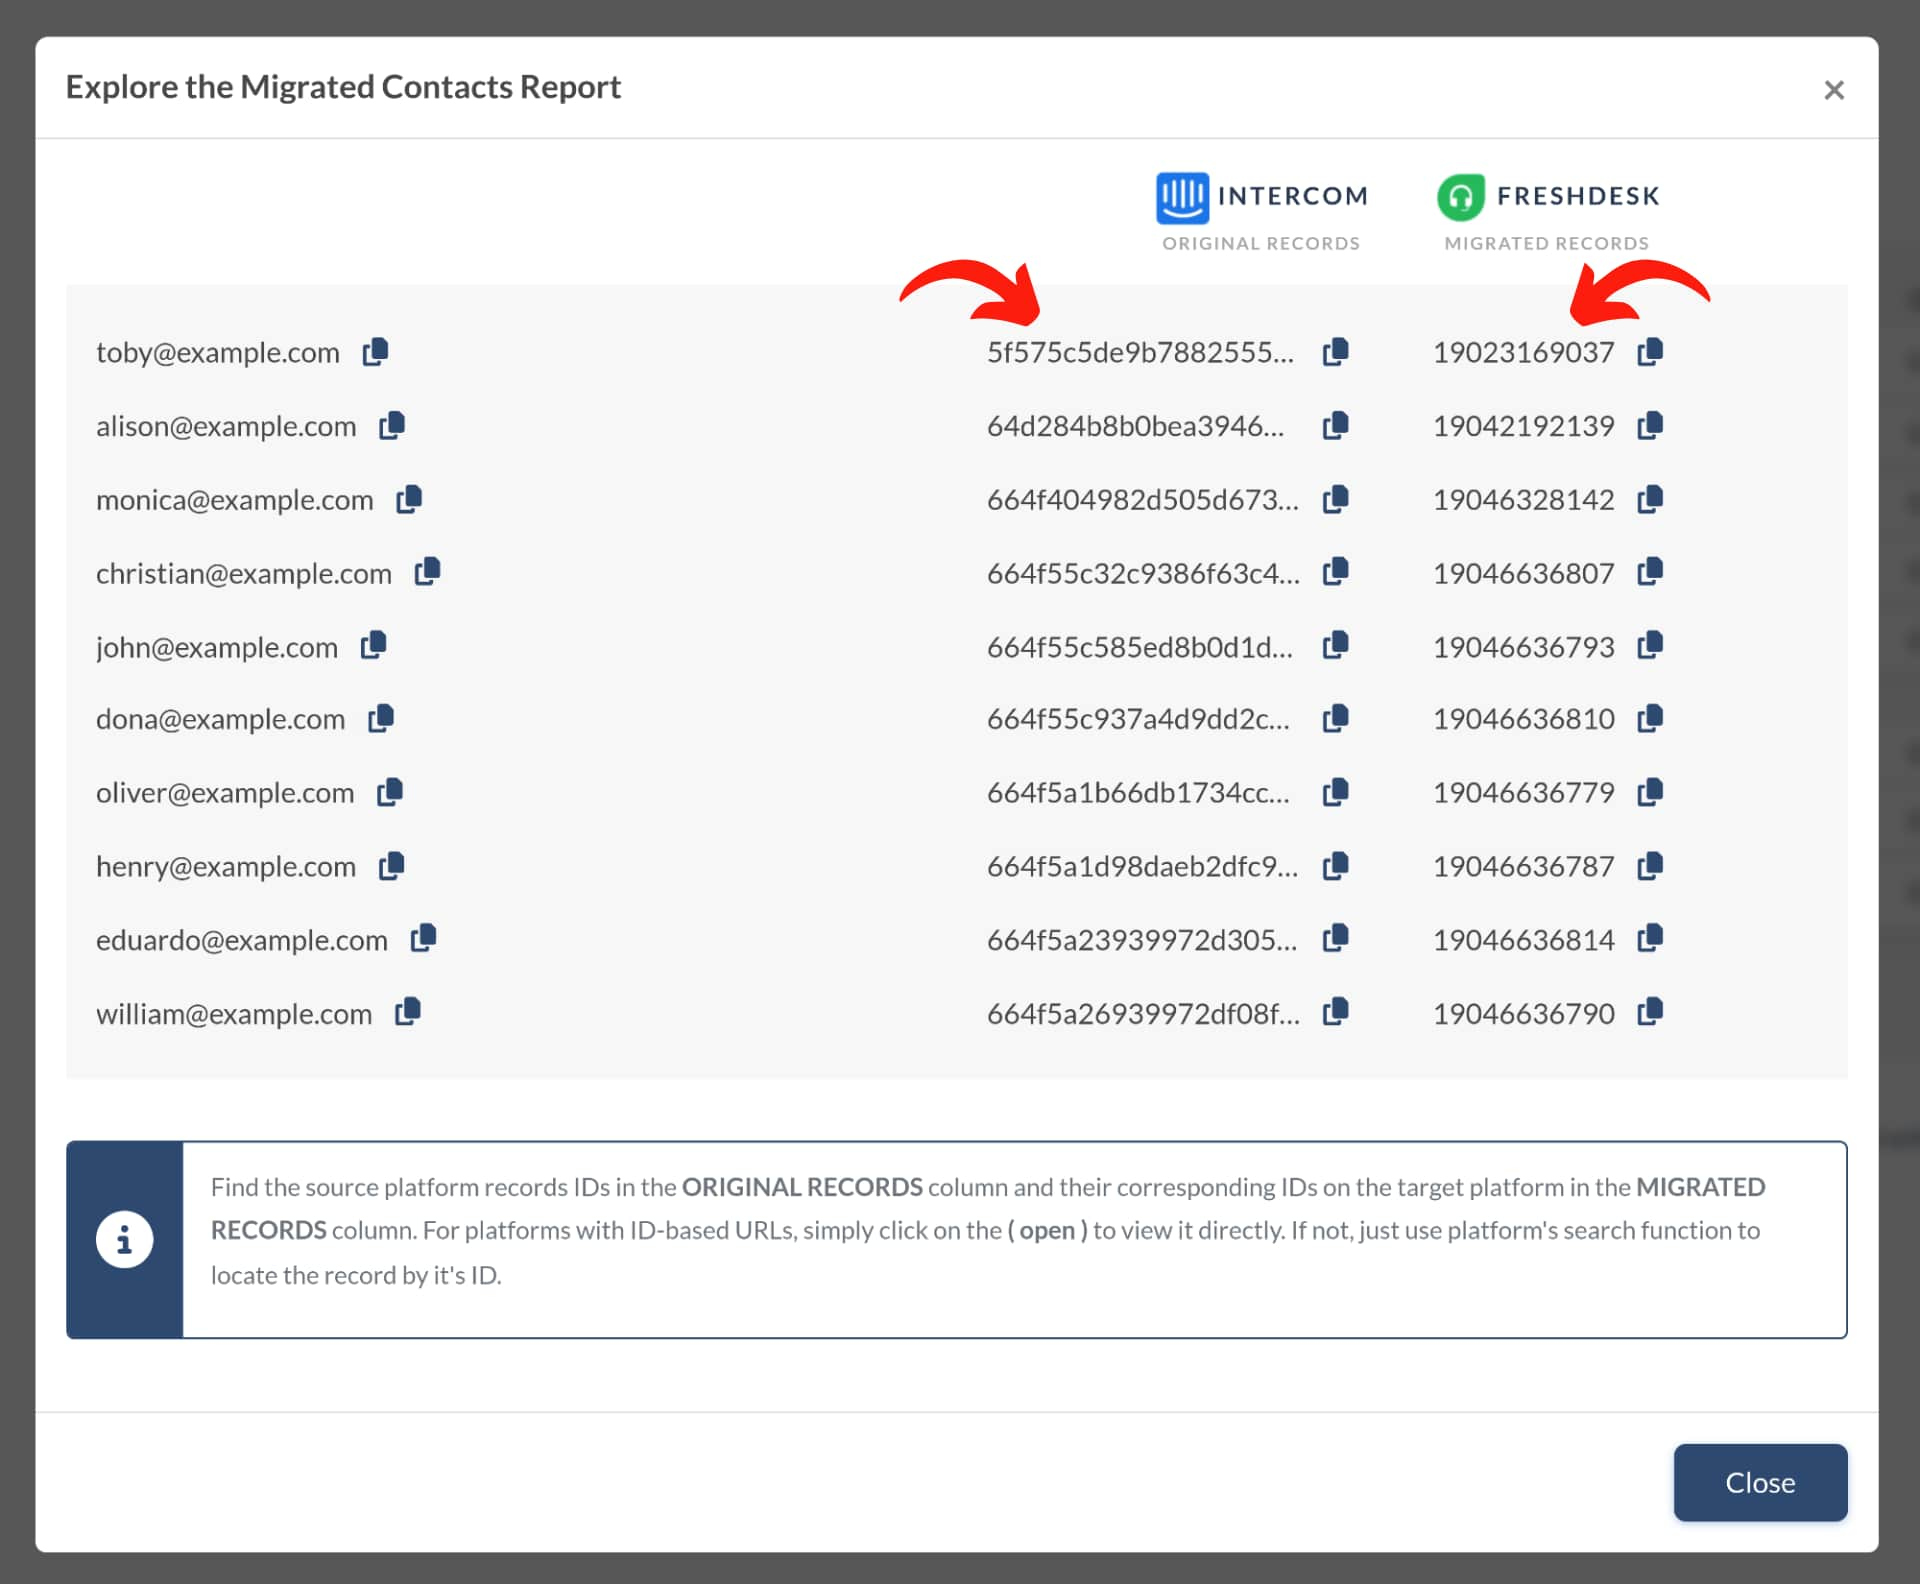
2. Click the "View records" button to open a list of records IDs in the source and respective new IDs in Freshdesk. Locate and check every record. The report should look like this:
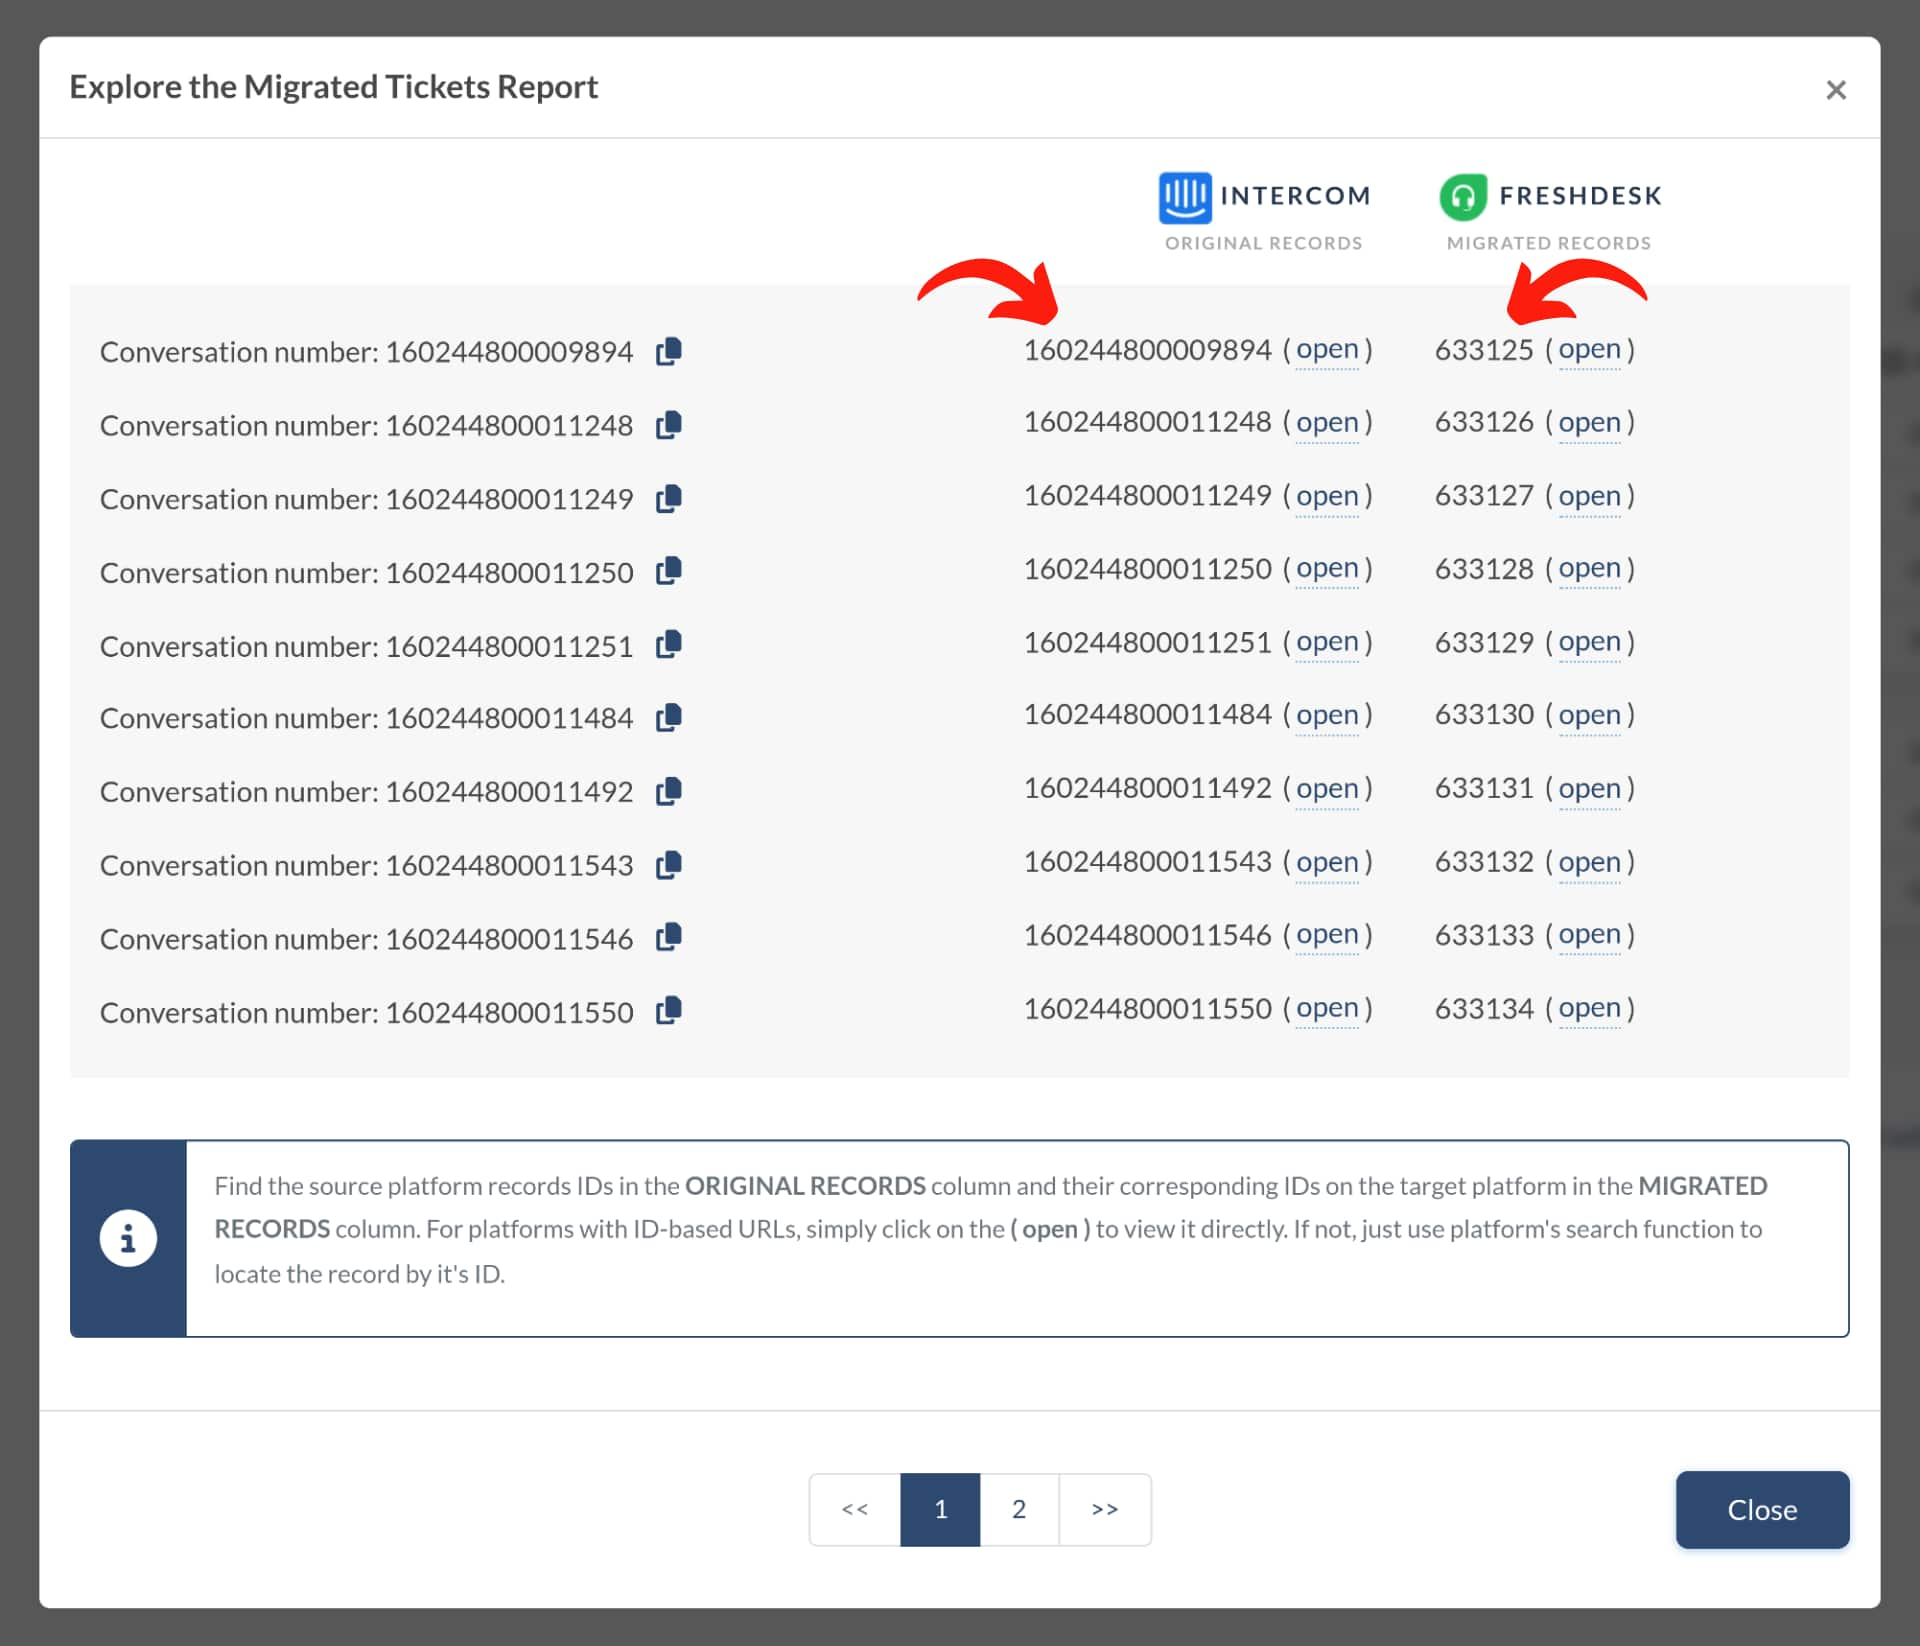
3. During the Demo Migration and Full Data Migration, tickets and related data migrate the same way. Therefore, if some ticket data weren't migrated or transferred incorrectly during the Demo Migration, it won't be relocated in the Full Data Migration.
Ensure you check if all tickets migrated along with their Type, Status, Priority, Source and Custom Fields, Requester, Agent, and Tags.
4. Moreover, if you import the knowledge base data too, ensure every article has a correct status and location.
Similar "Migration Results" reports will also appear after the Full Data Migration—make sure to check each one.
Why turn off Automations for Freshdesk migration?
Yes, turning off all Automation rules, Scenario Automations, and Email Notifications in your Freshdesk account is crucial before migrating to this platform.
Freshdesk offers powerful Automations to streamline tasks and boost productivity. However, migrating to Freshdesk with active automation rules can result in clients and agents receiving updates during the ticket import. To avoid this, disable all Automation rules before beginning the migration process.
Here's how:
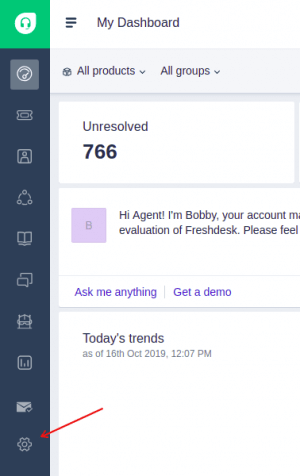
1. Log in to Freshdesk and navigate to the Admin panel.
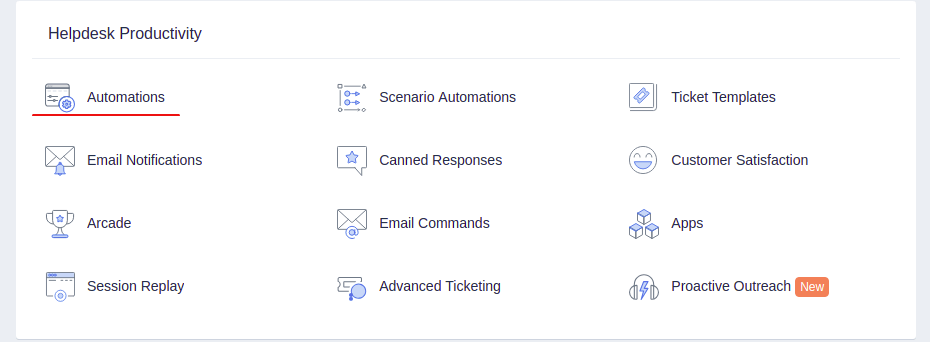
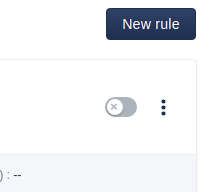
2. Go to Automations and disable all active automation rules by clicking the green slider button.

The button will become grey if the rule is turned off.
3. Similarly, go to Scenario Automations.
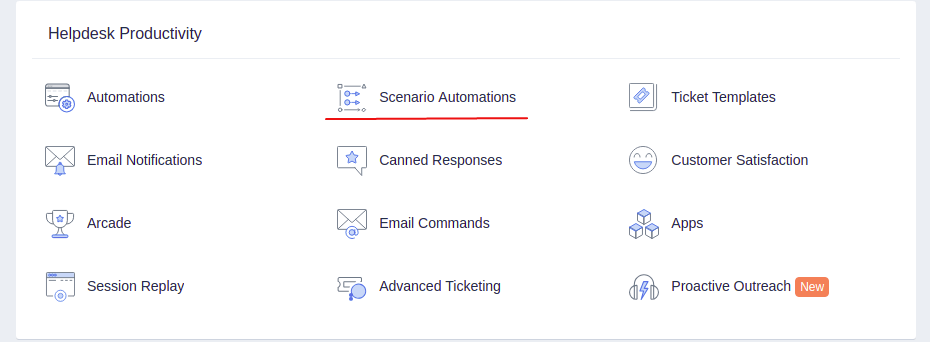
Document all scenarios and delete them afterward.

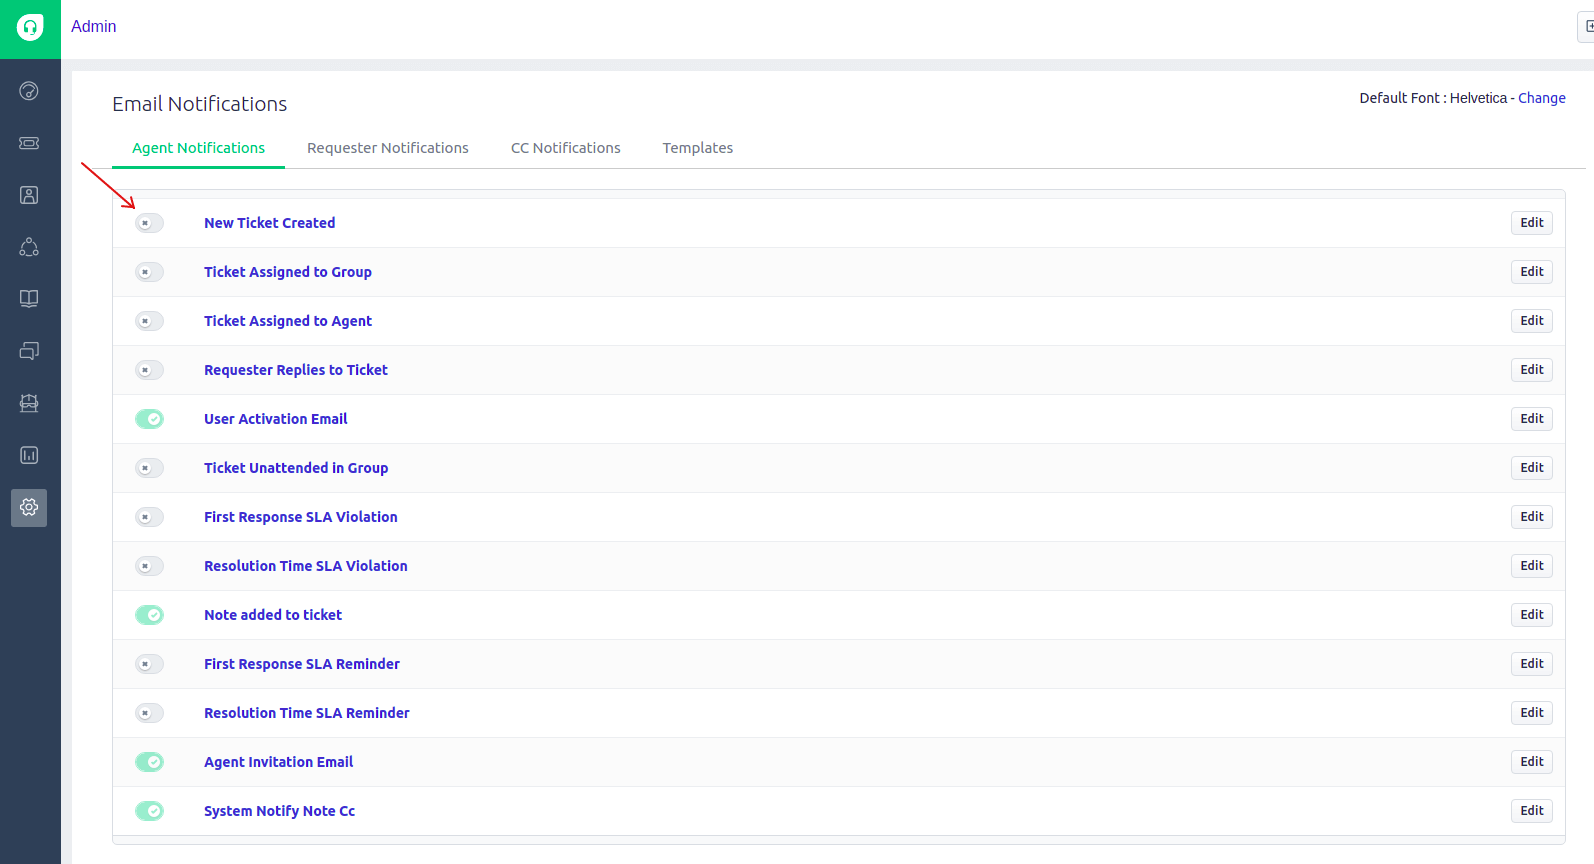
4. Lastly, in the Email Notifications tab, disable Agent and Requester Notifications by clicking on the green slider buttons next to each notification.
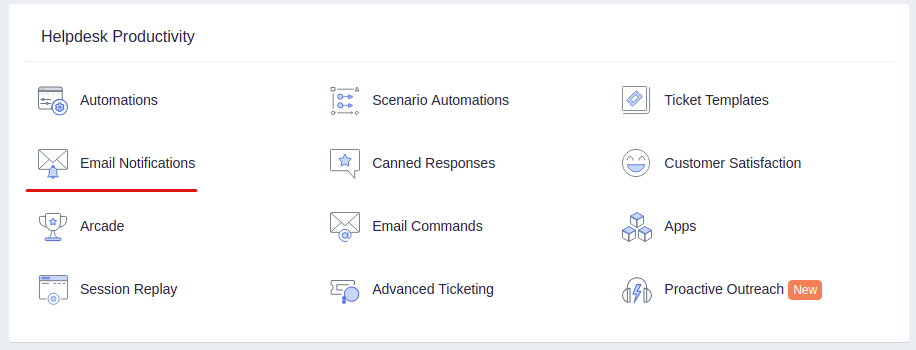
Disable all notifications by following the same steps as you did for Automation rules. Click on the green slider button next to each notification, and if it turns grey, it's disabled.
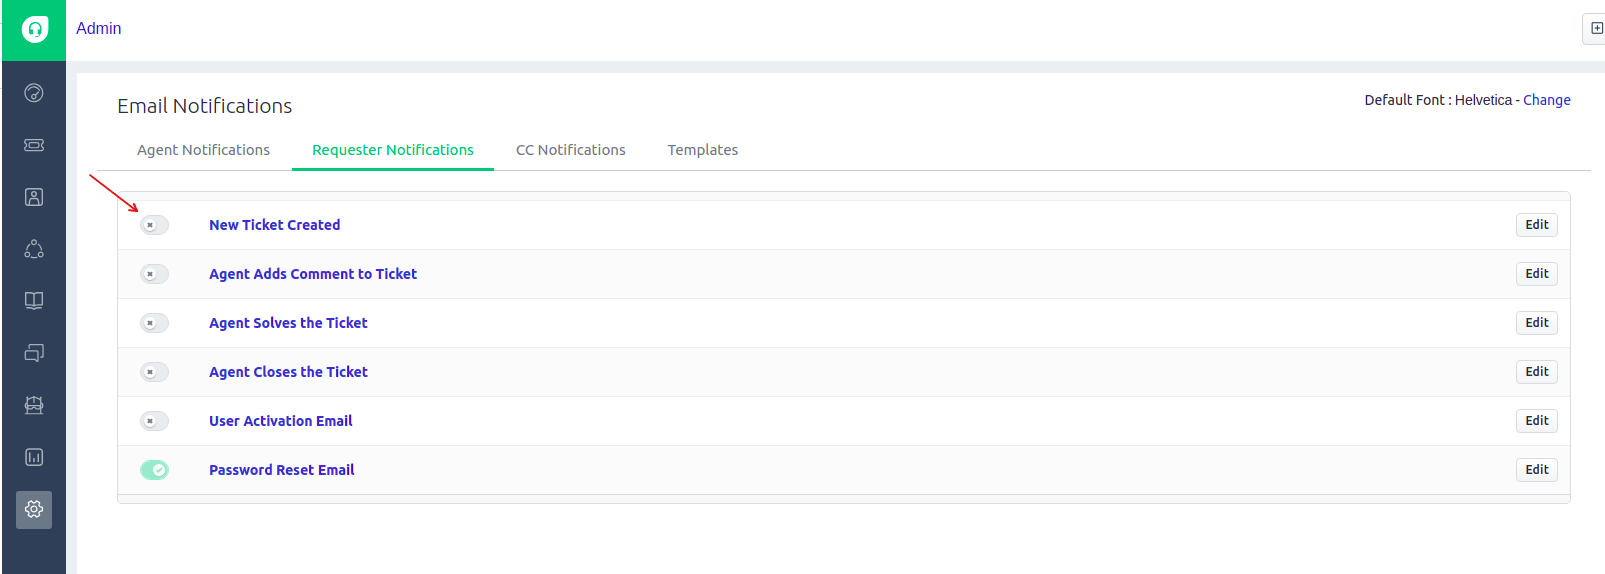
Now, go to the Requester Notifications section and do the exact same actions.
How to disable Parent-Child ticketing in Freshdesk?
In Freshdesk, users with Estate and Forest plans can divide complex tickets into smaller sub-tickets to resolve issues faster. However, this feature can pose problems during migration, as the Parent-Child relation field is mandatory for tickets of the Task type. If any ticket with this type lacks the necessary Parent-Child field info, the Migration Wizard cannot transfer it, resulting in migration failure.
To prevent this, we recommend disabling this feature in your Freshdesk account. Here's how:
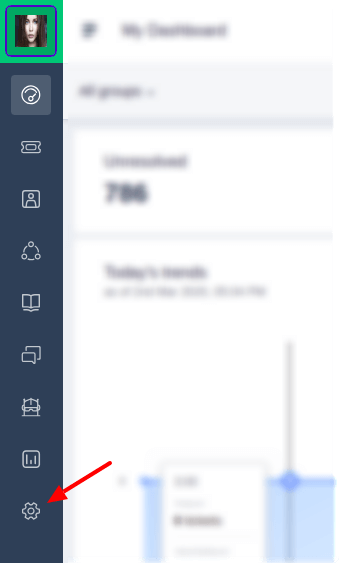
1. Login as an Administrator and navigate to the Admin section.
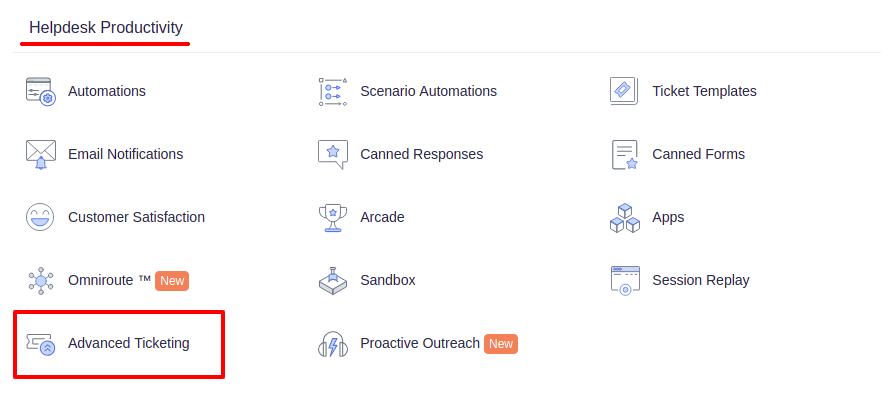
2. Scroll down to the Helpdesk productivity and click Advanced Ticketing.
3. Toggle off Parent-child ticketing in the upper right.
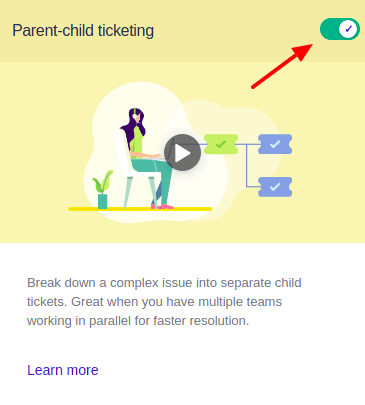
4. Confirm the action by clicking Disable.
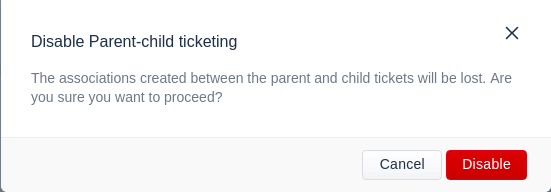
5. You'll receive a notification confirming the feature's disablement, allowing you to proceed with data migration.

How to calculate the number of tickets in Freshdesk?
To calculate the number of tickets in Freshdesk, follow these steps:
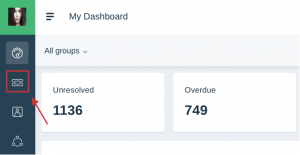
1) Go to the Tickets tab:
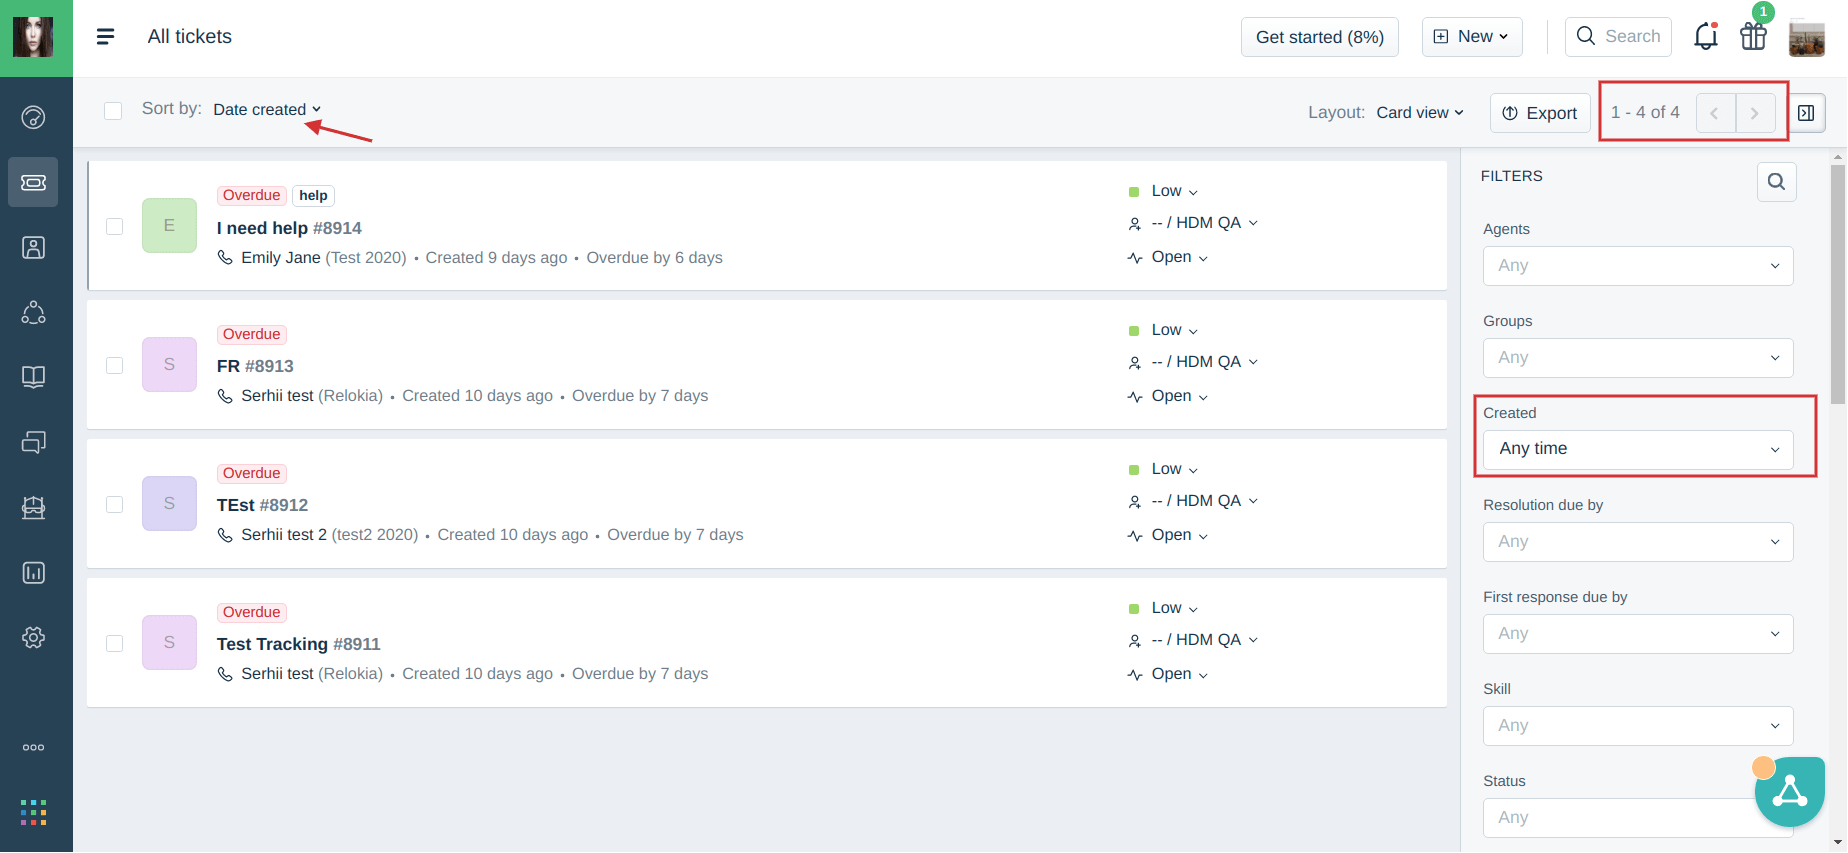
2) Sort the tickets by Date created, set the created time to Any time, and right away, you will see the number of all tickets in the top right corner:
Note: You can quickly calculate the number of your Tickets and estimate the cost of the data transfer during our Free Demo Migration.
How to calculate contacts in Freshdesk?
To calculate the number of contacts in your Freshdesk, follow this guide:
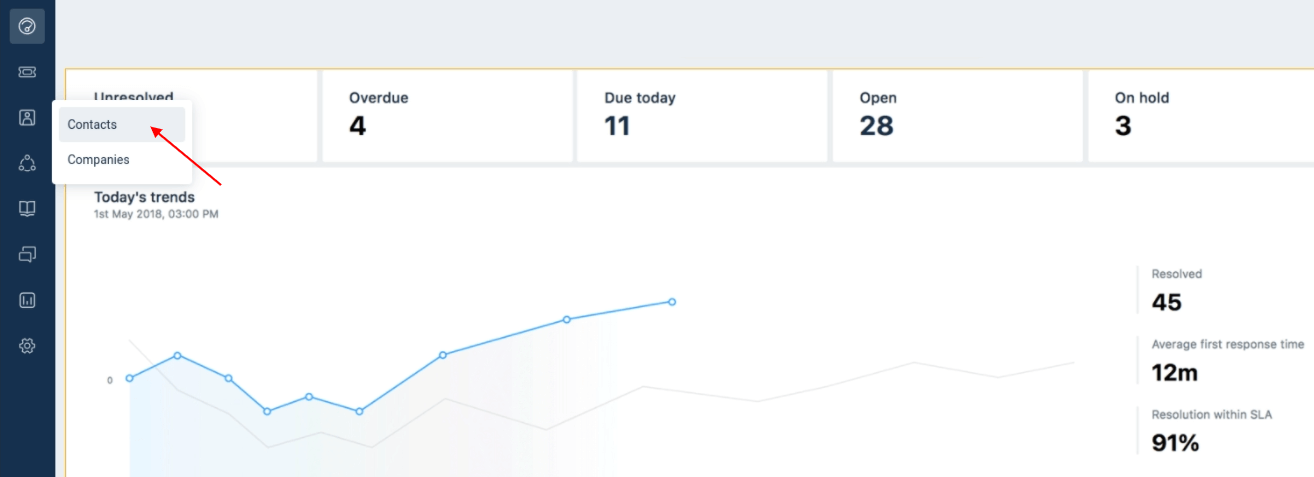
1. Hover over the Contacts icon on the Freshdesk sidebar and select Contacts.
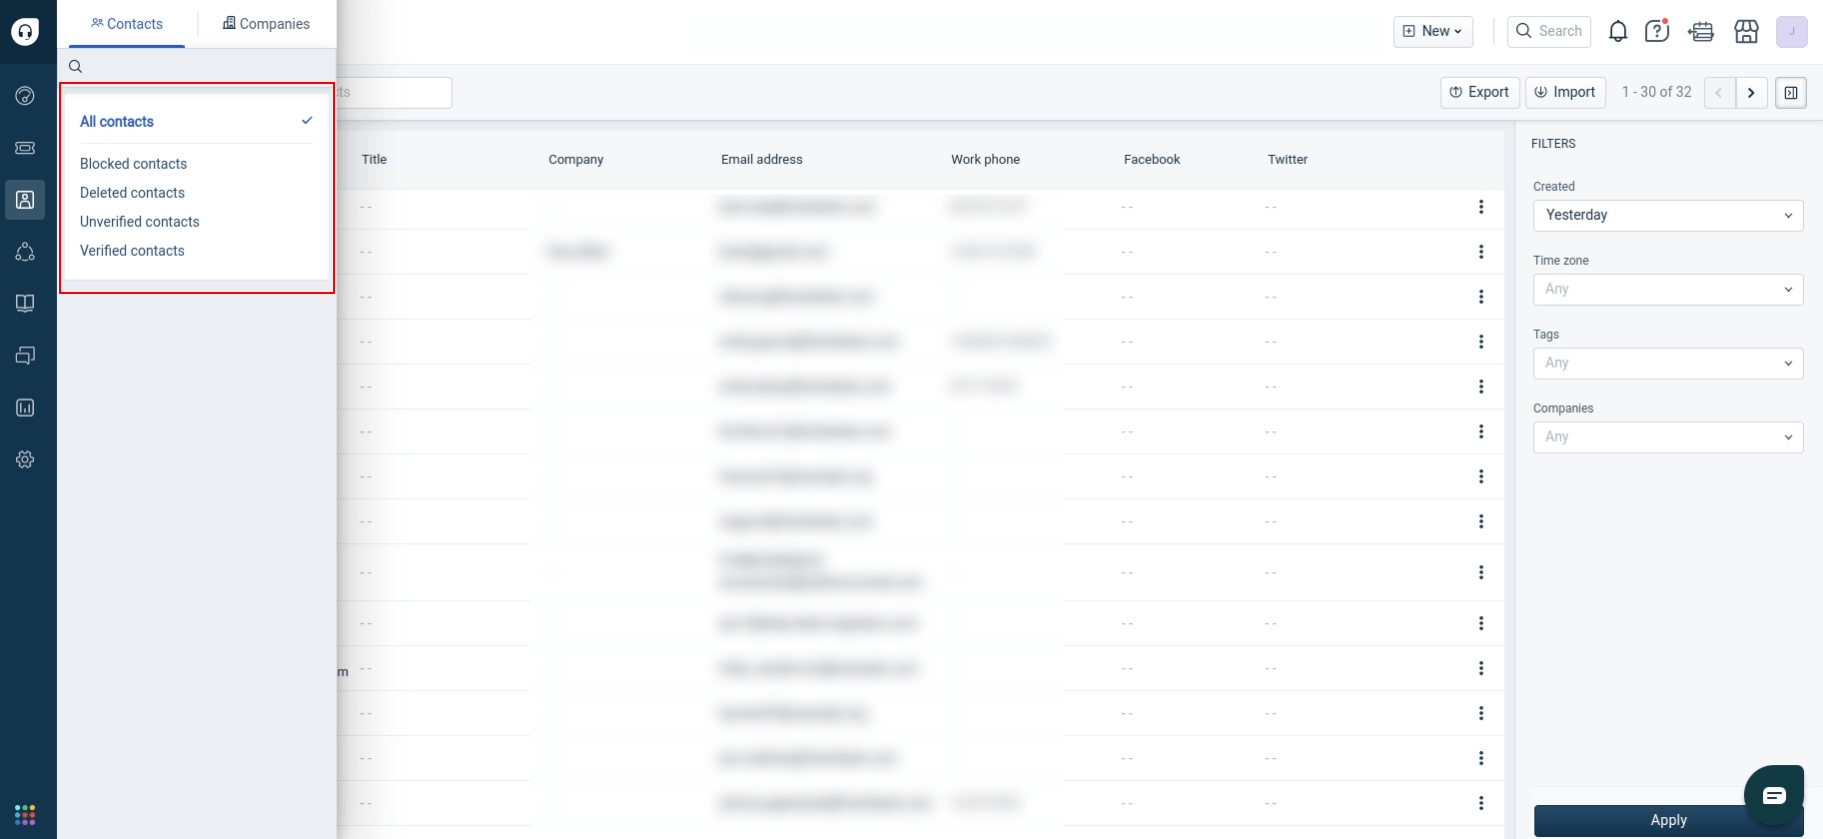
2. Click the filter icon to calculate a specific customer type.
![]()
3. Or apply the filters on the right.
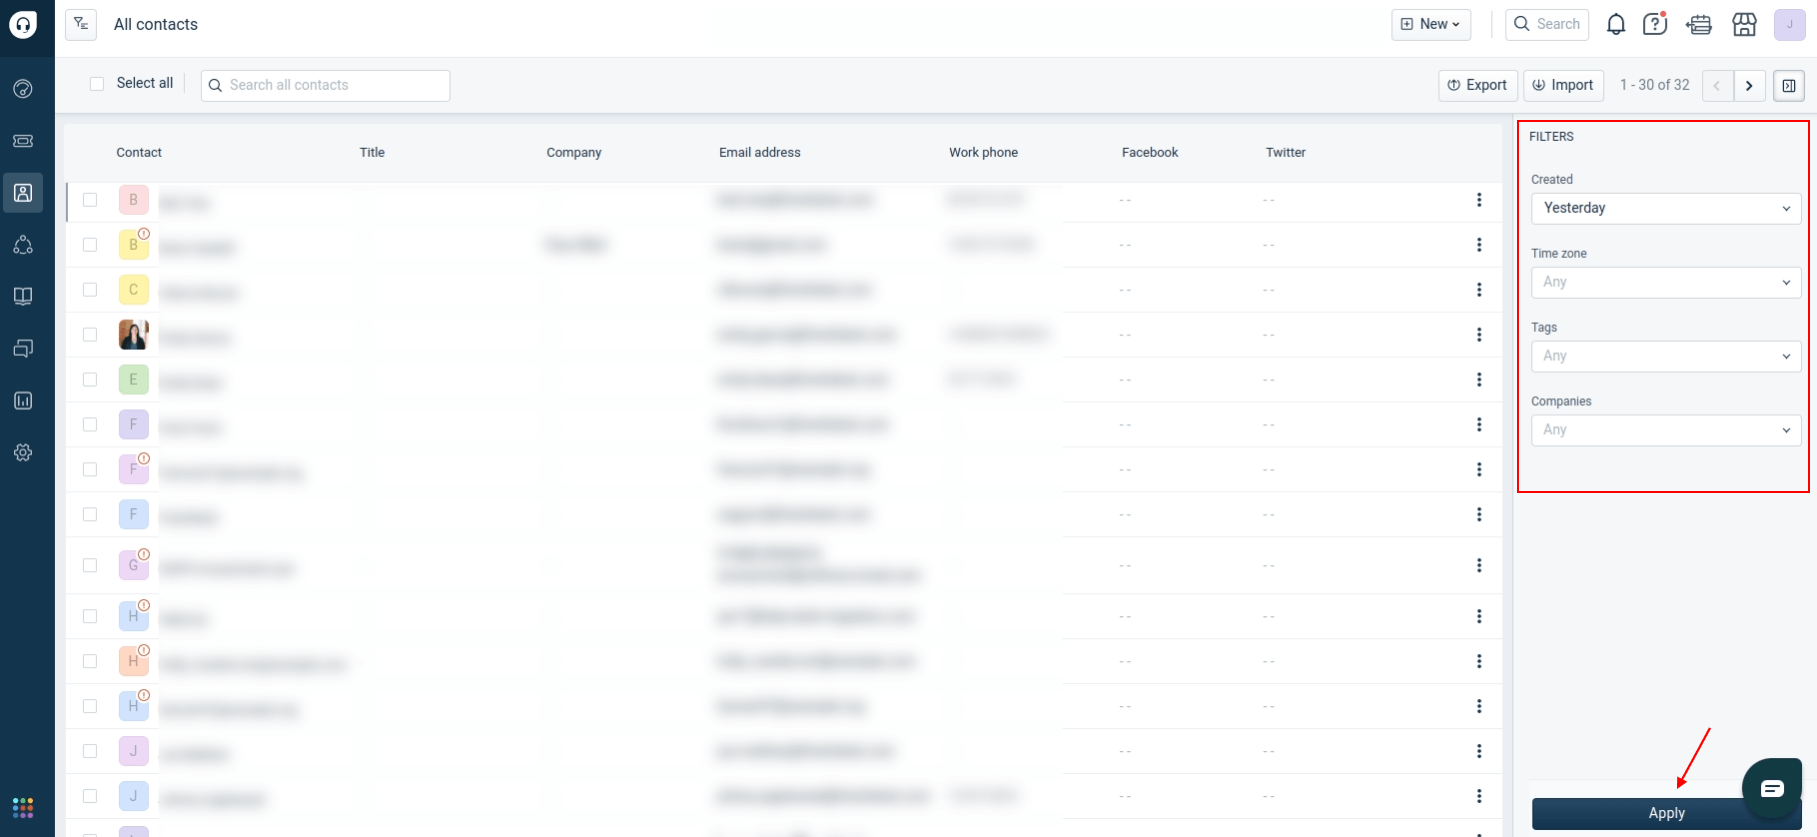
4. Find the number of filtered contacts on the top right.

How to calculate knowledge base articles in Freshdesk?
Freshdesk automatically calculates the number of knowledge-based articles for each category. To find this information, do the following steps.
1. Open the Solutions tab on the sidebar.
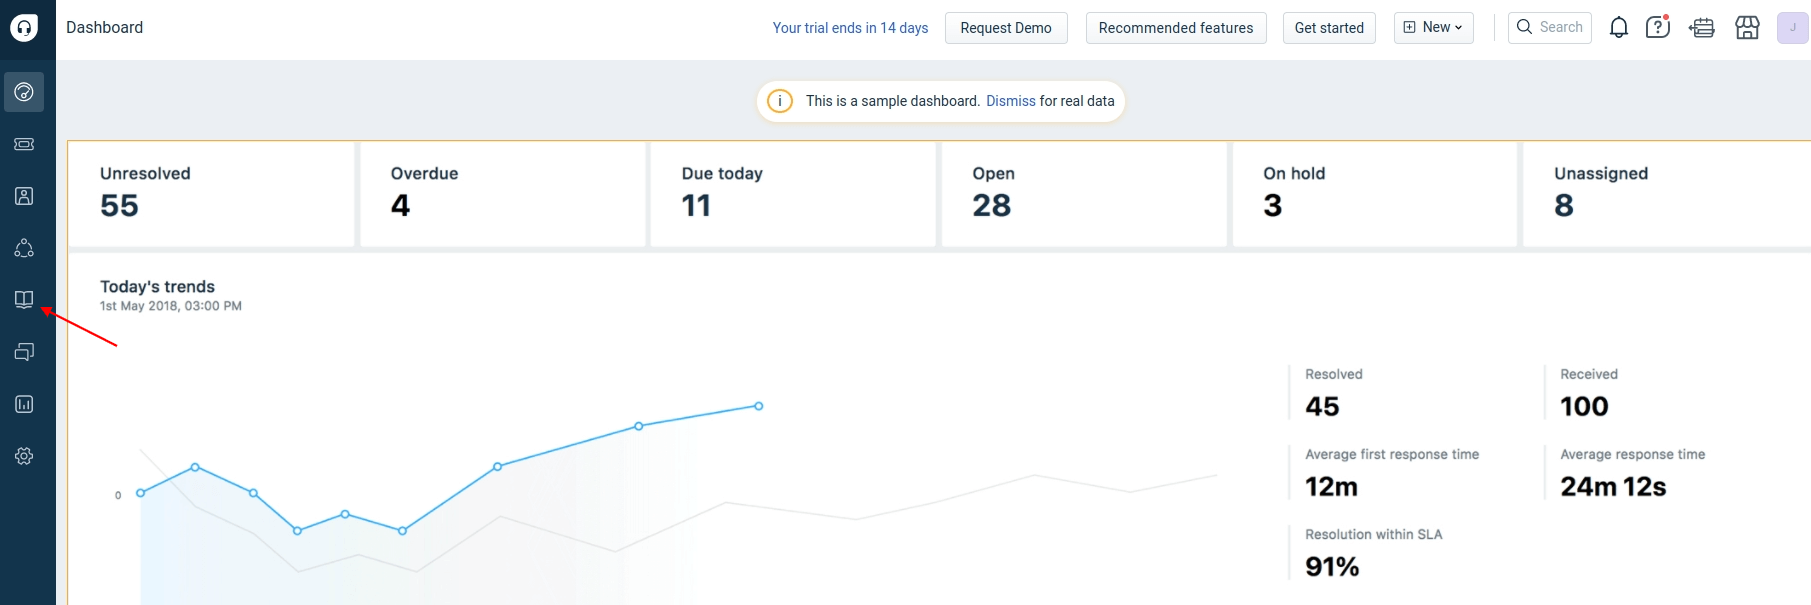
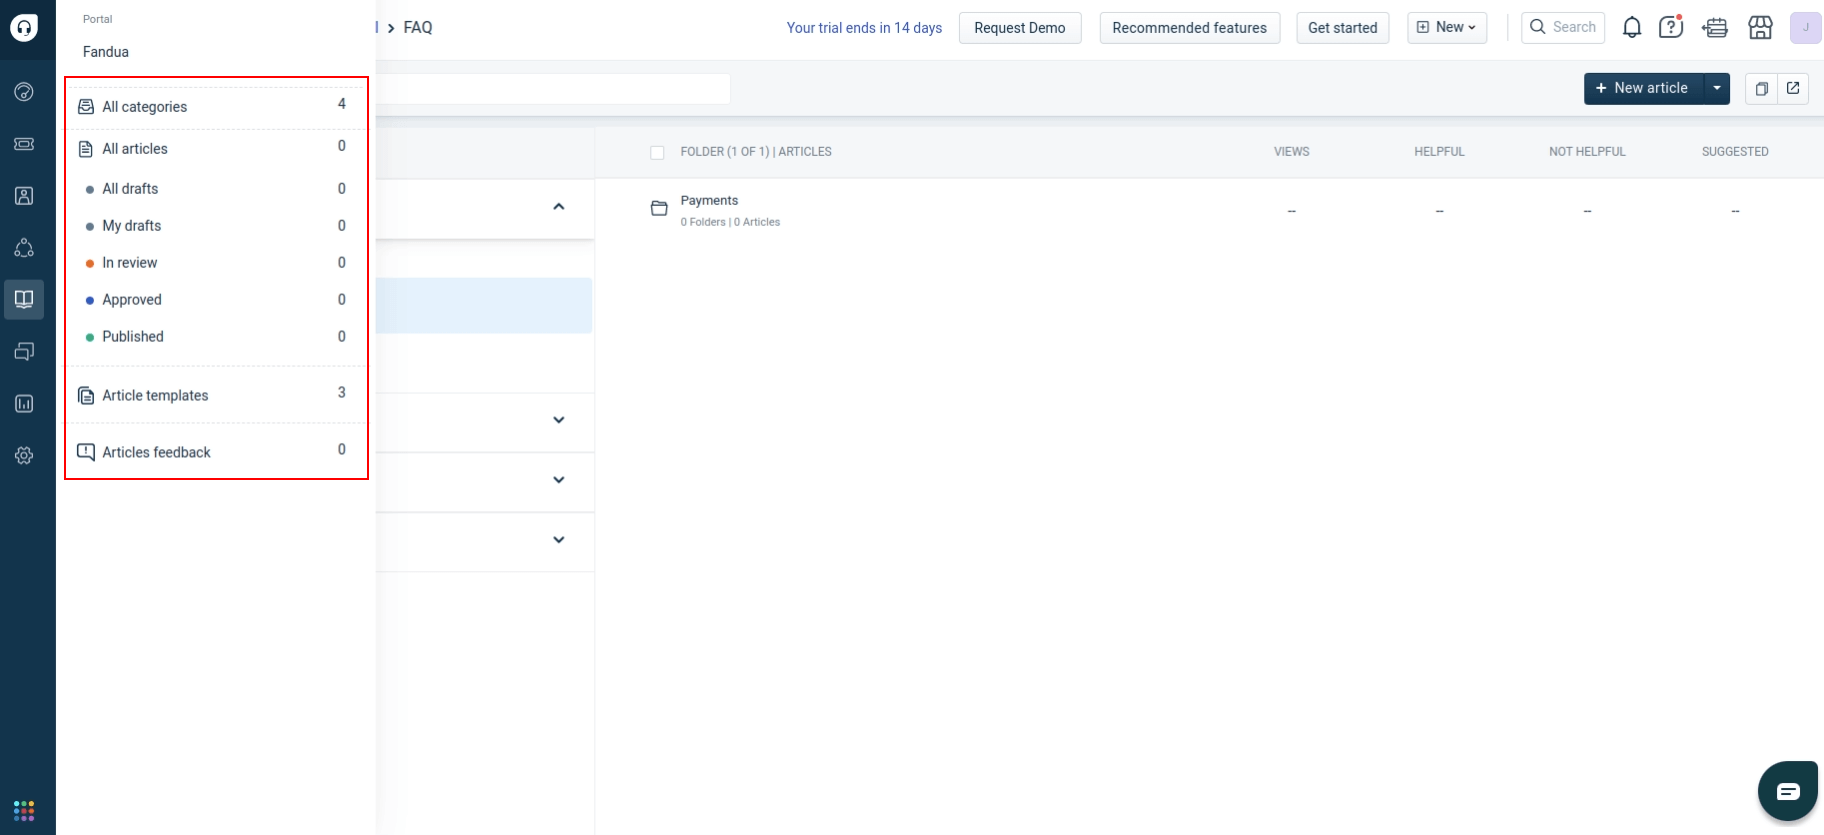
2. Check the number of articles in each knowledge base category. Click the filter button to view the number of articles related to specific groups, such as Drafts or Approved.
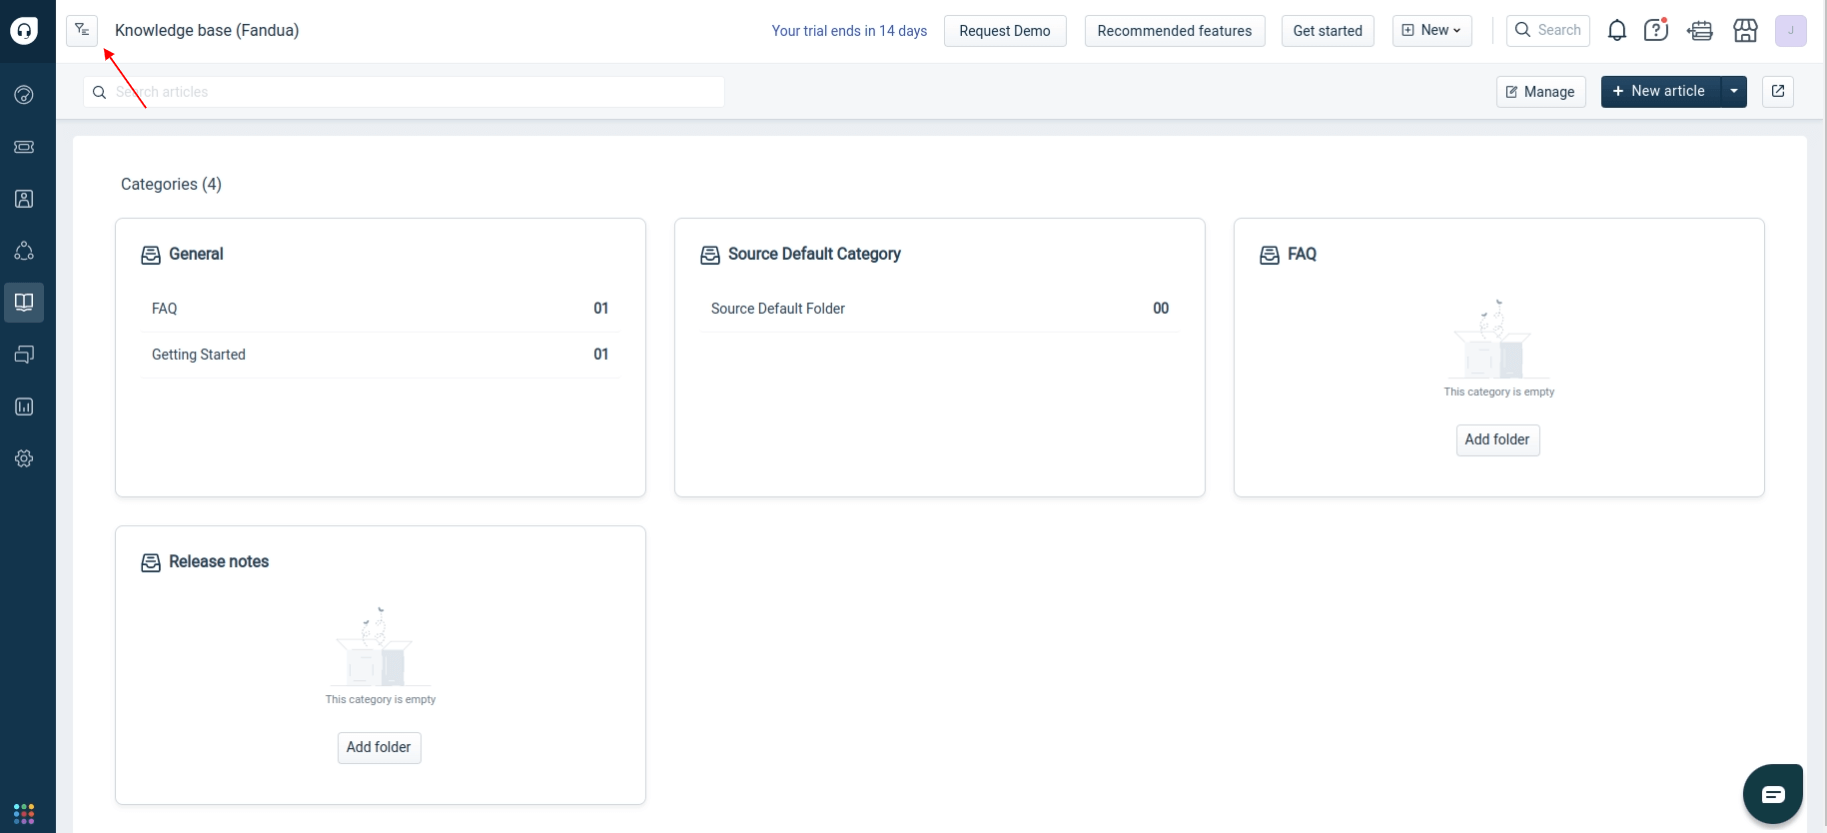
3. The number of articles will be displayed next to each group.
How to create custom filtering reports in Freshdesk?
You'll create a custom report to export Freshdesk tickets with specific filters. This is essential if you want to transfer tickets based on criteria like status or date. Our team can't use advanced custom filters due to Freshdesk's API limitations.
Follow these steps to create a custom report:
1. Go to your Freshdesk account.
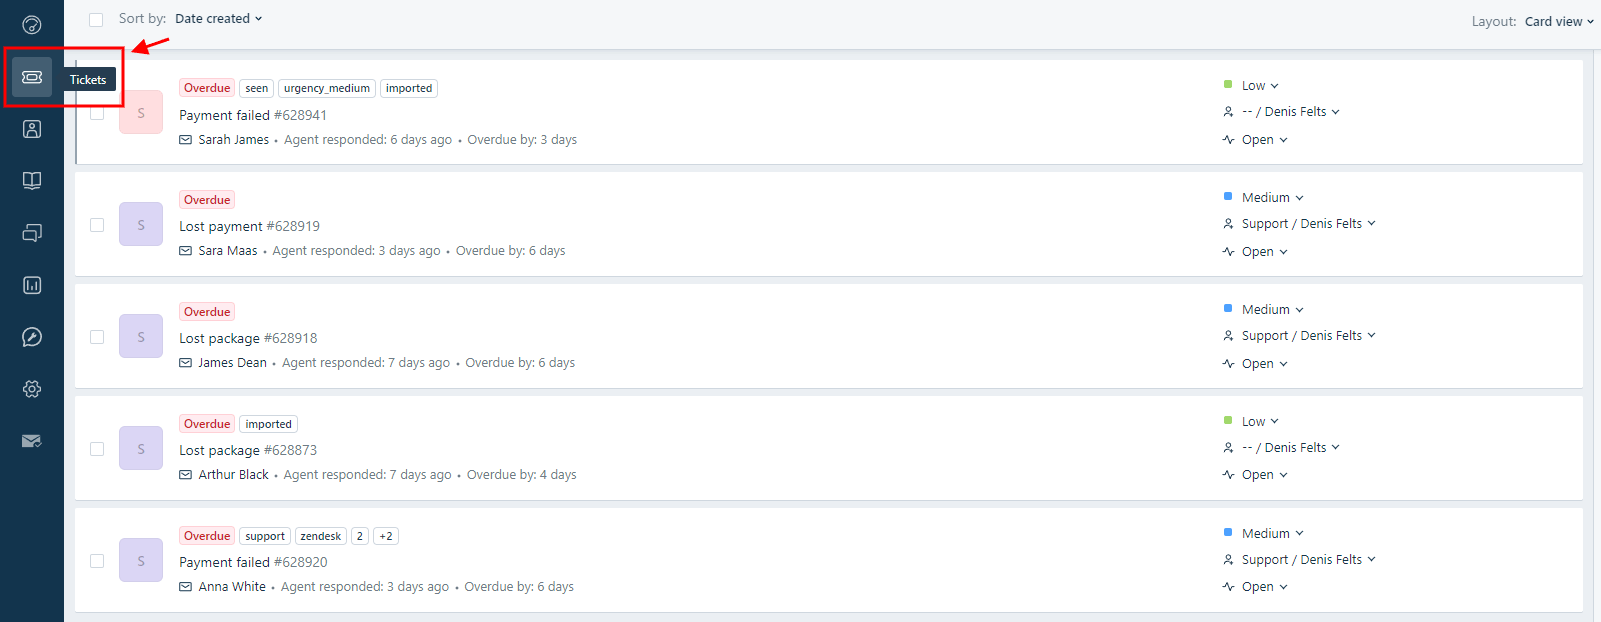
2. Select “Tickets” in the left navigation.
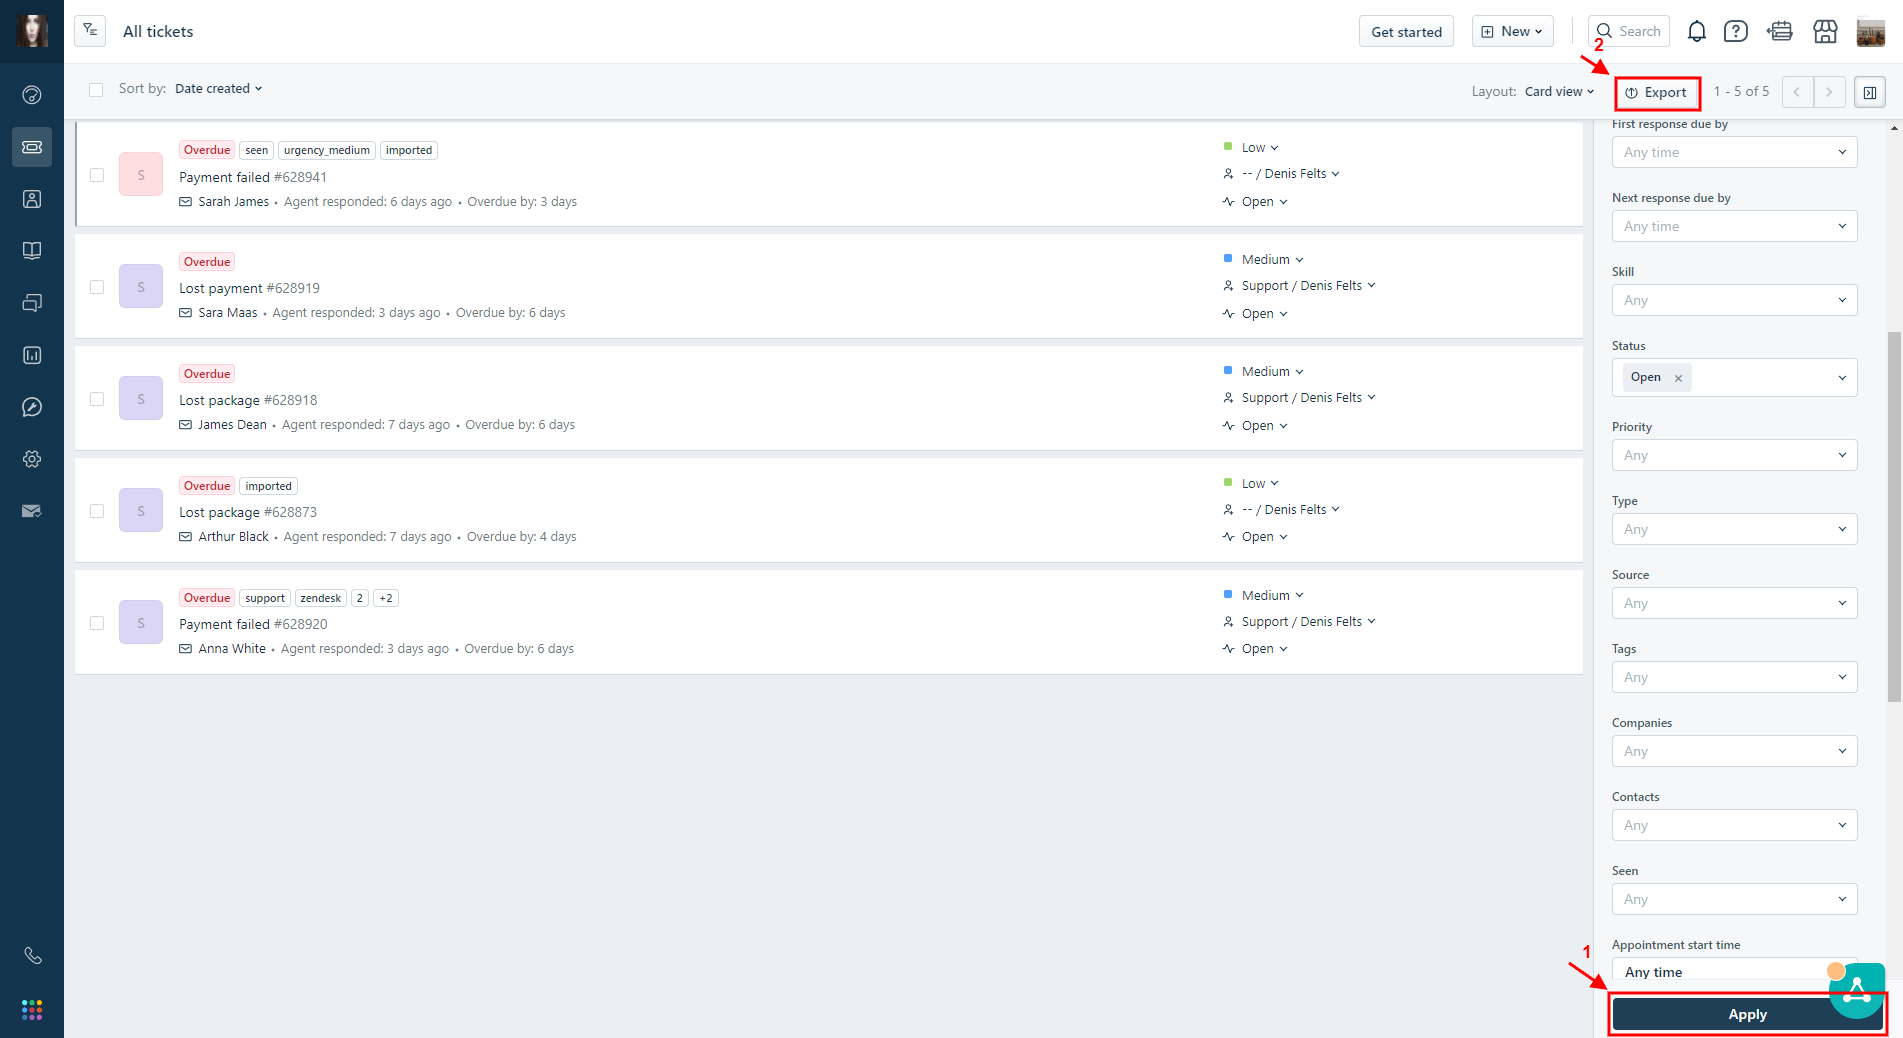
3. On the right-hand side, navigate to the "Filters" menu, choose the desired parameter you want to use as a filter, and then click “Apply.”
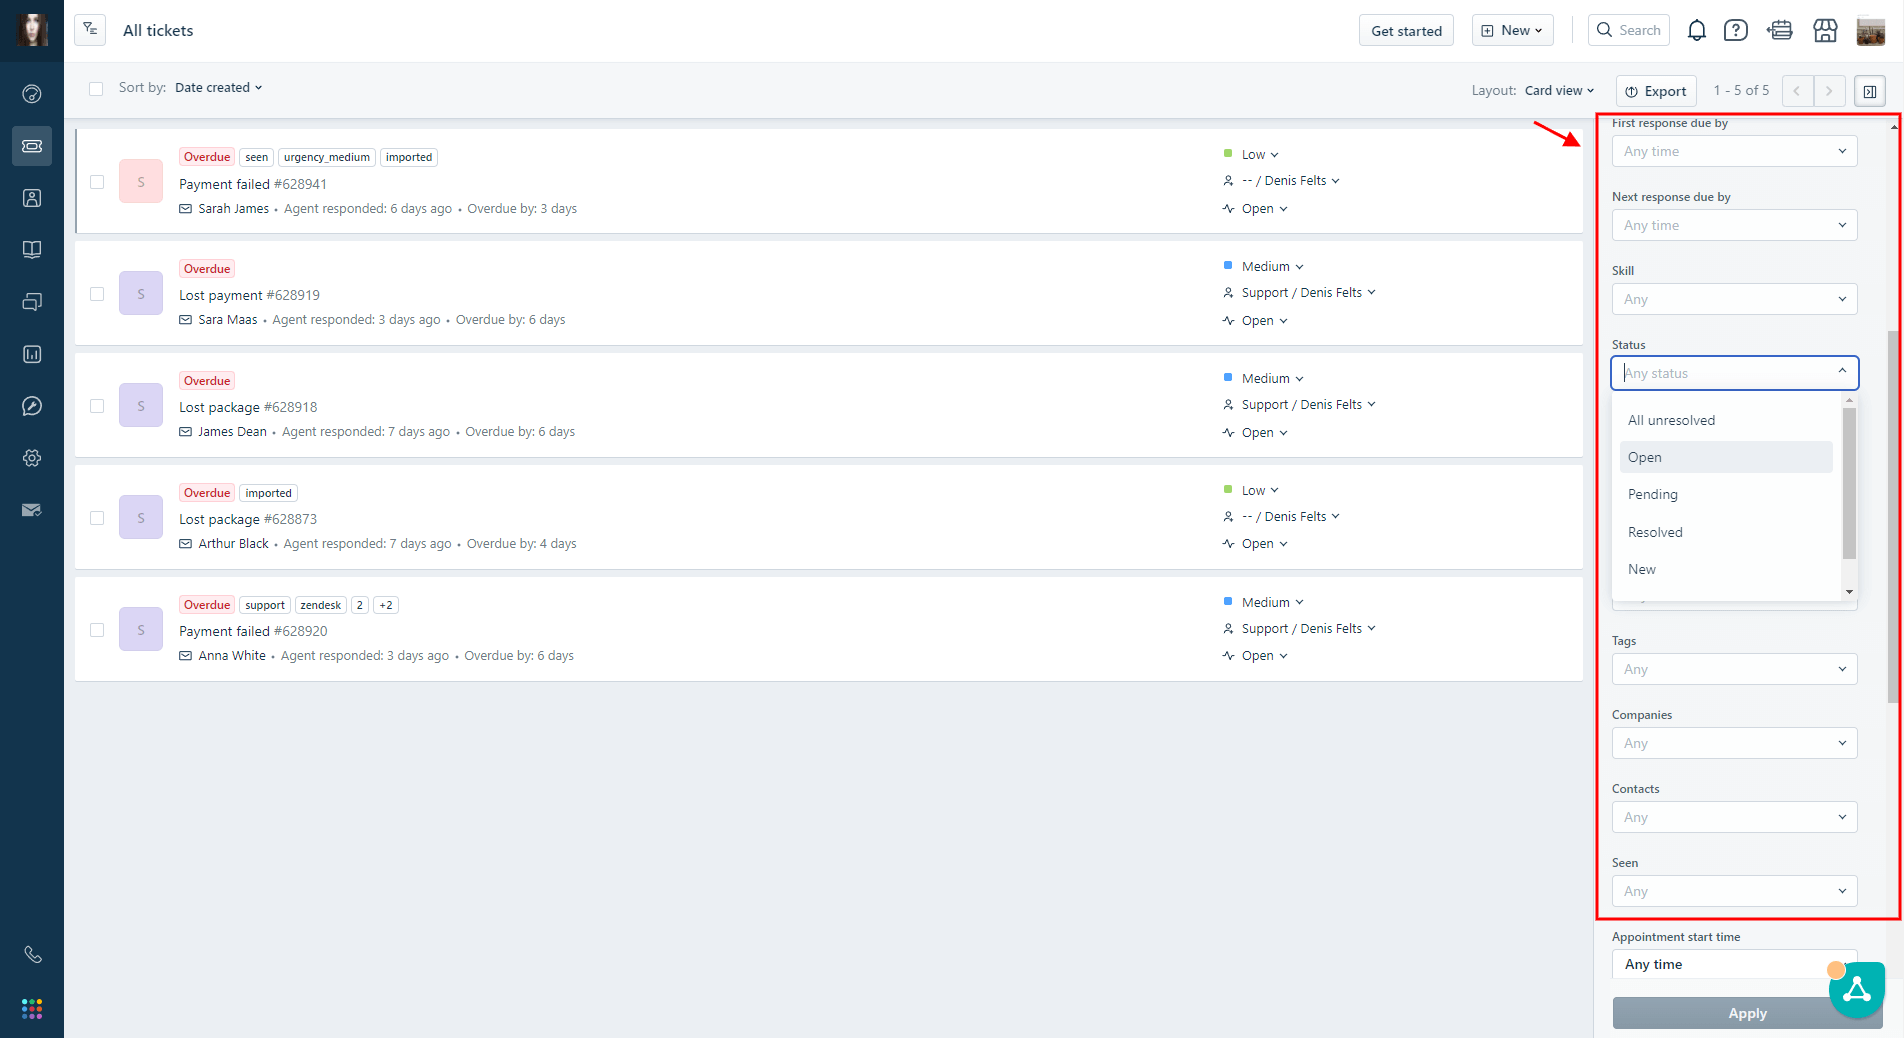
4. After applying the filter, click the "Export" button.
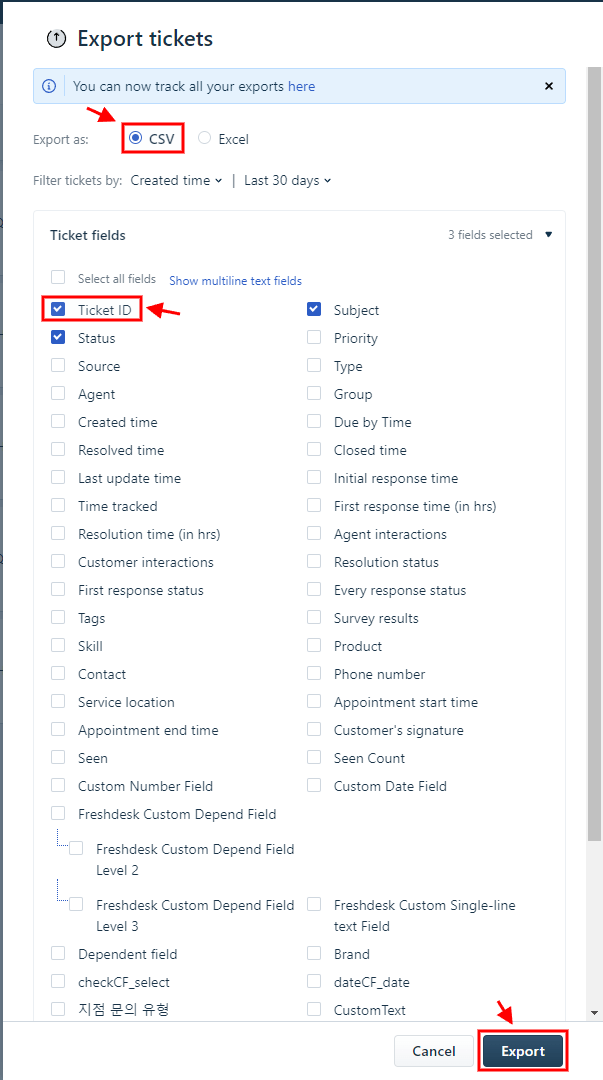
5. In the export menu, choose "CSV."
6. Select the required ticket fields, like "Ticket ID" and your filter criteria.
7. Click "Export," and the file will be sent to your email.
8. Forward the exported CSV file to our migration experts.
Following this step, our team will handle the ticket filtering process. If you have any questions, don't hesitate to contact our support team.
Why can’t I see attachments in unpublished articles in my Freshdesk?
If you're unable to view attachments in unpublished articles within your Freshdesk account, it's essential to note the following reasons:
Freshdesk operates on AWS servers, and attachments are hosted exclusively within AWS. However, attachments are only stored in AWS once an article is published. Since the API provides access solely to the Freshdesk database on AWS servers, attachments remain inaccessible via the API if the associated article is unpublished.
How can end-users access a portal in Freshdesk after the data migration?
Even though it's not complicated, accessing a portal after the data is imported to Freshdesk is a pitfall for many. Thus, we decided to cover the process in detail to help you out. We hope that this guide will make things clear for you.
Upon the transfer to Freshdesk, agents need to accept the activation email. The activation email will only appear if the 'User Activation Email' button is turned on.

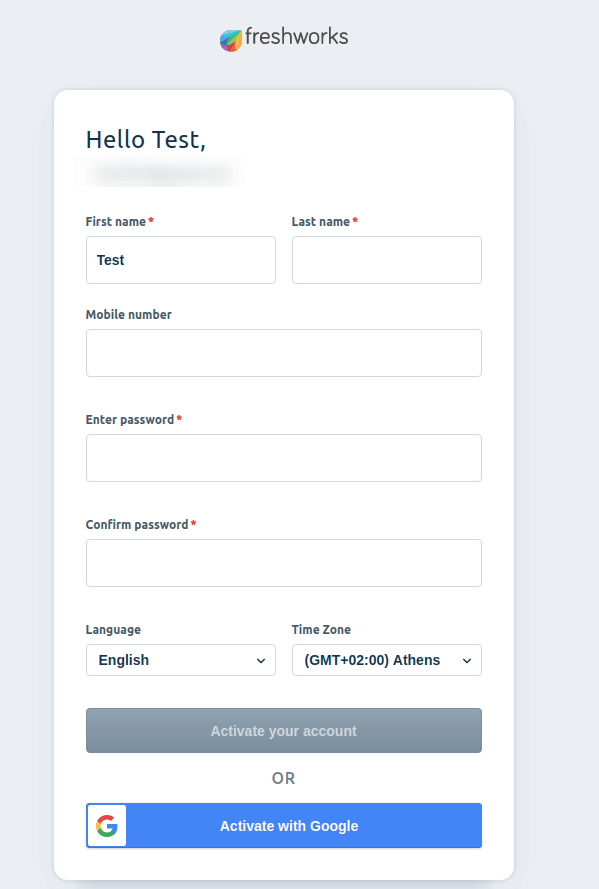
If the button is enabled, after the data migration, end-users will receive the activation email where they can click on the activation link. This will open an 'Activate your account' landing page, where they'll need to provide their full name and create a password. After that, they'll be active and able to log in to their account.
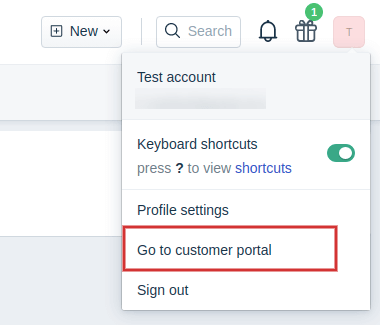
Next, they can click on their profile icon and hit the 'Go to customer portal' button, which will redirect them to the portal page immediately.
The user will be redirected to the portal page immediately.
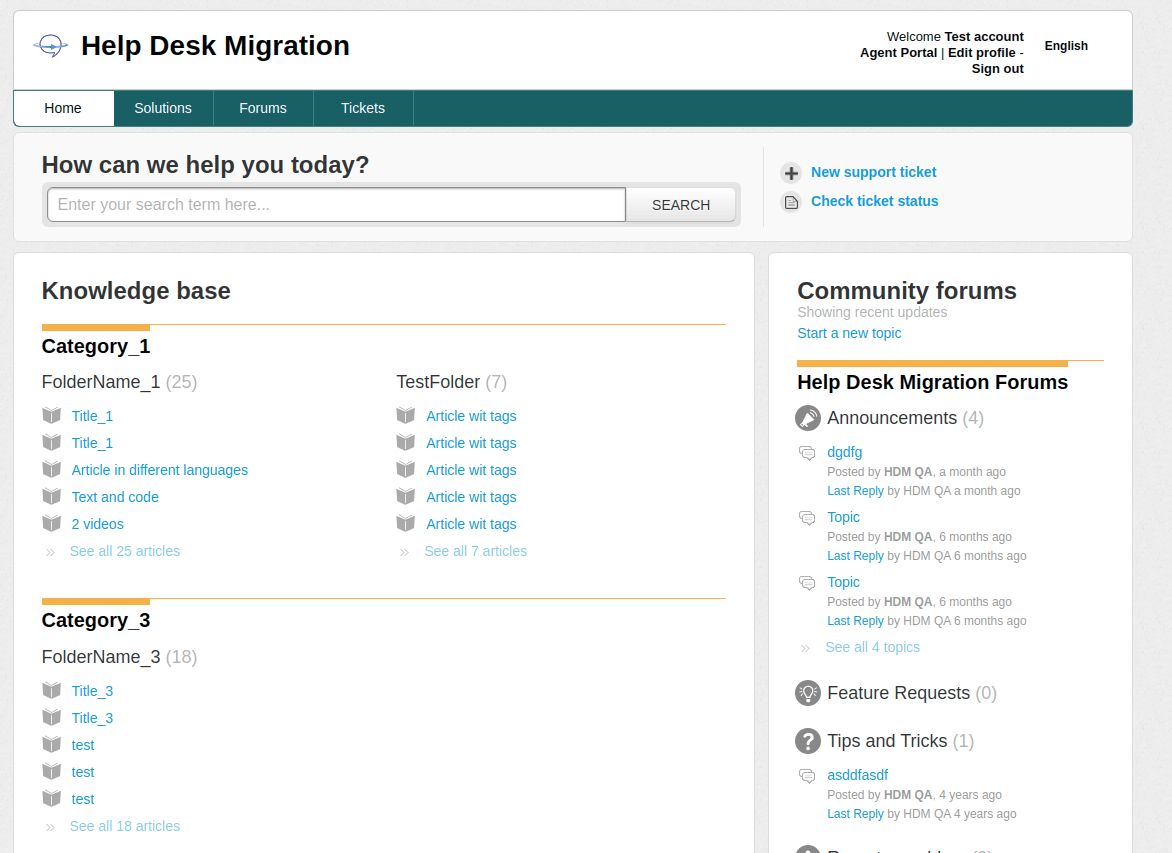
Having completed all the previous steps, the end-user in Freshdesk can:
- View Tickets
- Search for tickets
- Create tickets
- Update certain fields in tickets
- Comment on tickets
- View articles and sections
- Search articles


