eDesk Data Migration Checklist
Planning to move your customer data to eDesk? We've got your back. Help Desk Migration is an automated data migration tool that seamlessly transfers tickets, contacts, attachments, and more. No downtime, just a few clicks for a secure data movement to eDesk. Just ensure you have admin rights on your Source and eDesk accounts, and you're good to go!
What Migration Wizard Will Transfer to eDesk:
1. Tickets
- Created at dates
- Updated at dates
- Requesters
- Comments (Author, Created dates, and Visibility)
- Public notes
- Private notes
2. Contacts
3. Agents*
Consider the Peculiarities
- Ticket attachments larger than 10MB cannot shift to eDesk.
- The migration tool can transfer custom fields in a private note using a customized approach.
- You can import to eDesk only with a free trial or an Enterprise plan.
- If a ticket has two requesters, all replies will be assigned to the source requester.
- If a contact is deleted on the Source platform, the data transfer tool moves its name +without-email.com to eDesk.
What Data Won’t Be Replicated
Our automated data migration app can’t import groups, organizations, inline images, tags, custom fields, macros, triggers, automation, and other settings.
Before You Start Data Migration
To guarantee a successful eDesk data replication, let's walk through some essential preparation steps.
Data Migration Process Planning
Every help desk data migration process depends on the Source and Target platforms. So, there’s no all-round approach to fix every data transfer. Based on our ELT experience, there’re two identified methods:
1. Automated or custom migration
Automated approach is a DIY data migration where you map and transfer supported records using Migration Wizard. You can also customize your data replication with automated options by yourself.
Custom approach is an ideal option for those who has any special migration needs. Our support team comes up with a custom solution to personalize the process to your business's needs. You can request custom filters, data deduplication, or matching pre-existing data in your Target platform.
2. Combined approach
The mix of automated data migration + Delta migration. You run Delta after the main data movement and transfer only new and updated records— for getting clean and consistent data on your new helpdesk.
Consider the volume of data and help desk or service system complexity to find the best approach for your data transfer.
Pre-migration Settings on eDesk Account
For a smooth eDesk data movement, follow these steps:
- To connect your eDesk account, enter the email and password. Ensure you have access to the admin account.
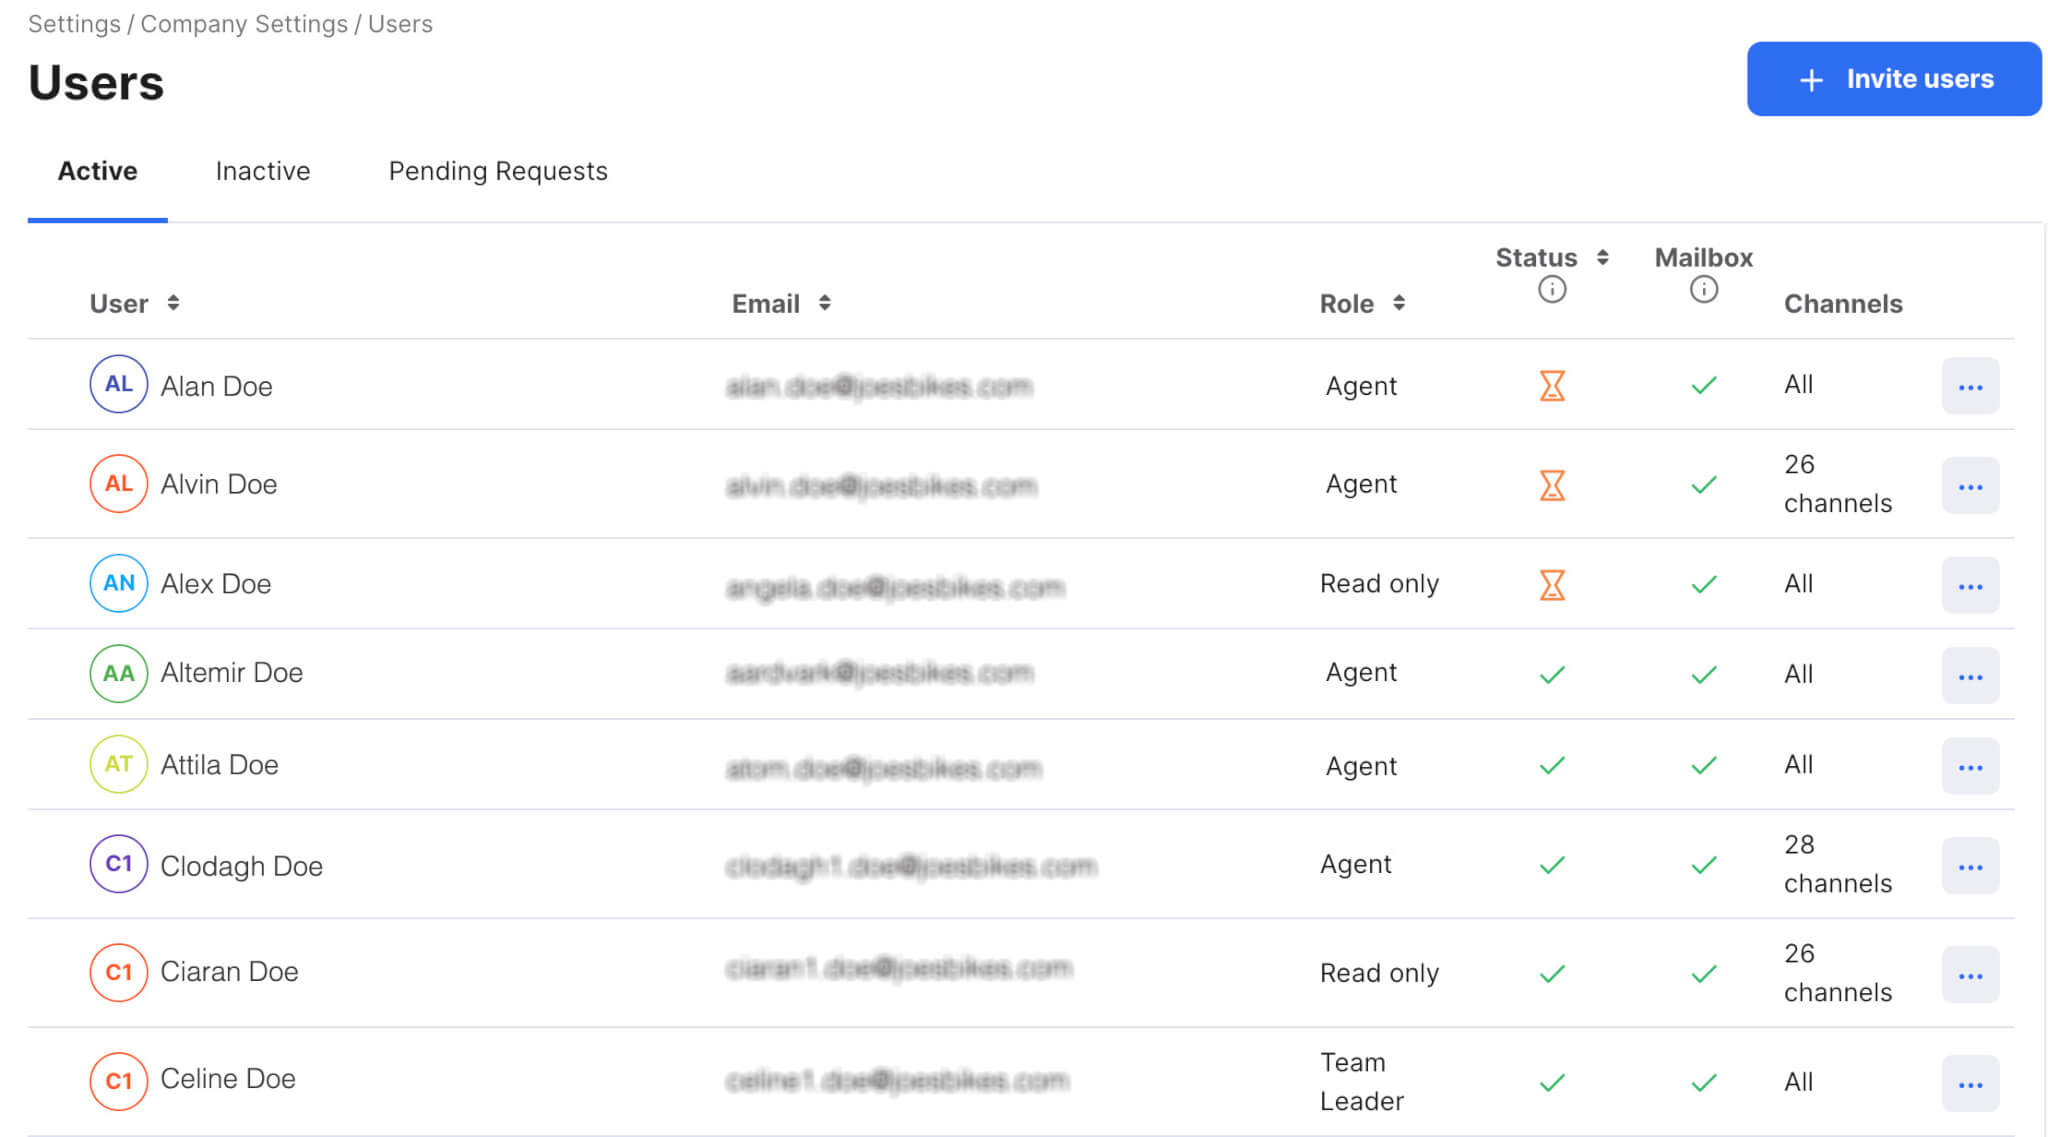
- Add all source agent profiles you need to move to eDesk and ensure they have accepted the team invitation. Go to Settings → Company Settings → Users → + Invite users.
If you have any questions about these steps, contact our support team—we're here to assist you.
Setting Up Data Migration to eDesk
With the Help Desk Migration service, the data transfer begins with a free Demo to test-drive the migration tool and see how your customer service records can be imported. A Demo Migration is a great way to try different settings before the Full migration. You can run your Demo as many times as required.
Here's how to start your data movement to eDesk:
Step 1. Sign Up for the Migration Wizard Account
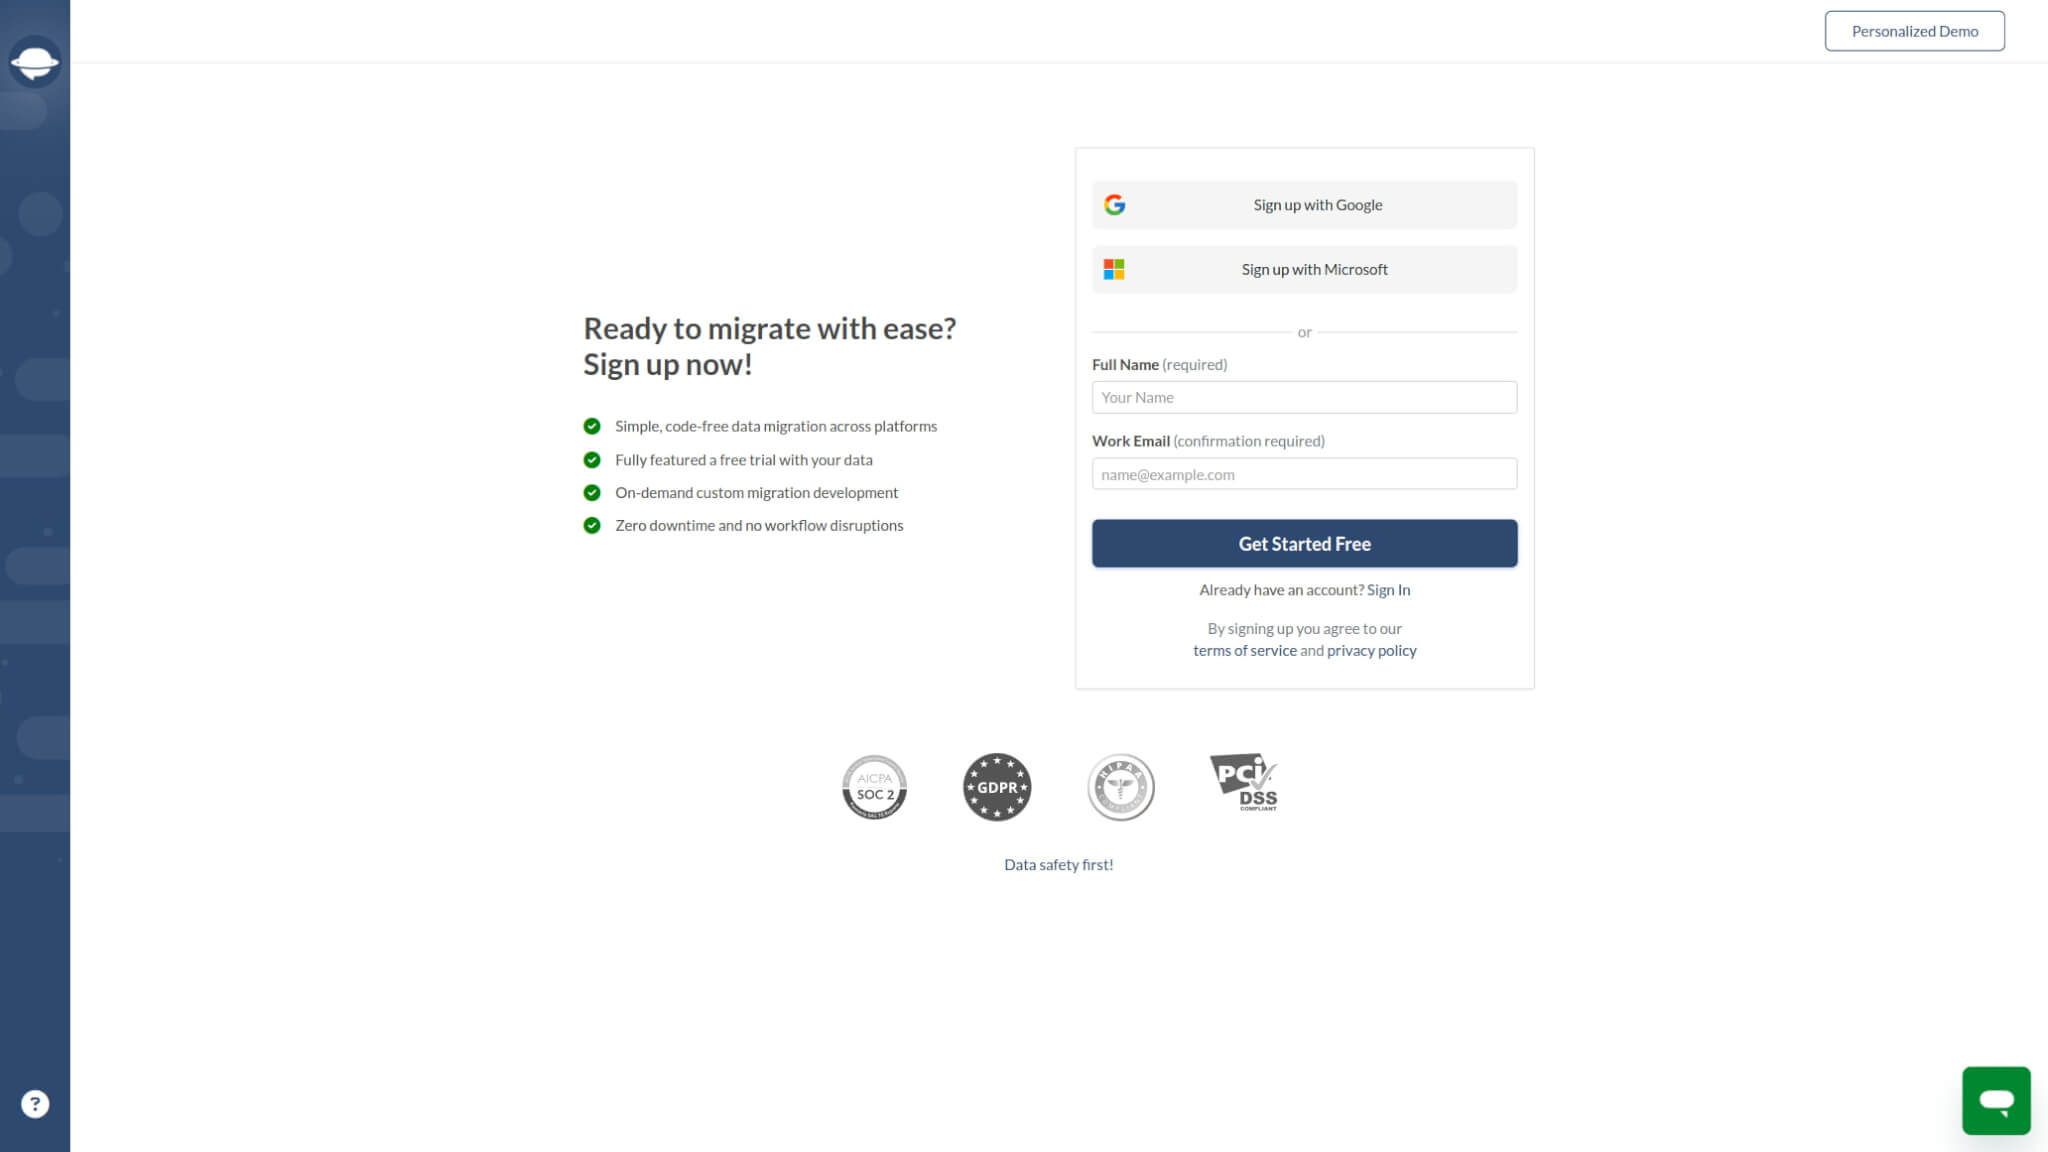
Create a Migration Wizard account with Google, Microsoft, or your work email. If you pick the work email, you need to confirm it by following the instructions sent to your email.
Step 2. Connect Your Source and Target Platforms
Different help desks and service desks require different access credentials. This could be a URL, API token, or logging in with your source platform account and then granting access permissions.
The Migration Wizard offers on-the-go tips to enhance the platform connection process.
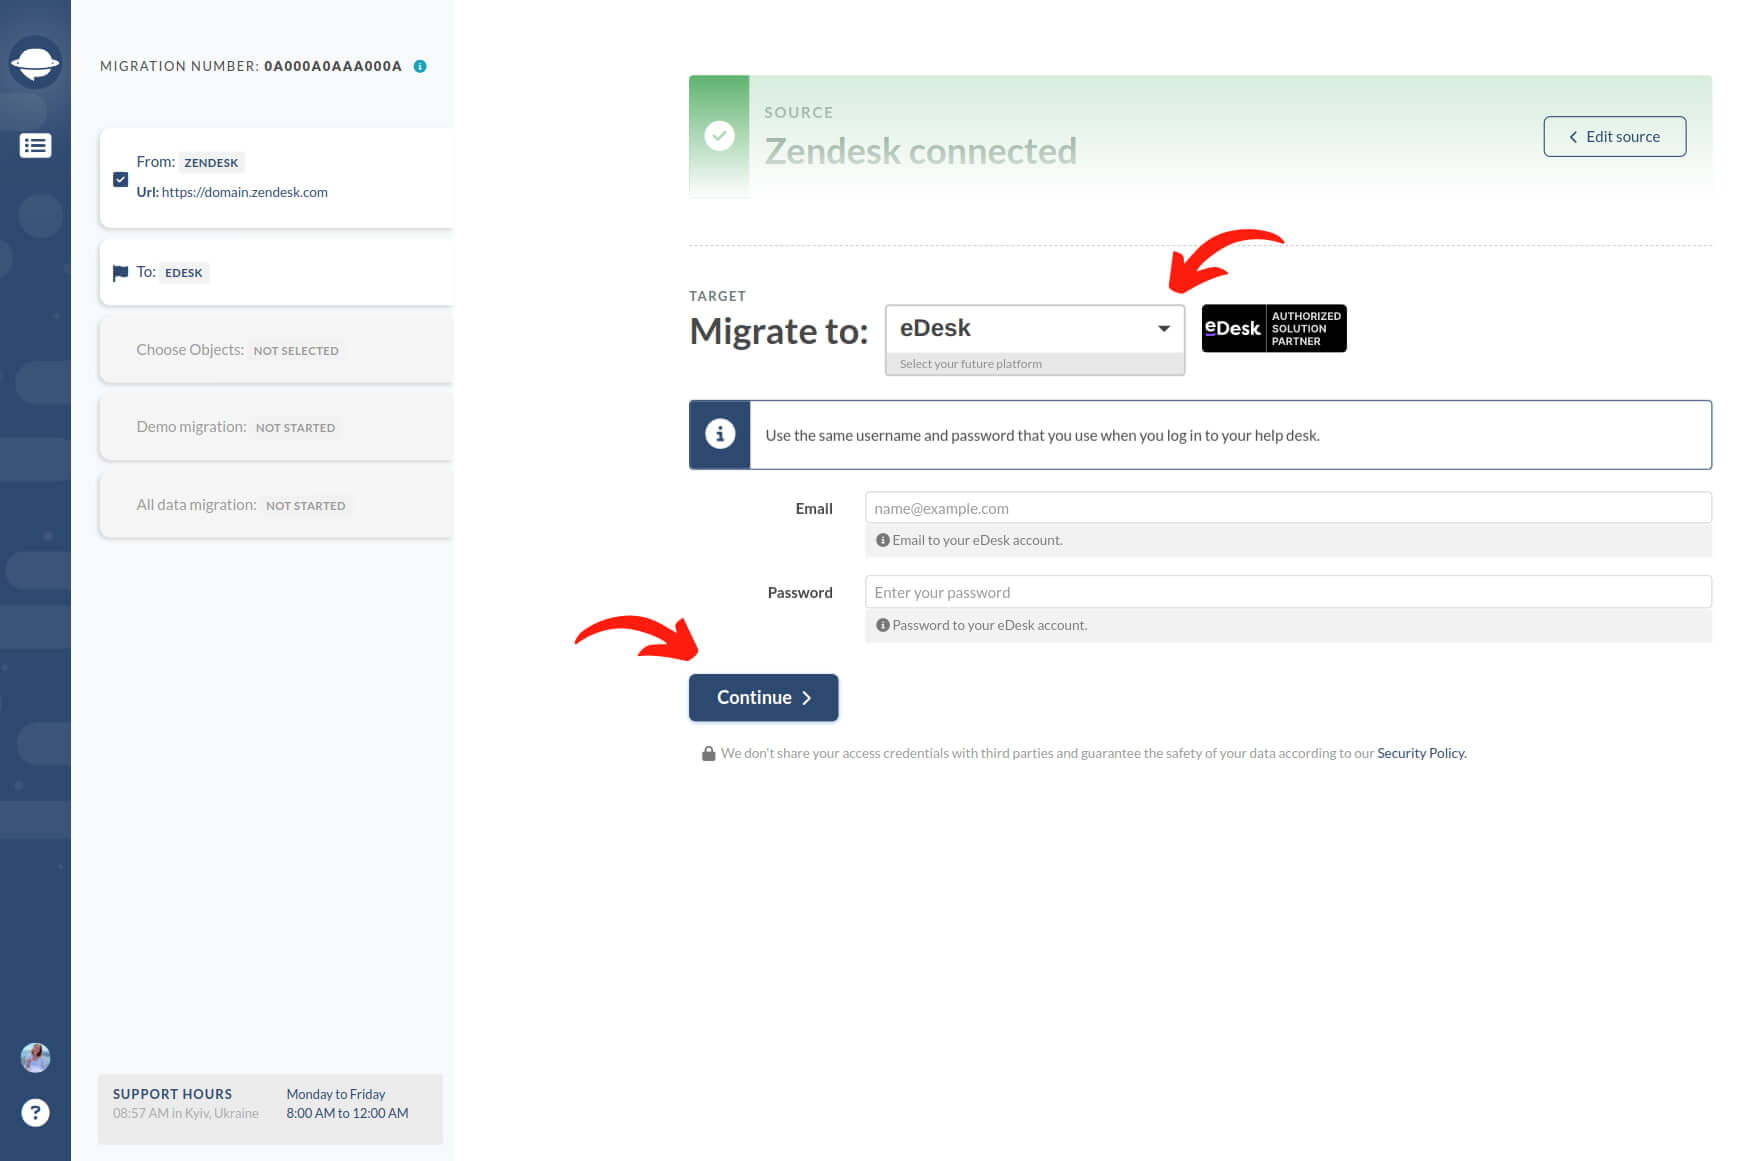
To connect eDesk as your Target platform, provide your email address and password.
Step 3. Configure eDesk Channel
Select the eDesk channel into which you want to move data from your Source platform.
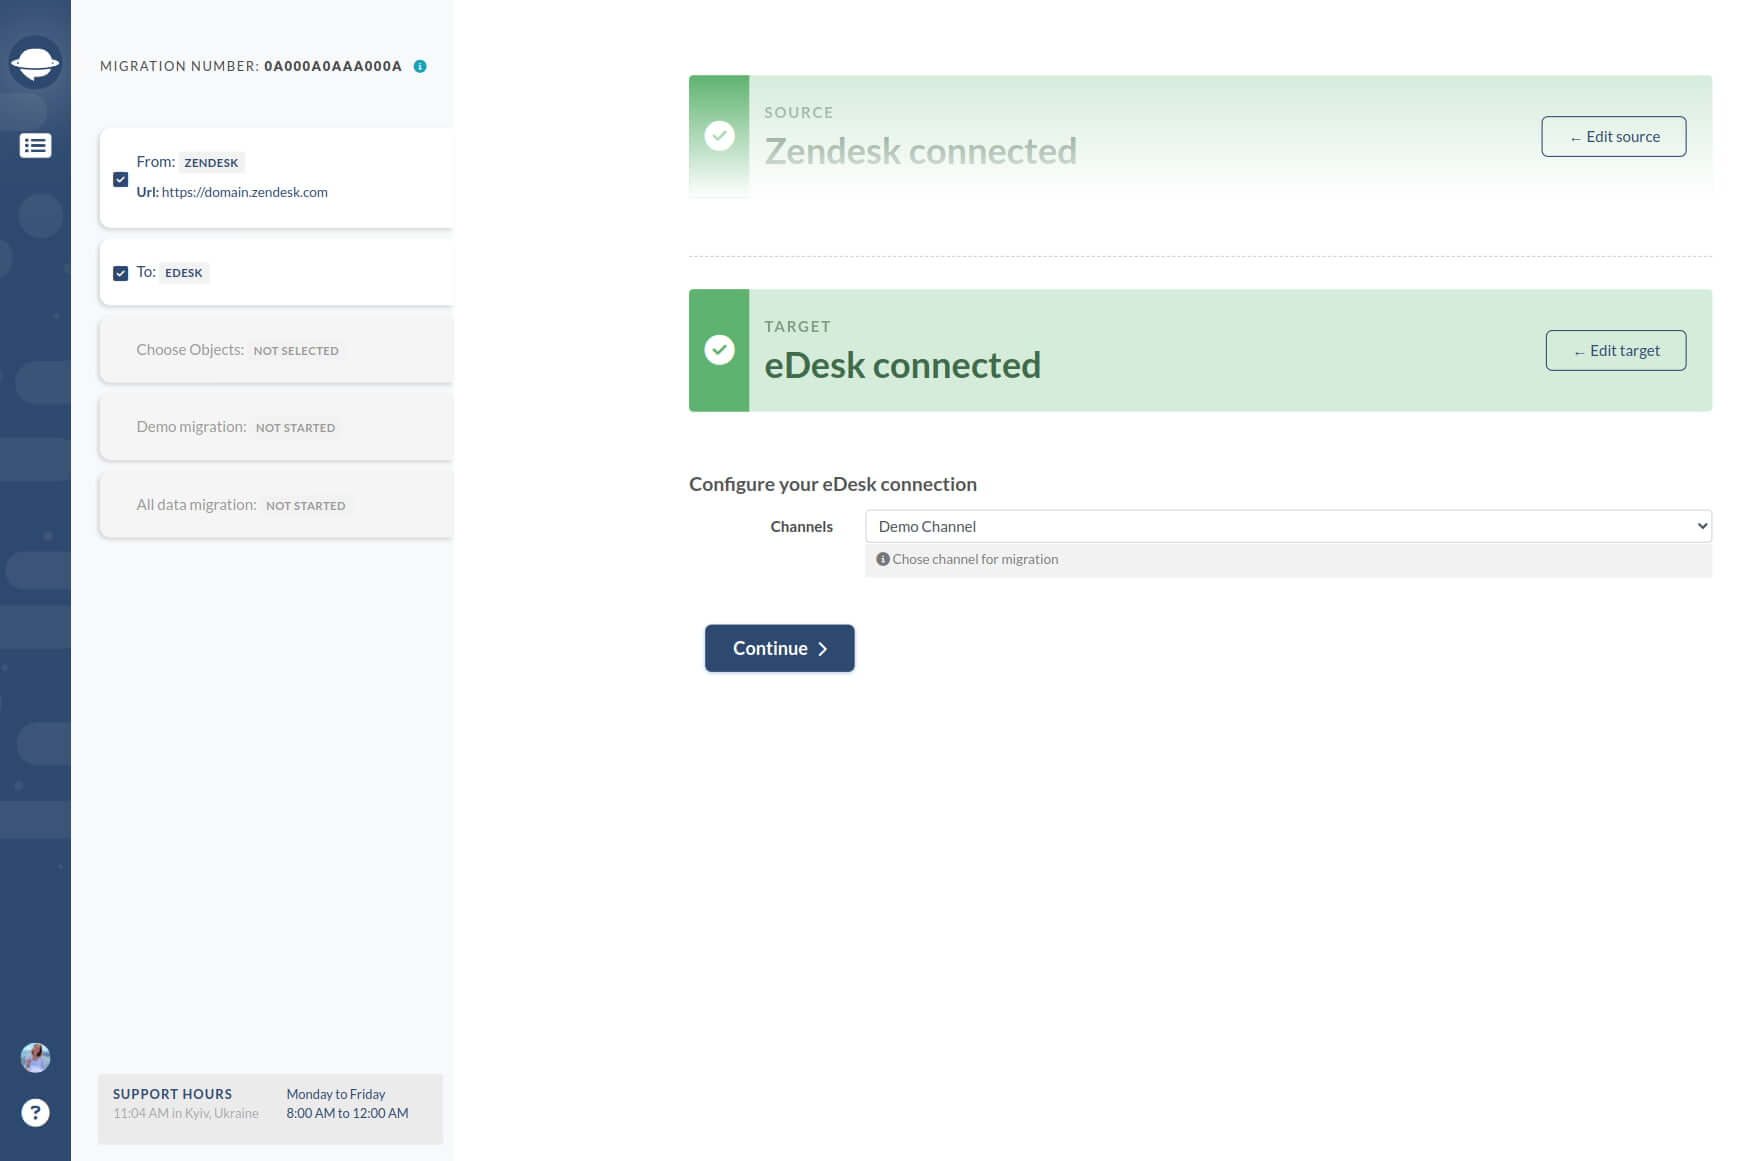
By default, you can transfer one workspace/mailbox/inbox in one Full Migration. For some source help desk platforms, you should filter data on the source account and send distinct data batches to different inboxes. So, if you have multiple mailboxes, set up a Full Migration for each.
If your Source platform has a unified mailbox, you request custom data filtering to sort your tickets for each channel.
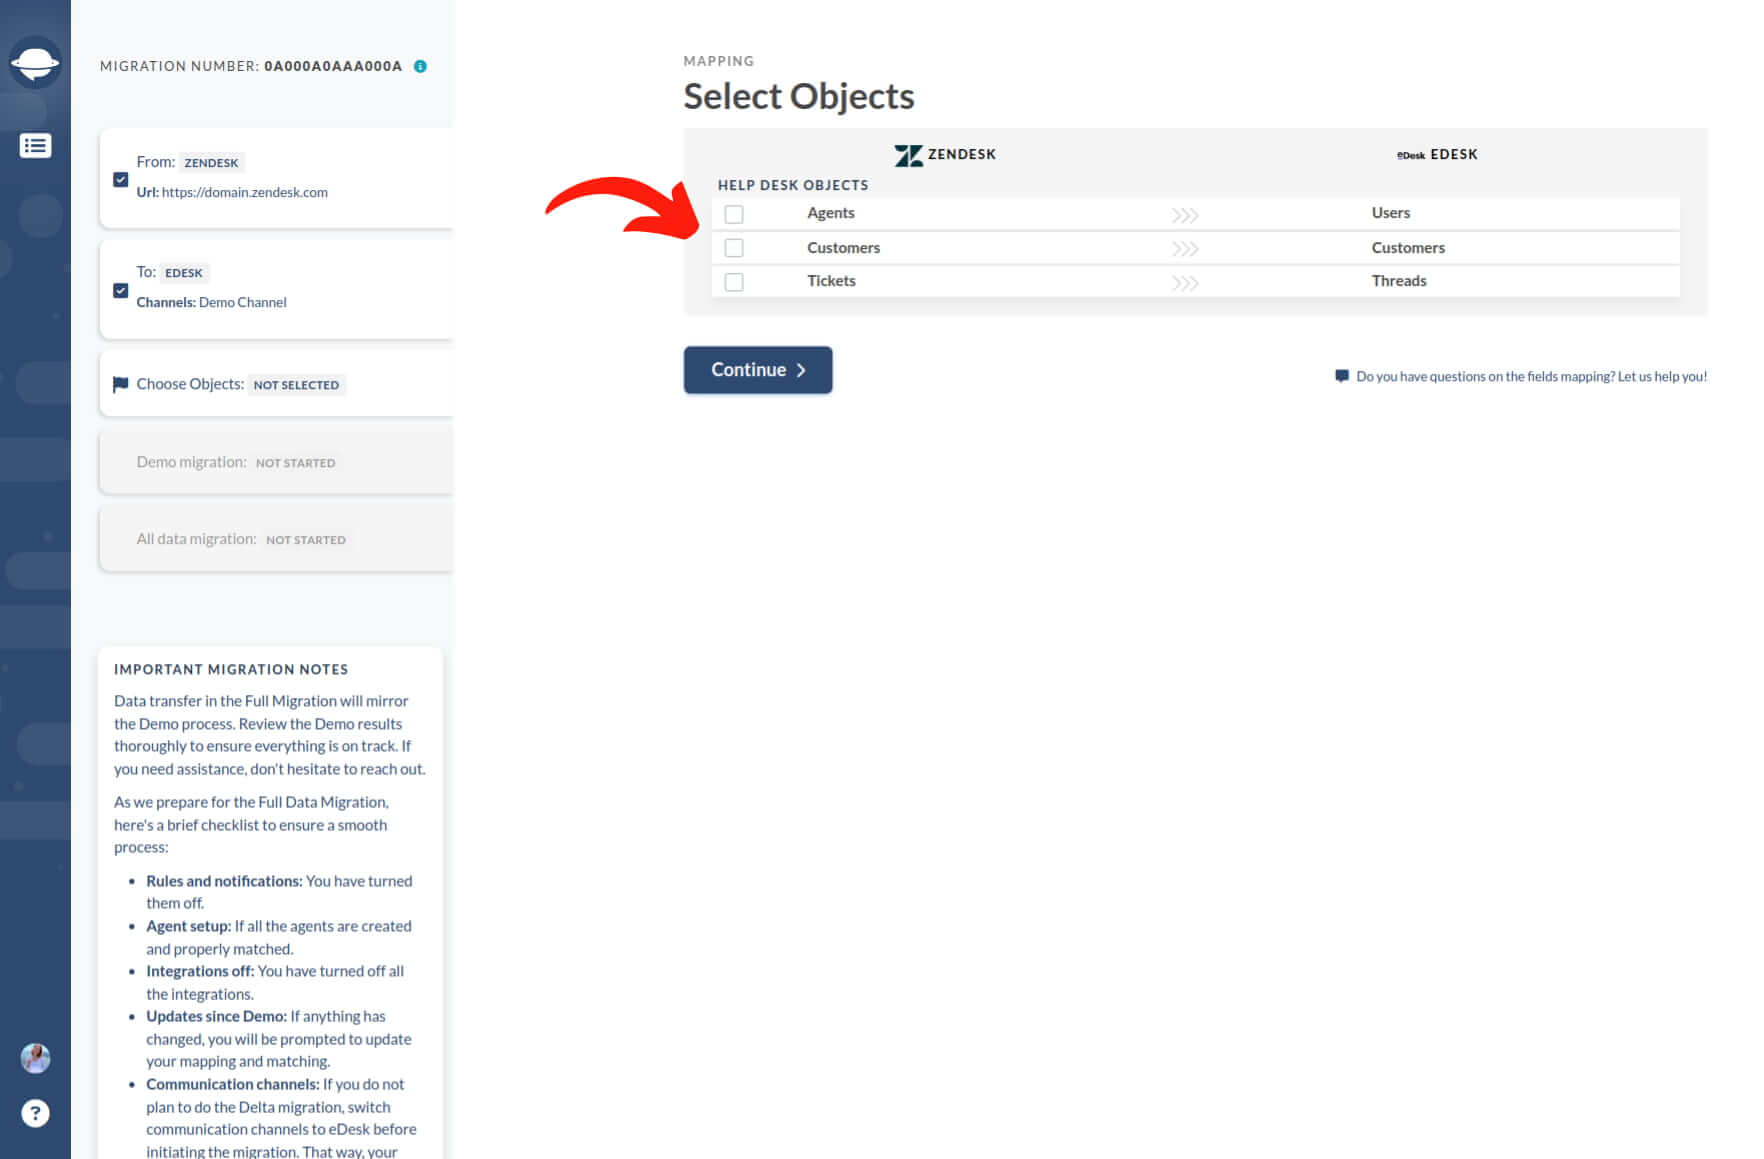
Step 4. Choose What Data Object to Transfer
Choose the help desk records you want to import to eDesk, then match users and map ticket fields.
Step 5. Match Users
Choose 'Match items' for users to map agent profiles between the Source and Target platforms. If you have unassigned tickets, deleted or inactive agents, you can choose a default agent for those records.
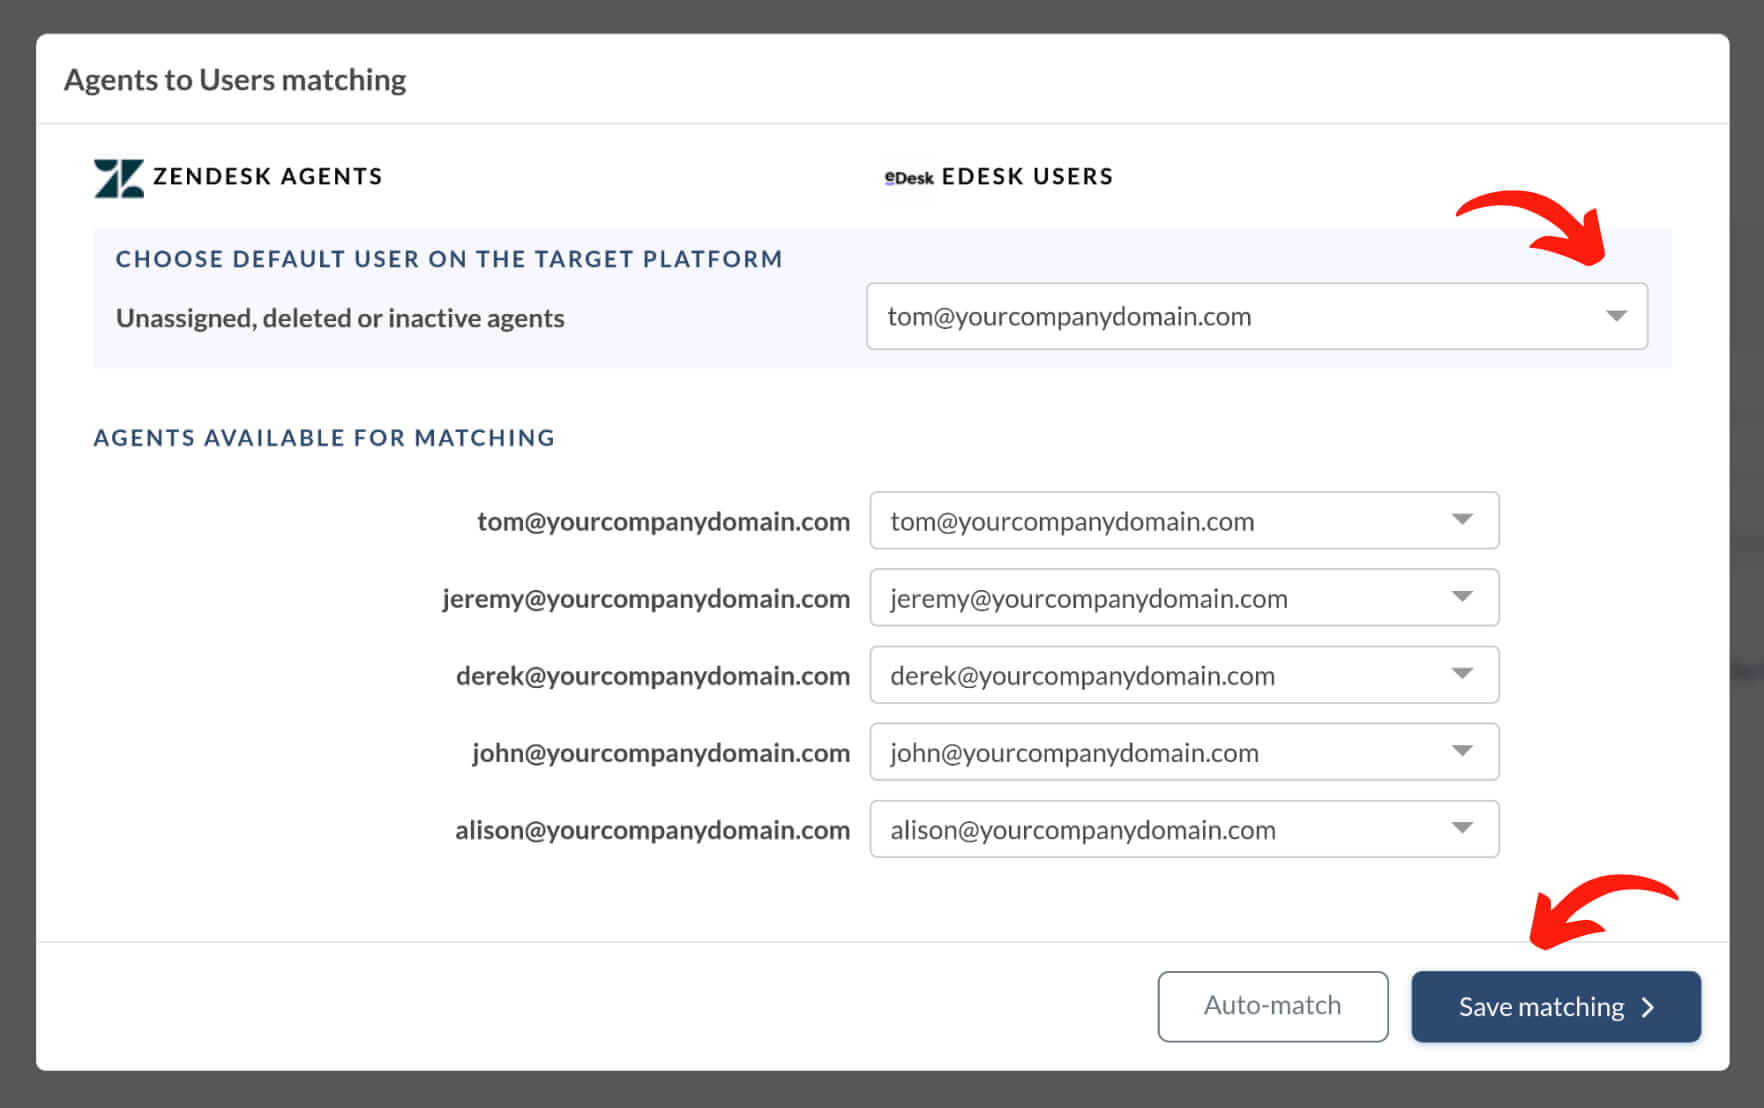
Click 'Save matching' to move to the next step. Use 'Auto match' for users if you re-run your Free Demo.
Step 6. Map Ticket Entities
Choosing the ticket checkbox opens a window for mapping ticket fields. System fields: subject, assignee, contact, comments, and dates are mapped automatically. Head over to mapping ticket status and type fields. When all is done, click ‘Save mapping’ to move forward.
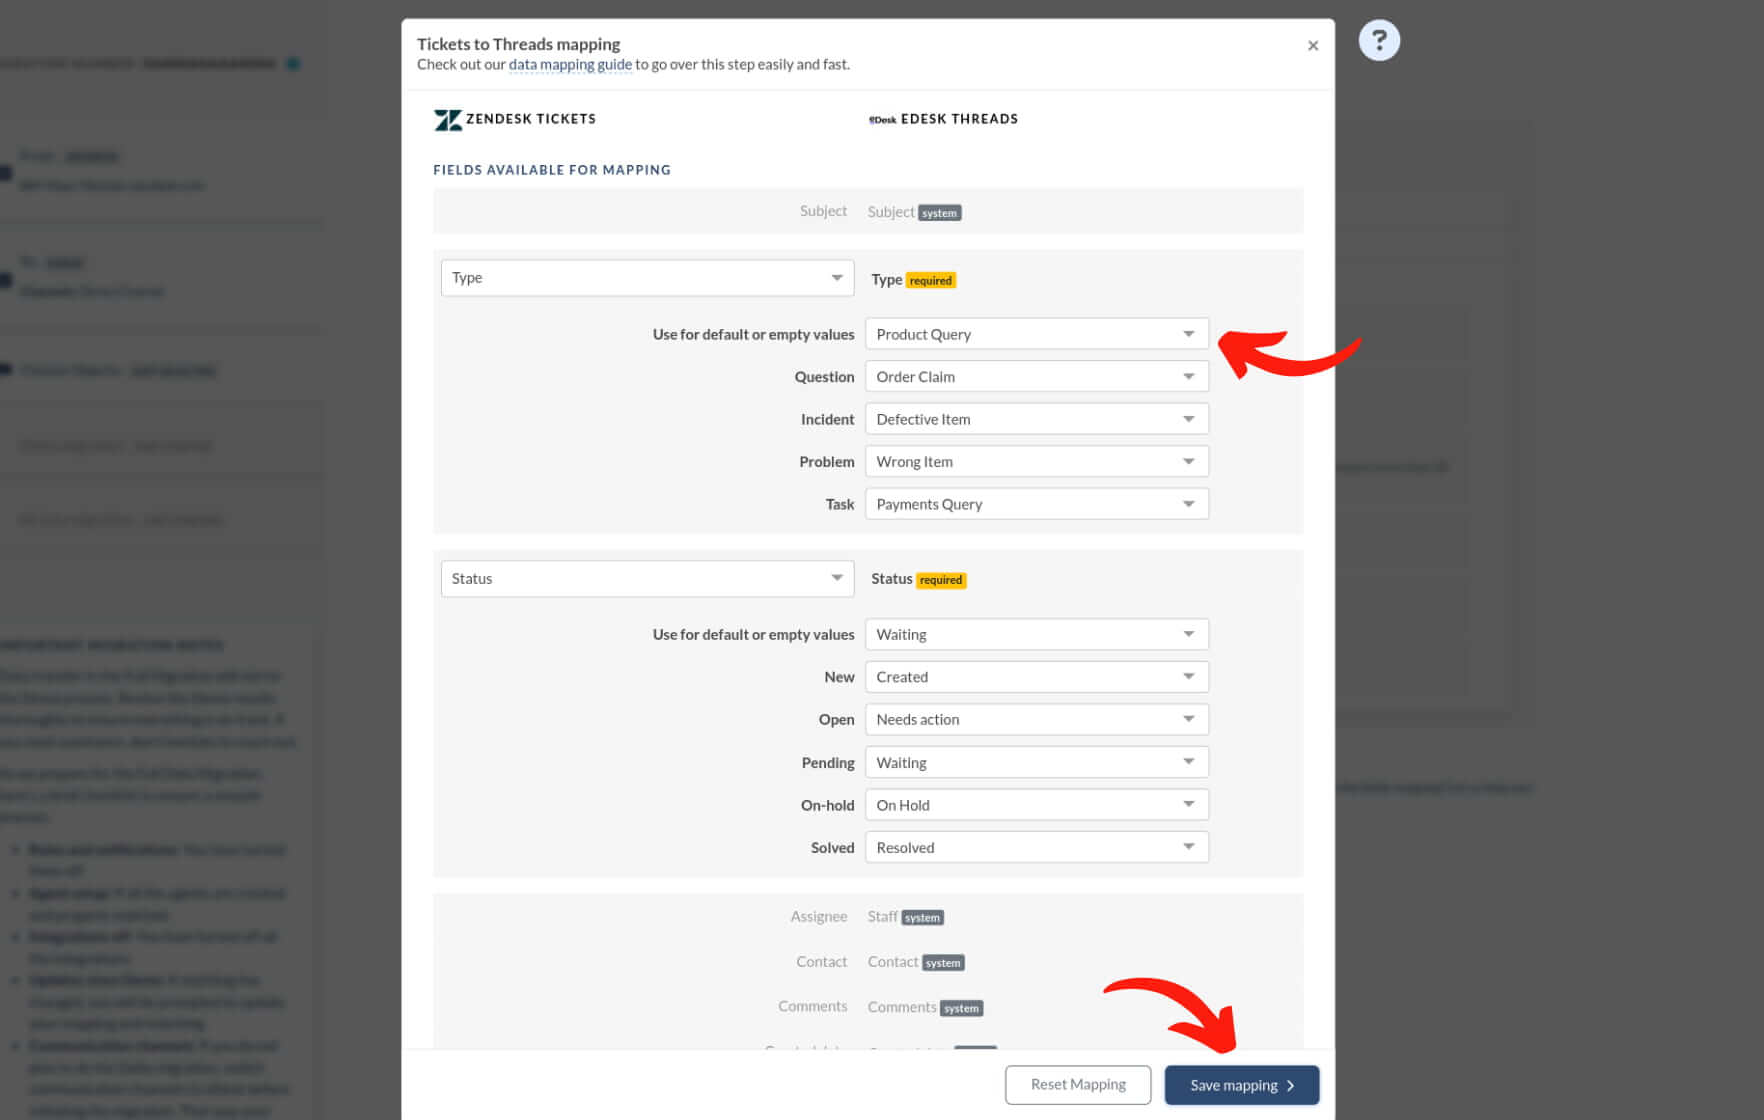
Custom field mapping is available for eDesk import. But those fields can be replicated to private notes only. You maintain all customer service information in internal comments on your eDesk.
Step 7. Out-of-the-box Customization Options
The list of available pre-built customizations depends on your data migration pair. Let’s say you move from Zendesk to eDesk, then your custom options are:
- Move inline images as ticket attachments. Keep all details of your customer communication history even if your Source platform is unavailable.
- Skip attachments. By default, Migration Wizard transfers all attachments. However, if you want to save storage or speed up the data migration, choose this option.
- Migrate your call recordings as attachments, making them easily accessible for future reference.
- Use "Demo with custom data" feature to move the selected 20 records. You can choose them by IDs and check how those records will appear on eDesk.
- Transfer side conversations as private notes to keep the context of customer conversations.
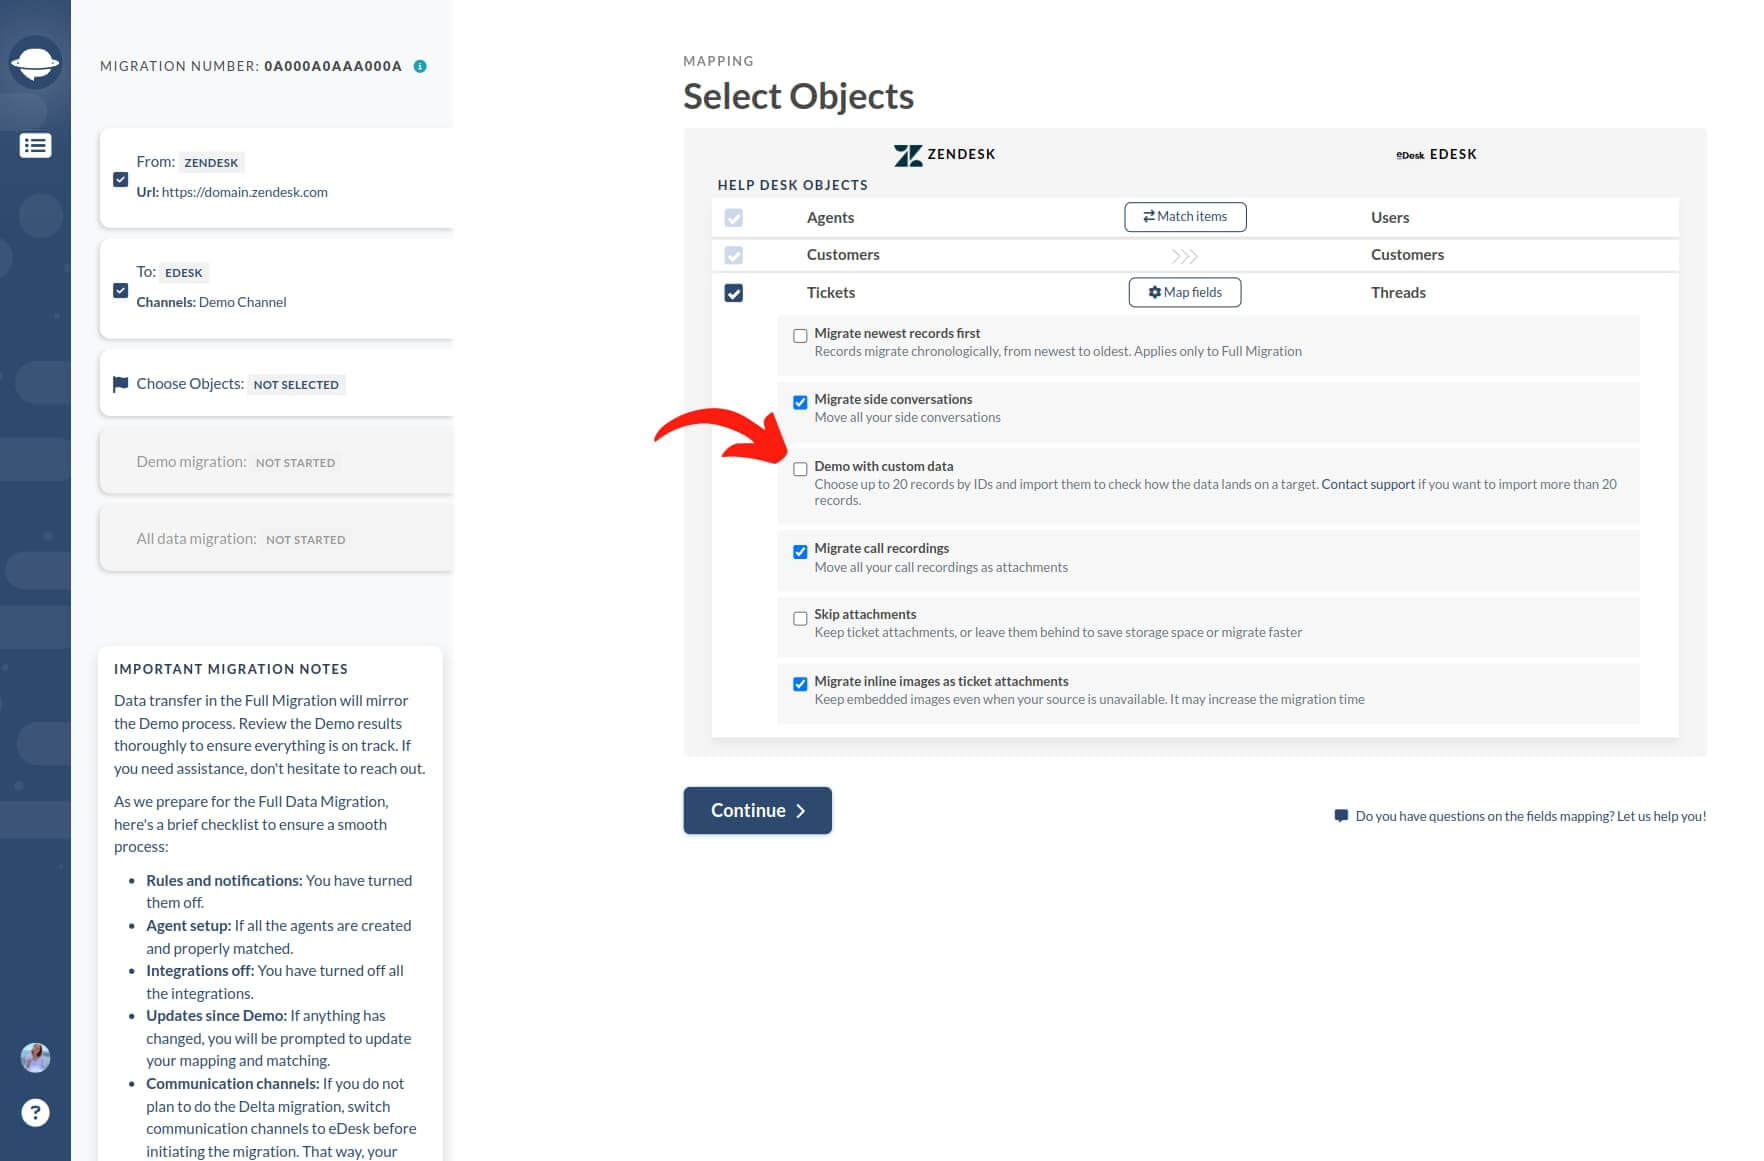
After completing data mapping, click ‘Continue.’ If there are any unsaved mapping or matching details, Migration Wizard will show the mapping window for you to review.
What to Do After the Demo Data Migration
Once your Free Demo to eDesk is complete, go through the following steps.
Assessing Demo Results
It's crucial to review the Demo movement results because the data migration process of Demo goes the same way as Full Data Migration. If some records weren’t imported in the Demo, they won’t be replicated in the Full Data Migration.
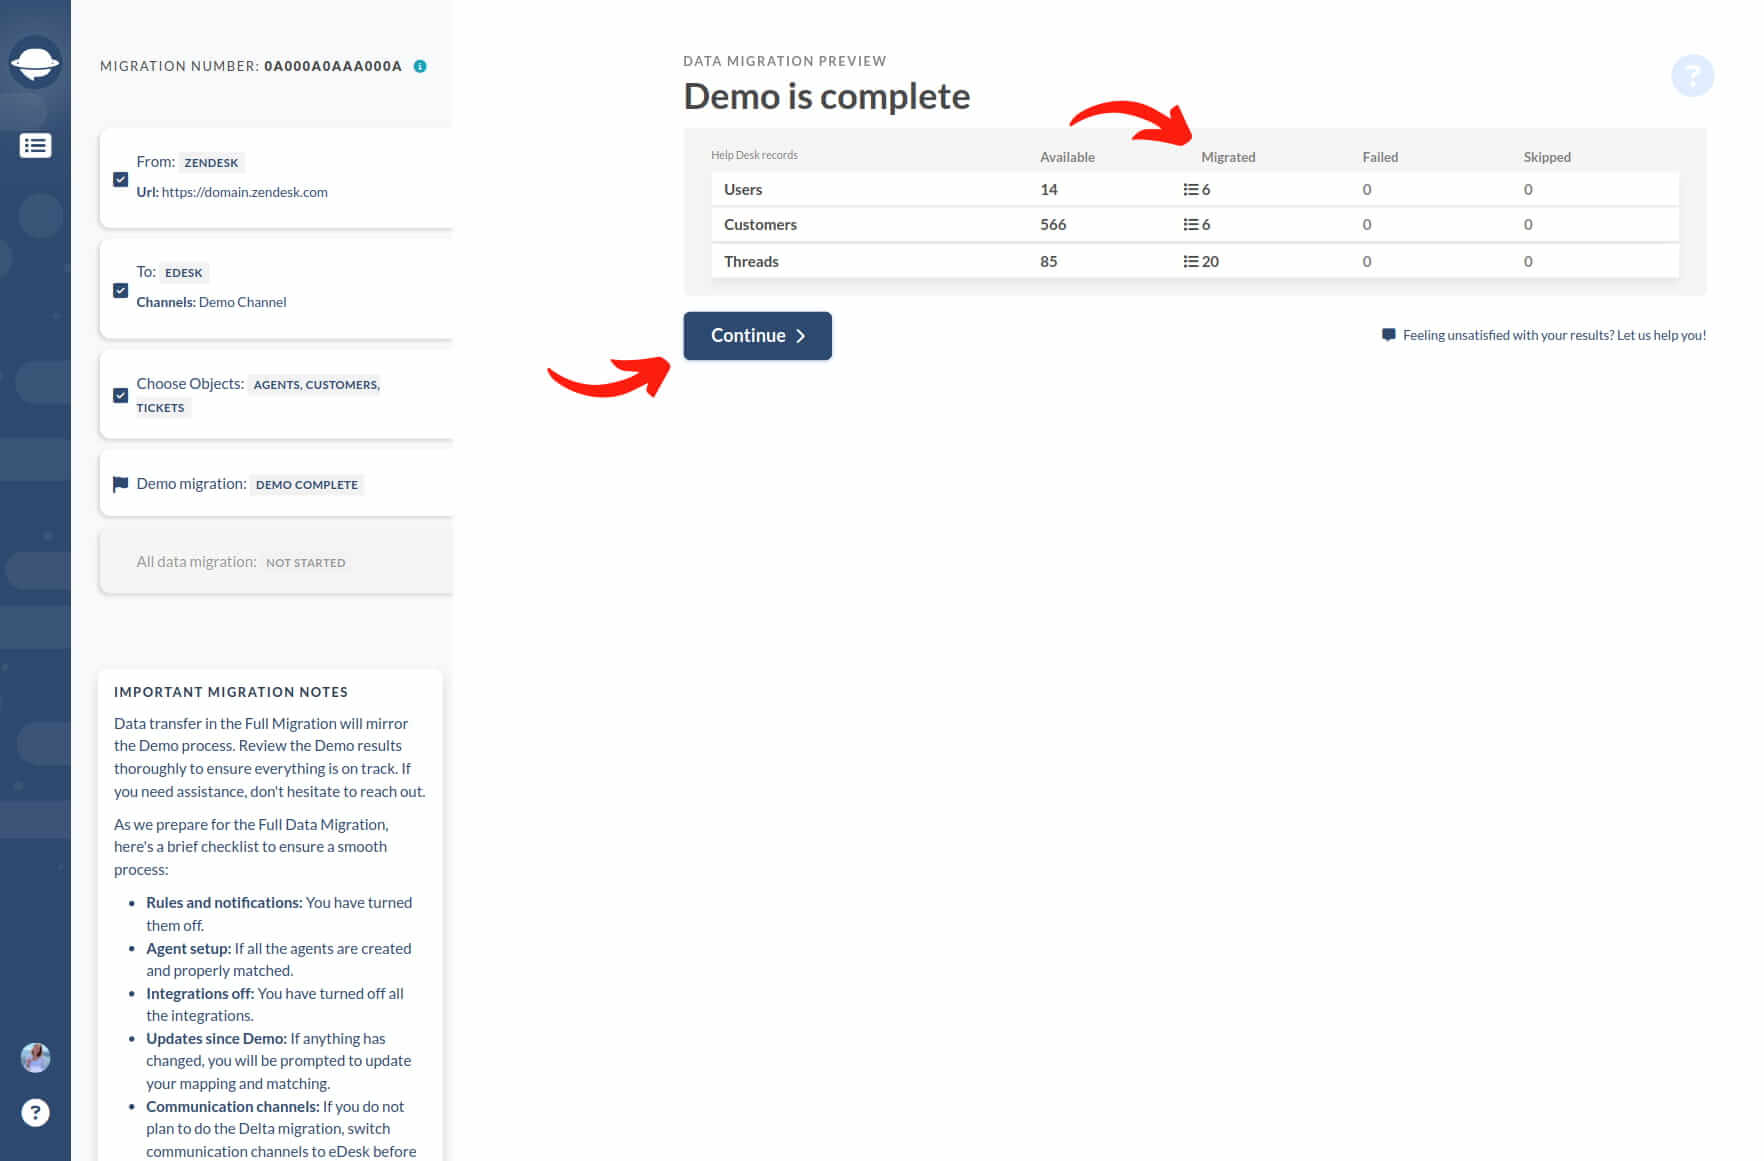
Open each report for migrated, skipped, and failed records and verify each by checking IDs on the Source platform and eDesk.
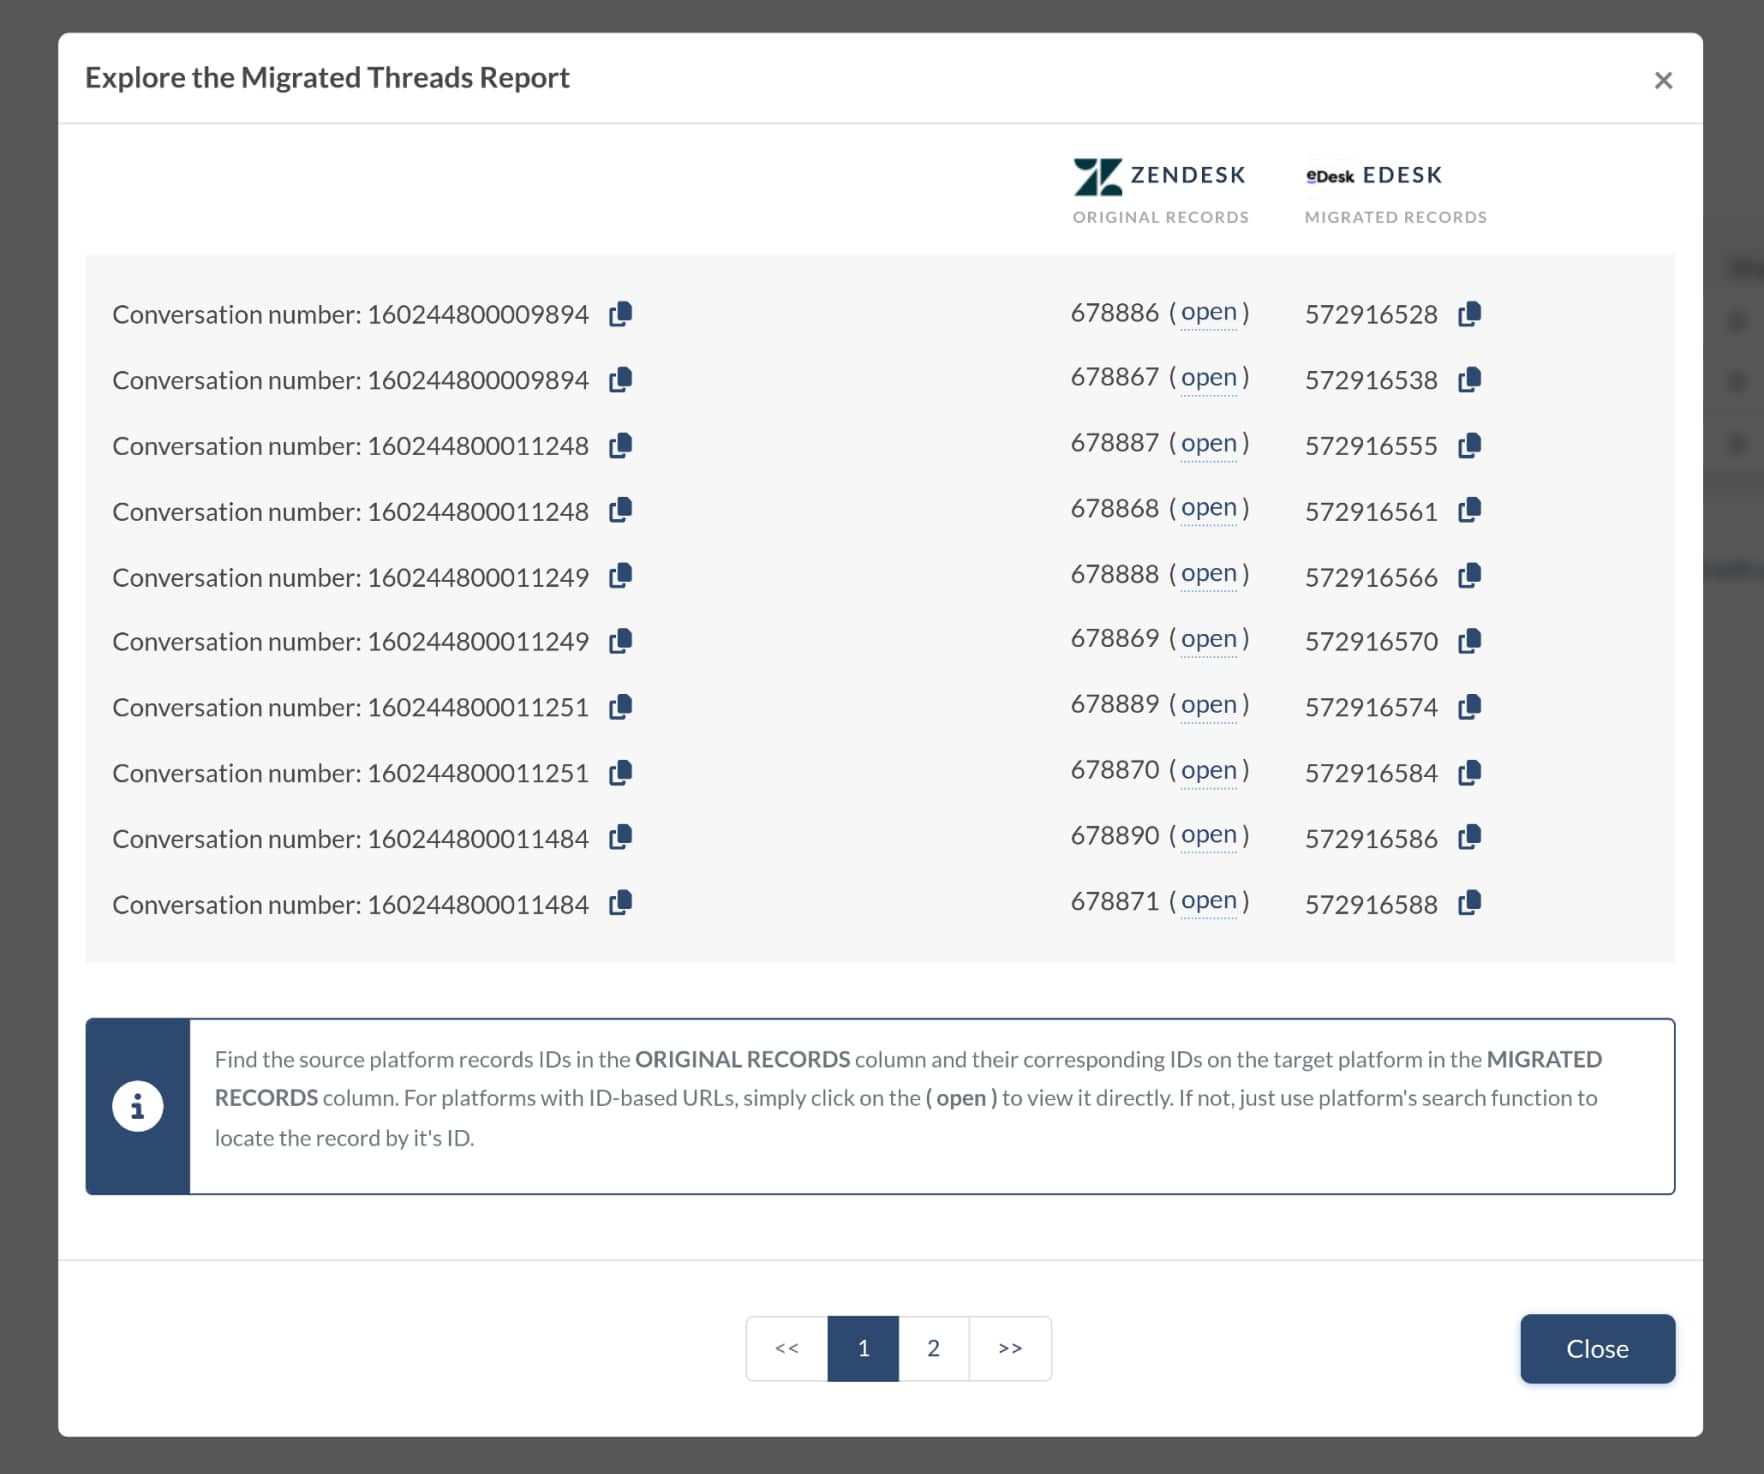
What to Look for When Checking Migrated Records
- All comments were transferred, and if the comment authors are the same.
- Tickets are assigned to the right users.
- Contacts migrated accurately.
- Attachments moved as expected.
- The automation rules didn't alter any Demo data.
Managing Suspended Demos
If your Demo migration gets suspended, be patient and let our support team assist you in resolving the issue. Make sure you have granted our support team access to your eDesk transfer.

If you see any failed reports, check the record IDs to find out what went wrong. If you can, fix the problem, check the 'I've fixed errors' box, and restart the Demo.
Choose Support Package
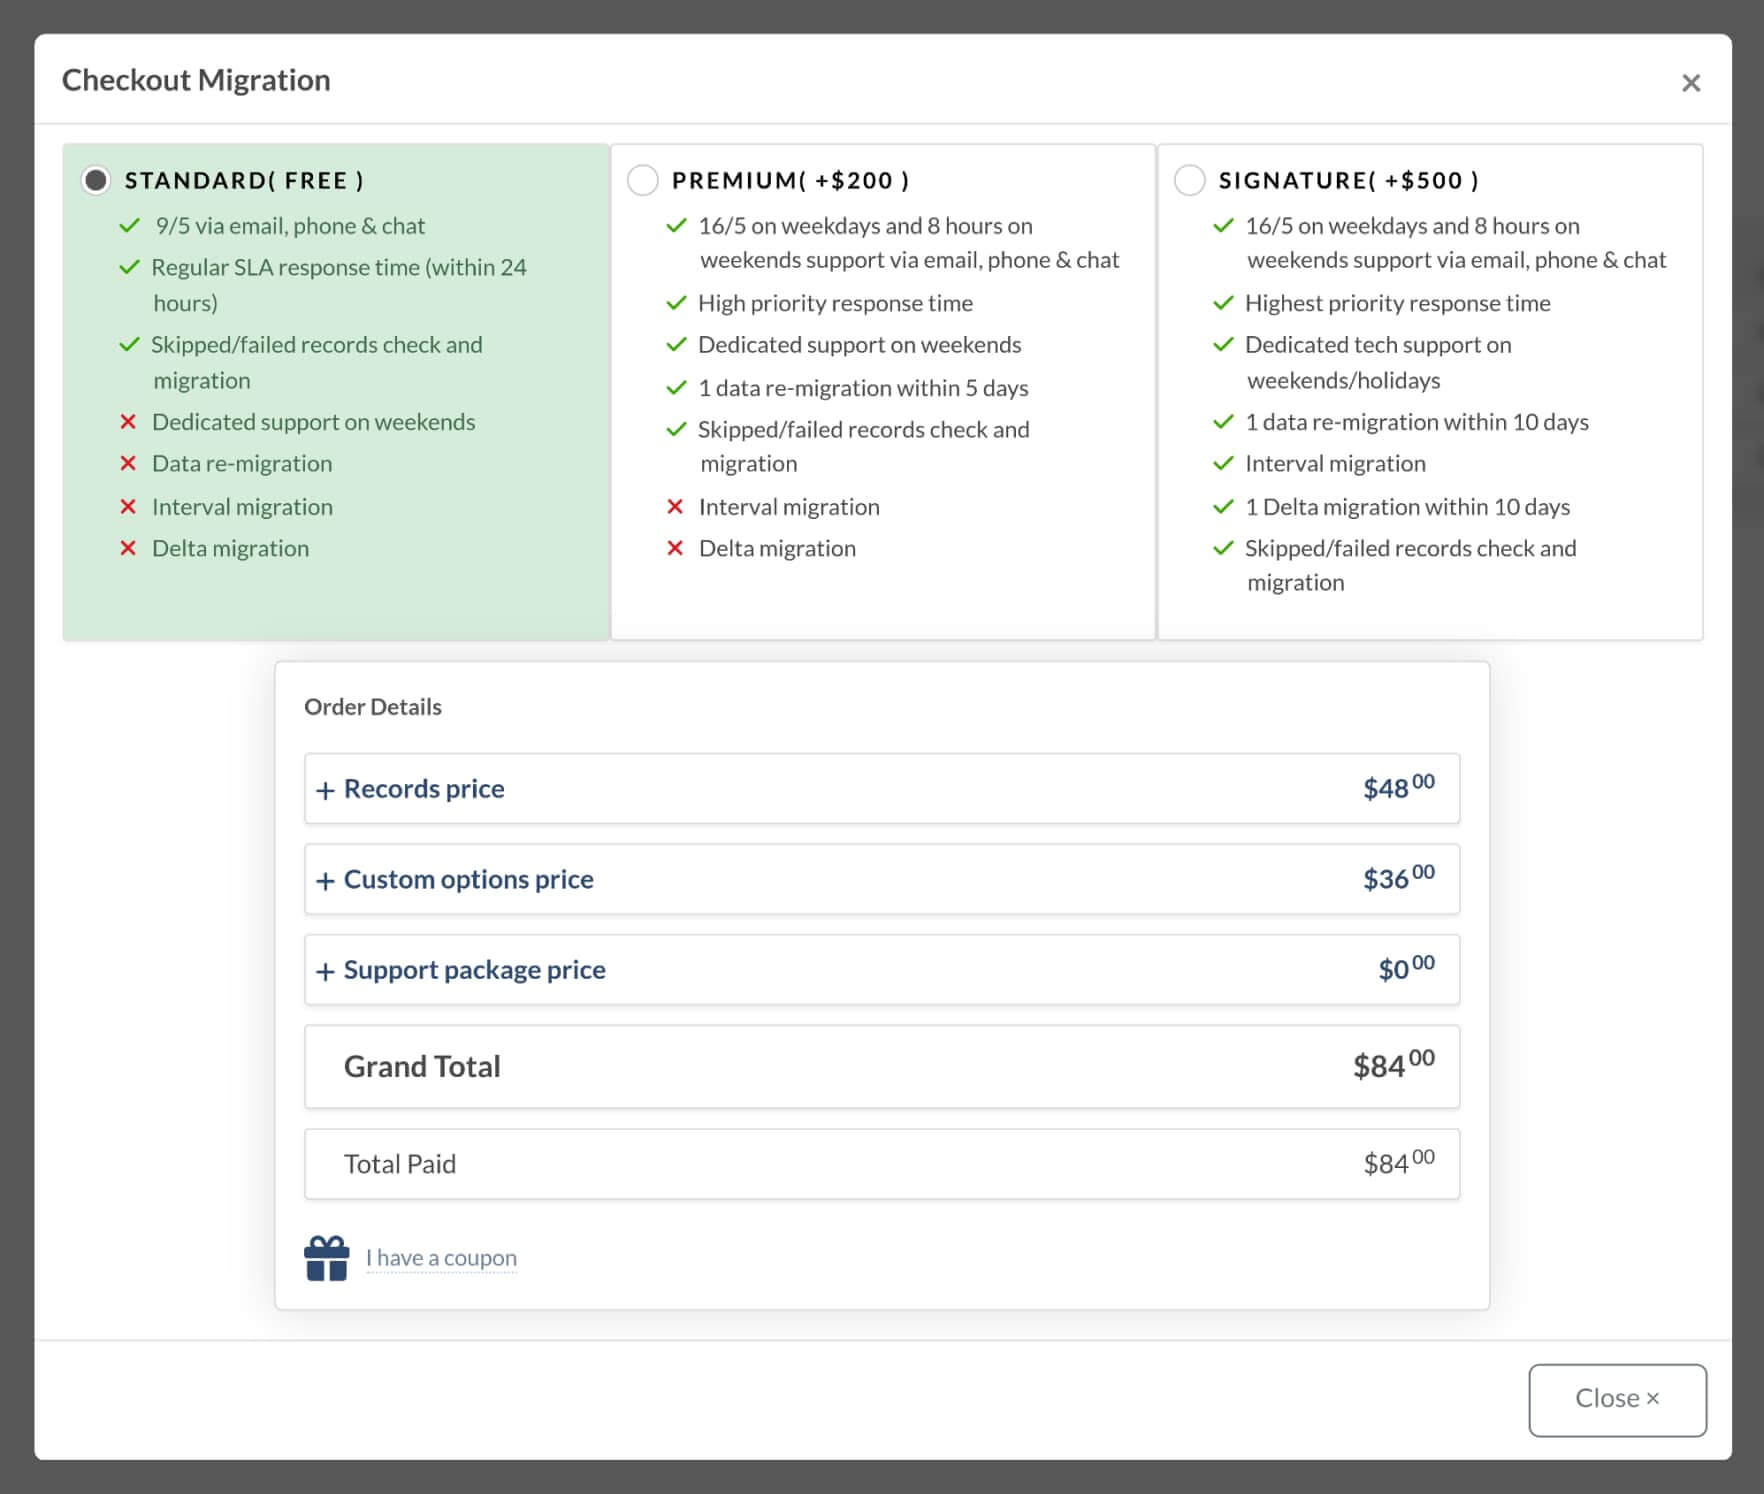
Each data migration process is individual; some data transfers are fine with the basic support, while others need additional features like Delta, data re-migration, or Interval migration. Select the support plan that fits your needs when moving to eDesk.

Check more details about the additional features available in Premium or/and Signature plans:
Data re-migration:
Move your data again within 10 days after the Full Migration.
Pause migration during the workweek and resume on weekends or a schedule that suits you.
Update or add tickets and articles created after the Full Migration. Be cautious of potential duplicates if you continue working on the source platform.
Skipped/Failed records Check: Useful for a thorough custom migration.
Price Breakdown and Payment
Look at the detailed price breakdown for a clear explanation of Full Migration cost.
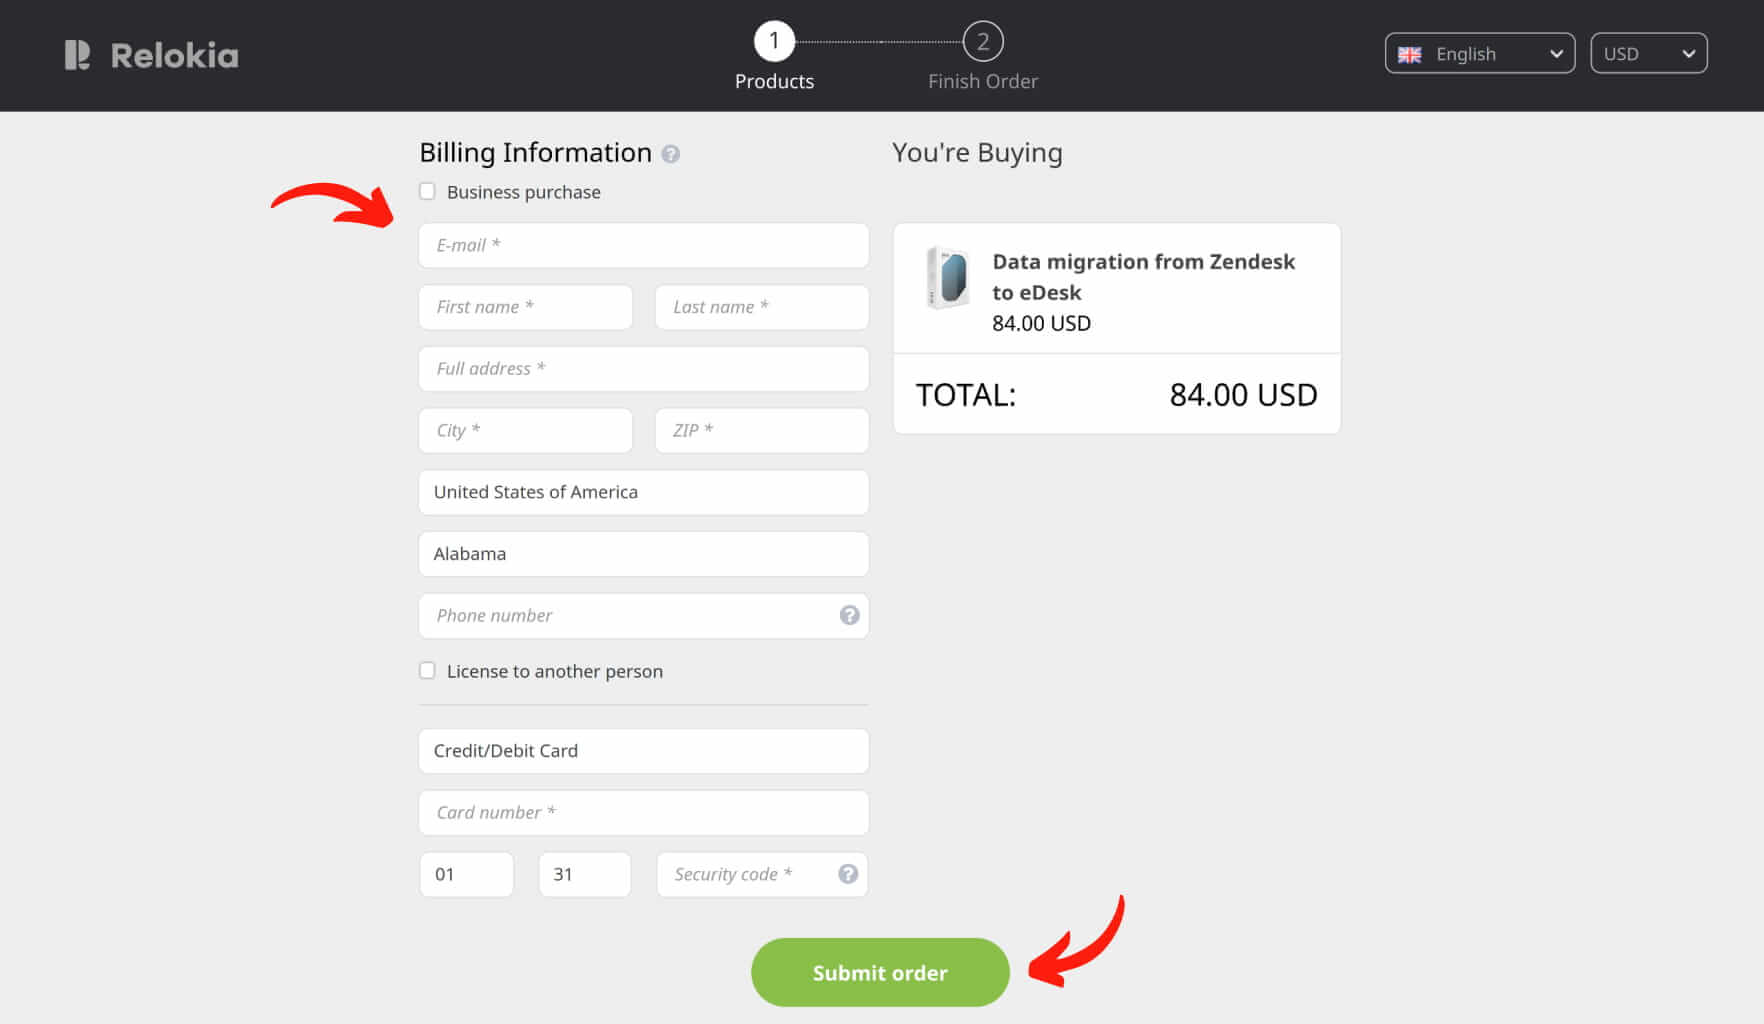
When you're set, enter your billing details and click ‘Submit order’ to complete the payment.
Grant Access to Your Teammates and Customize the Migration Name
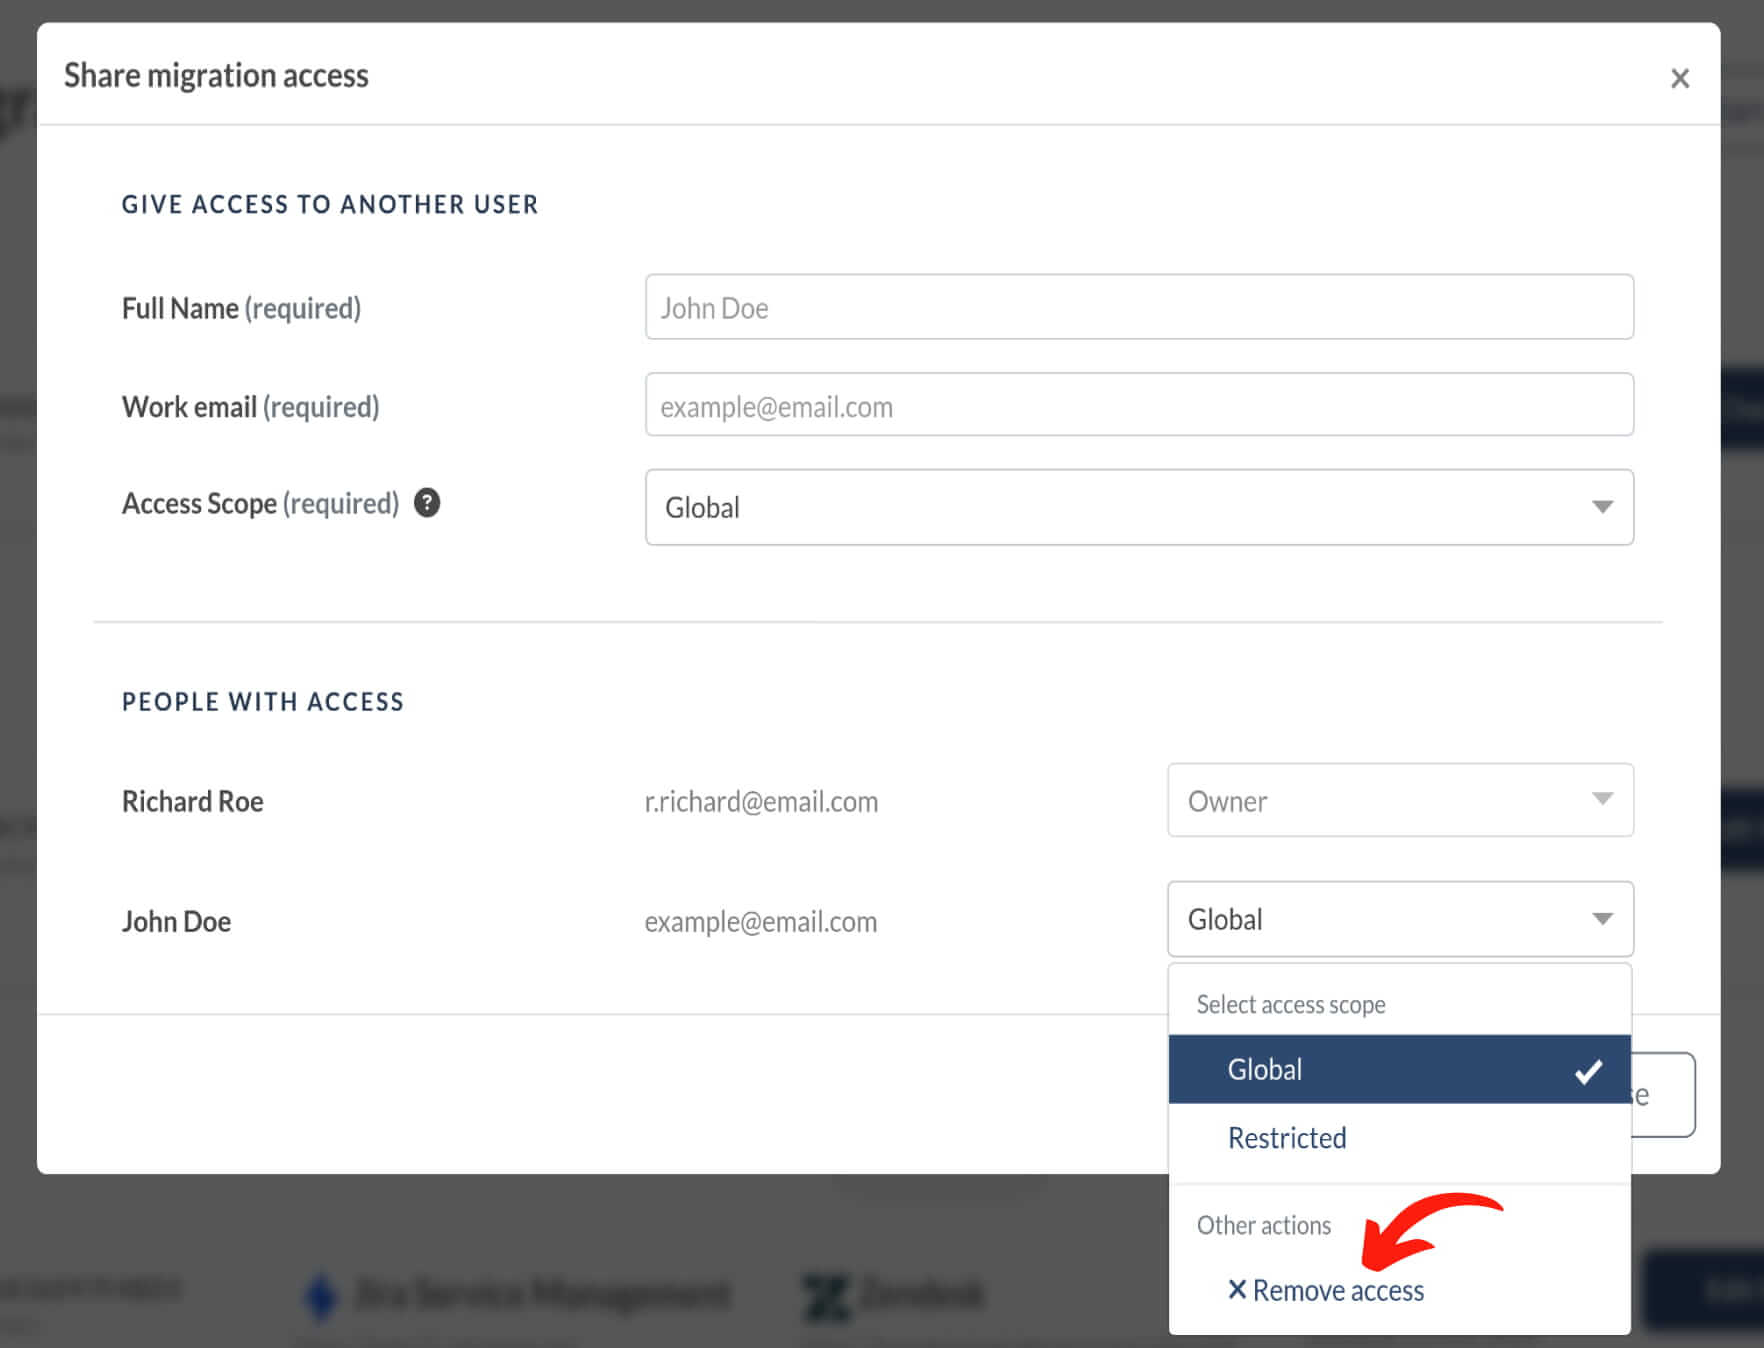
The mapping step can be tricky, so if you need help from a colleague, use the option to share your eDesk migration.
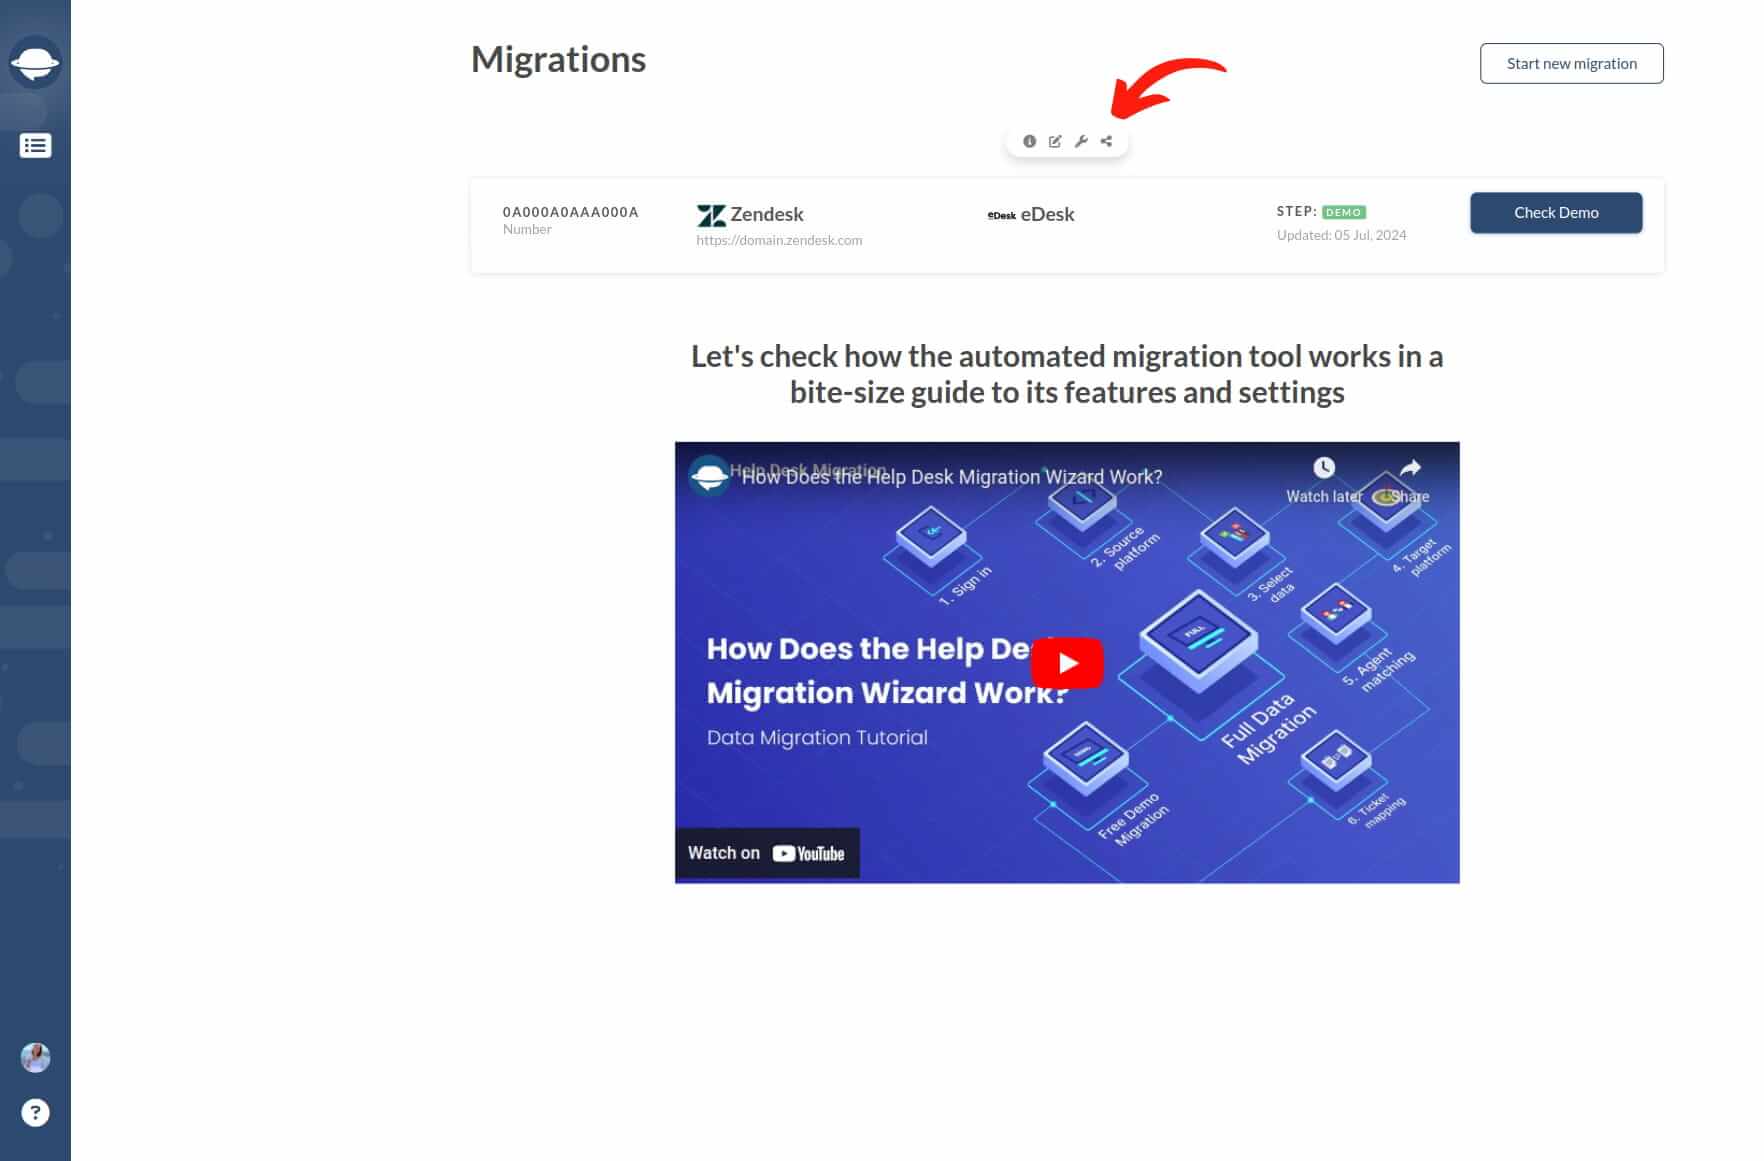
You can control the access level. Give them full or restricted access, or revoke access.
If you have several data migrations, give each one a name for easy recognition.

Start Full Data Migration
Once your payment is confirmed, you'll return to the Migration Wizard. Remember, avoid last-minute changes to keep things smooth.
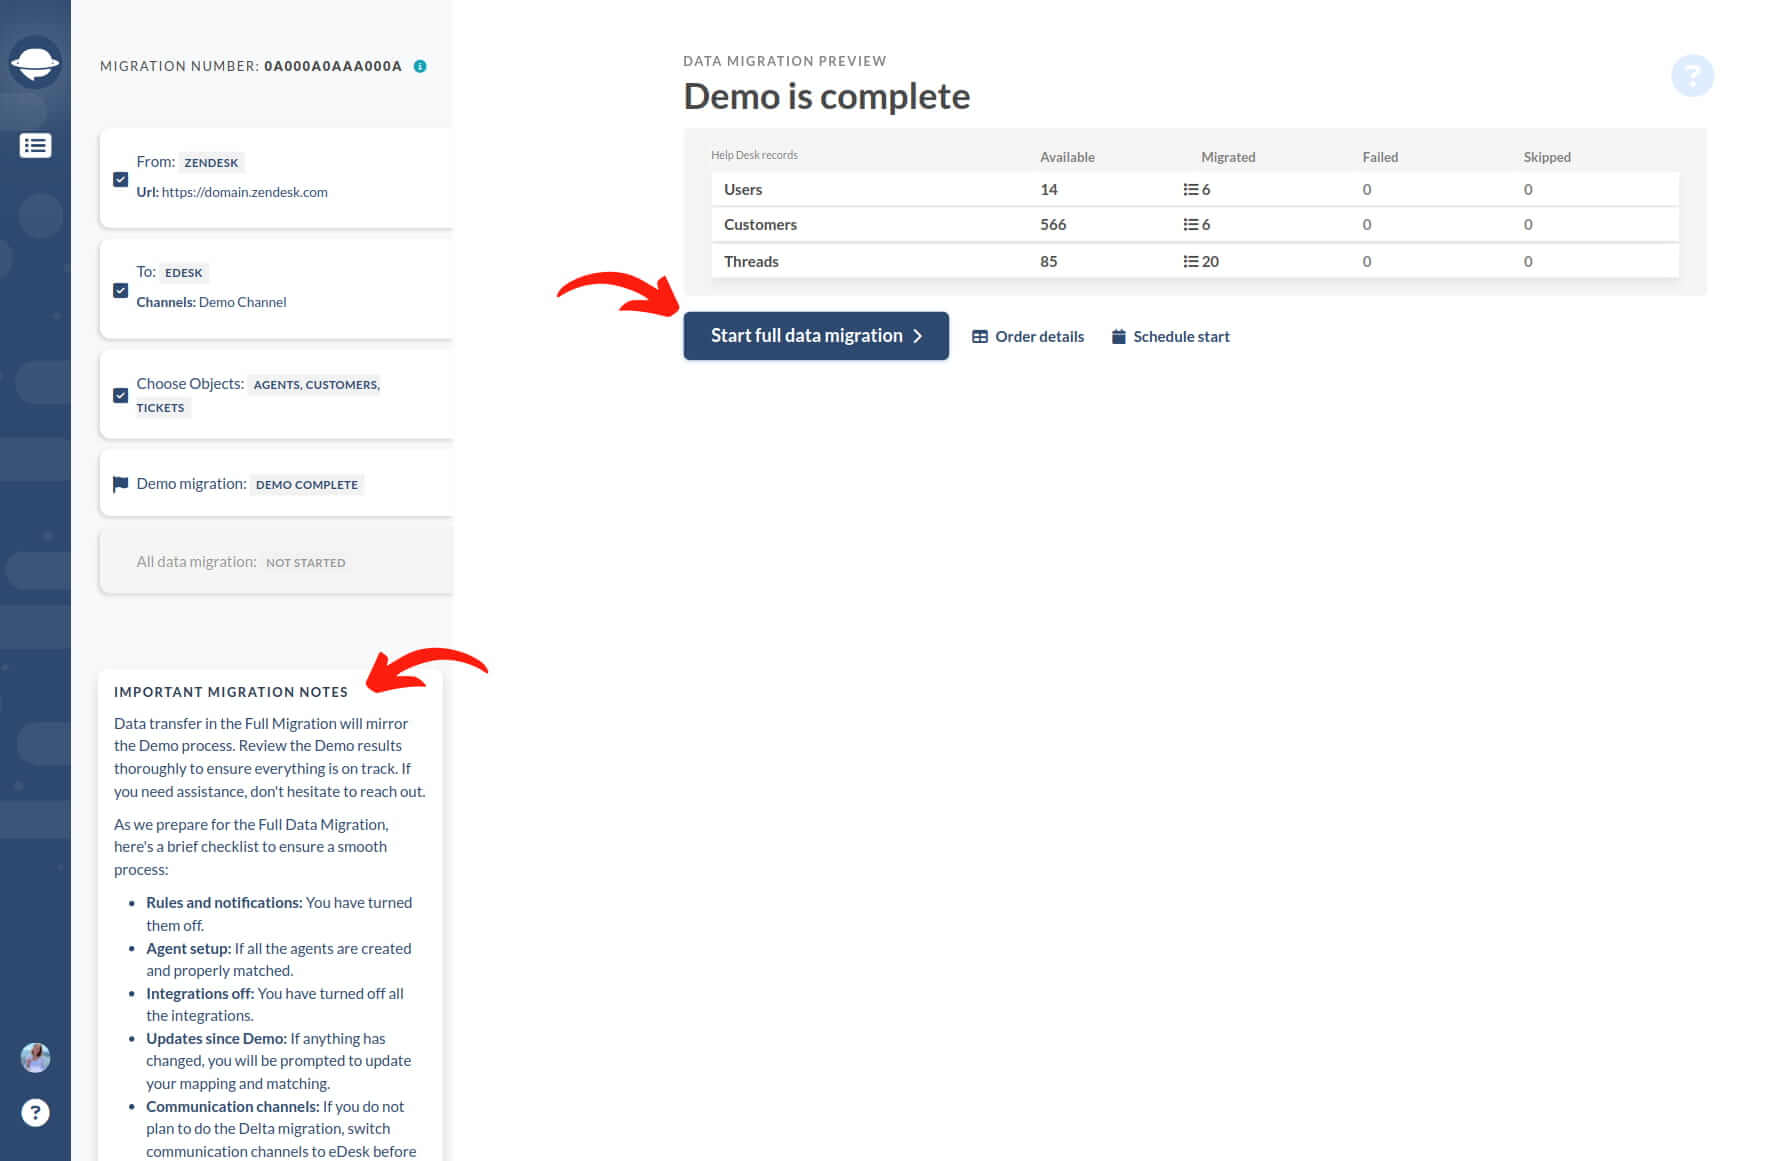
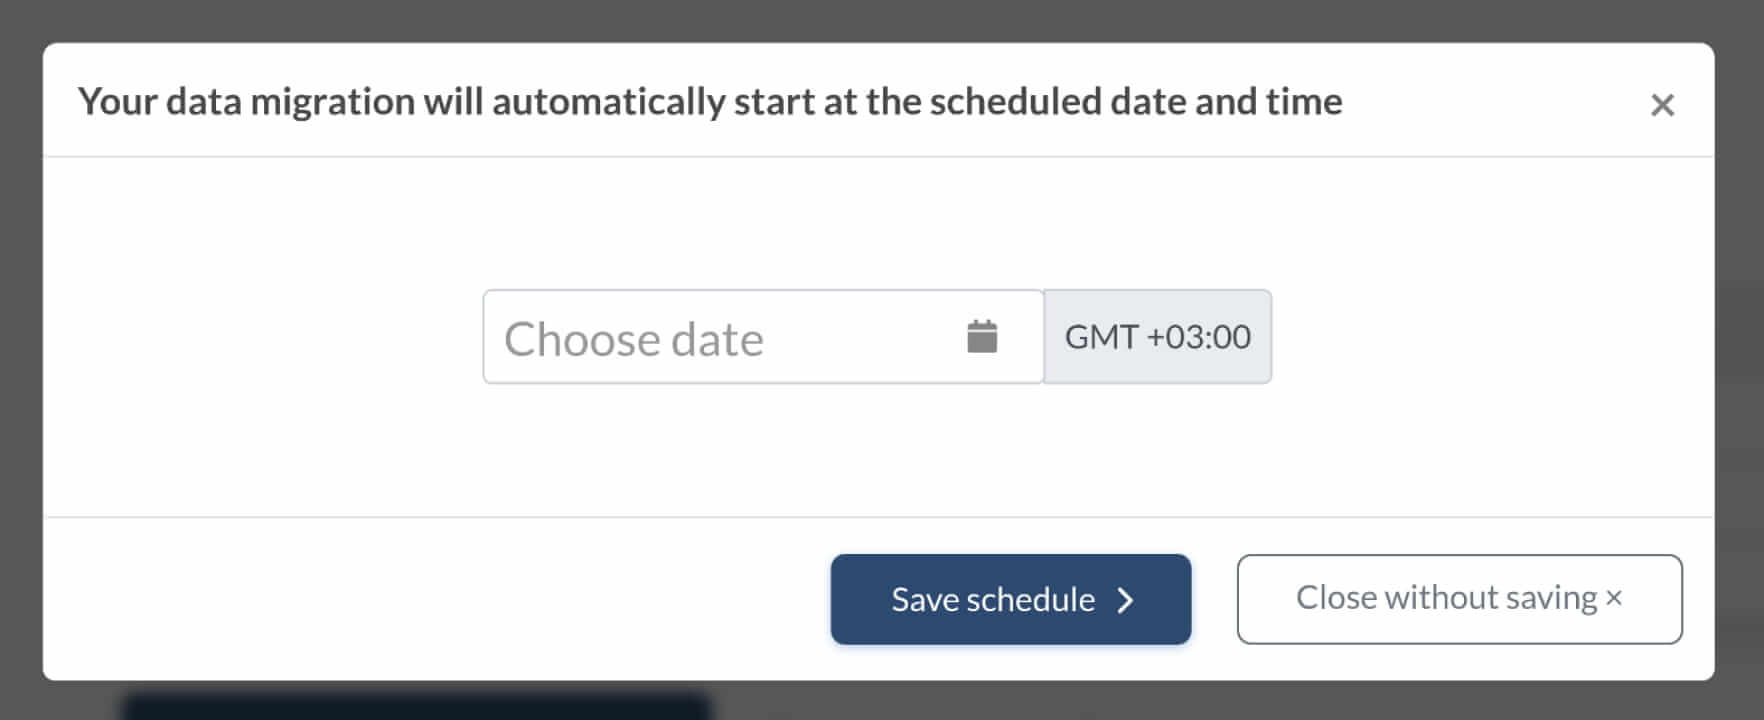
If you're ready to start your Full Migration, go ahead. Or, schedule it for a desired time and click Save schedule.
The data migration time depends on how many records you want to move. Average data transfer goes around 2000 tickets per hour. For a faster data shift, you ask your vendors to increase your API limits. Just give us a heads-up about any changes before starting your Full Data Migration.
If you need help or run into any questions during the data migration process, our support team is here for you. Your smooth eDesk transfer experience matters to us.