Intercom Migration Guides
How to connect Intercom to Migration Wizard?
The process of connecting your Intercom account with the Migration Wizard is pretty straightforward. All you have to do is:
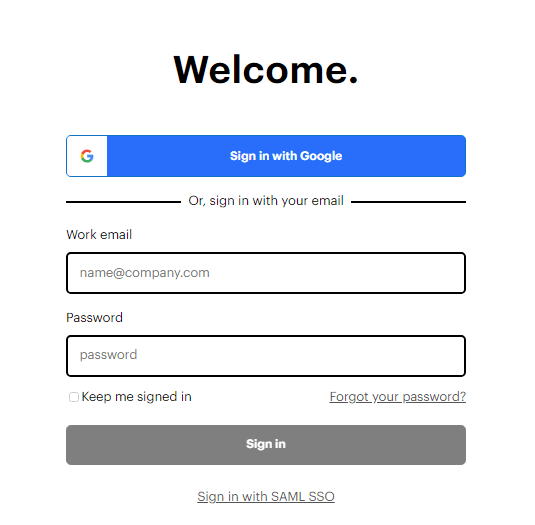
1) Pick Intercom as either your source or target platform. Since we use Open Authorization for Intercom migrations, after clicking Continue, you will be redirected to the Intercom sign-in page.

2) Log in as you usually would, by providing the necessary credentials.
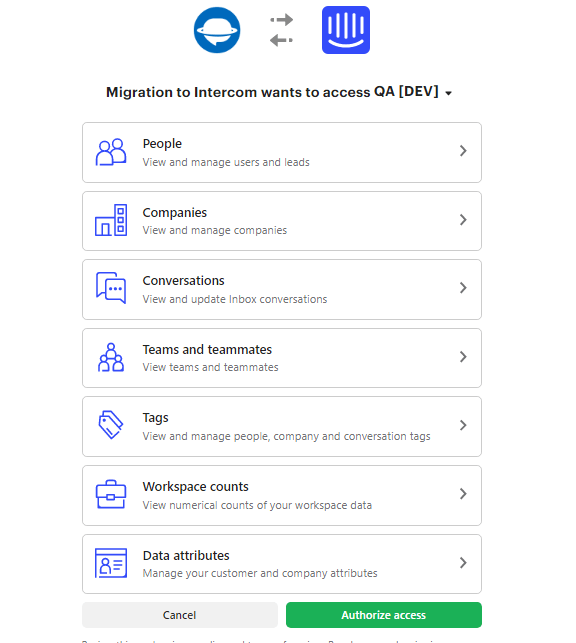
3) Authorize Migration Wizard to access certain records. All of the icons are clickable so you can see what exactly you’re granting access for.
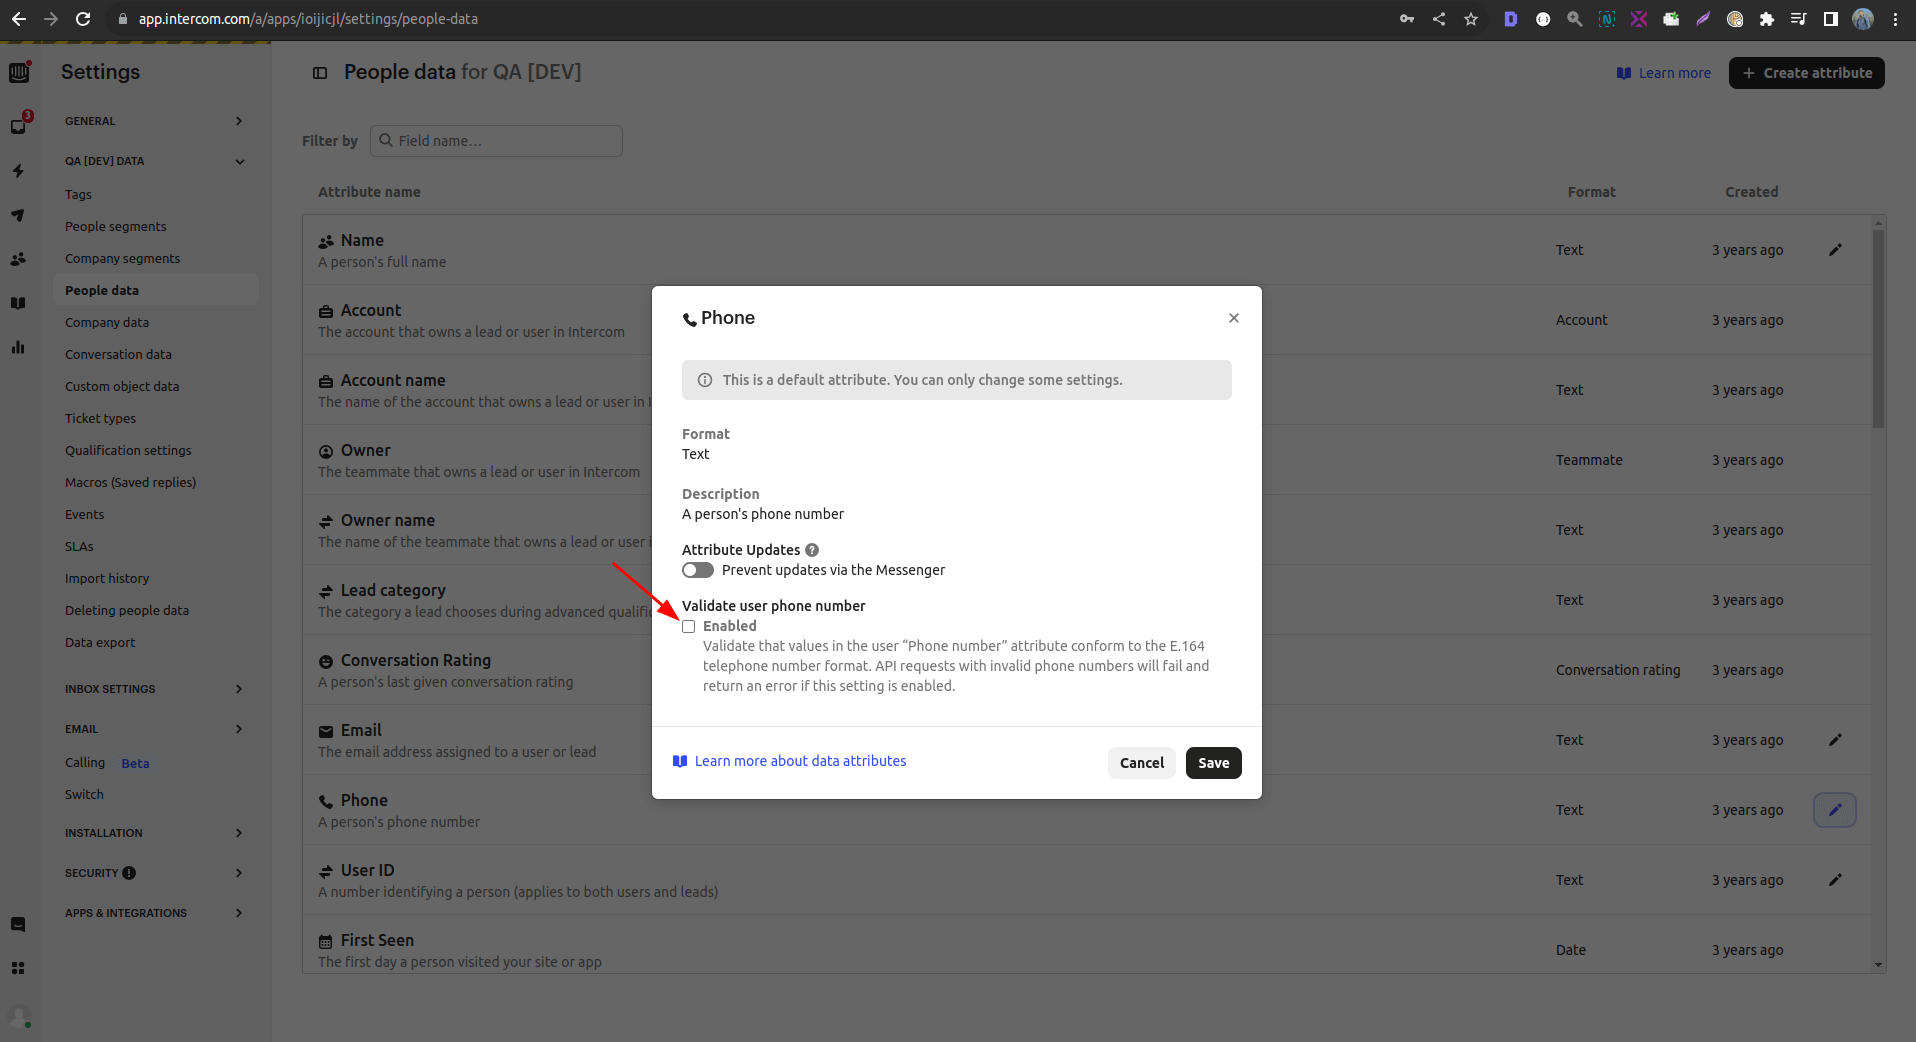
When migrating contacts or agents with phone numbers, should the phone number validation be disabled?
When migrating contacts or agents with phone numbers, please keep in mind that if phone number validation is enabled, the data migration might encounter problems if some of the phone numbers are invalid. To prevent this, consider disabling phone number validation in your workspace settings.
Here's how: Settings > Your Workspace > People Data > Phone.
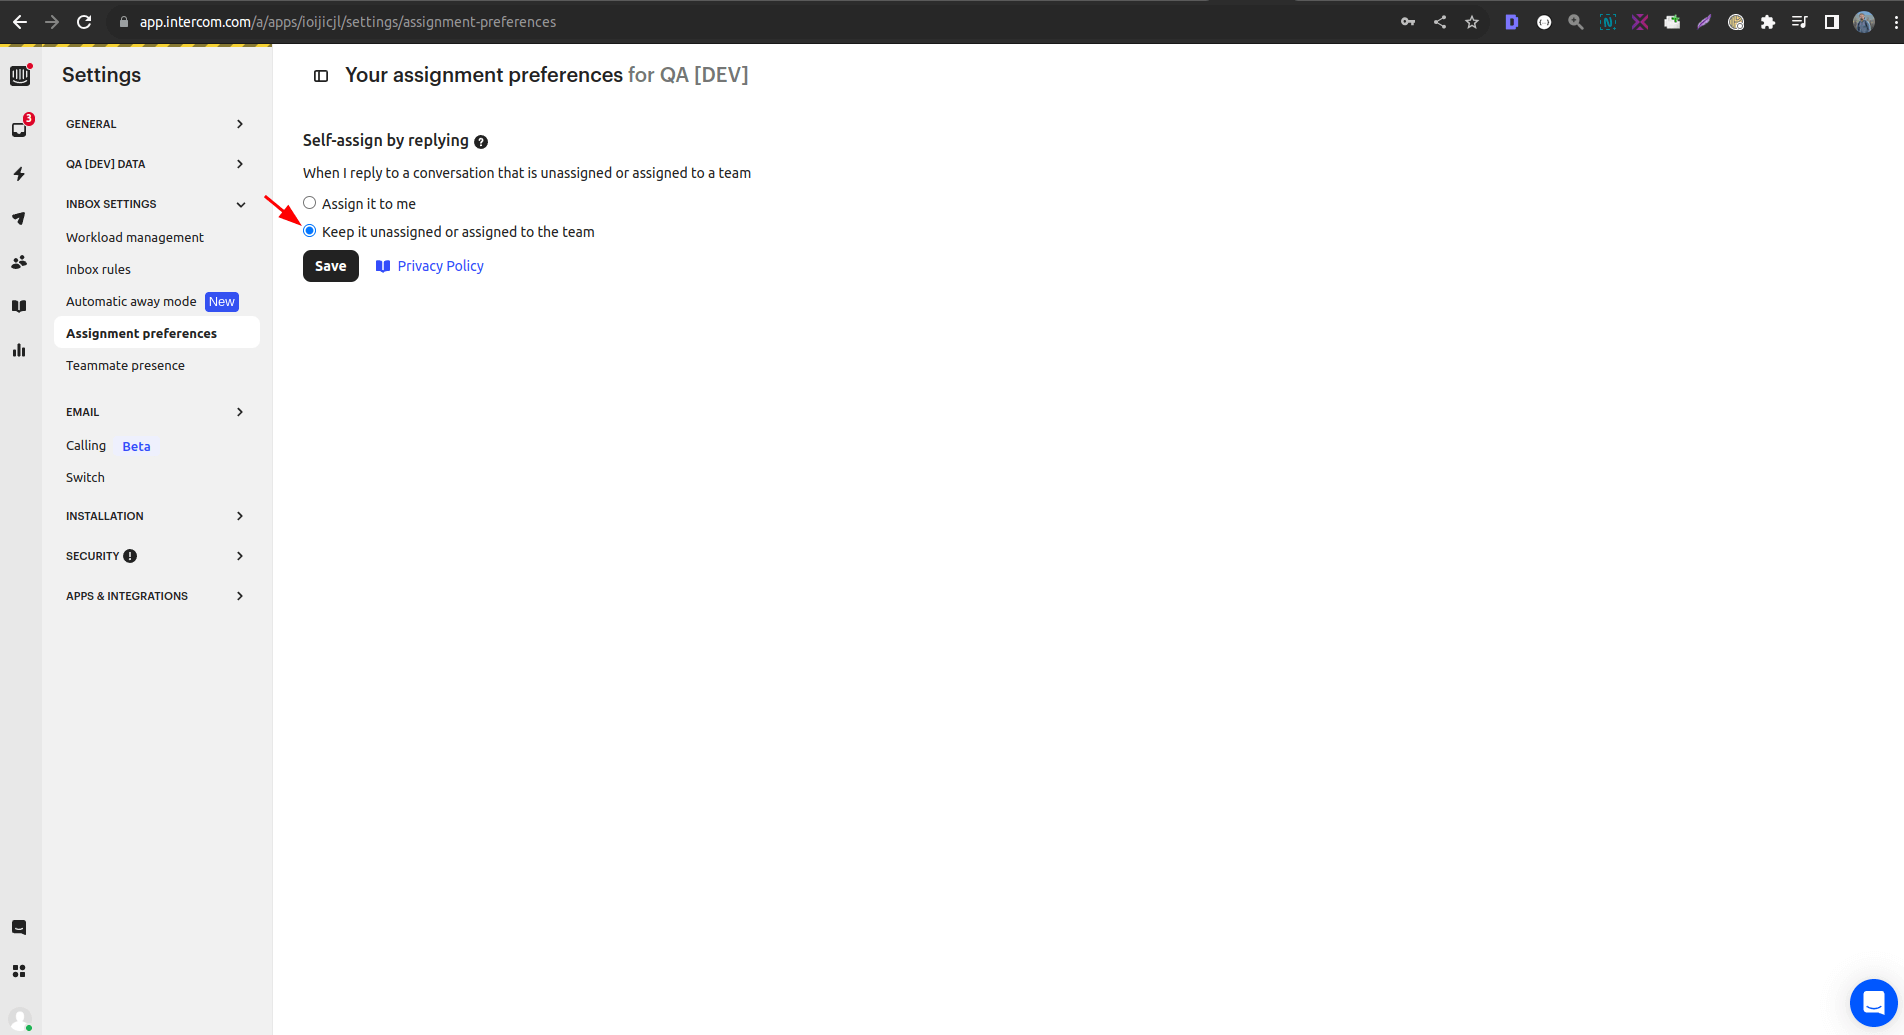
How to ensure a smooth Intercom migration for unassigned tickets?
To ensure a successful migration of tickets without assigned agents, it's essential to enable default assignment settings. Here's how to do it: Setting > Inbox Settings > Assignment Preferences, and then choose "Keep it unassigned or assigned to the team."
What dates are migrated during the Intercom data migration?
The migration process includes migrating both the ticket creation date (Created_at and Updated_at) and comment dates (Created_at).
Can support agents disable notifications individually?
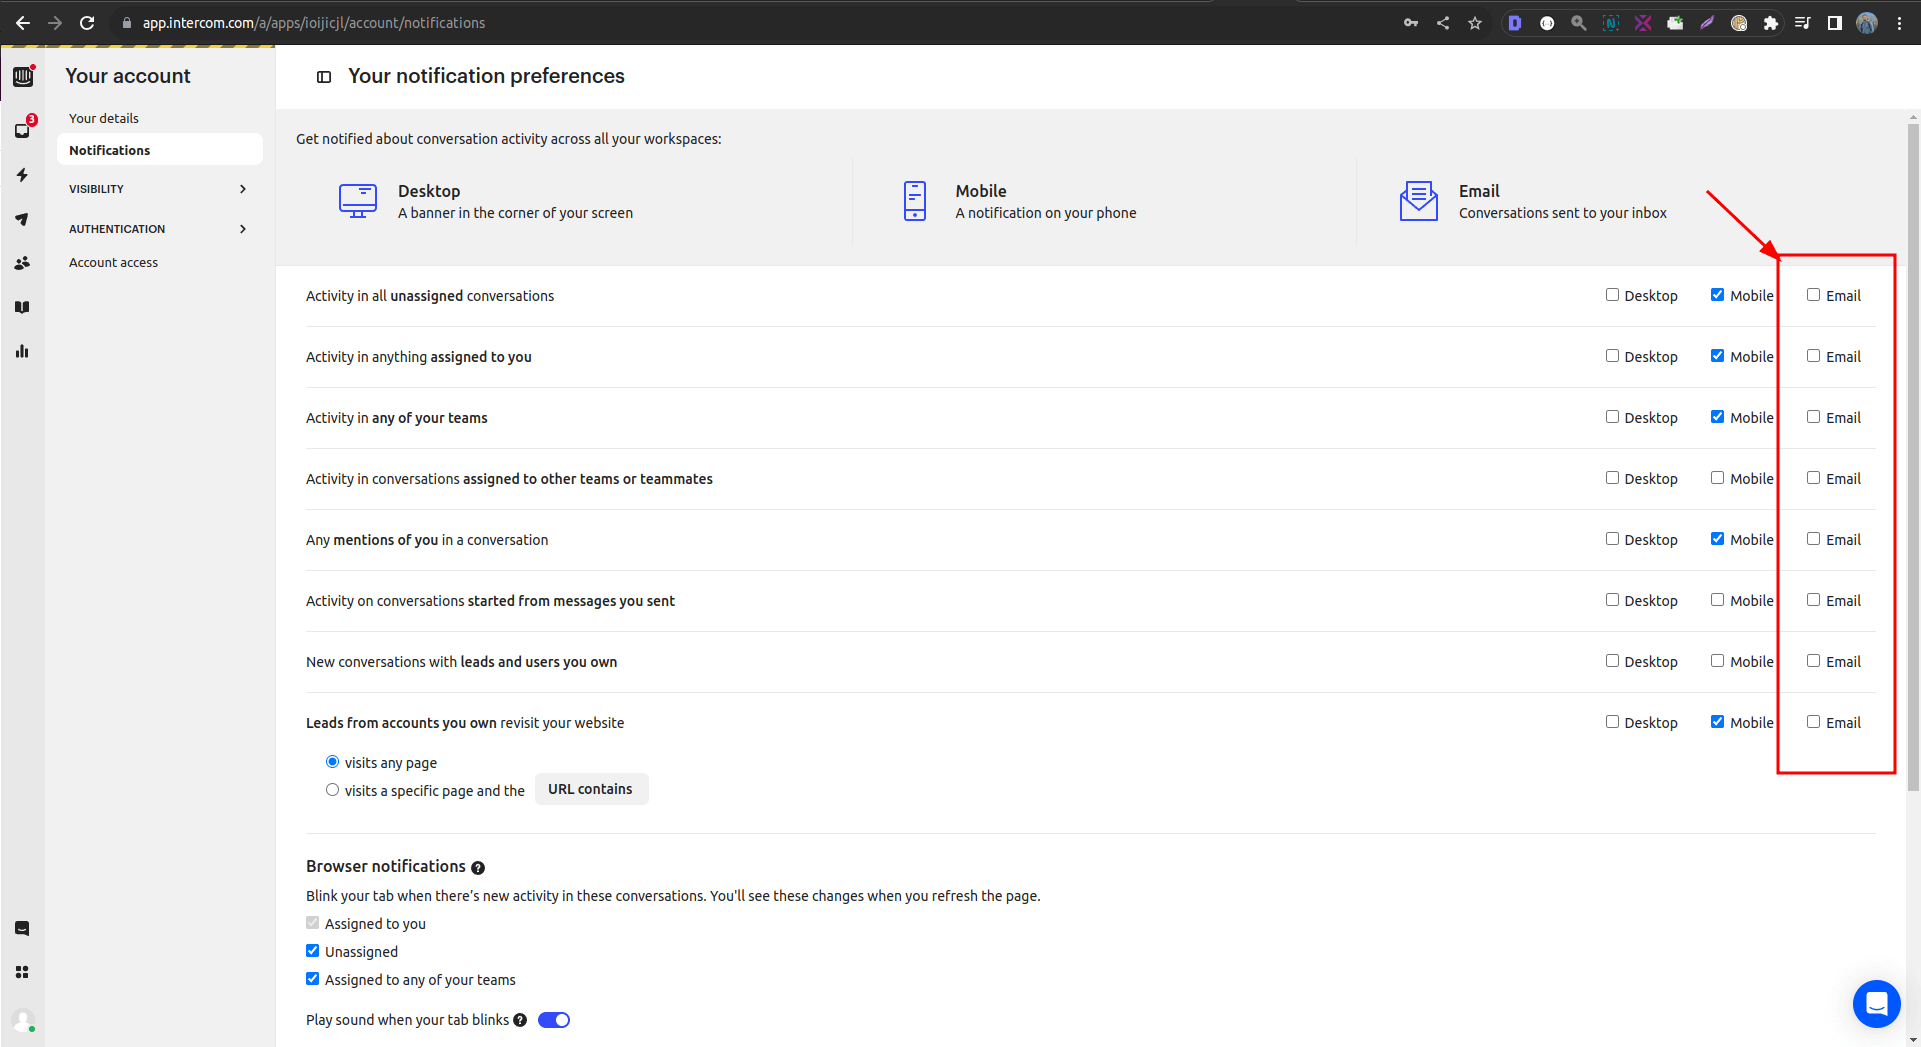
Yes, your support agents can customize their notification settings individually. To do this, visit Your Account > Notifications.
Why disable campaigns during Intercom migration?
Intercom operates under an API limit, which regulates the number of requests processed over time. Automated email campaigns contribute to this limit, potentially slowing down data migration processes.
To ensure smooth migration, it's advisable to disable active automated email campaigns before initiating the data migration process. Here's how:
1. Log in to your Intercom account.
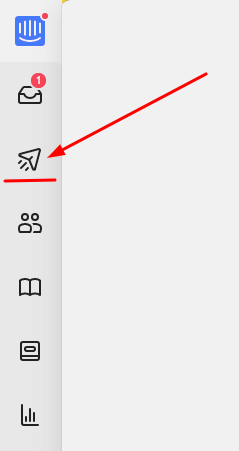
2. Click on Outbound.
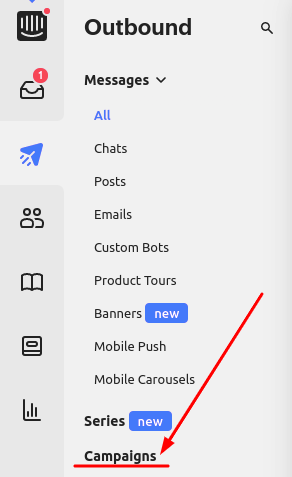
3. Go to Campaigns in the Outbound section.
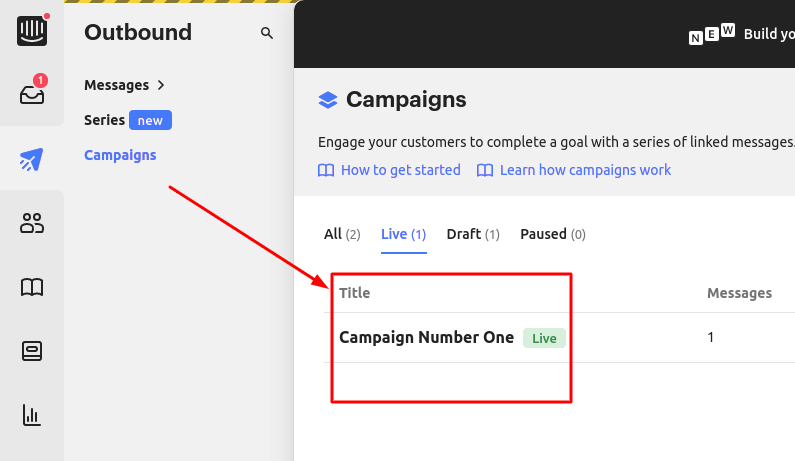
4. Choose a campaign you would like to disable from the list of your active campaigns.
5. Now, click on the “Pause campaign” button.

Repeat this process for all campaigns to disable them effectively. With your automated email campaigns disabled, you can proceed with your migration from Intercom without affecting the API limit.
How to export knowledge base data from Intercom?
Exporting Knowledge Base articles from Intercom may present challenges with organizing the database hierarchy, particularly regarding the three-level structure of articles – Category; Folder; Article (known as Collection; Section; Article in Intercom).
It's worth noting that in Intercom, it's possible to create an article without a section, leading to a simplified structure of Collection > Article. While seemingly innocuous, this structure can cause unexpected shifts in the hierarchy when exporting Knowledge Base data to a target help desk.
Most other help desk systems support only a three-level hierarchy. Therefore, to ensure a successful migration, the Migration Wizard will automatically assign articles to the default folder and category if it doesn't find them in the hierarchy. Consequently, articles attached to categories without folders will adopt the following hierarchy - Source Default Category; Source Default Folder; Article.
Please note: 'Source Default Category' and 'Source Default Folder' are simply names we use to denote the category and folder created to facilitate migration.
To mitigate these issues, we recommend checking if your articles in Intercom adhere to a three-level database hierarchy. If not, ensure to assign the necessary section within the existing collection. Otherwise, post-migration, manual assignment of articles to the appropriate folders and categories will be necessary.
By default, Migration Wizard exports your Intercom articles in a default language. Yet, you have the option to import language variations to specific destination platforms. To enable this, make sure to select "Migrate content translations" when mapping your data.
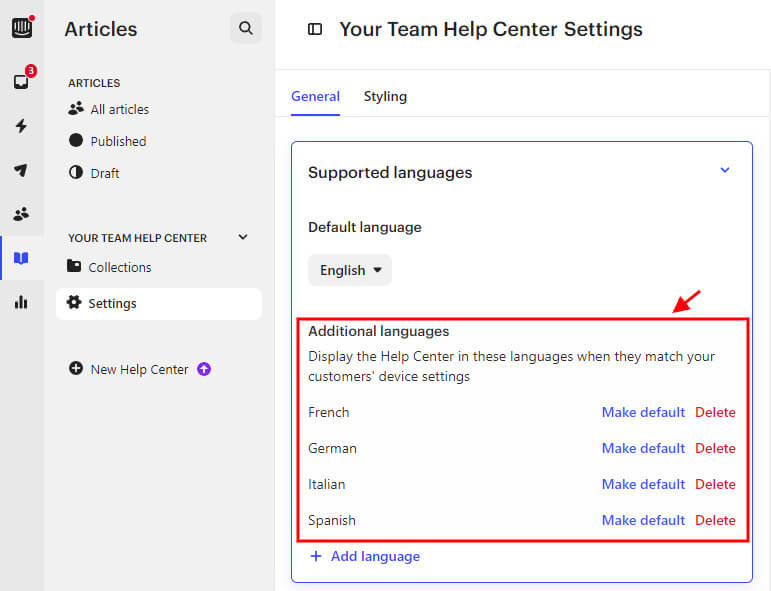
Here’s how to set up a Intercom export including language versions:
1. Choose Intercom as your source platform. Then sign in with your account.
2. Select your target platform and fill in the required access credentials.
3. Set up data mapping, including agent and group matching, field mapping from organizations, customers, tickets, and articles.
4. Check to activate Migrate content translations.
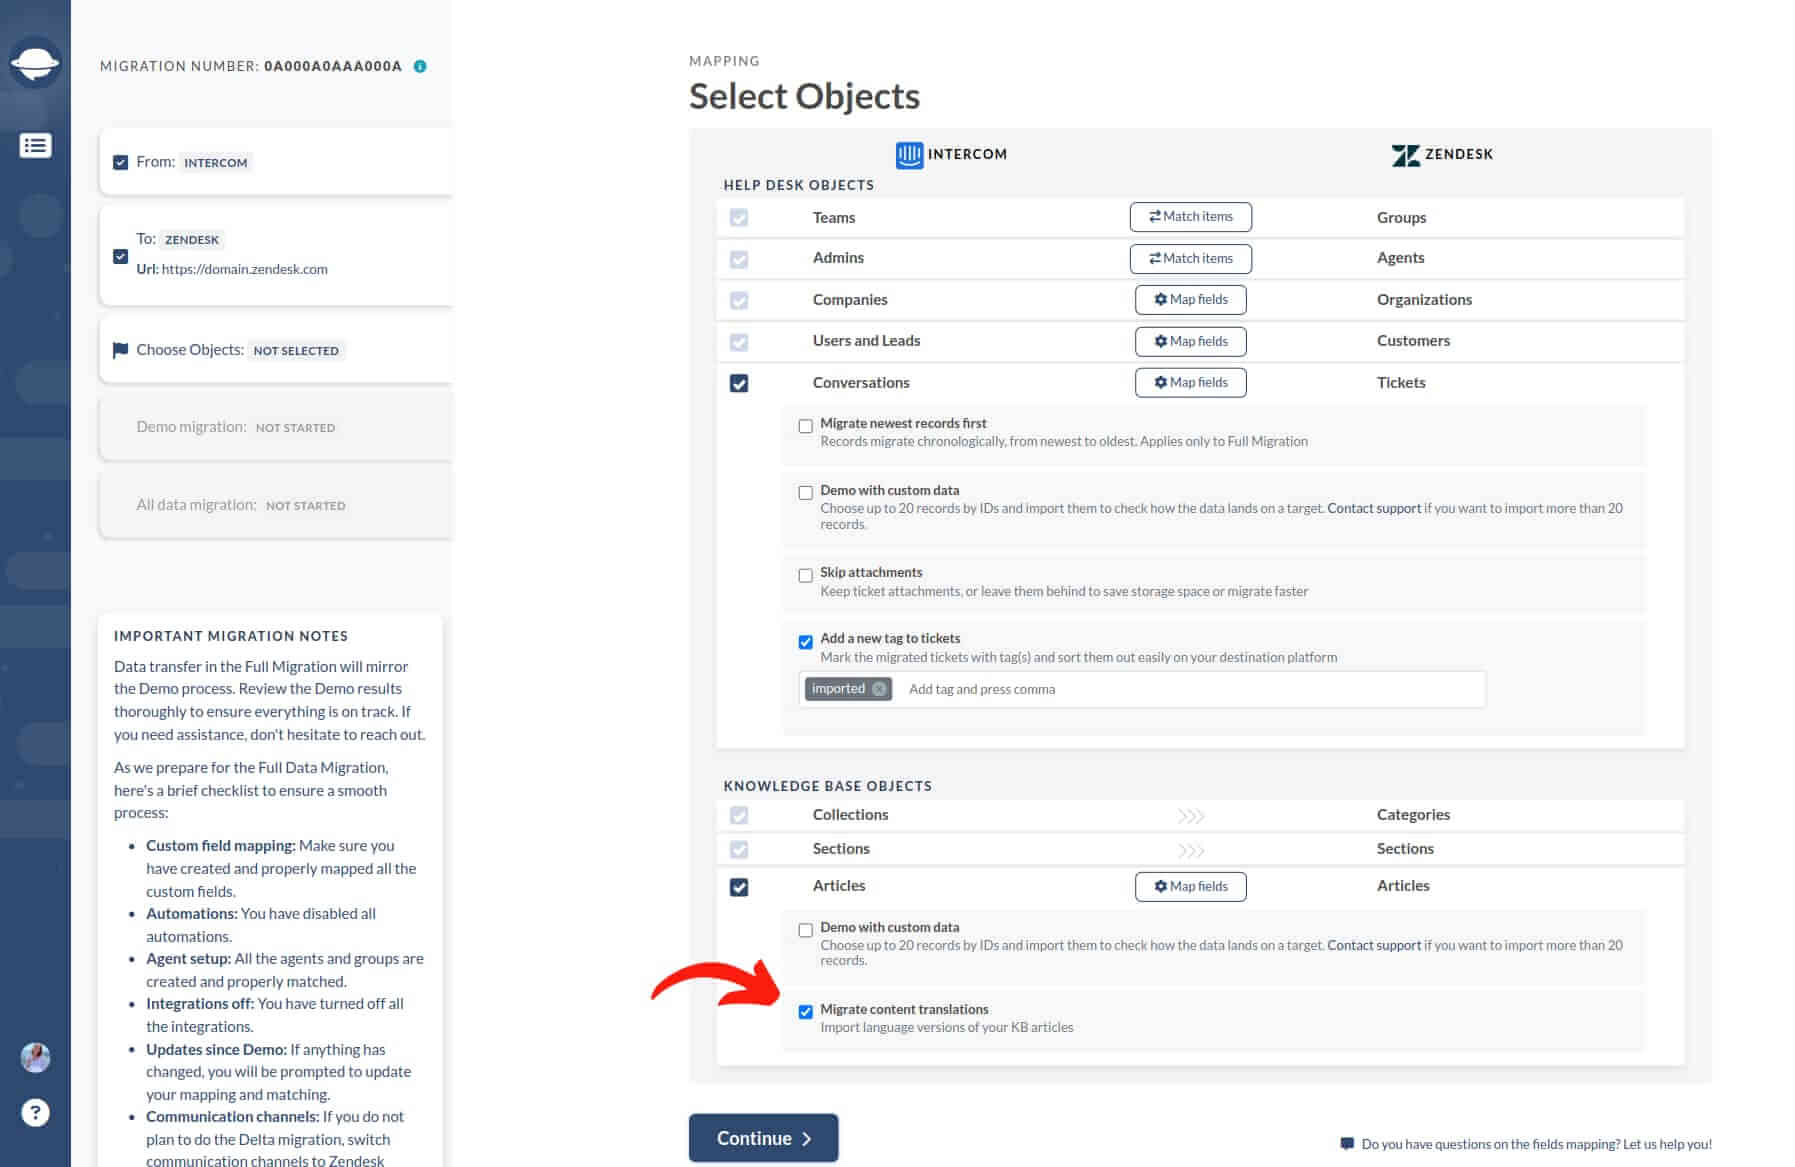
5. Initiate a Free Demo to test-drive how the feature works.
6. After the Demo Migration, check your content translations on the target platform.
How to get Intercom API access token?
In the past, you needed an Intercom API access token to connect your platform with a third-party app like Help Desk Migration service. However, Intercom does not support API tokens anymore. Instead, you need to use open Authorization (OAuth).
How to Undergo OAuth Authorization
OAuth lets you choose a specific Workspace on your account where to import all tickets and articles.
Here’s how to connect your Intercom account with OAuth.*
1. Click Sign in with Intercom.

2. In a new page, fill in your work email and password. Then click on Sign in.
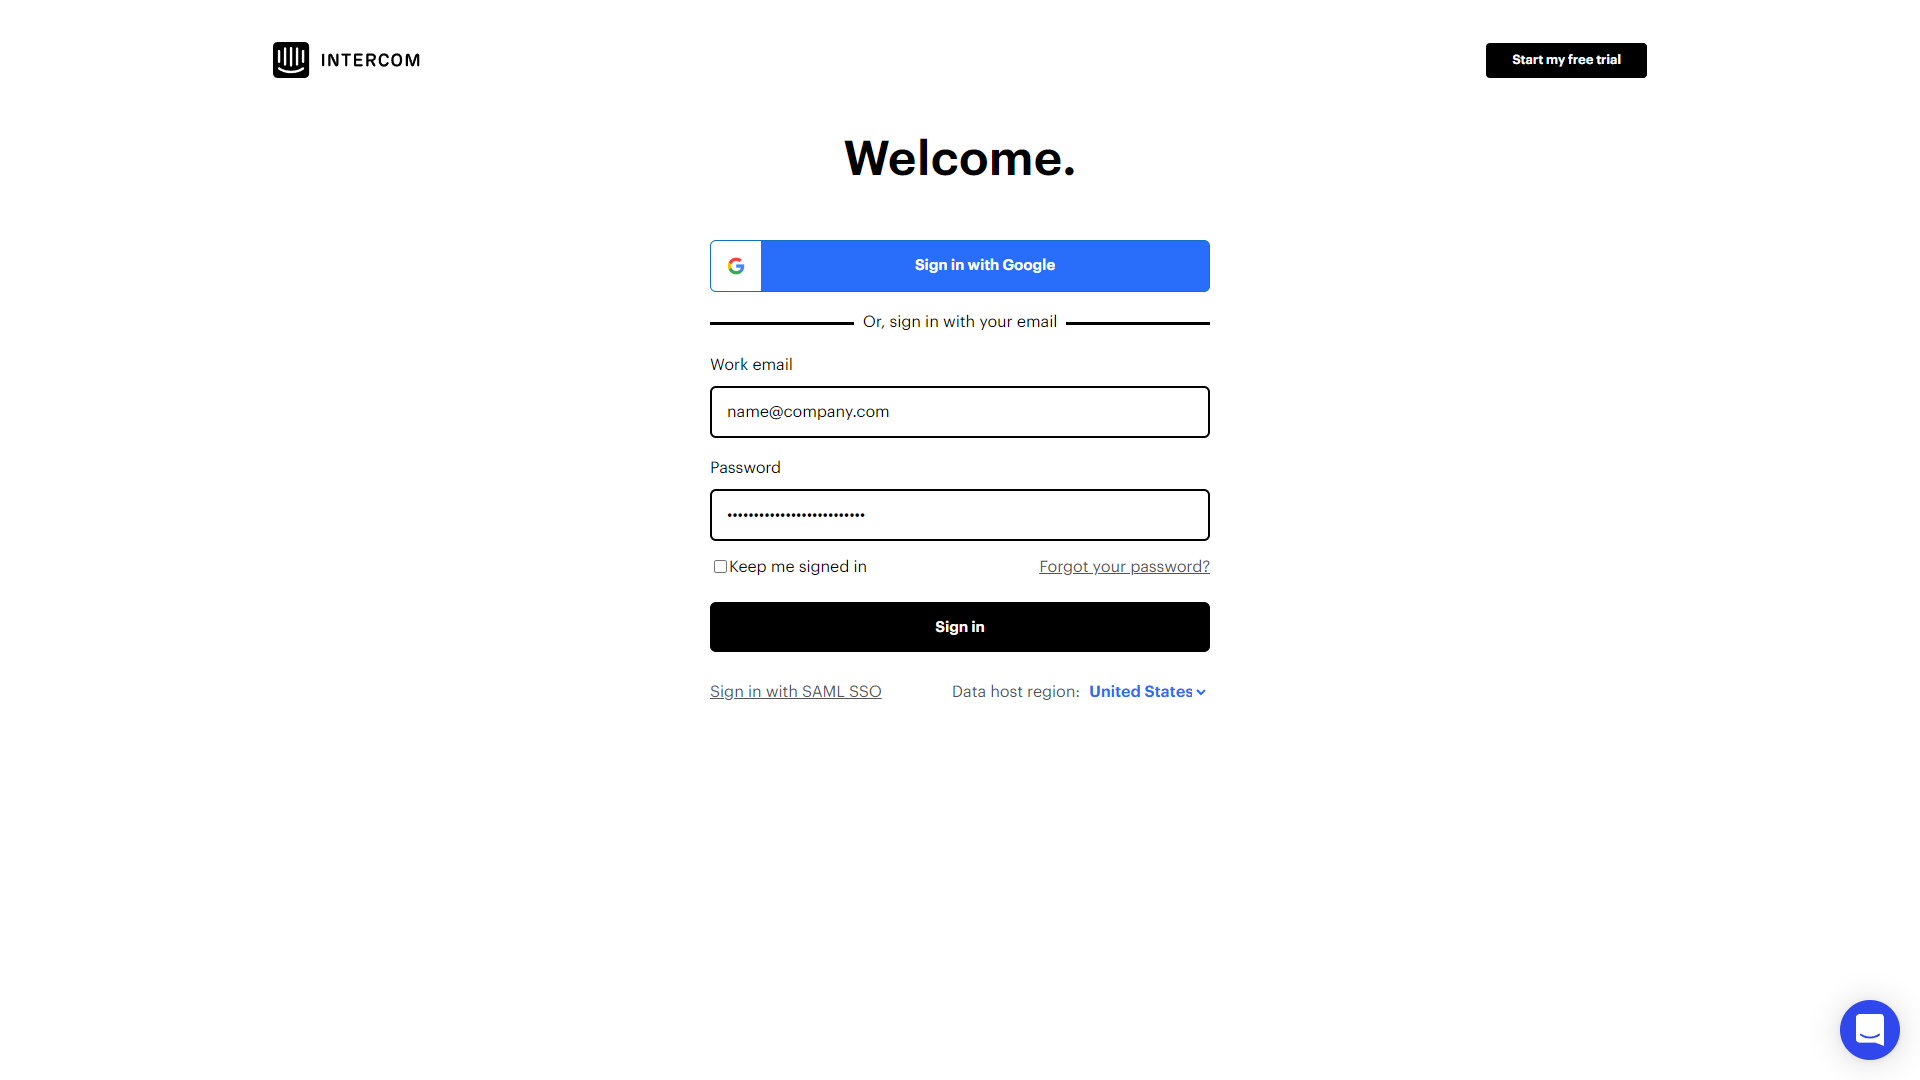
Note: Use the access credentials valid to the Intercom account where you want to transfer your data.
3. Pick up a specific Workspace where you want to import or export your help desk data.
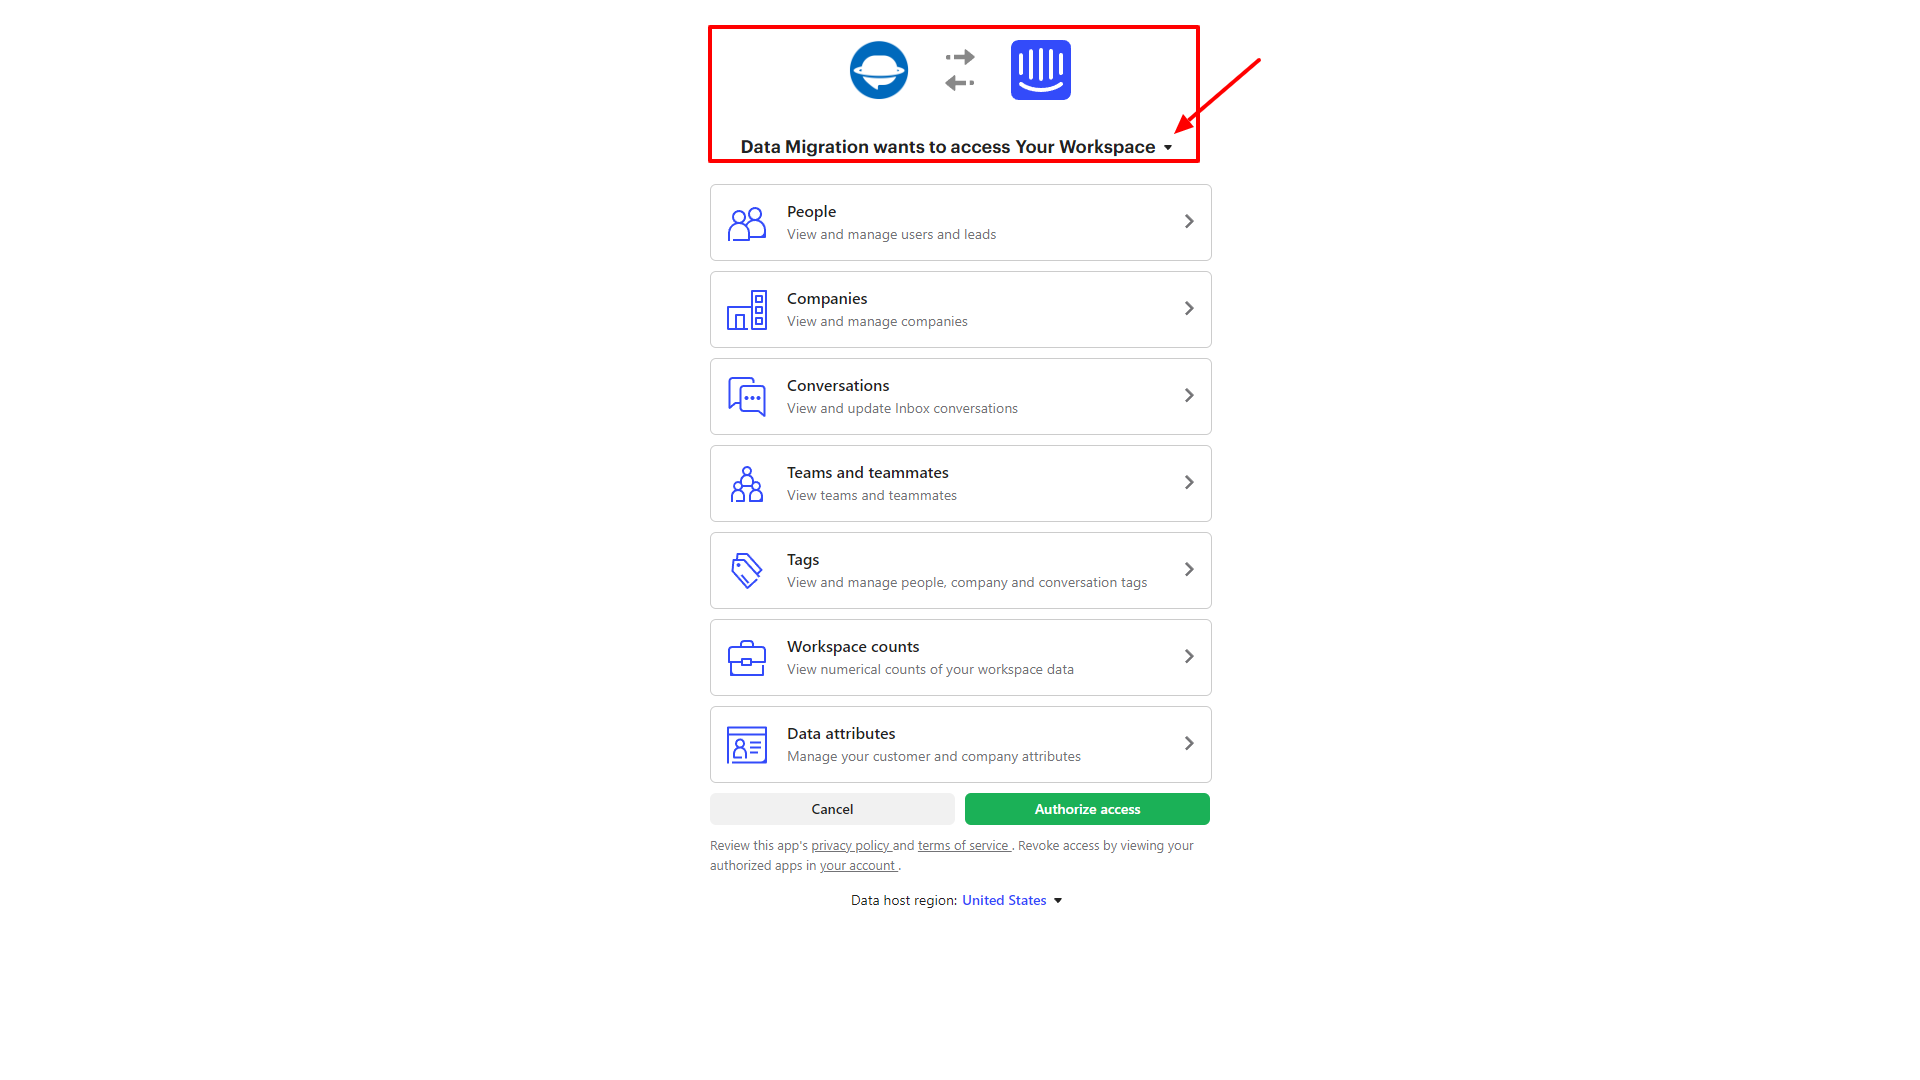
If you got more than one Workspace available, open a drop-down and choose the needed one.
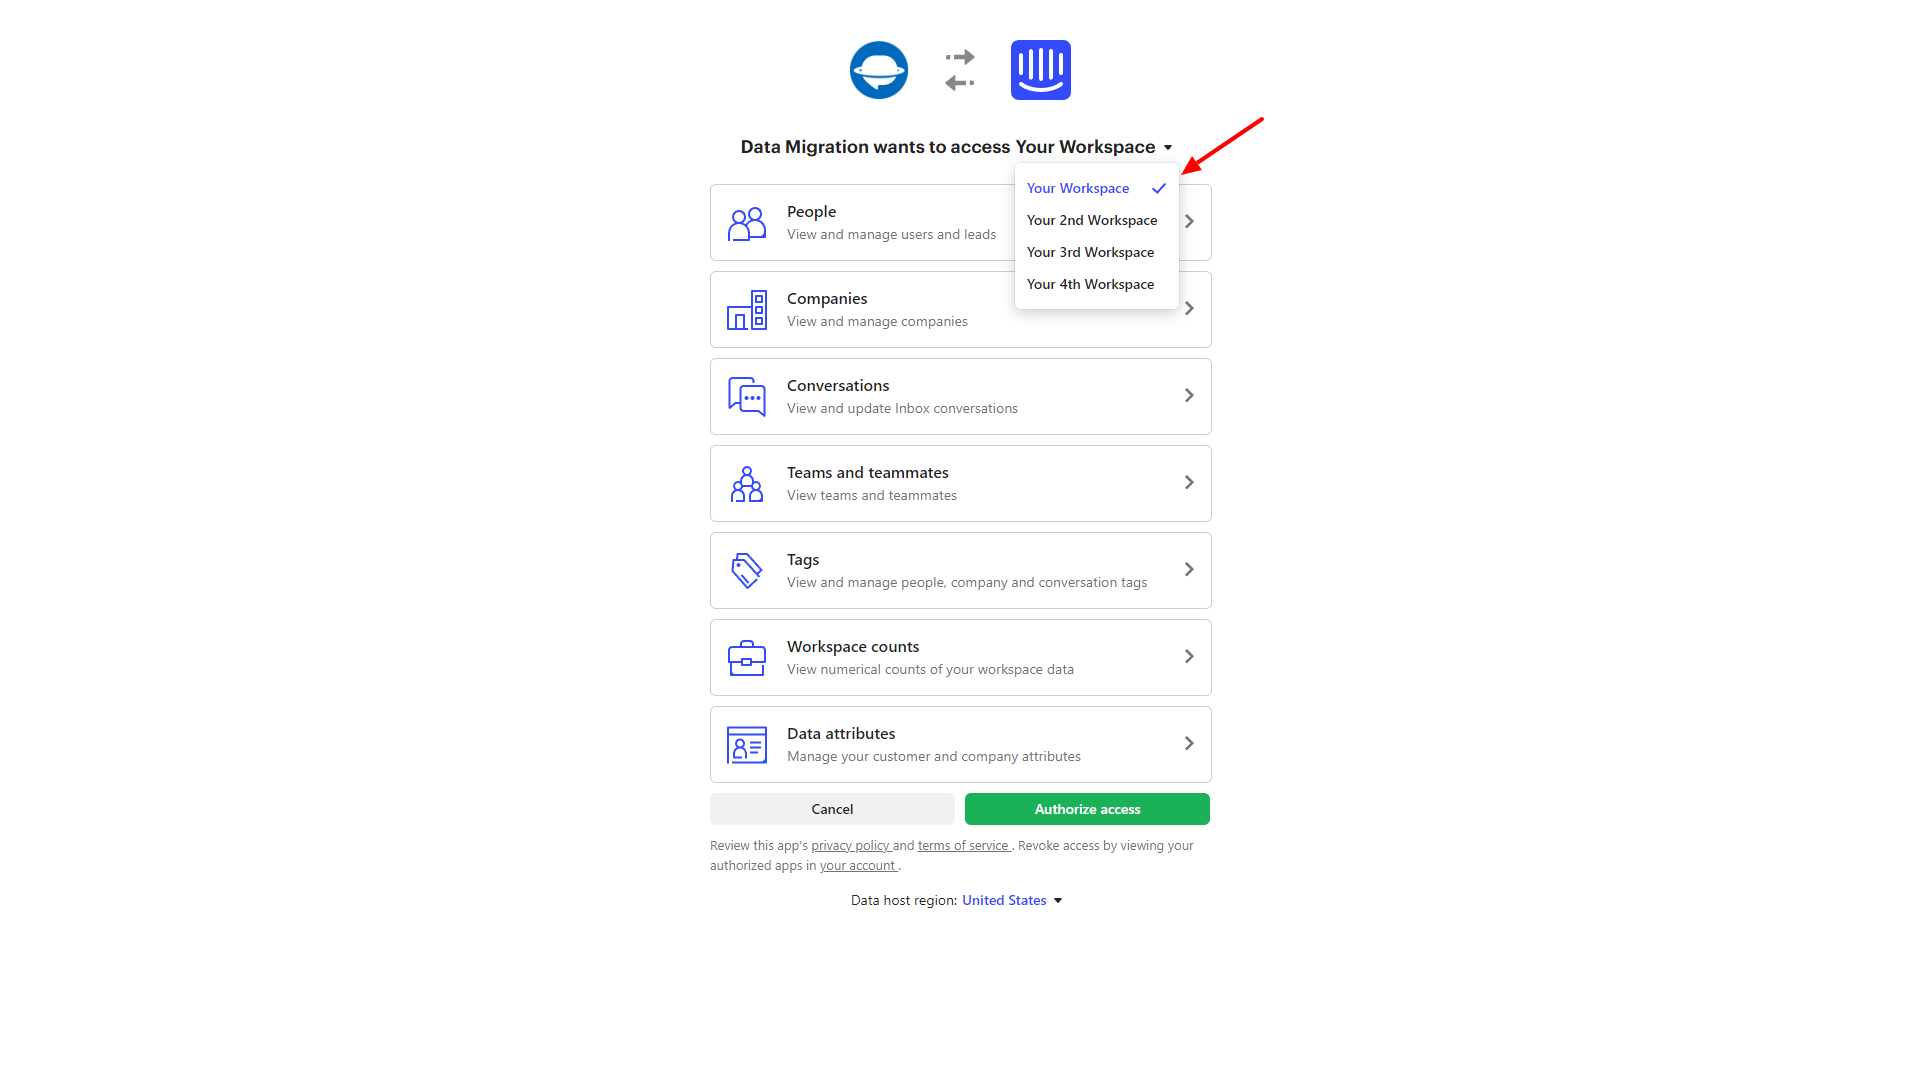
4. Check out what permissions you will grant to Data Migration. Open up each type:
- people
- companies
- conversations
- teams and teammates
- tags
- workspace counts
- data attributes
The list includes permissions to write and read the data. And they vary depending on the data type.
5. When you’ve checked permissions, click on Authorize access.
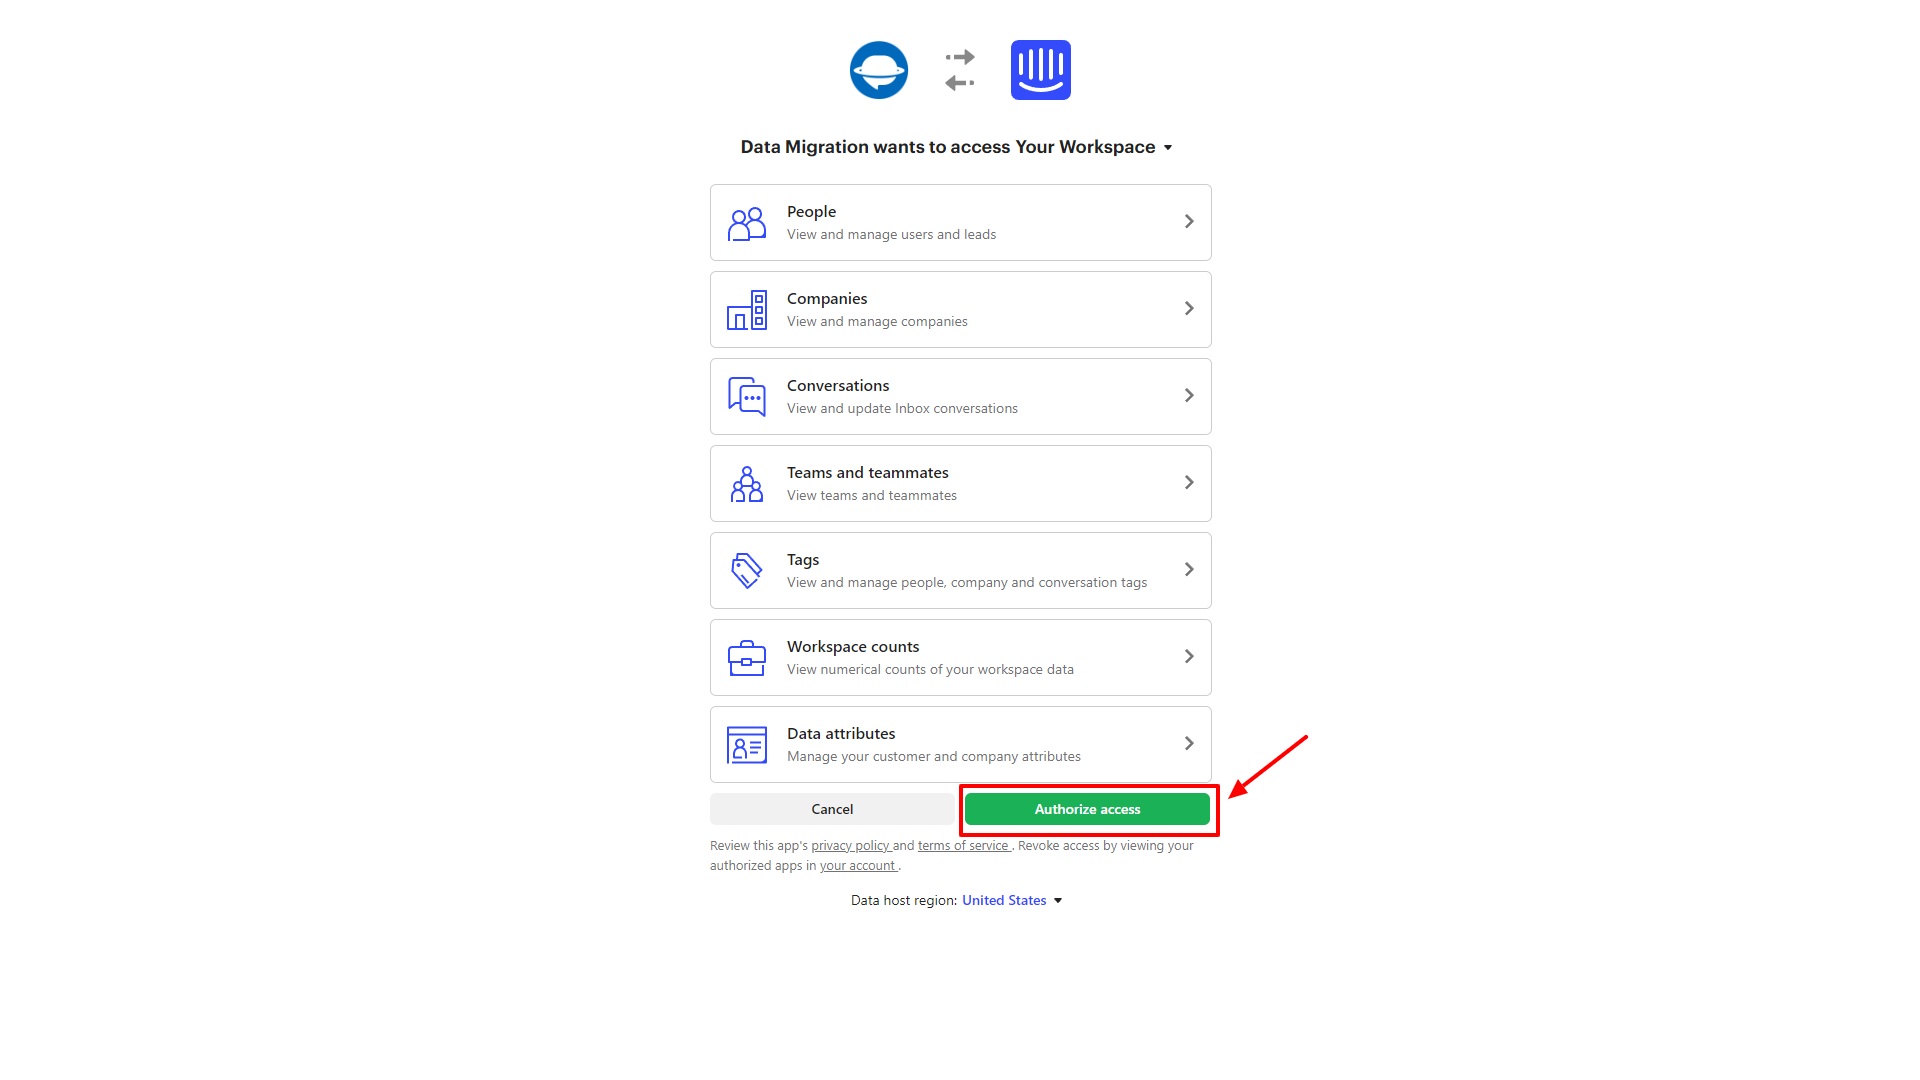
*Note: The OAuth process is the same whether Intercom is your Source or Target platform.
How to create a Personal Access Token
In case you still require a Personal Access Token for your private integrations and apps, we’ll tell you how you can find it.
Intercom provides a separate Access Token when you create an app on your workspace. So, first of all, to get the Access token, you have to create an app in your workspace in Developer Hub:
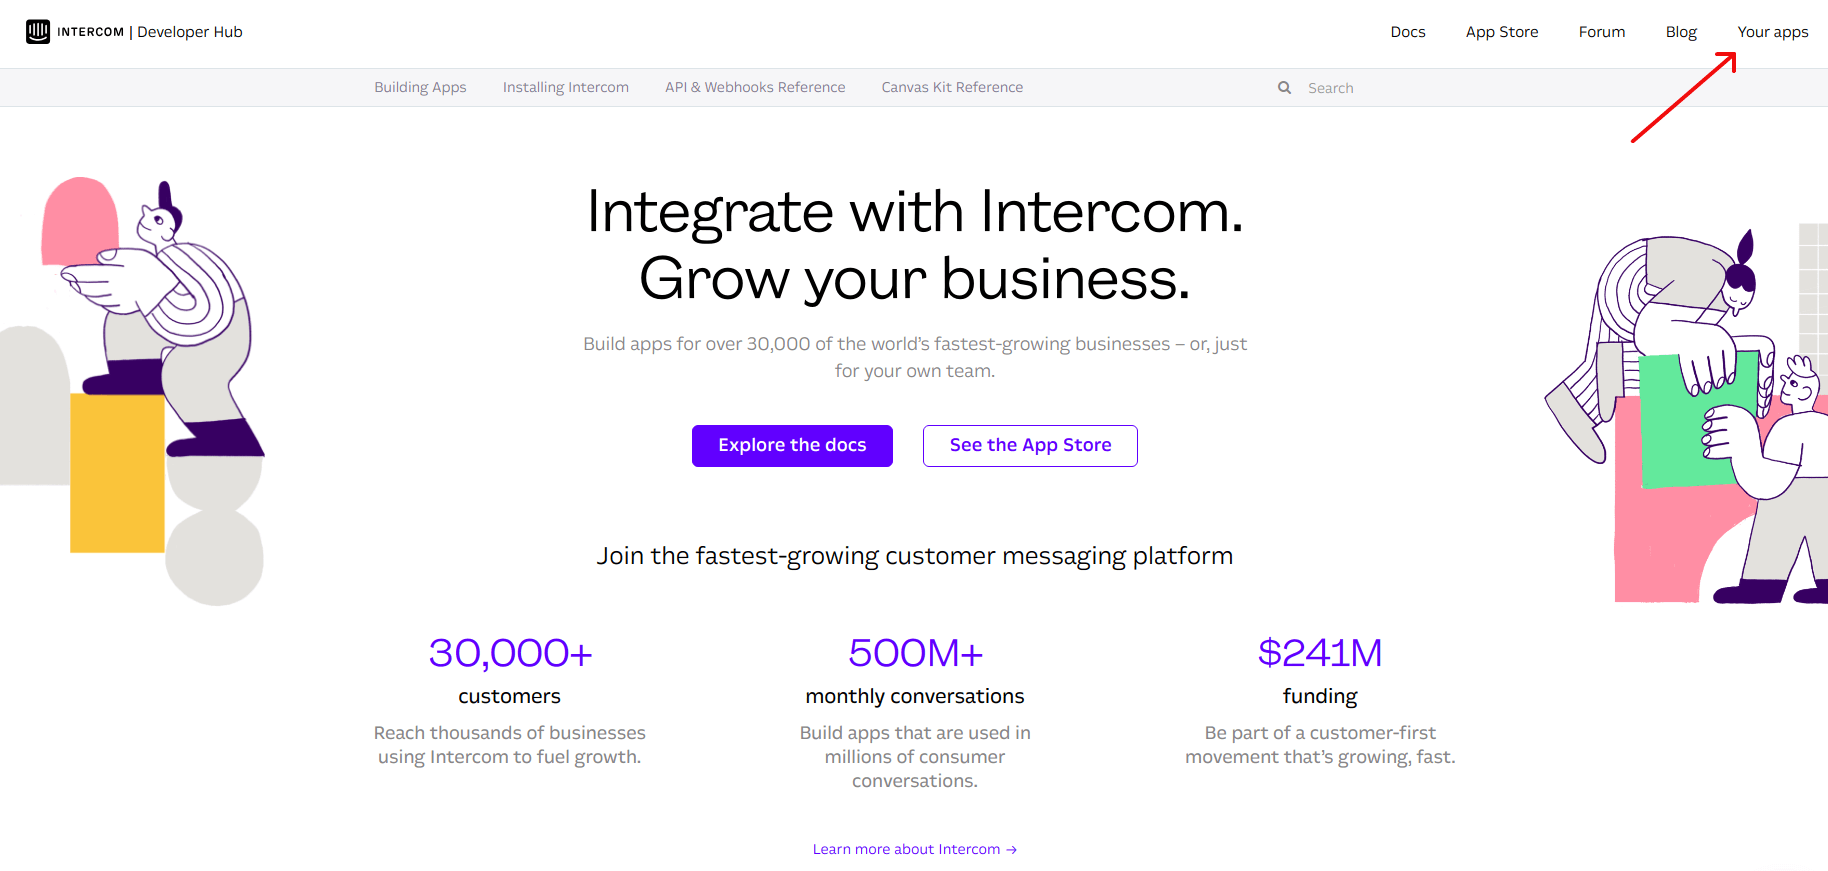
1. Log into your account in the Intercom Developer Hub and go to Your apps section.
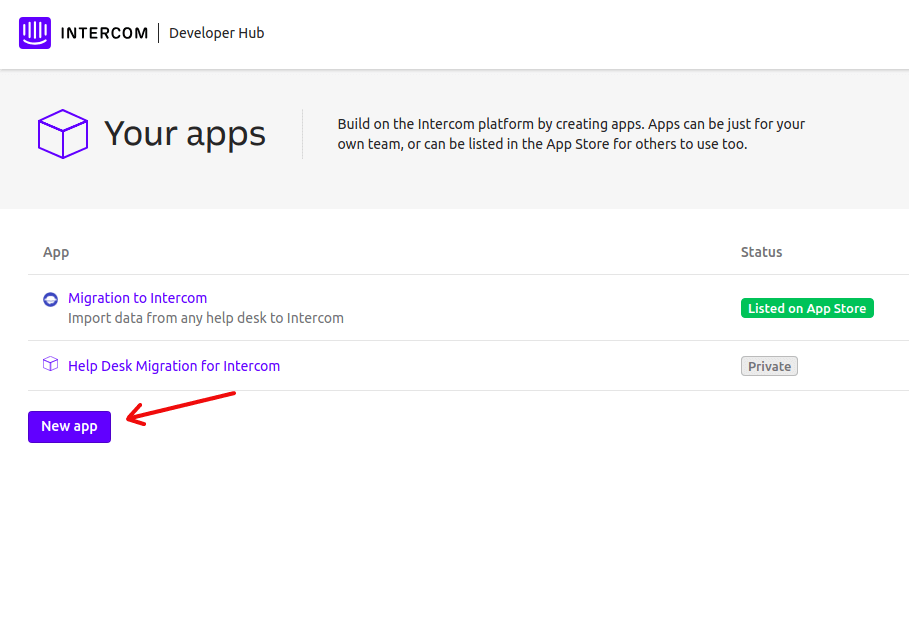
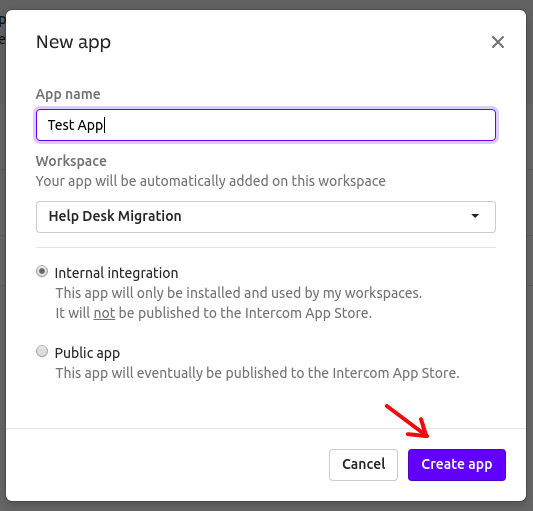
2. Click on New App button.
3. Name your app, select the workspace to add it to, and pick the Internal integration option. Then click on Create app.
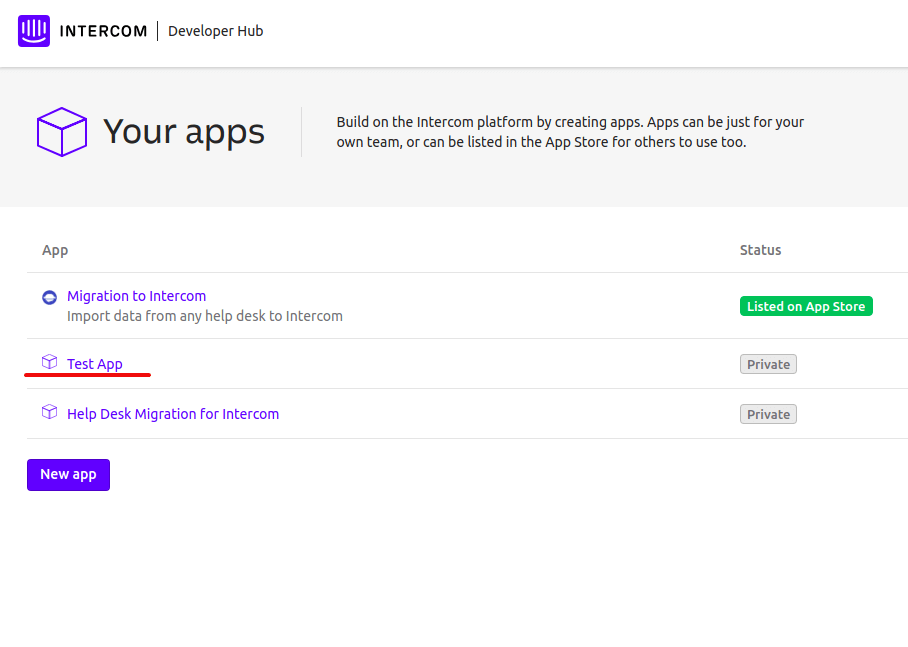
4. Now that your app is created, click on the app to open its info section.
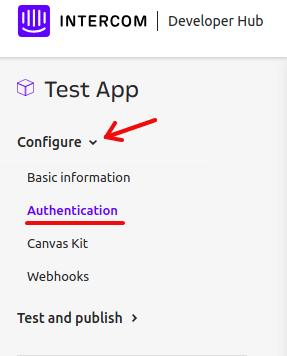
5. Select Configure and then Authentication.
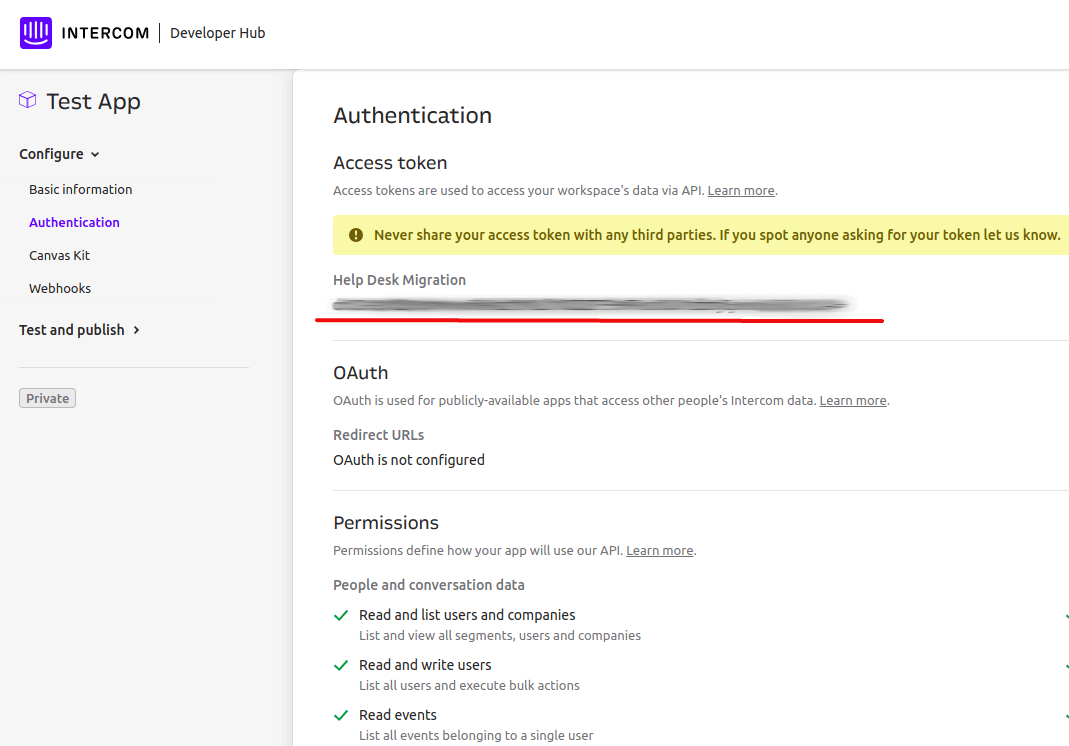
6. You will see your Private Access Token under the name of the Workspace you added your app to. Now, you will be able to copy it and go on with your data migration.
How to check the result of Demo Migration in Intercom?
Once your Demo Migration is complete, you’ll see the table showing you an overall number of transferred records along with reports for migrated, failed, and skipped data.
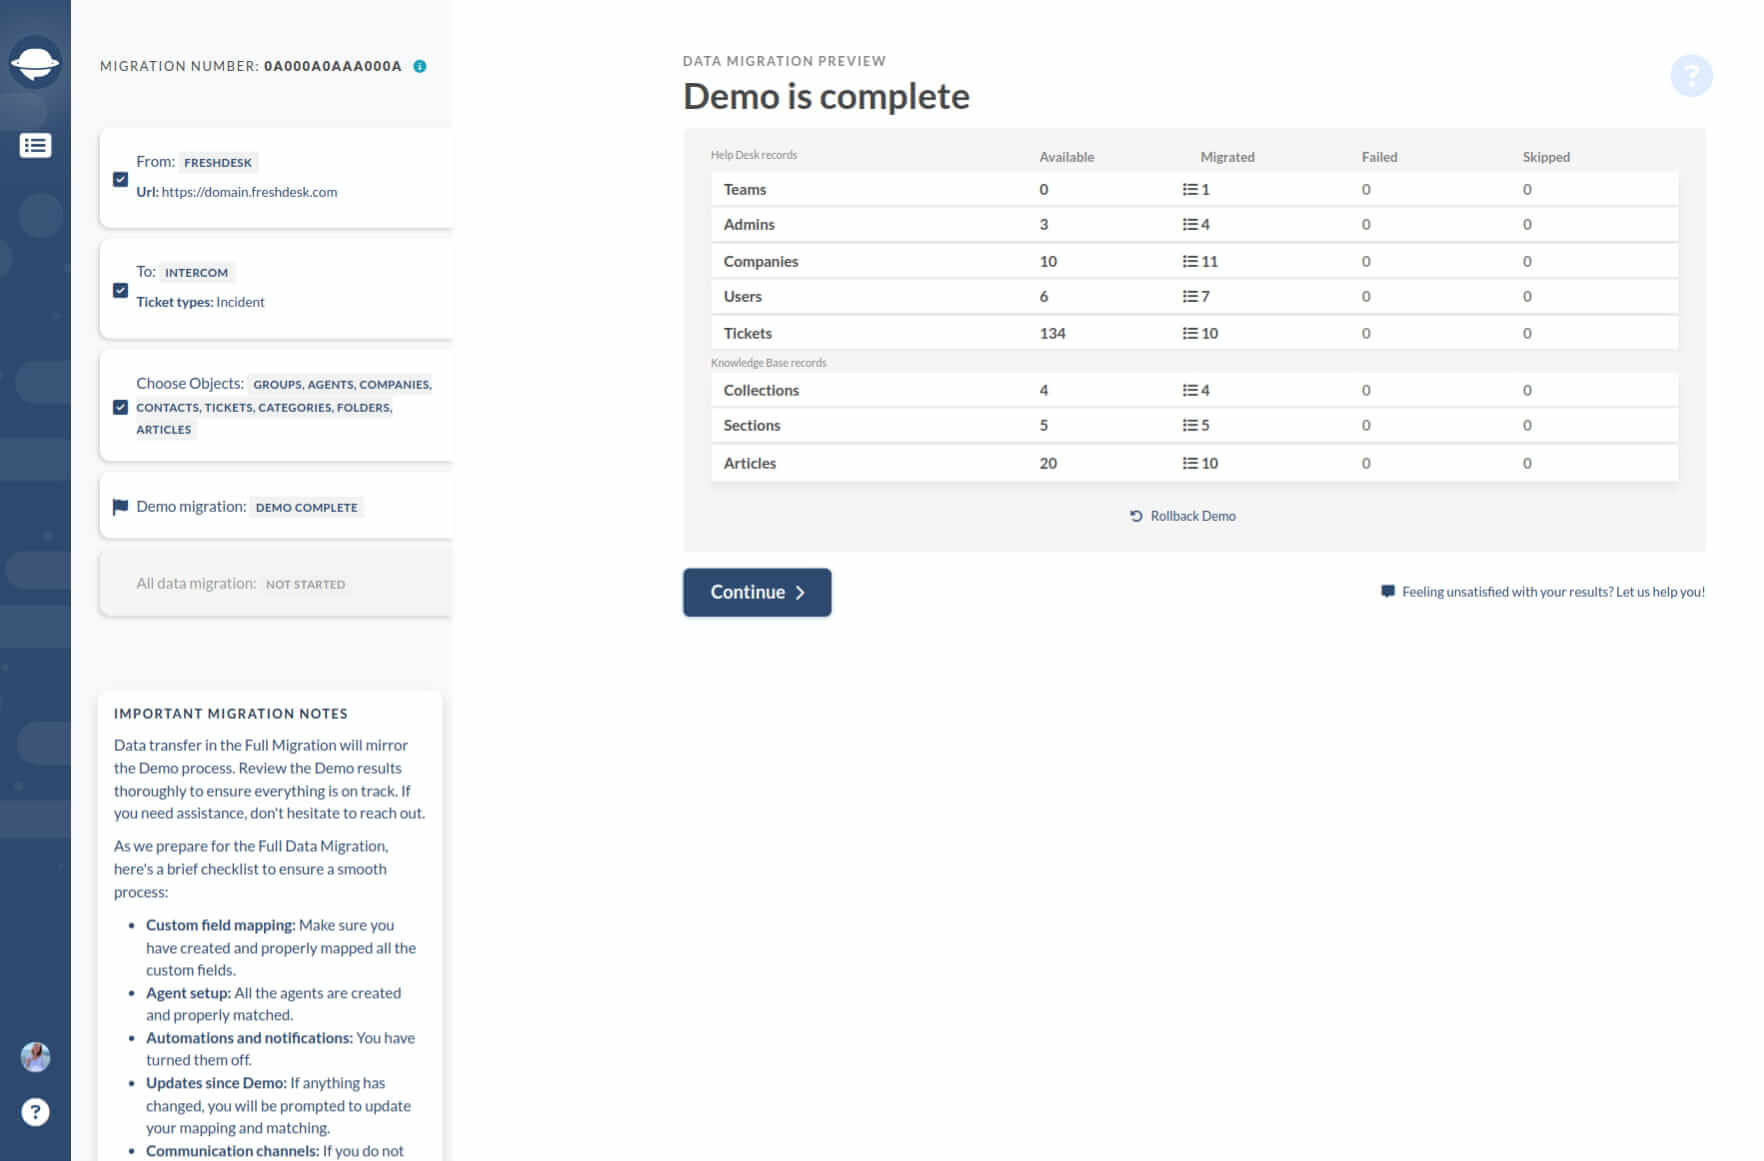
Every report includes a list with all the records IDs used for the Demo from the source database and respective new IDs in Intercom. Locate and examine each record in your new help desk. The report looks like this:
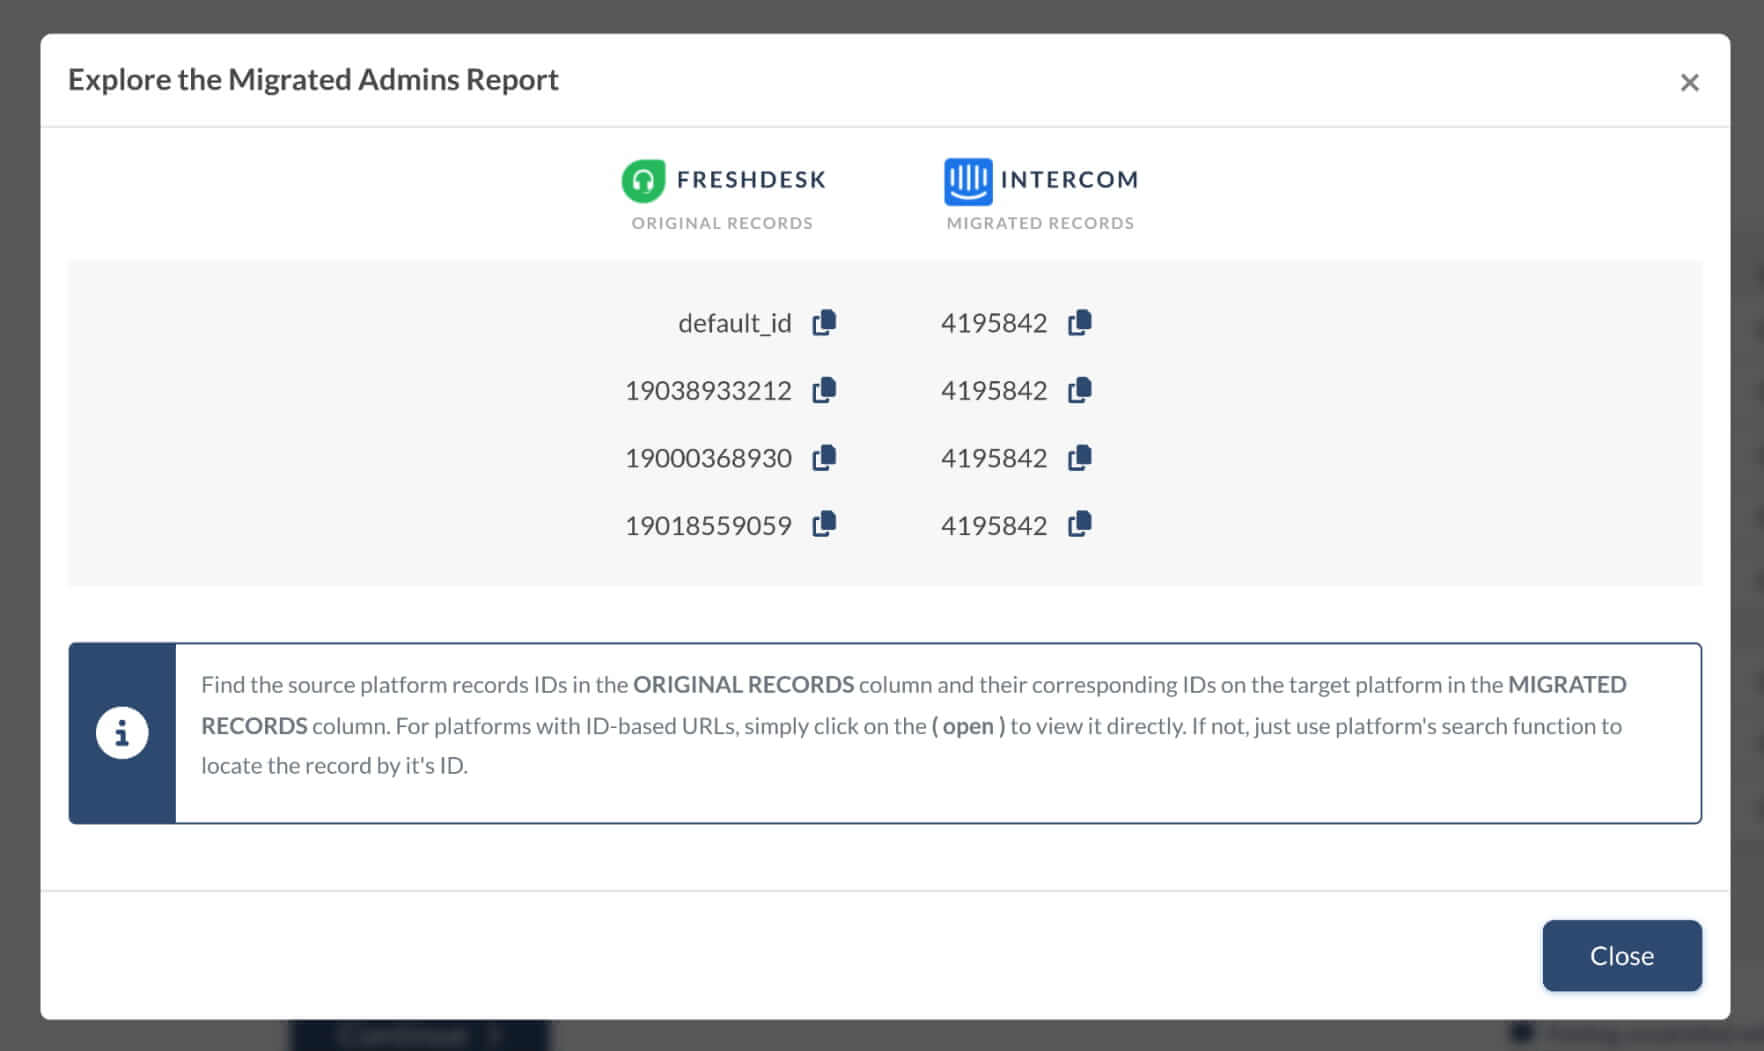
Whether it is the Demo Migration or Full Migration, all tickets and related data transfer similarly. So, if some records weren’t migrated during the Free Demo, they wouldn’t move during the Full Data Migration.
You need to check if all tickets transferred along with their Type, Status, Priority, Source and Custom Fields, Requester, Agent, and Tags. If you also migrate Knowledge Base, inspect the articles, their statuses, and attachments.
When the Full Data Migration finishes, you’ll see a similar table with clickable reports - check all migrated records too.
How to calculate contacts in Intercom?
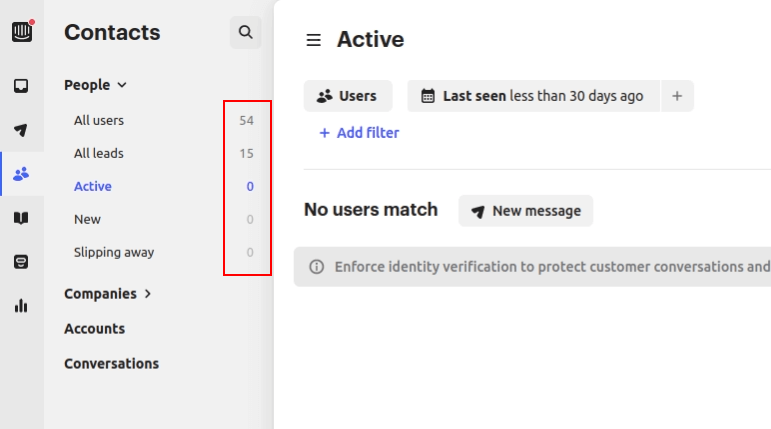
Intercom breaks your contacts into categories and shows their count next to each. Here’s how you can find it.
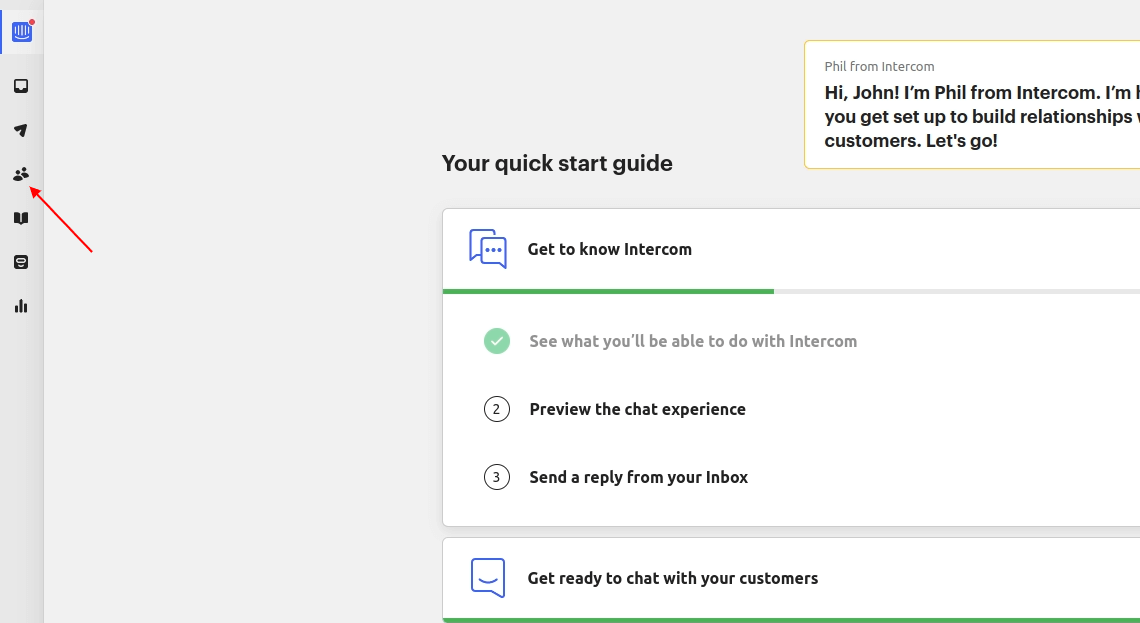
1. Select Customers from your sidebar.
2. The People dropdown contains all contact categories and shows their number next to each category.
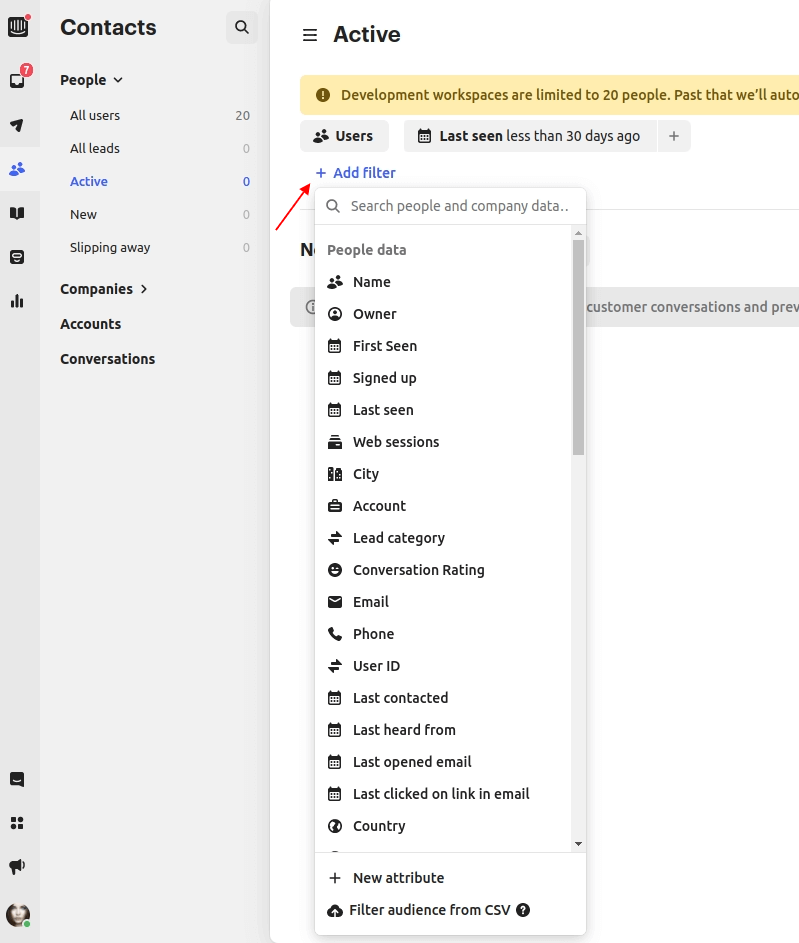
3. Click +Add filter to filter your contacts by specific data.
How to calculate conversations in Intercom?
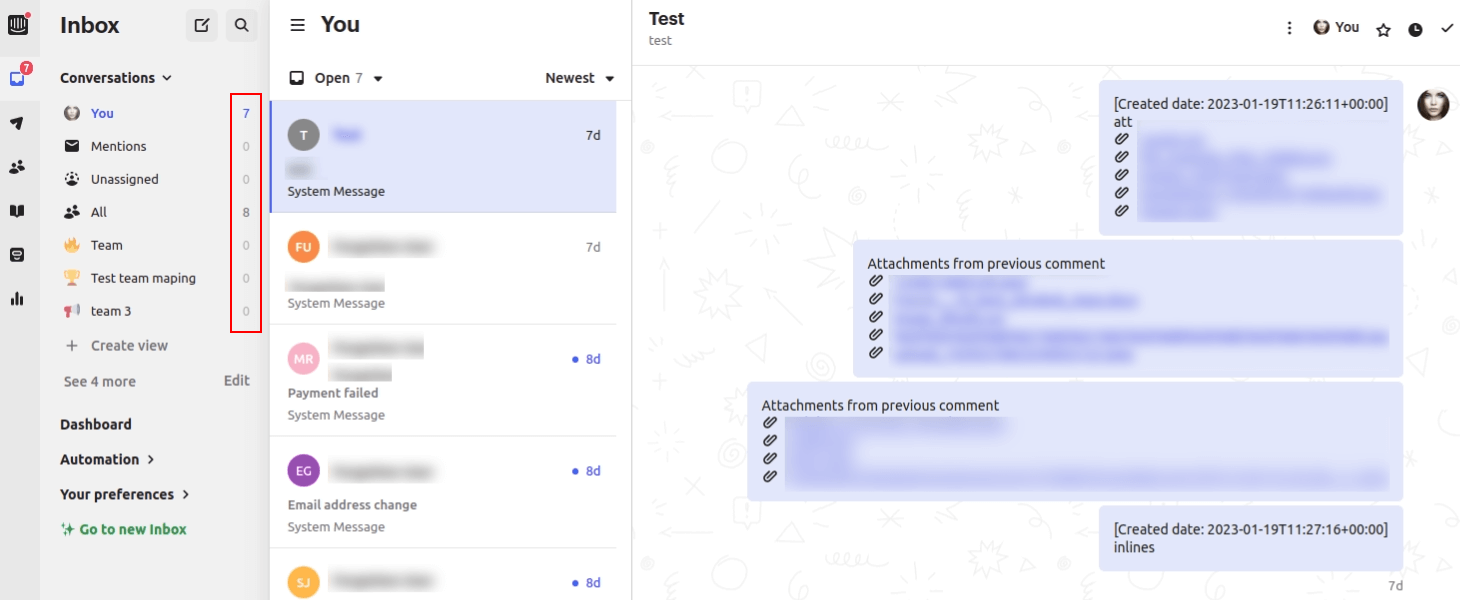
Intercom sorts your conversations into categories and counts them for you. You can create views to find specific conversations.
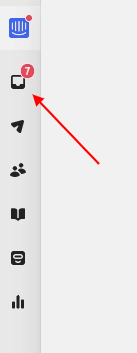
1. Go to Inbox from the sidebar menu.
2. Check the number of tickets next to each category.
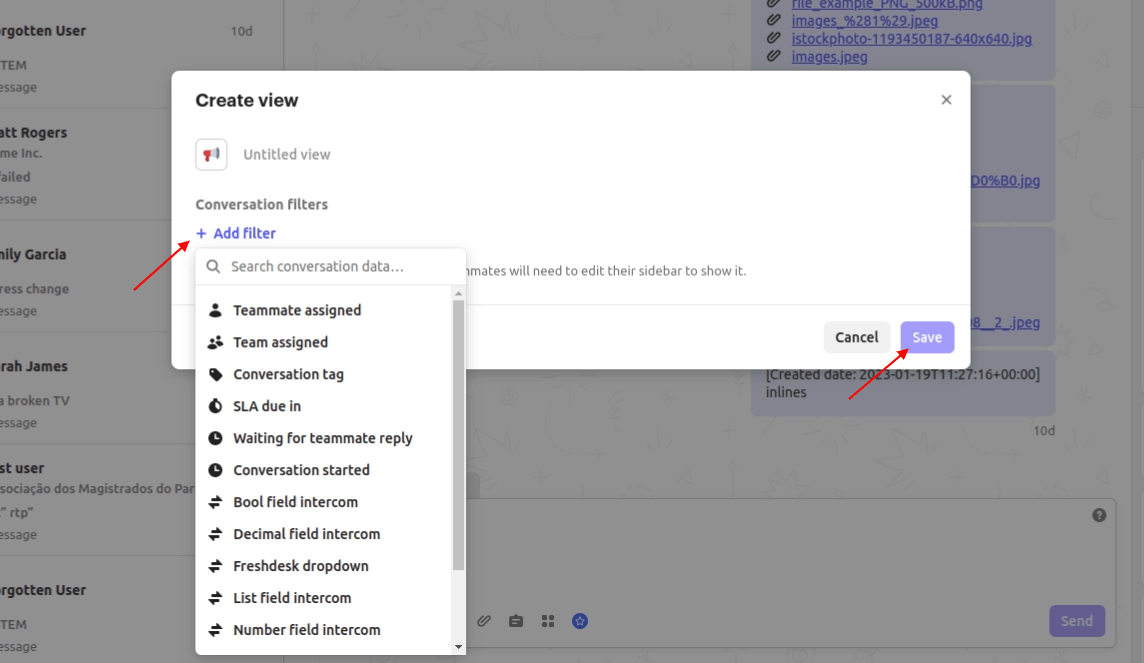
3. To add more filters, click Create view.
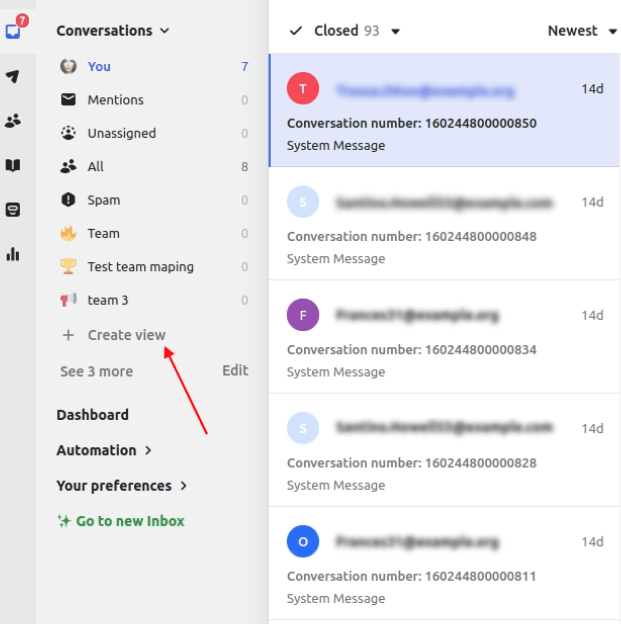
4. Then click +Add filter option. Choose one or more filters and click Save.
How to calculate articles in Intercom?
In Intercom, you can check the number of all articles or calculate them using filters.
1. Choose Articles from the Intercom sidebar menu.
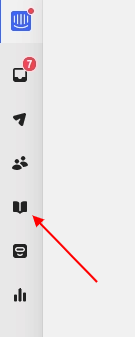
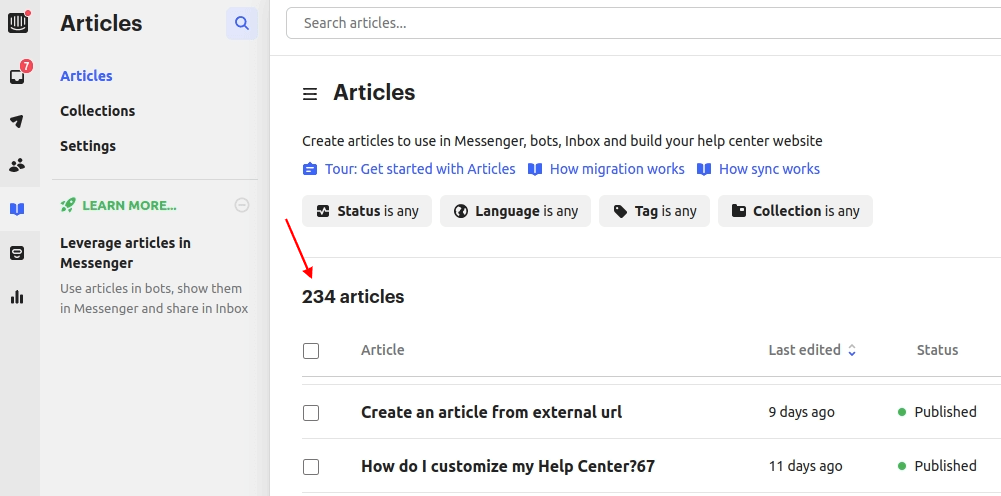
2. Find the number of Intercom articles above the list with your articles.
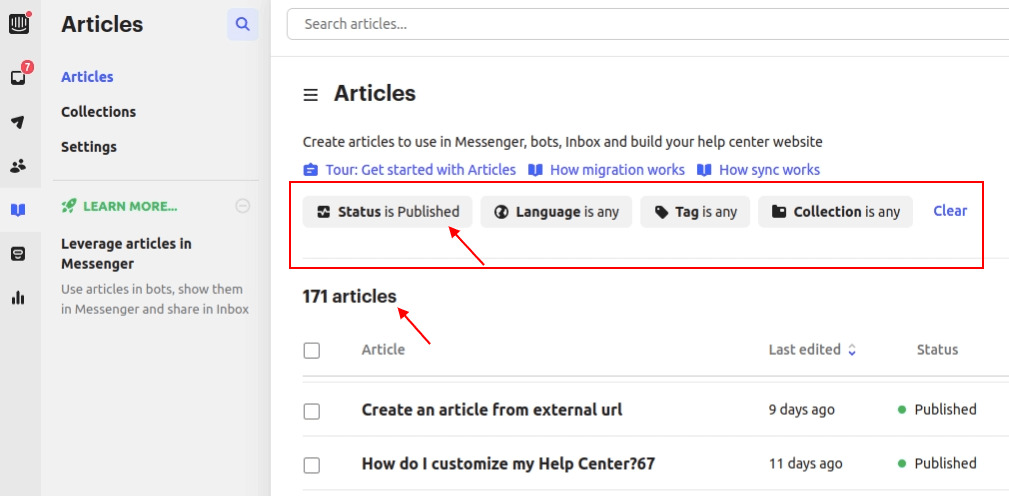
3. You can filter articles by status, language, tag, and collection and check the number of filtered articles.
How to access unsupported attachment file types in Intercom?
Intercom supports text files, images, videos, and PDF files as default so after the data switch everything works right. But if you imported unsupported file types, you will see such a message:

If you want to migrate unsupported files types, you need to change settings in Intercom before starting your data migration. To access unsupported attachment file types:
- Go to your Intercom account.
- Click the User icon in the lower-left corner.
- Choose the Settings option.
- Under Settings, select Security.
- Then click Attachment settings.
- Open Control which file types can be received.
- Enable Allow more file types.
- Fill in the file types you have and want to import from your source platform. Separate them with a comma.
- Put a tick next to I understand the security risk involved by allowing these file types.
- Then Save.
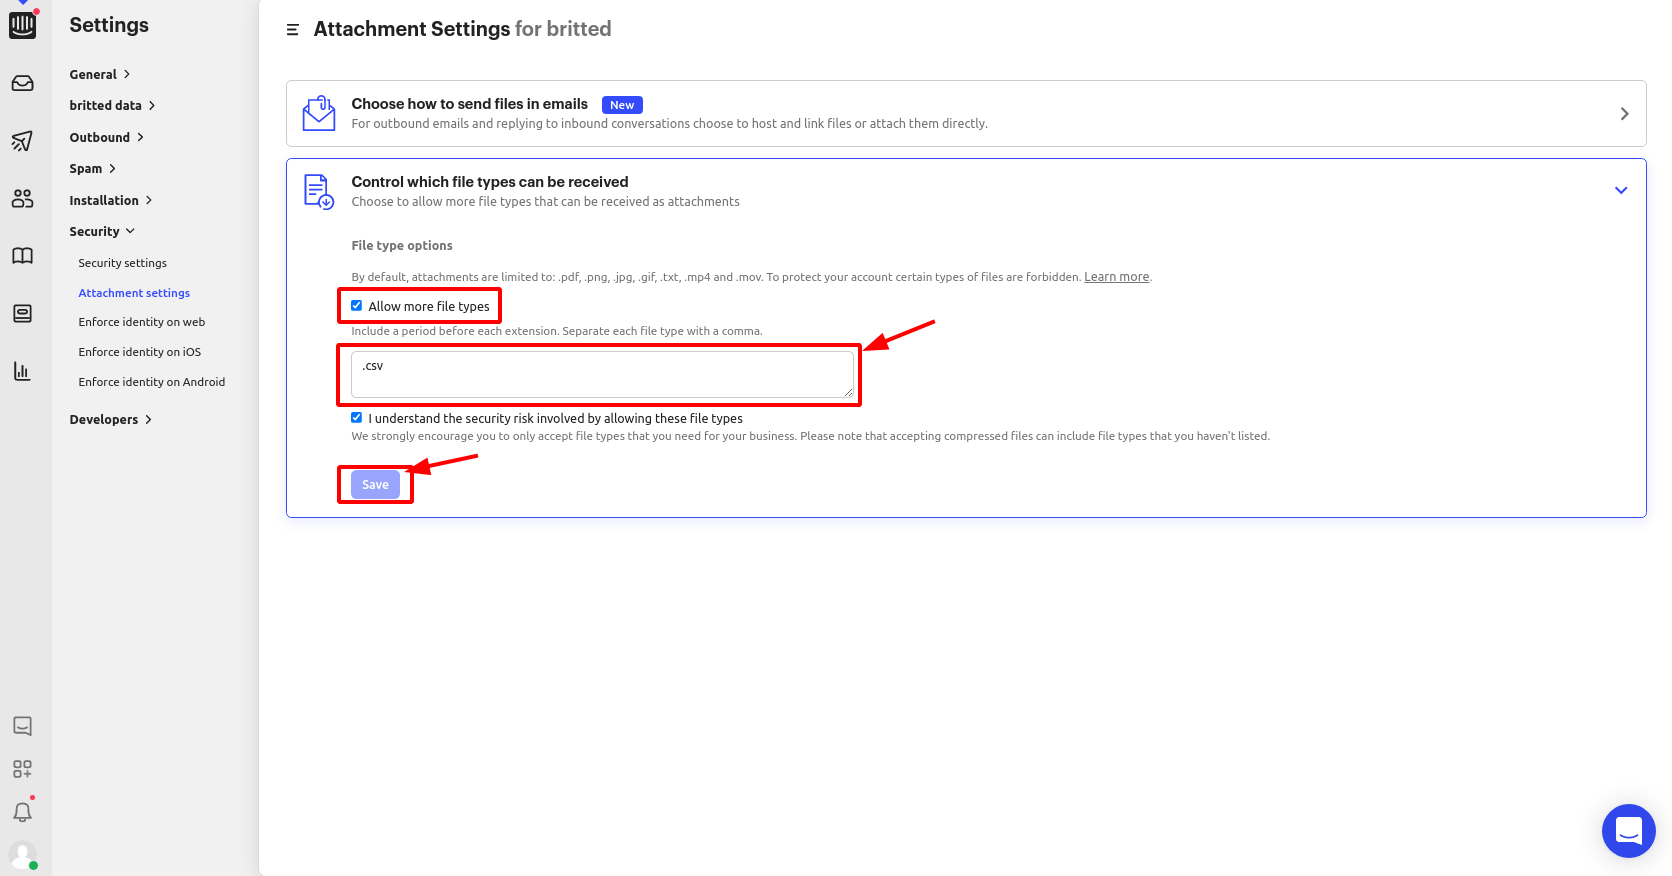
Now you can start your data migration to Intercom.
Note: Intercom doesn’t support certain file types as they may pose a threat for malicious content or malware. The list of unavailable file types includes .exe, .sys, .scr, .shb, .wsf and others.
Can I migrate tickets and conversations from Intercom into one ticket entity?
Migrating from Intercom to a new help desk platform? Make the move without losing a single conversation.
With Help Desk Migration, you can import both tickets and conversations into a single ticket entity—keeping every customer interaction intact and organized from day one.
- No more scattered data—just a smooth and structured migration that keeps everything in place.
- Keep all customer interactions intact and properly structured in your Target.
- Forget splitting migrations or juggling separate processes—this is a one-and-done solution.
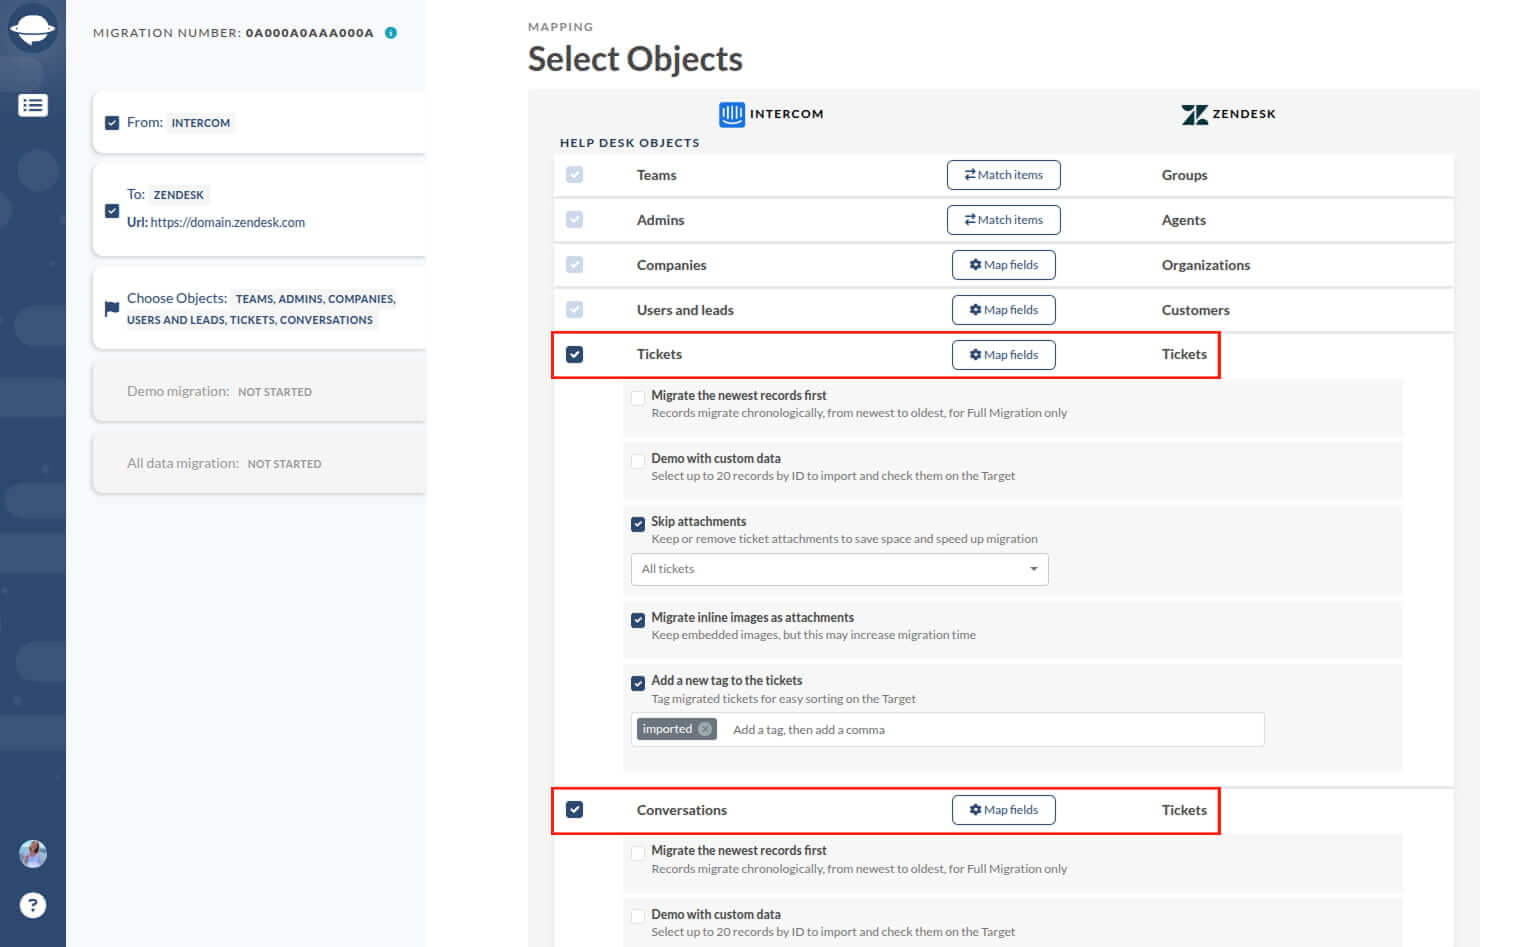
Help Desk Migration automates the entire process, reducing manual effort and eliminating the risk of data loss. Whether upgrading to a more robust help desk or optimizing your workflows, this feature makes moving from Intercom faster, easier, and painless.
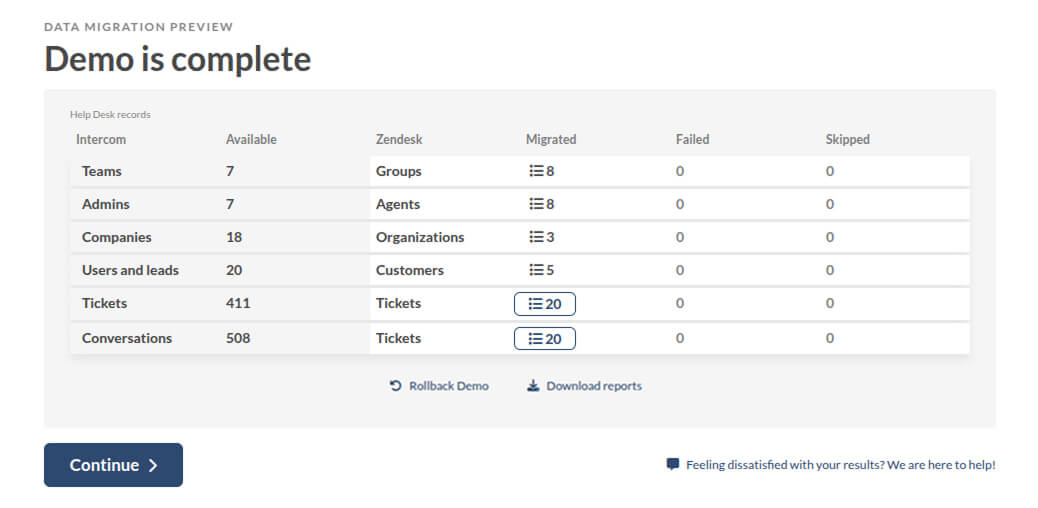
Ready to see how seamless your migration can be? Start your free trial and migrate your Intercom tickets and conversations with confidence.

