Zoho Desk Migration Guides
Migrating from Zoho Desk via Migration Wizard?
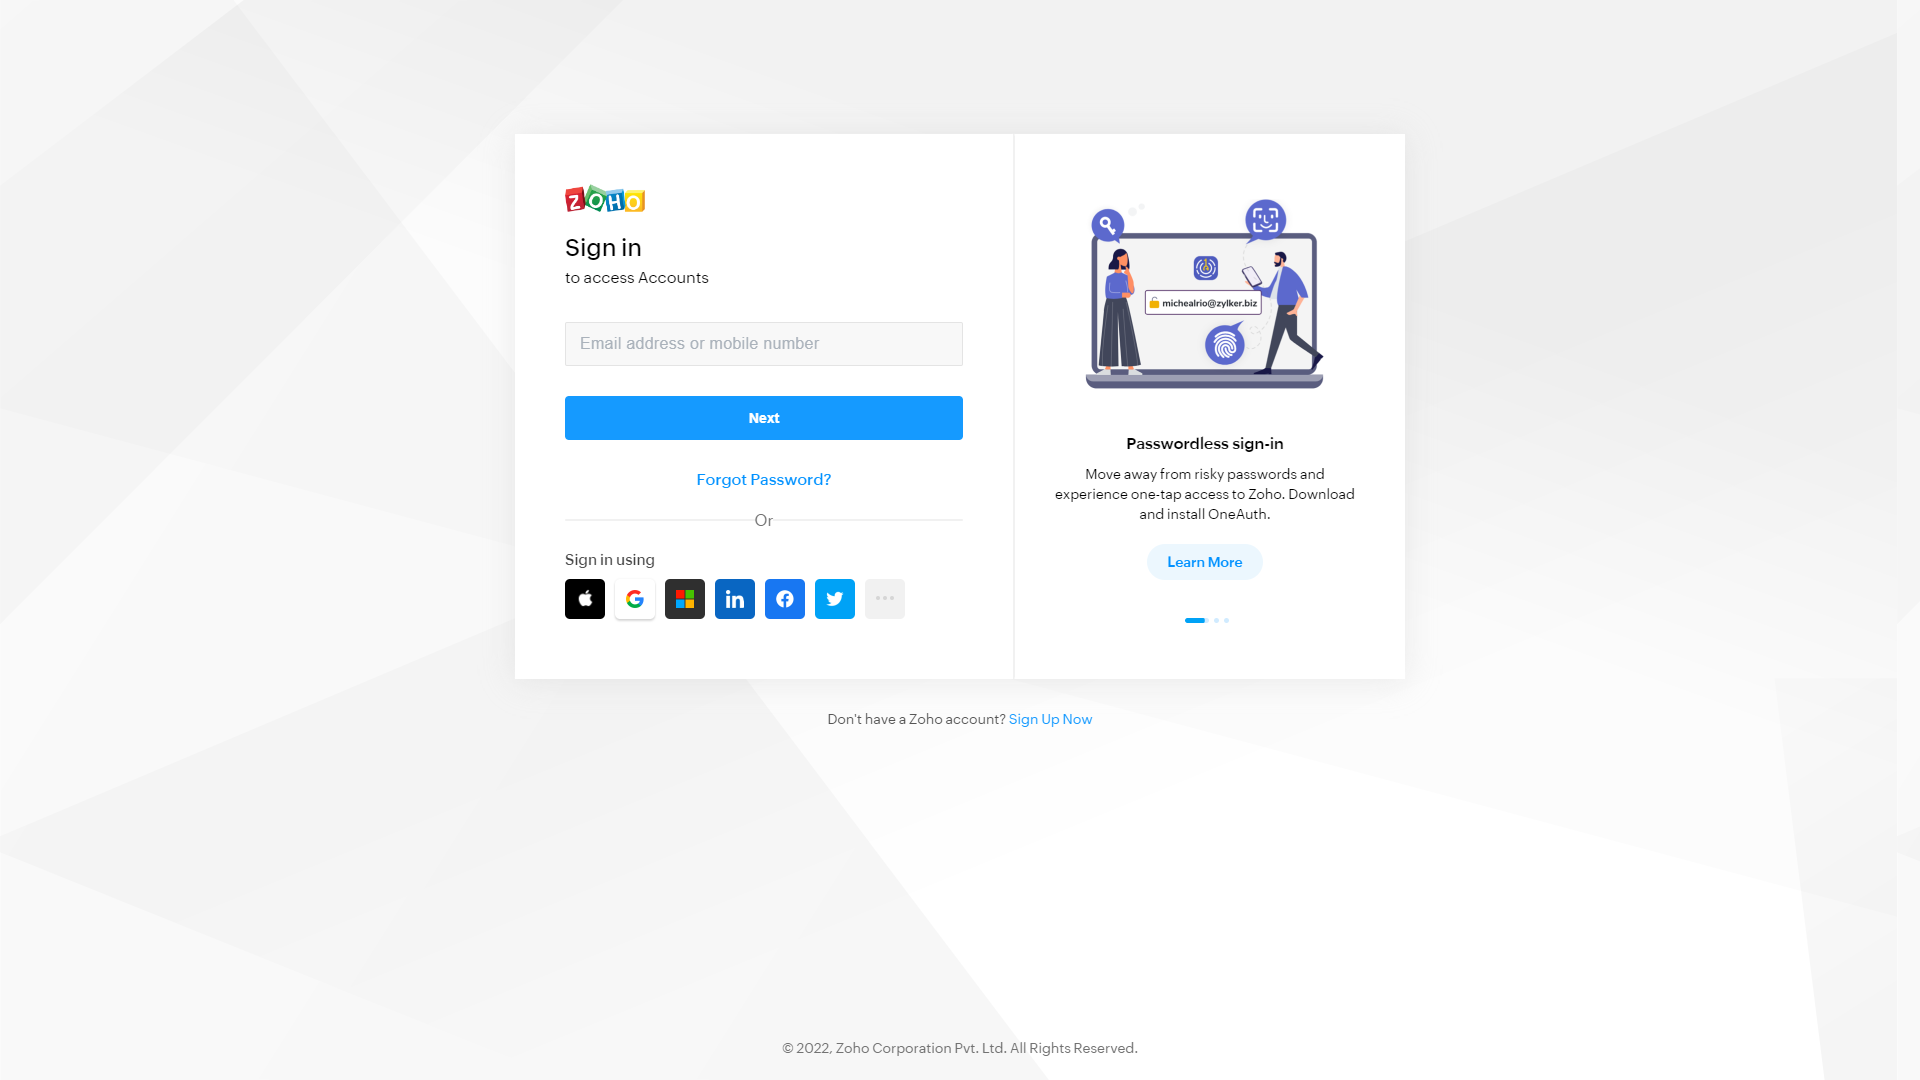
To migrate from or to Zoho Desk you need to sign in to your account:
1. After you've chosen Zoho Desk from the list, click on the Sign in with Zoho button:

2. It redirects you to the Sign in page. There you need to log into your Zoho Desk account. Fill in your email address and password.
3. Then click Accept to allow our service access the data:
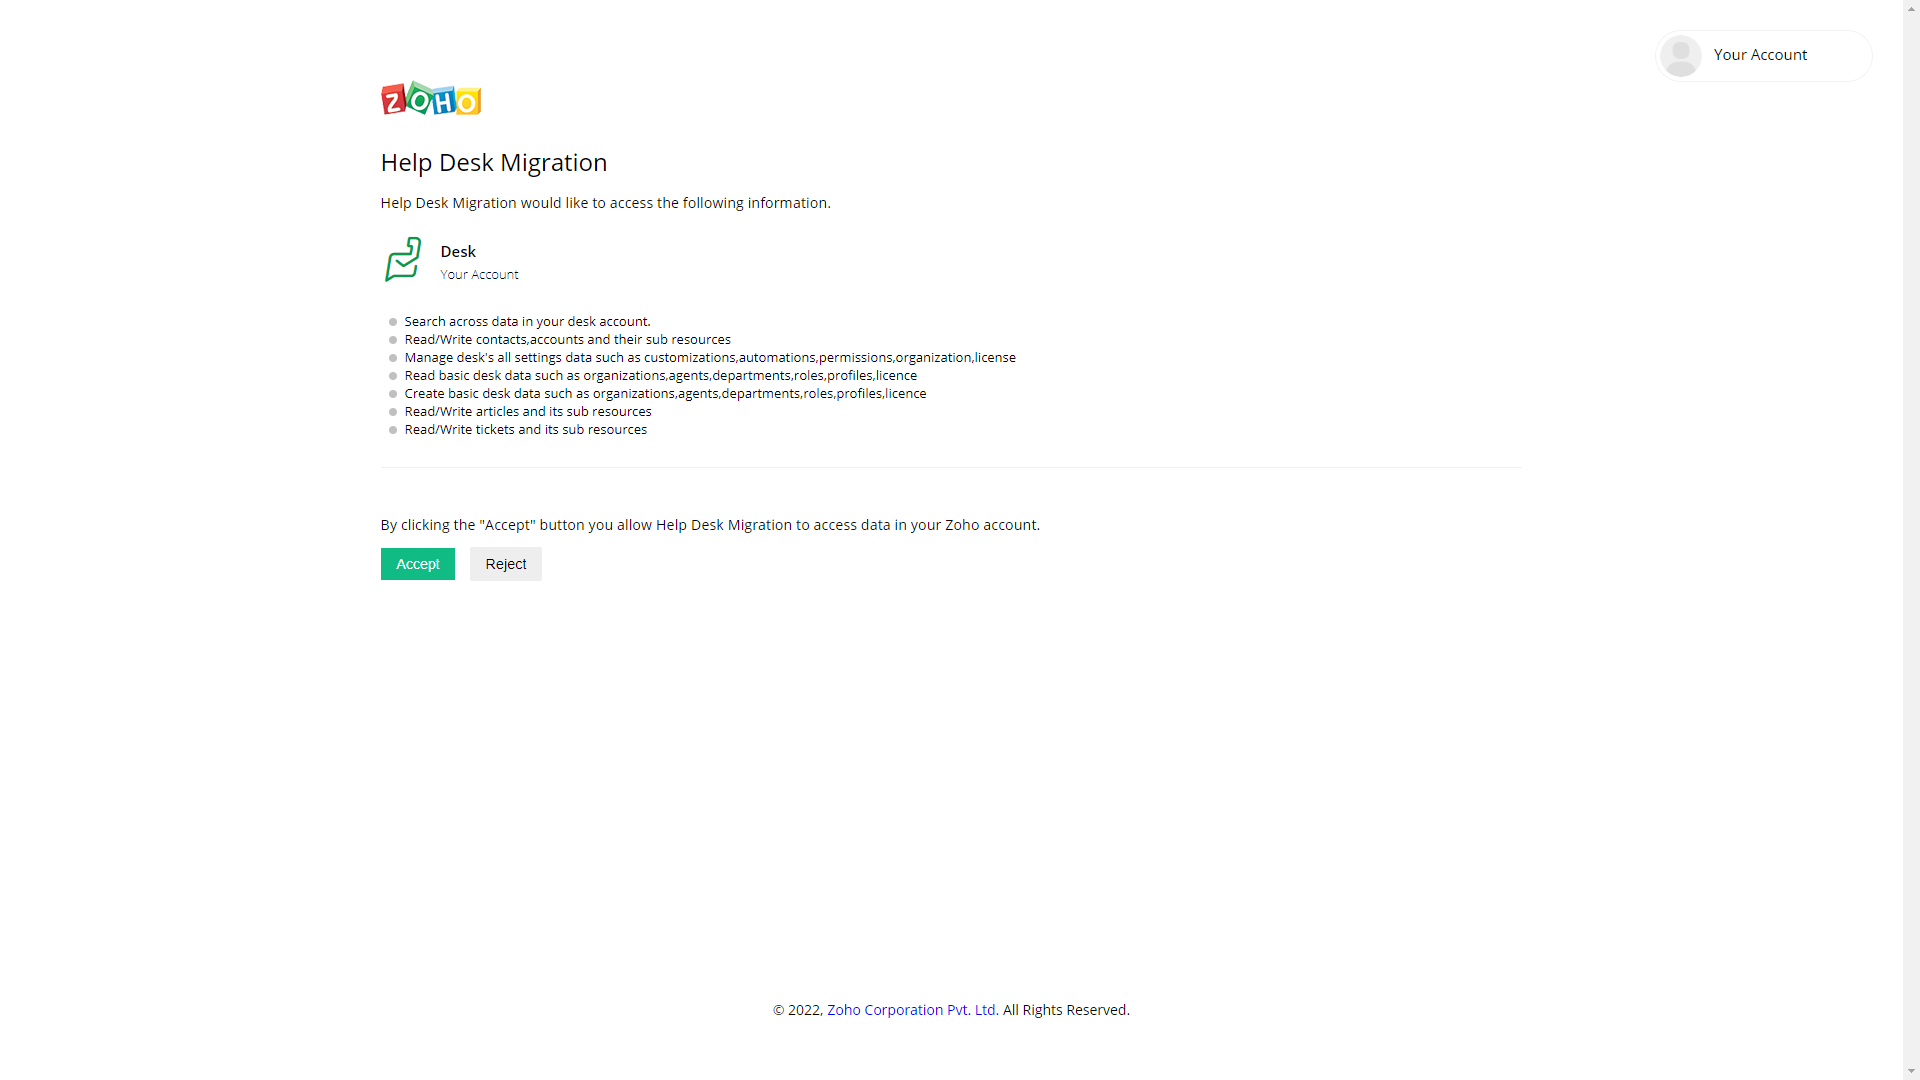
4. Continue setting up your migration.
Do you support Tags migration in Zoho Desk?
Yes, we do. Tags are migrated when moving TO or FROM Zoho Desk.
How to check the result of Demo Migration for Zoho Desk?
Once your Demo Migration to Zoho Desk is completed, you’ll see the table summary of the migrated data. The summary contains the number of migrated test portions of data along with the accessible reports for migrated, skipped, and failed records. The reports contain the IDs of transferred entities.
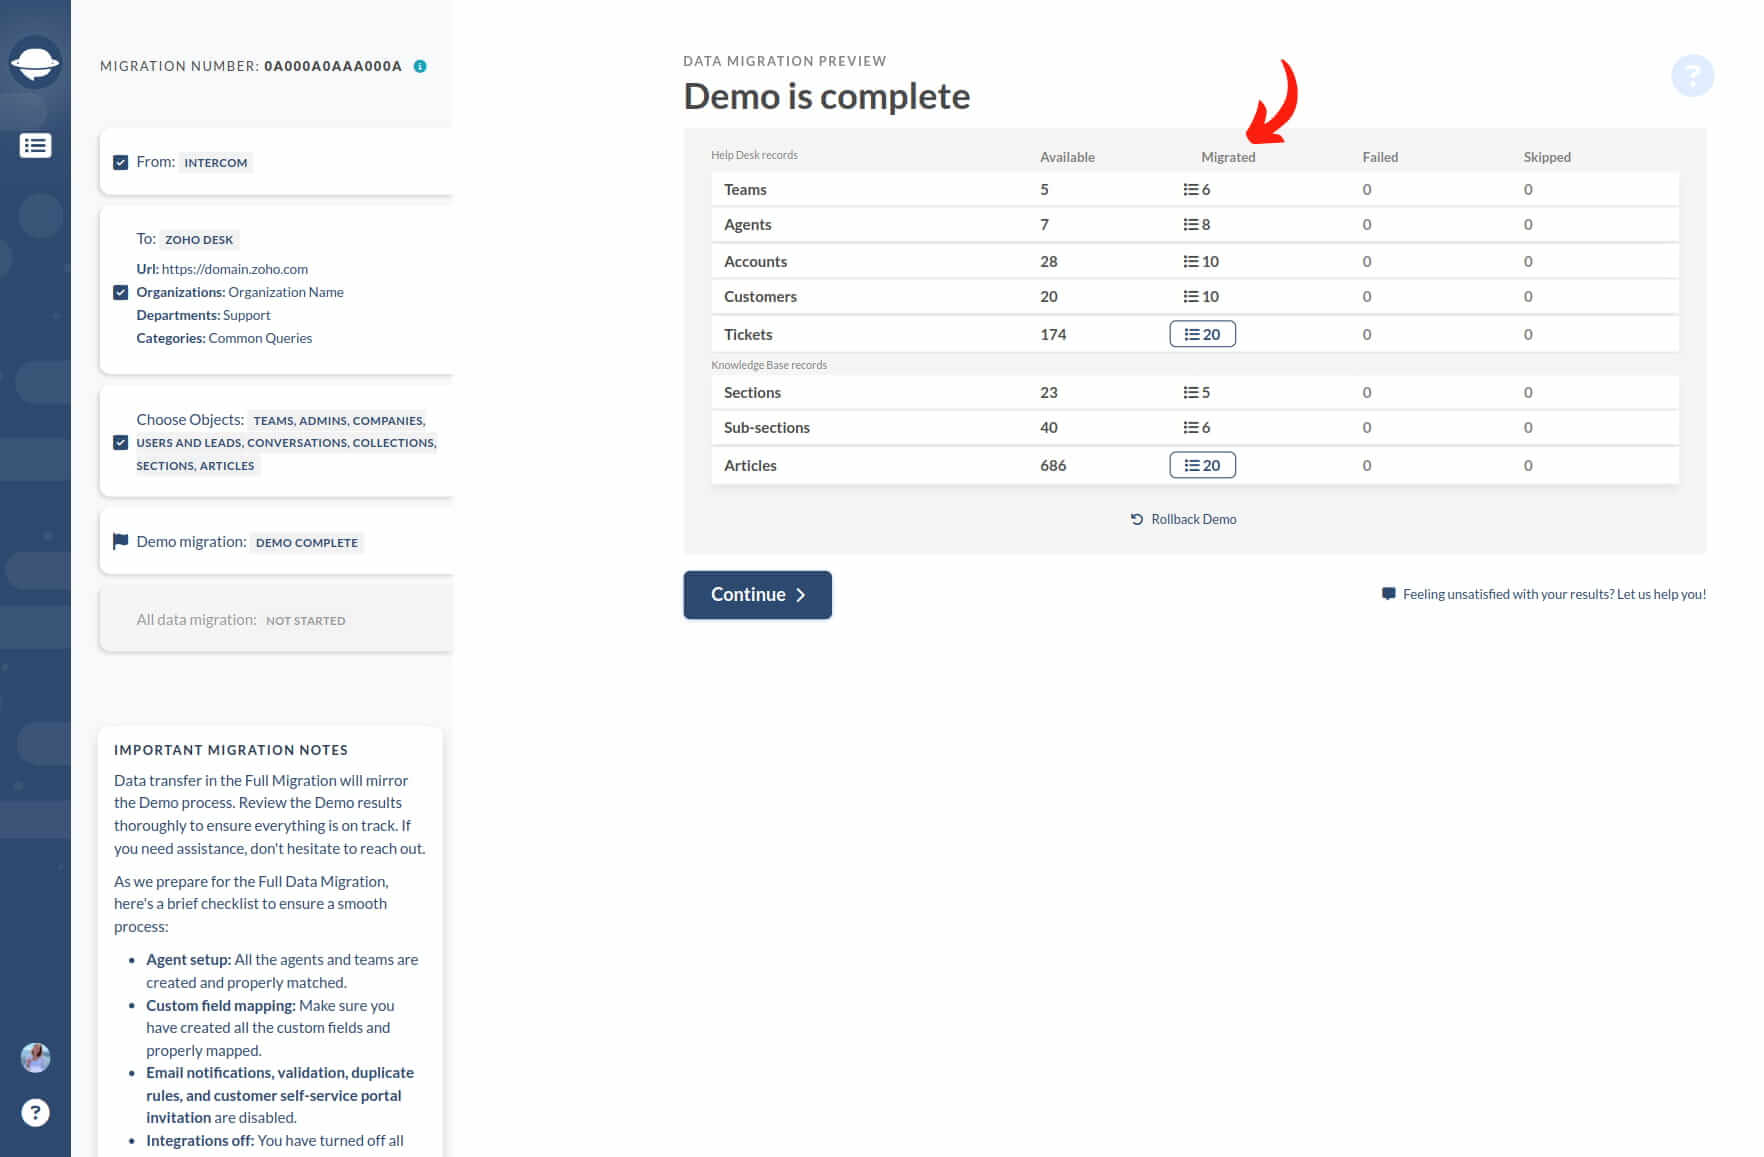
Click on any report to view the list with all the record IDs for the Demo Migration from the source database and respective new IDs in Zoho Desk. The report file looks like this:
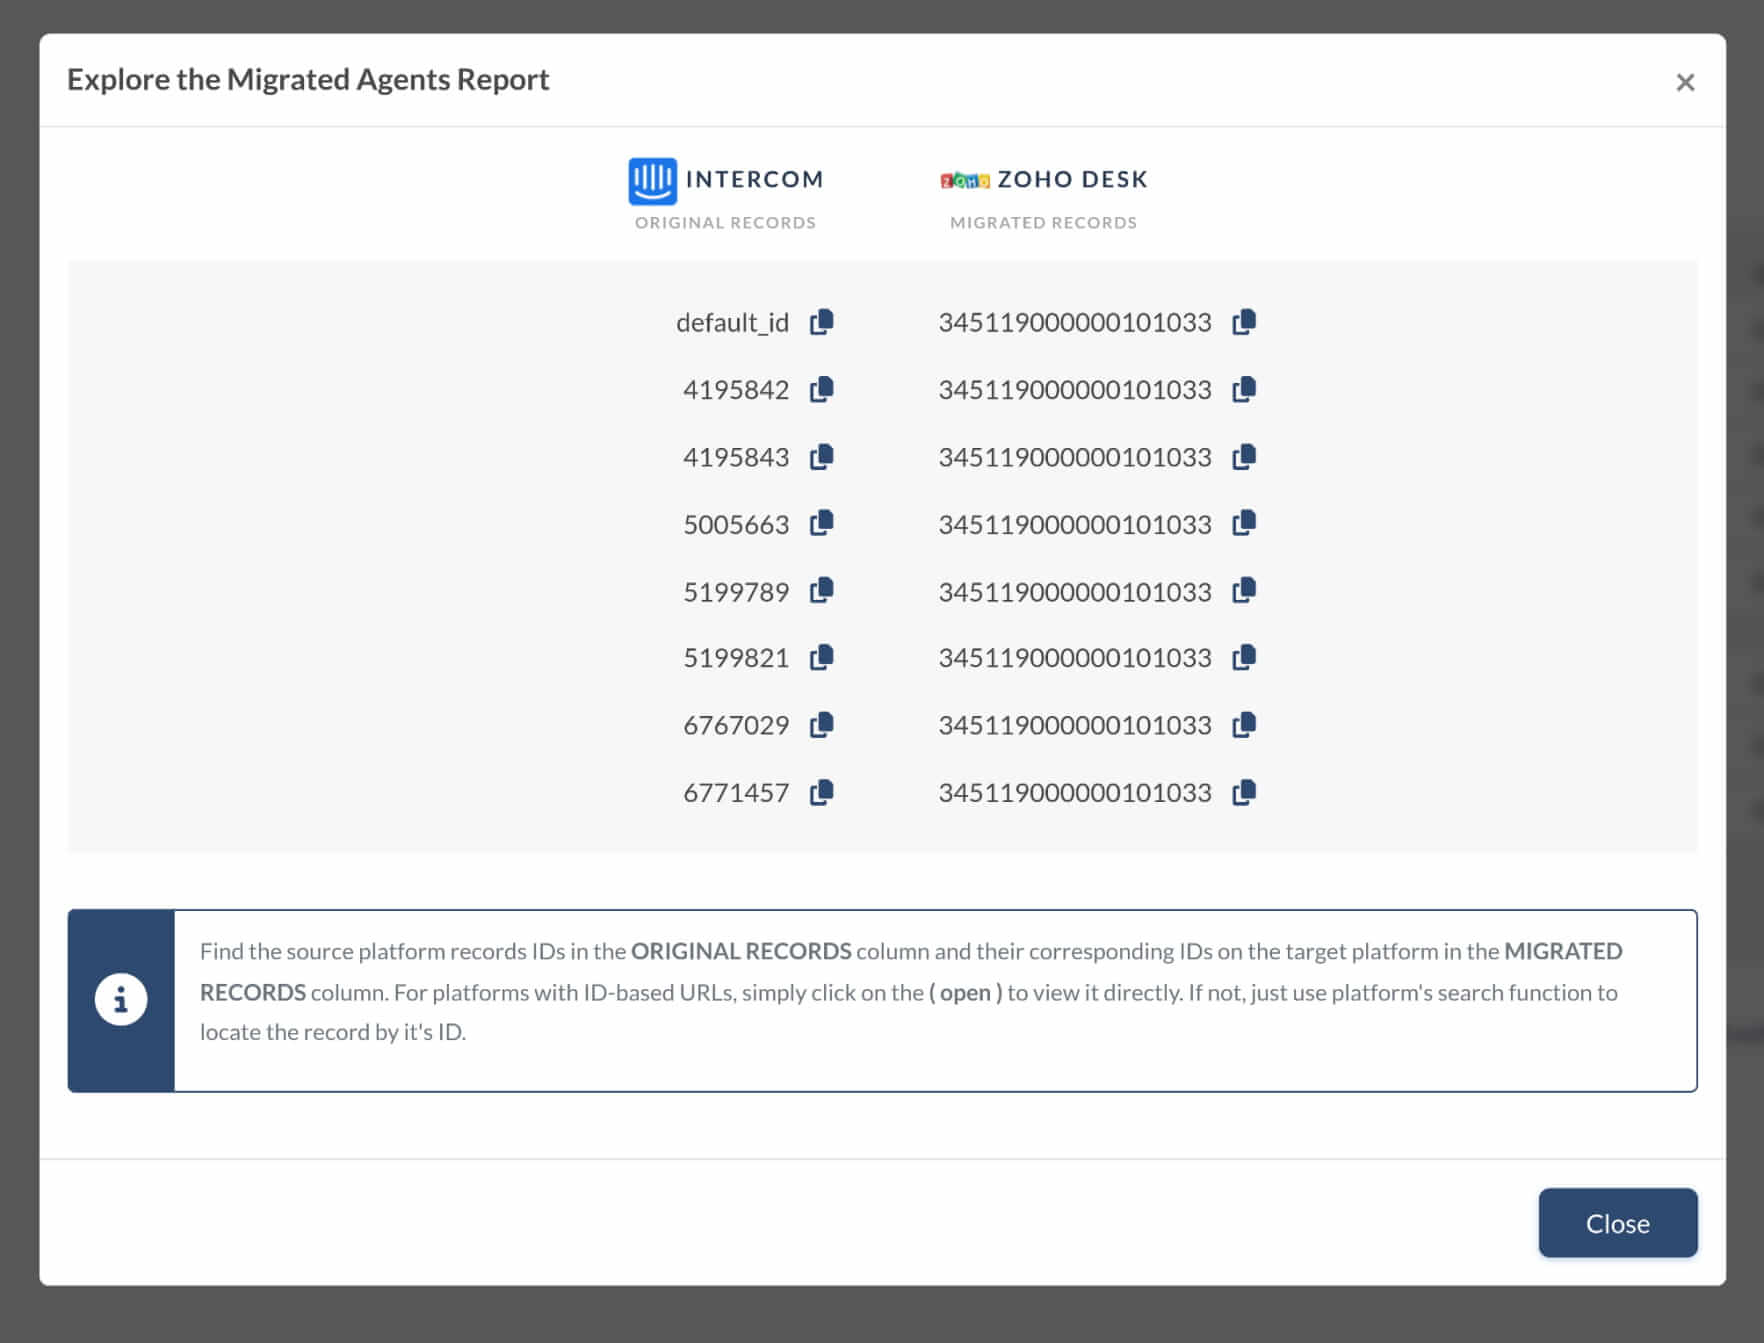
In both the Demo Migration and the Full Data Migration, tickets and related data import in the same way. Due to this, if some ticket data were not migrated or/and were transferred incorrectly during the Demo Migration, it won't be migrated during the Full Data Migration.
That’s why, look through each ticket and check if everything along with Type, Source, Status, Priority, Custom fields, Requester, Agent, and Tags migrated as needed. Do the same for Knowledge Base articles.
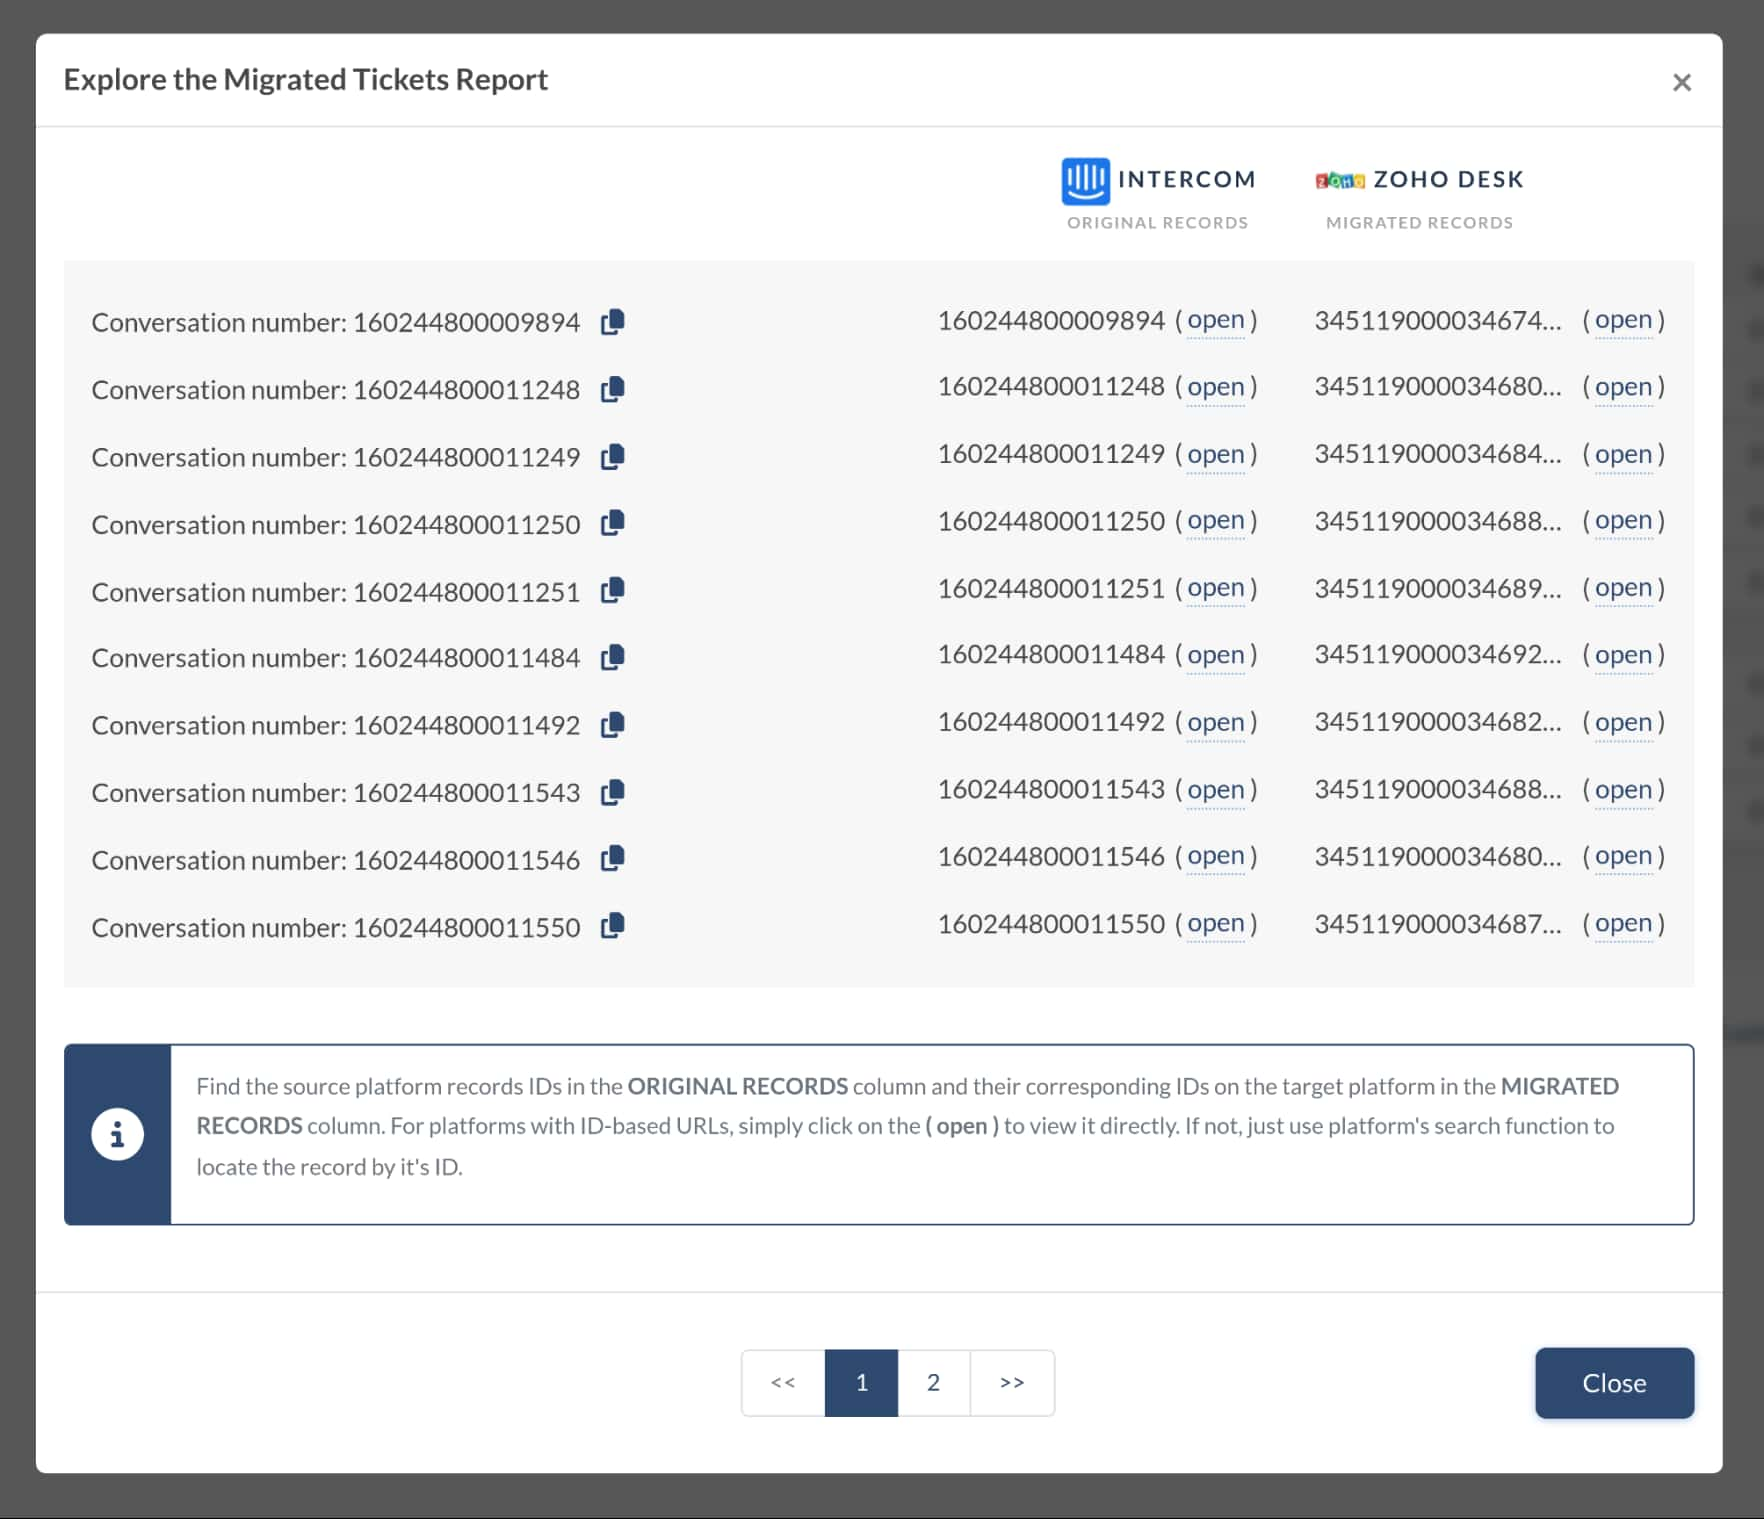
When the Full Data Migration finishes, you’ll also see the table with similar clickable reports. Examine everything to get the best experience working with Zoho Desk.
How to migrate agents with different status from/to Zoho Desk?
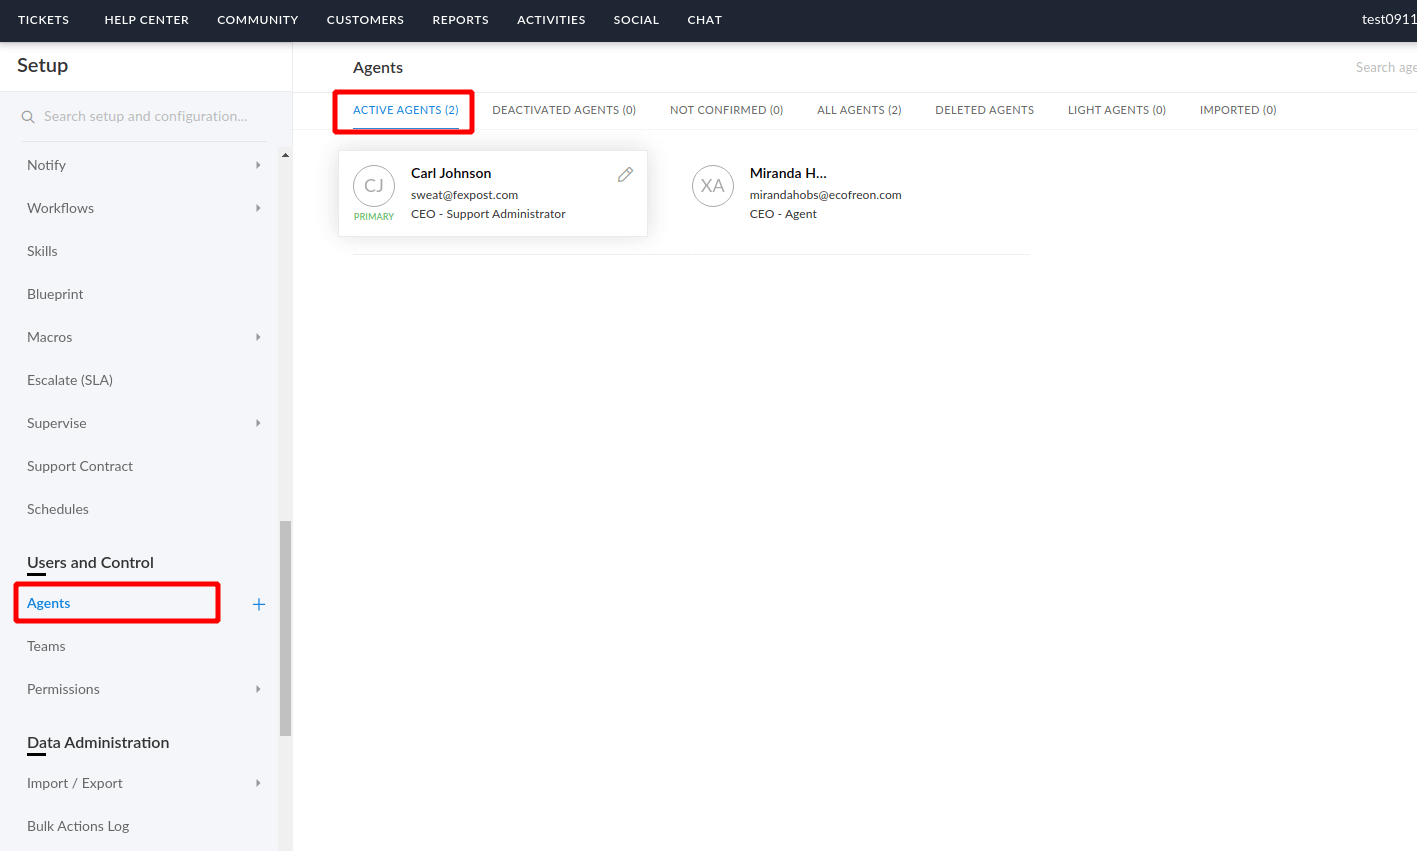
To migrate agents from or to Zoho Desk, you need to match your source and target agents. However, you can match only the active staff: agents and admin.
You can’t match Light agents, Not confirmed and Deactivated agents won’t be listed in the matching window.
If you want to see and match those types of agents, you need:
- a) Activate Deactivated agents.
- b) Confirm the email for Not confirmed agents.
- c) Change Light agents to agents.
How to disable email notifications in Zoho Desk?
Before migrating to Zoho Desk, check if the email notifications for agents and customers are enabled. If they are enabled, then during the migration, customers and agents will receive email updates as tickets are imported into Zoho Desk.
We recommend disabling all notifications before starting the migration. Here’s how to do it:
1. Go to Setup:
![]()
2. Under Automation find Notify:
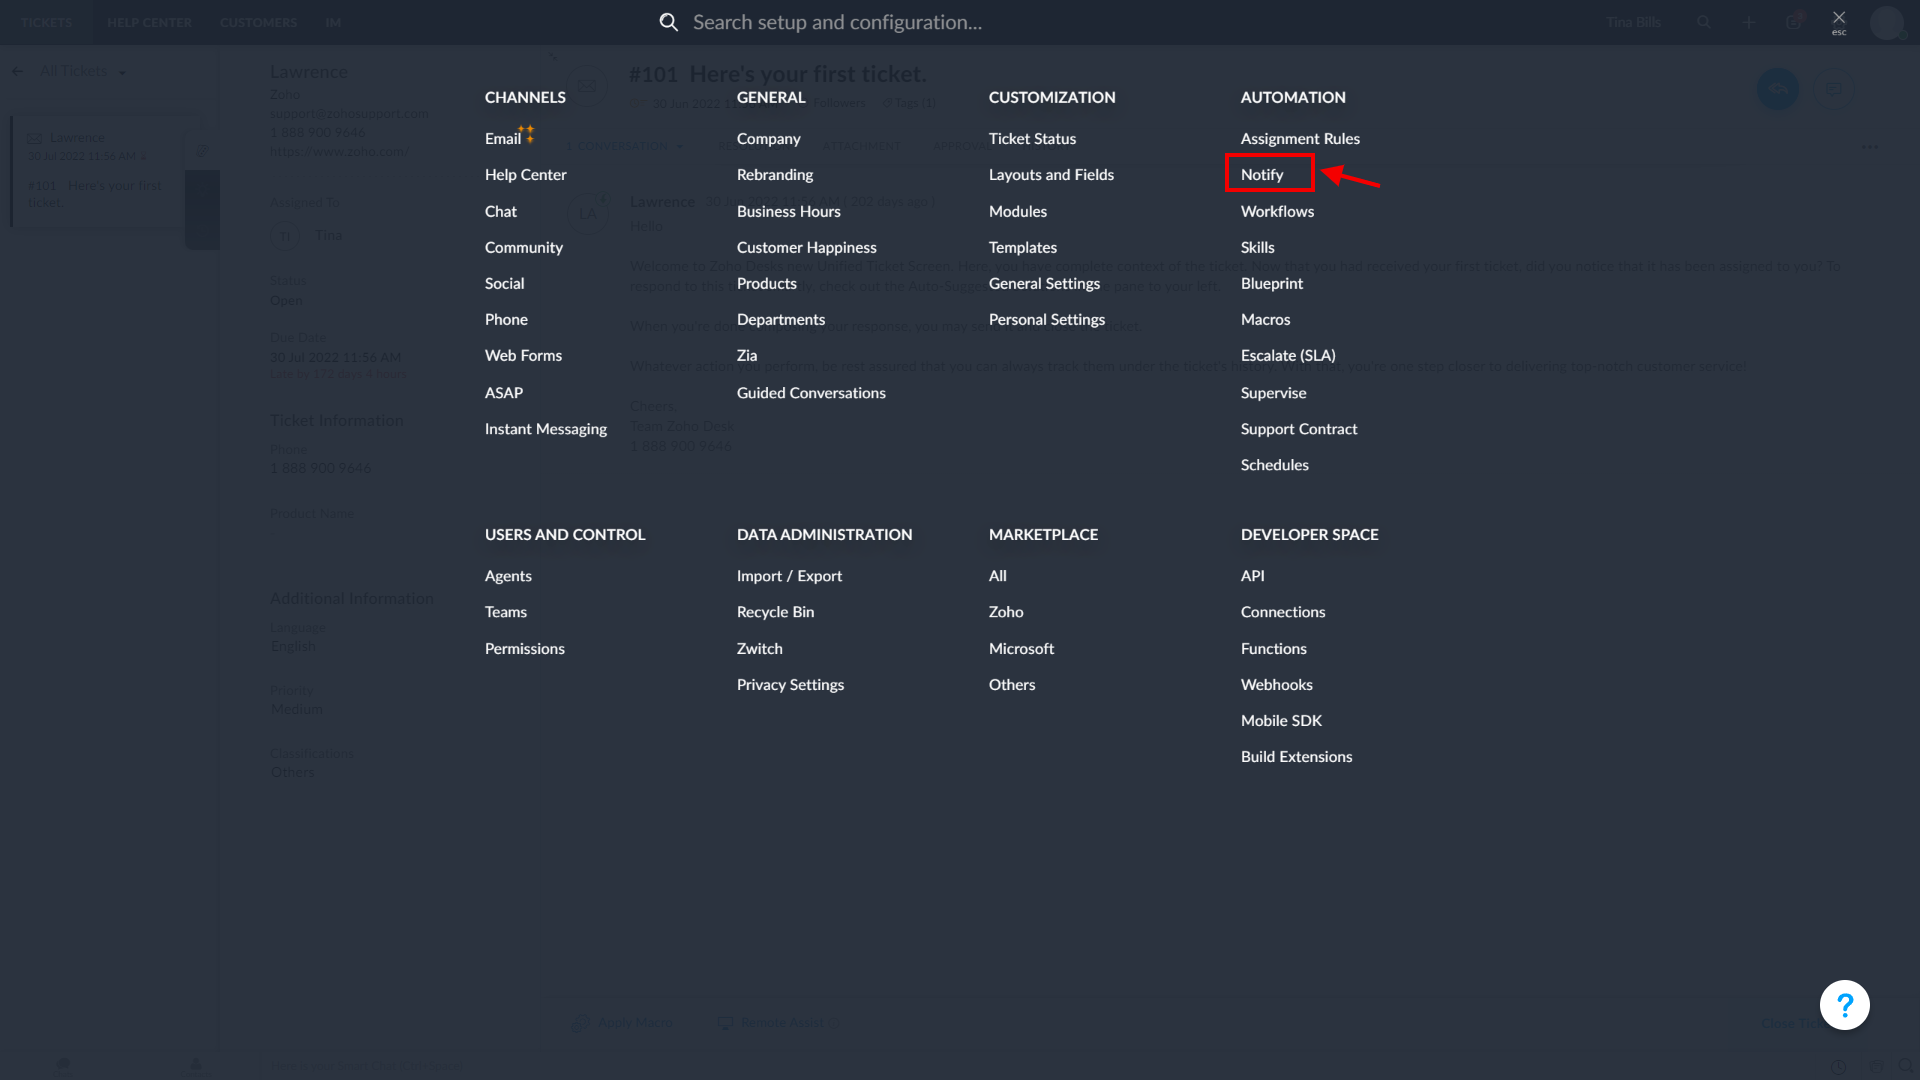
3. Disable all notifications from top to bottom. You need to disable notifications in four categories: Contact, Agent, Department, and Team.
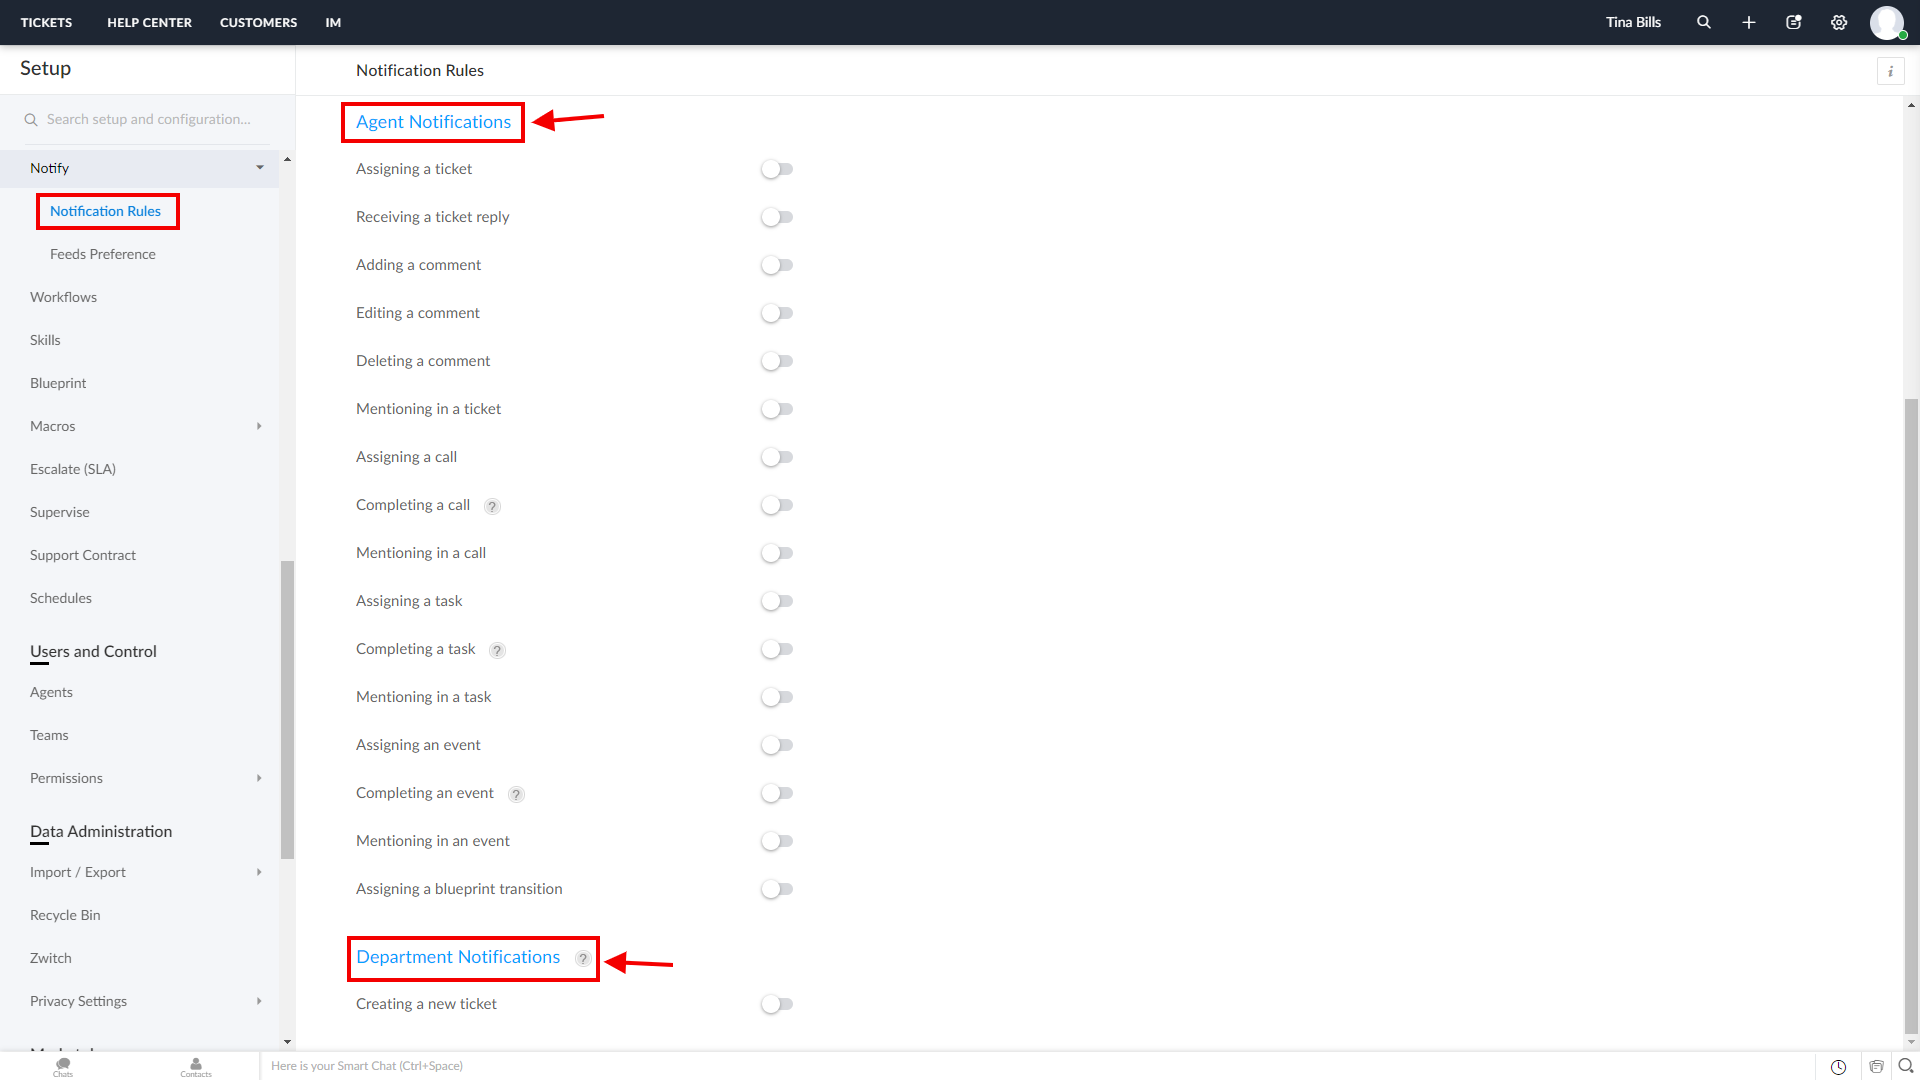
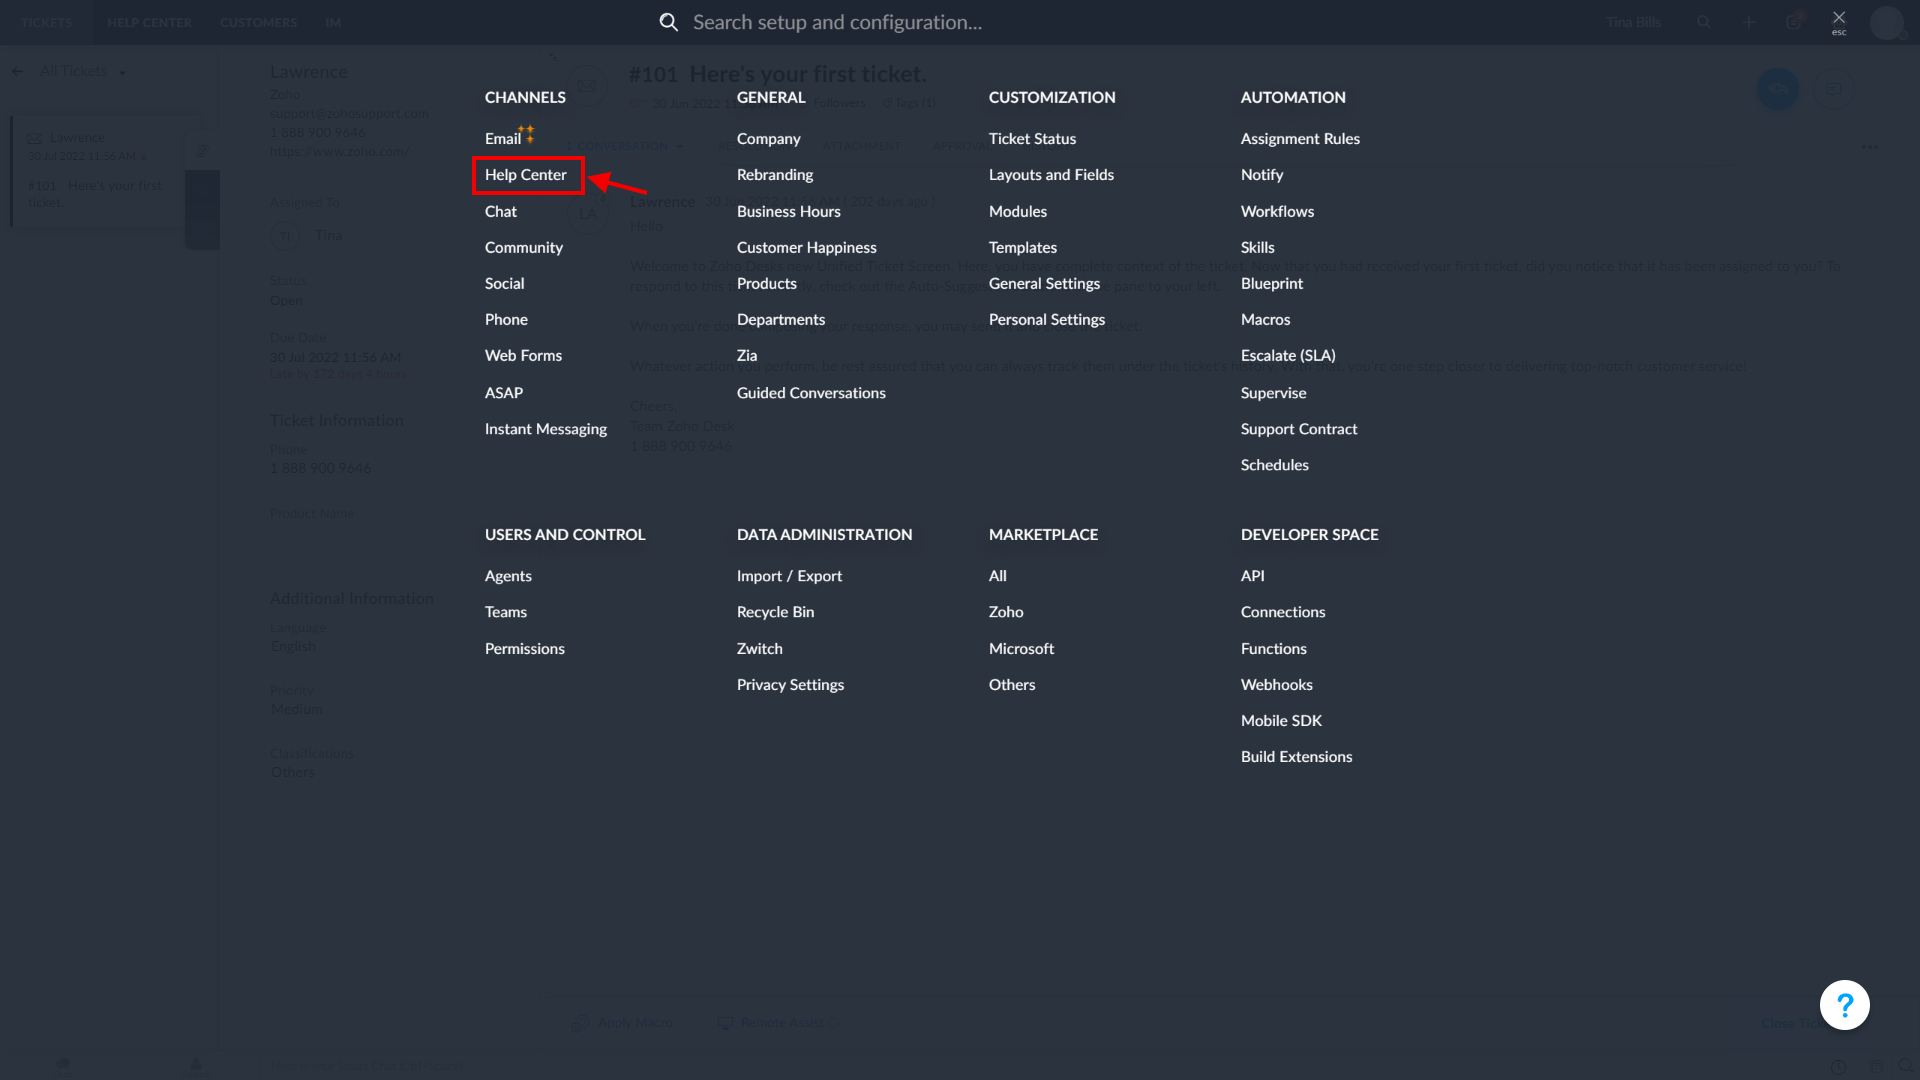
4. When the migration is over, you can enable the notifications. Additionally, we recommend disabling Customer Self-Service Portal Invitation. Unless you do this, each of your Contacts will receive a welcoming email during the migration to Zoho Desk. To do this, follow the following path:
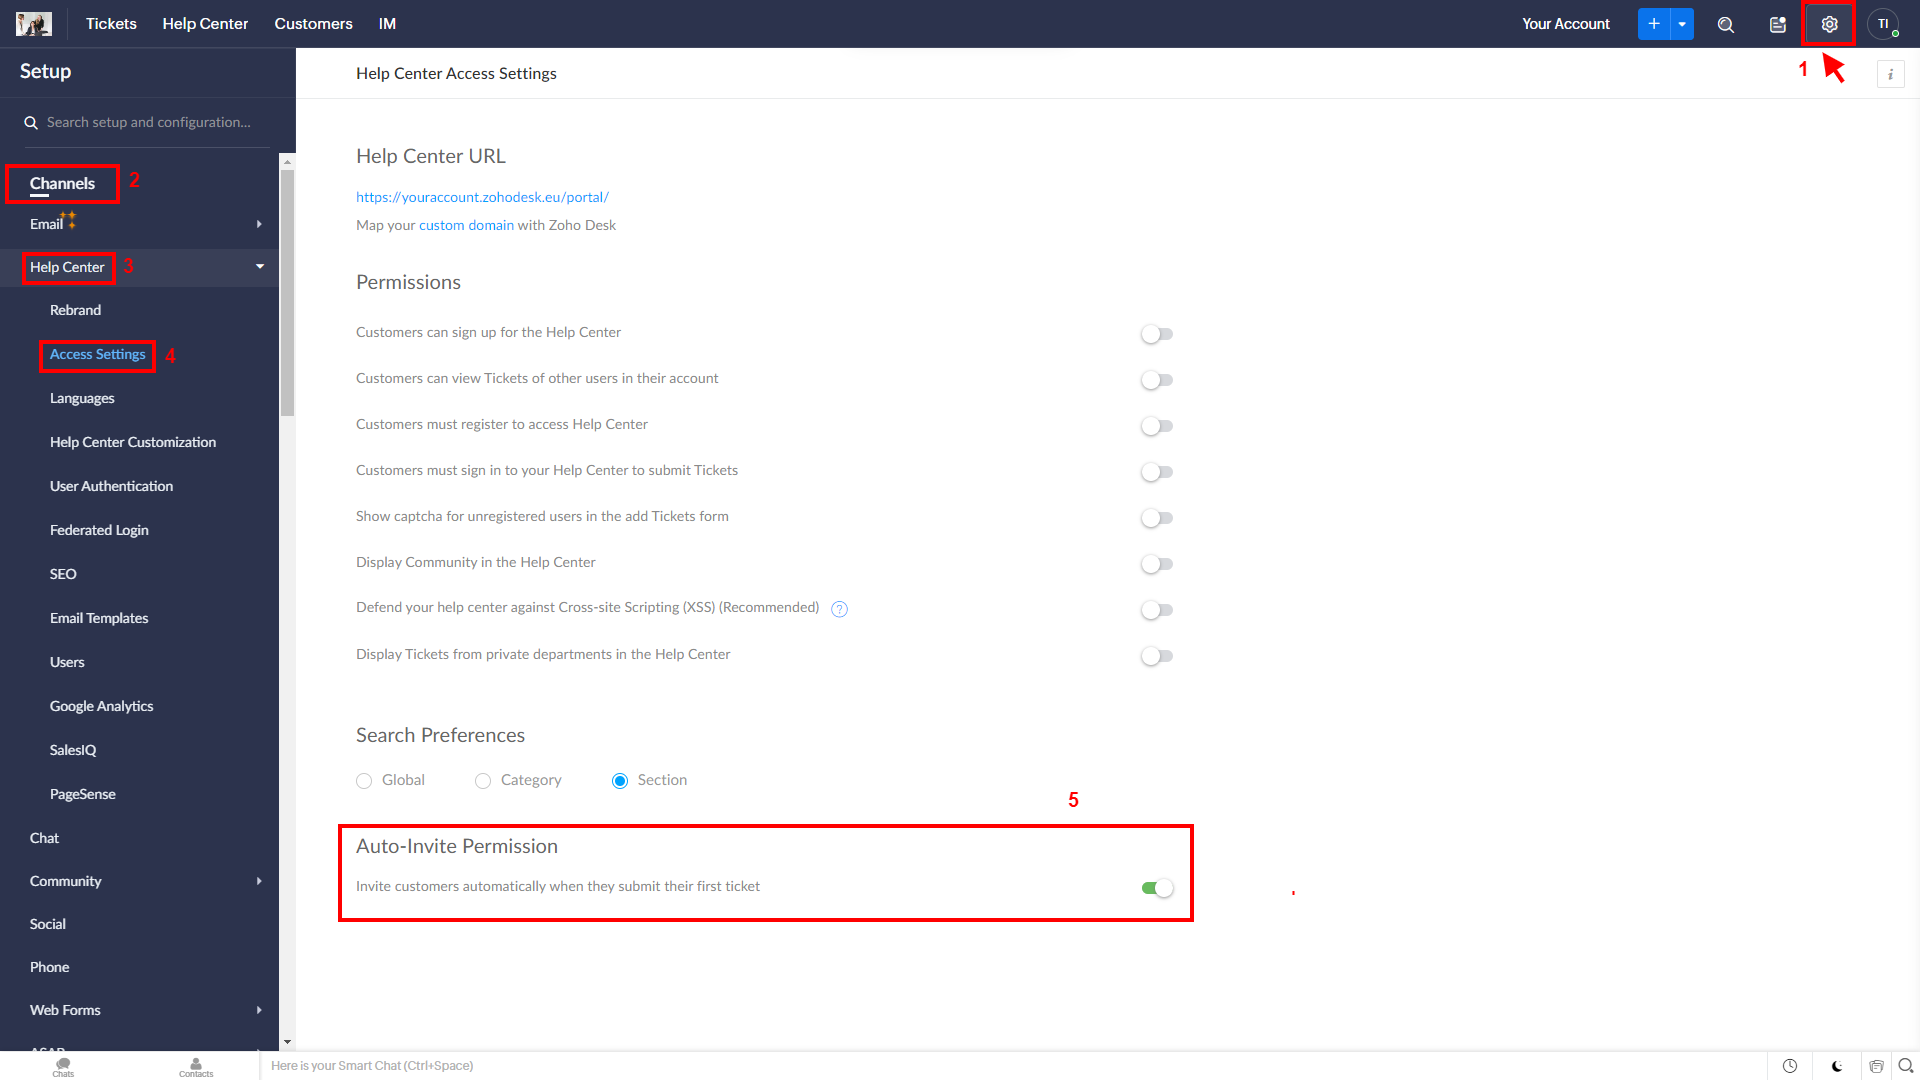
1. Go to Setup again, and under Channels, select Help Center.
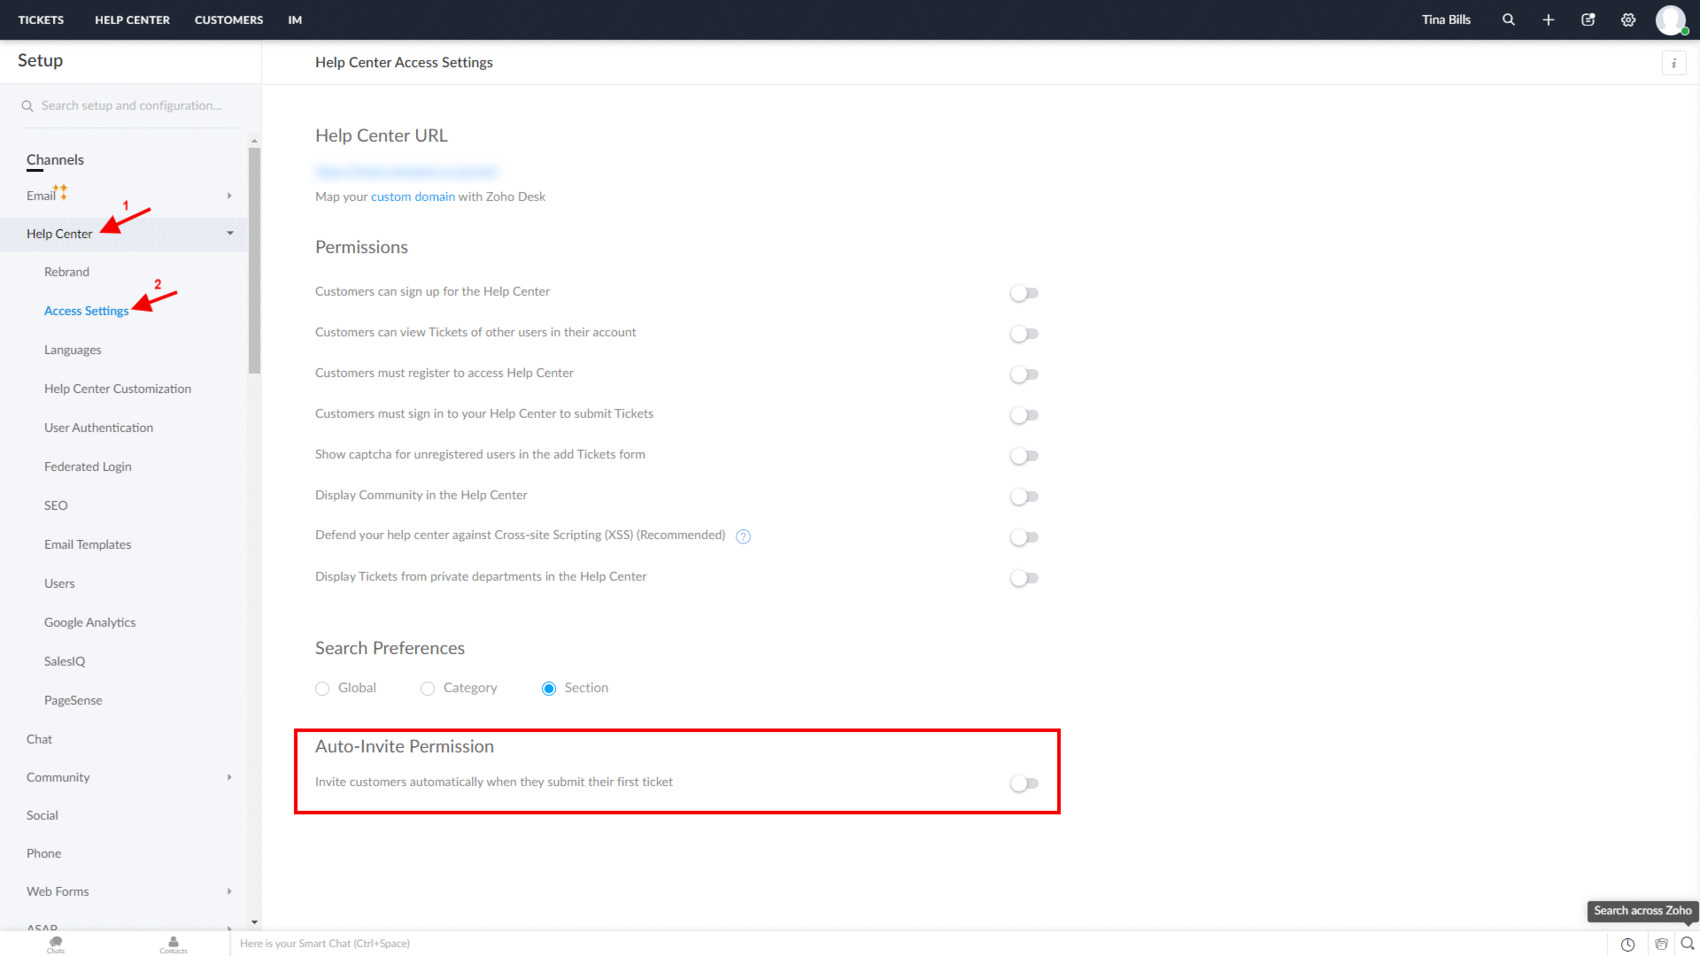
2. Move to the Access Settings section.
3. Under Auto-Invite Permissions, you will see Invite customers automatically when they submit their first ticket. You have to disable it to prevent sending out all the unnecessary emails.
How to calculate the number of customers in Zoho Desk?
With Zoho Desk’s customer views, you can filter out specific groups of customers and find out their total count.
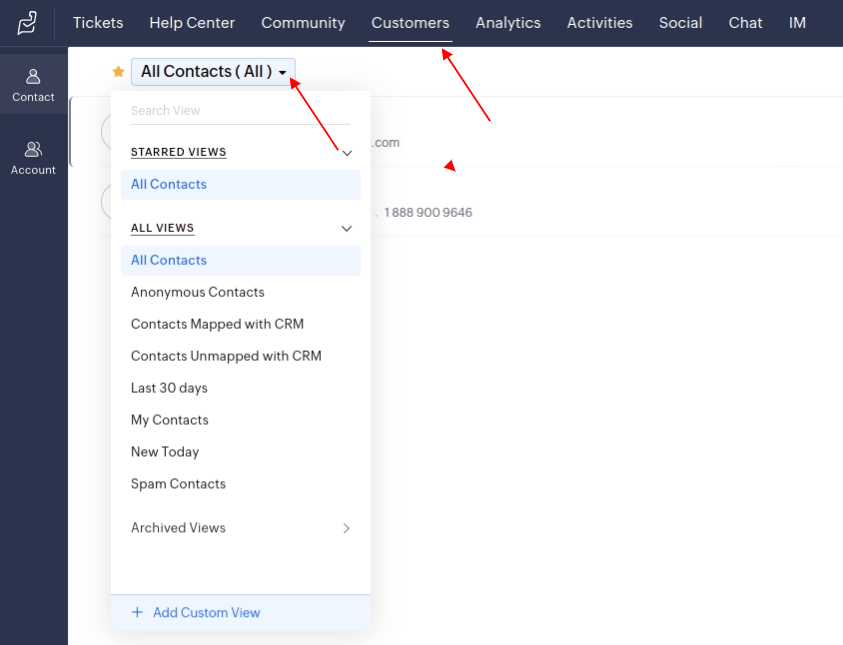
1. Select Customers on the top menu and choose the view from the dropdown. Expand the All Views dropdown to see more views.
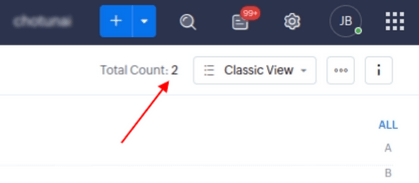
2. Click Total Count on the top left and check the number of customers.

How to calculate the number of tickets in Zoho Desk?
Zoho Desk calculates the number of tickets based on the selected view.
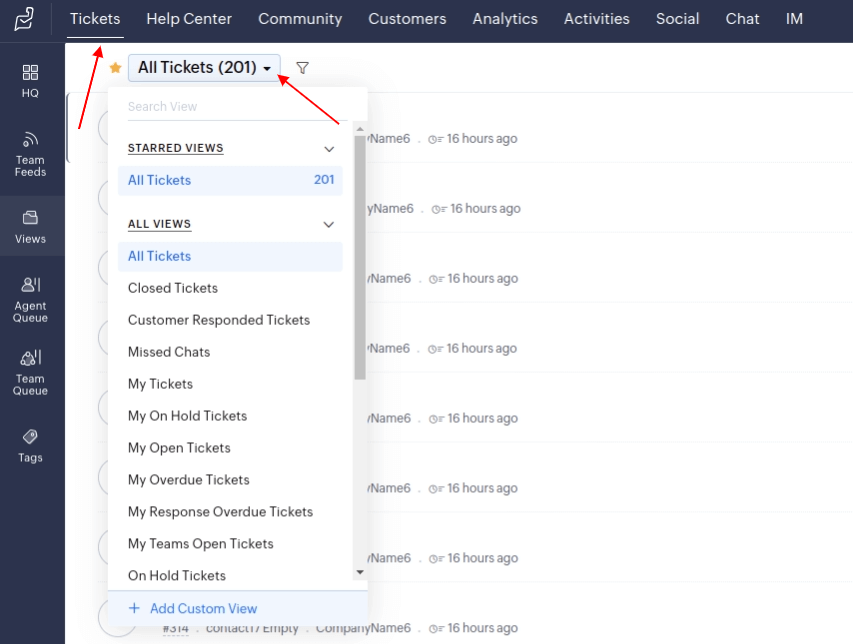
1. From the top toolbar, go to Tickets and select the ticket view. You can get more views by expanding All Views. See the number of tickets in brackets.
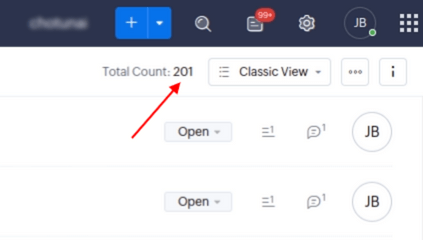
2. Click Total Count on the top left to see the total number of tickets.

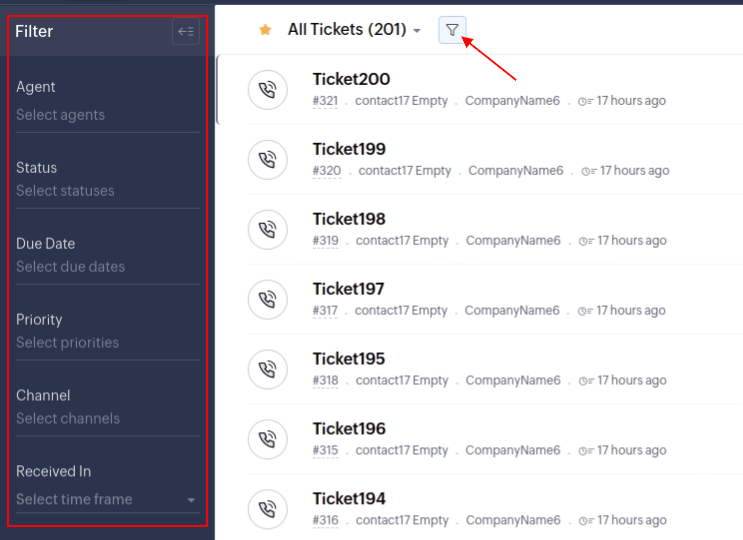
3. Click the filter icon to apply filters to the list of tickets.
How to calculate the number of articles in Zoho Desk?
Zoho Desk counts how many articles you add to your Help Center. To find the total count of articles, use the guide below.
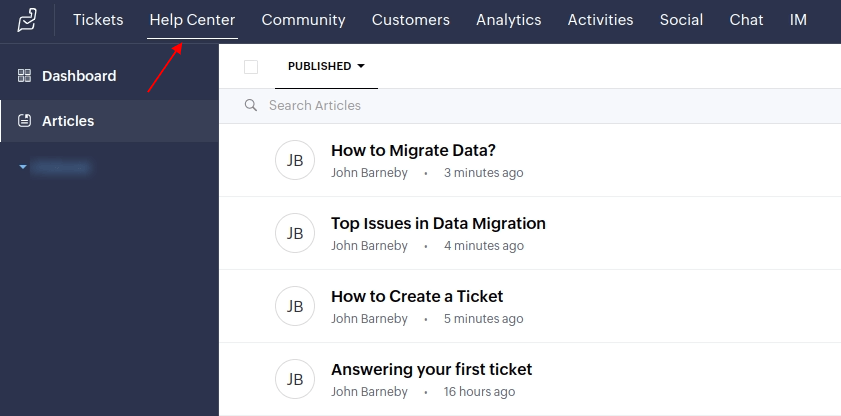
1. Go to Help Center from the top menu and choose Articles on the sidebar.
2. Click Total Count in the lower right and check the total number of articles.


3. Use the filter on the top right to search for specific articles.

How to create Users in Zoho Desk?
To migrate and match Agents when switching to Zoho Desk, manually create their profiles. Here’s how you do it:
1. Sign in to your Zoho Desk account or set up one if you haven’t already.
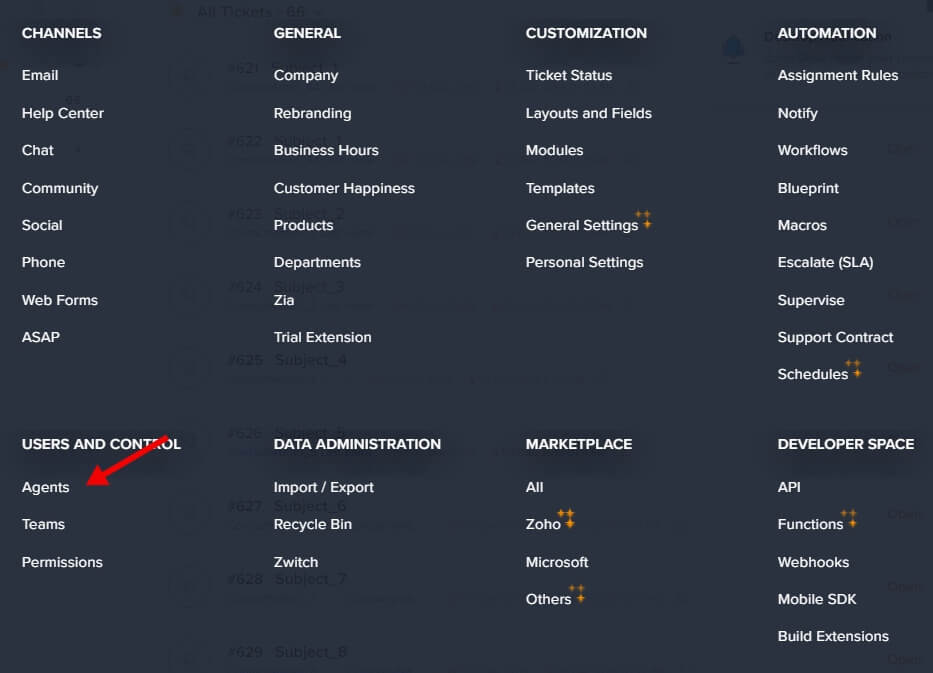
2. Click the Setup icon at the top right corner or just click "S" on the keyboard to open the Setup directory.

3. In the Users and Control category, click Agents:
4. You’ll be taken to the page with all Agents in your Zoho Desk. In the top right corner, click the "+" icon to add a new Agent:

5. Fill in all the details, including First and Last Name, email, department, agent role, etc. Please, note that all agents must have Agent permission during the migration. You may change this setting after the transition is completed.

6.Save the profile by clicking the "Add New Agent" button. All agents will receive an email notification with the prompt to accept the invitation.
Accepting invitations to Zoho Desk
When inviting Users to your Zoho Desk account, you should consider the two possible scenarios:
1. If users are completely new to the system and don’t have a Zoho account:
- After clicking the invitation link, they will be redirected to Sign Up page, where they will have to create an account with Zoho
- During account creation, click the Continue signing in button
- Then, confirm the email address and registration again by clicking the link in the Confirmation Email.
2. If users already have an account in Zoho, but don’t have one in Zoho Desk:
- After accessing the invitation link, they should only click the Continue signing in button and, afterward, they will be logged in to the Zoho Desk account associated with their company.
Re-inviting Users
If a user hasn’t accepted an invitation, he/she will be listed as “Not confirmed.” If you send an invitation to a specific user, and they haven’t accepted it within 7 days, you can send the invitation again. To do so, follow these steps:
1. Go to the Setup directory and click Agents under the Users and Control category.
2. On the Non-confirmed page, find the required agent and click the Re-invite button.
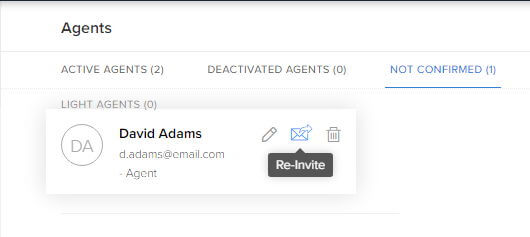
3. The new invitation will be sent to this user.
Activating/deactivating users
If you want to remove users temporarily but will need them again later, you can deactivate them instead of deleting them. Thus, you can use their license for another user, for example.
To activate the deactivated account back, follow this path:
1. Again, go to the Setup directory and select Agents under the Users and Control section.
2. Go to the Deactivated Agents view, find the necessary agent profile in the list, and click the Activate icon.

3. In the pop-up window, click Activate again to confirm the action.

How to create Teams in Zoho Desk?
Unfortunately, Help Desk Migration cannot transfer your Teams, when migrating to Zoho Desk. However, we can add the Agents to relevant Teams during the data migration process. To perform this task, the required Teams must already exist in your Zoho Desk account. So, you will need to create them manually before starting the migration. Here’s how you do it:
1. Login to your Zoho Desk account with Agents and Teams permission and go to the Setup directory.

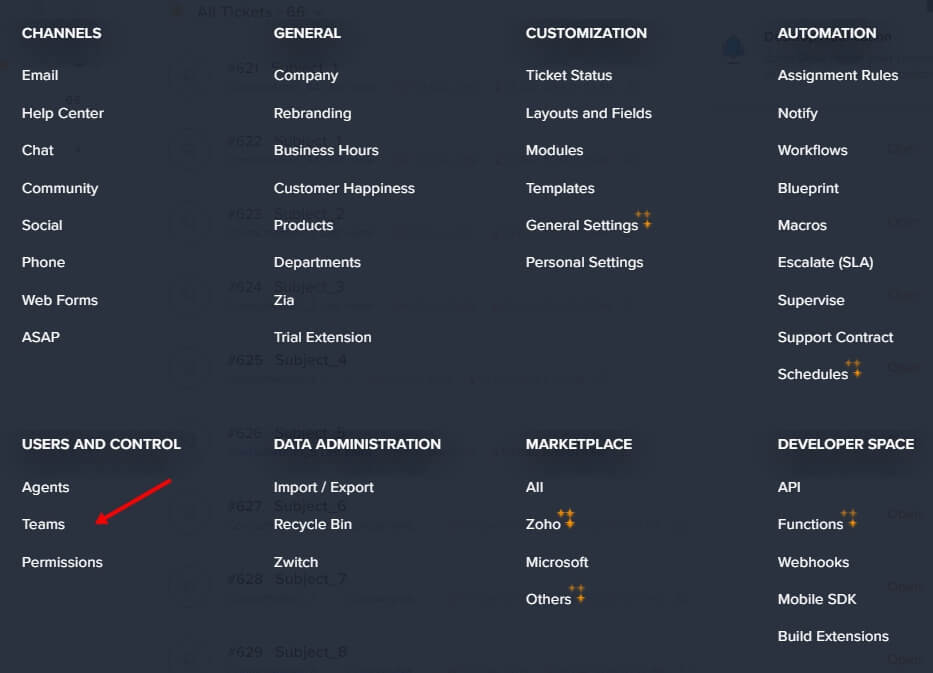
2. Select Teams in the Users and Control category.
3. In the top right area, click the New Team button.
4. Then, you will have to input the Name, and Description of your team.
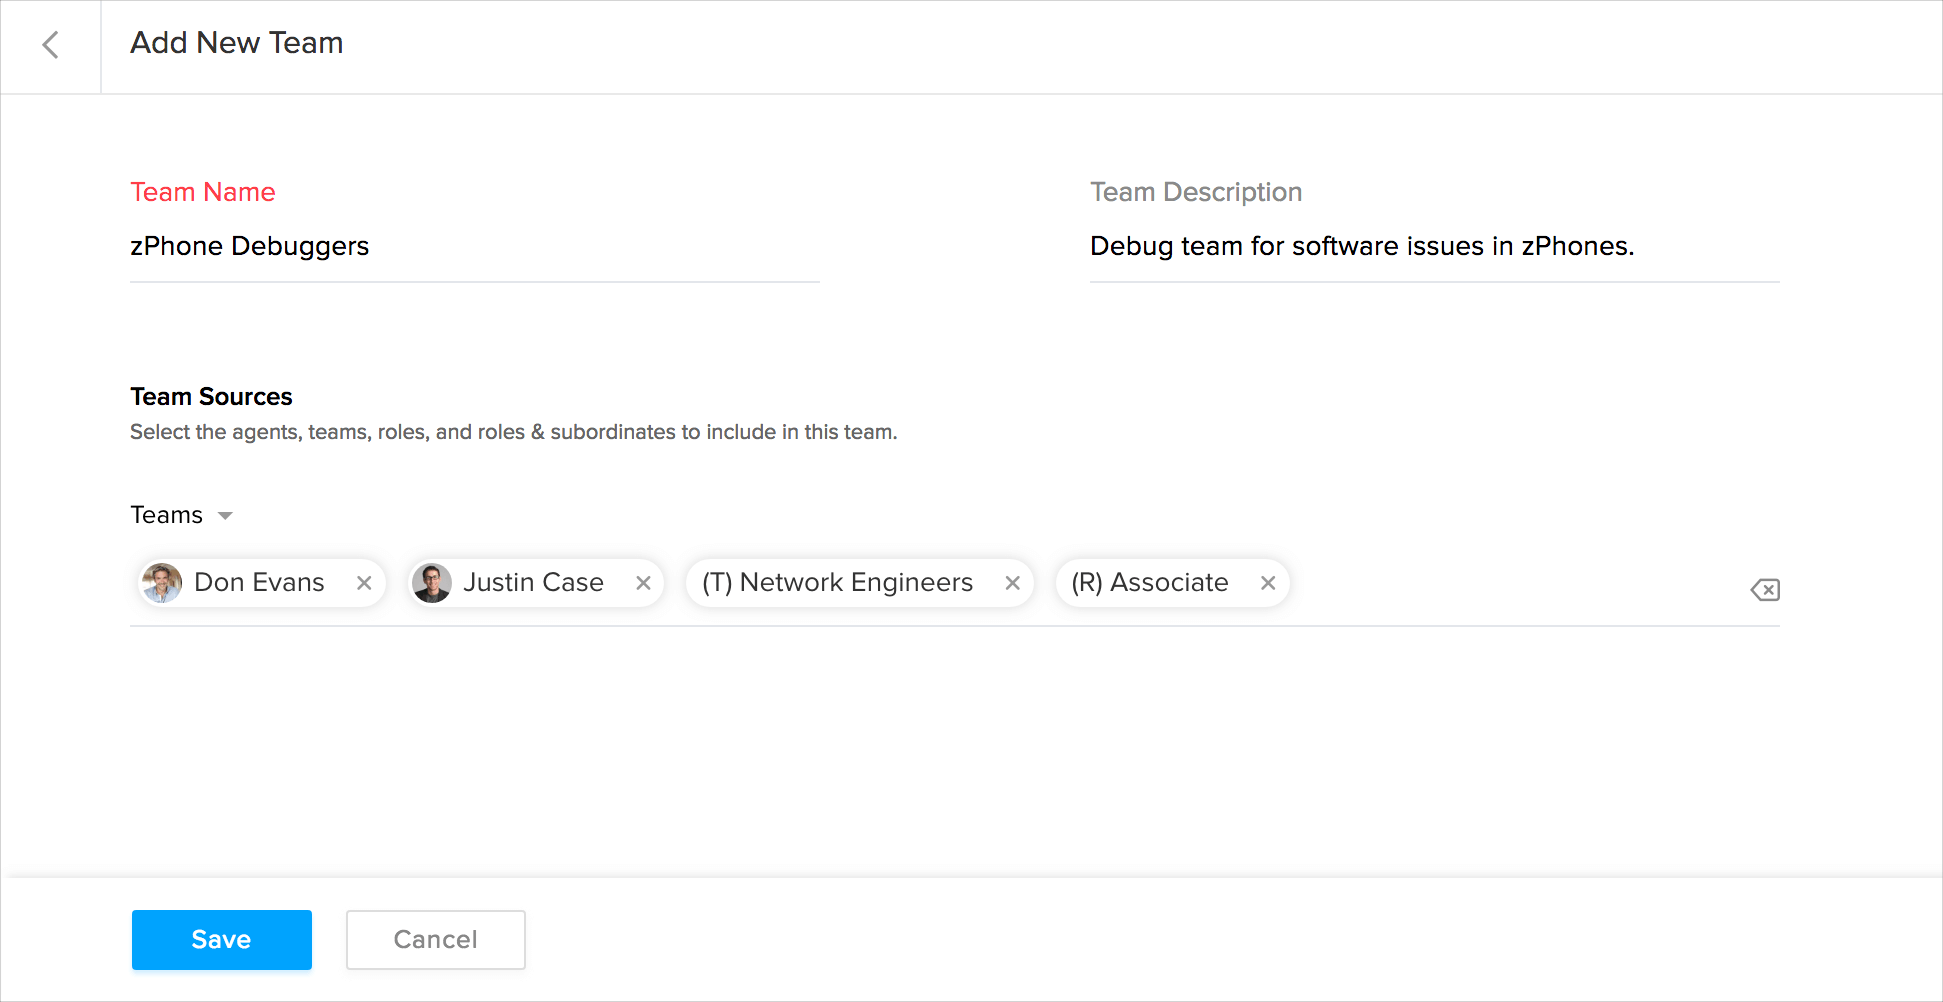
5. Click Save. Repeat the process for each team.
Additionally, you will have to turn on the Team Assignment setting. This is required to allow our Migration Wizard to assign the Tickets to your Teams during the data migration to maintain the right data structure. To do this:
1. Follow the same procedure until you are in the Teams management menu again.
2. Then, in the top right corner, click the More button (three dots symbol).
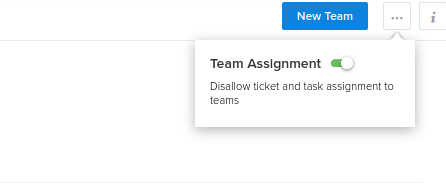
3. Switch on the toggle next to the Team Assignment text.
How to restore deleted categories in Zoho?
If you’re planning a migration from Zoho Desk and want to move all the Categories, including deleted ones, to your new help desk, you simply won’t be able to do it. We can only migrate actual records from Zoho Desk. That’s why you’ll have to restore them first, and only then move on to your migration.
Restoring Categories is a simple task, and now we’ll tell you how to do this in a few clicks:
1. First of all, login to your Zoho Desk account.
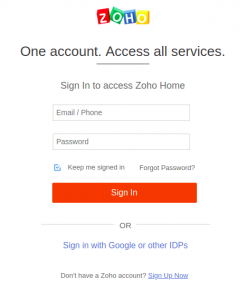
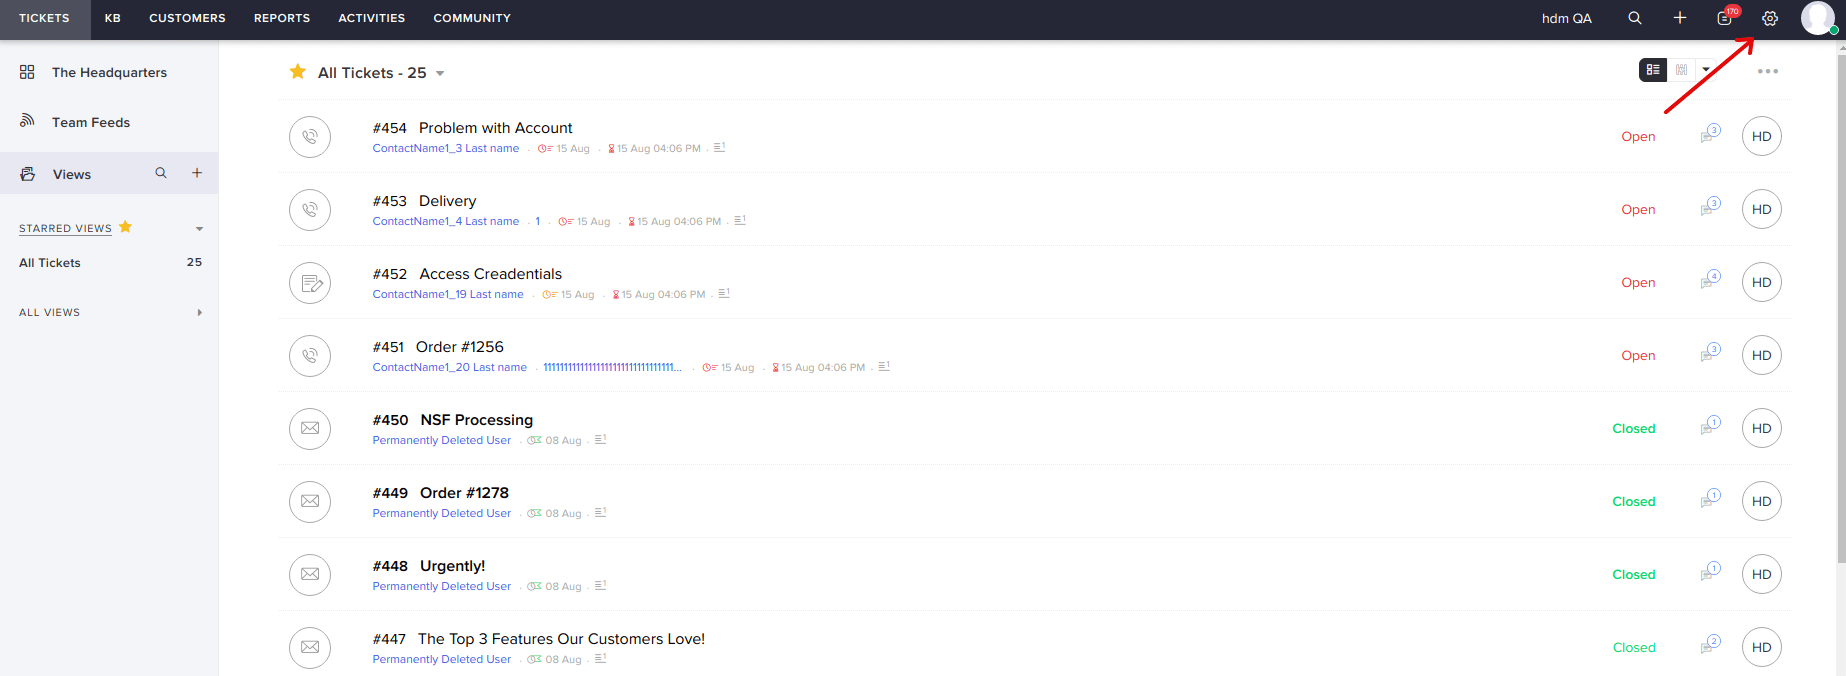
2. Then, enter the Recycle Bin where all the deleted records are stored. To do so, click on the Setup button.
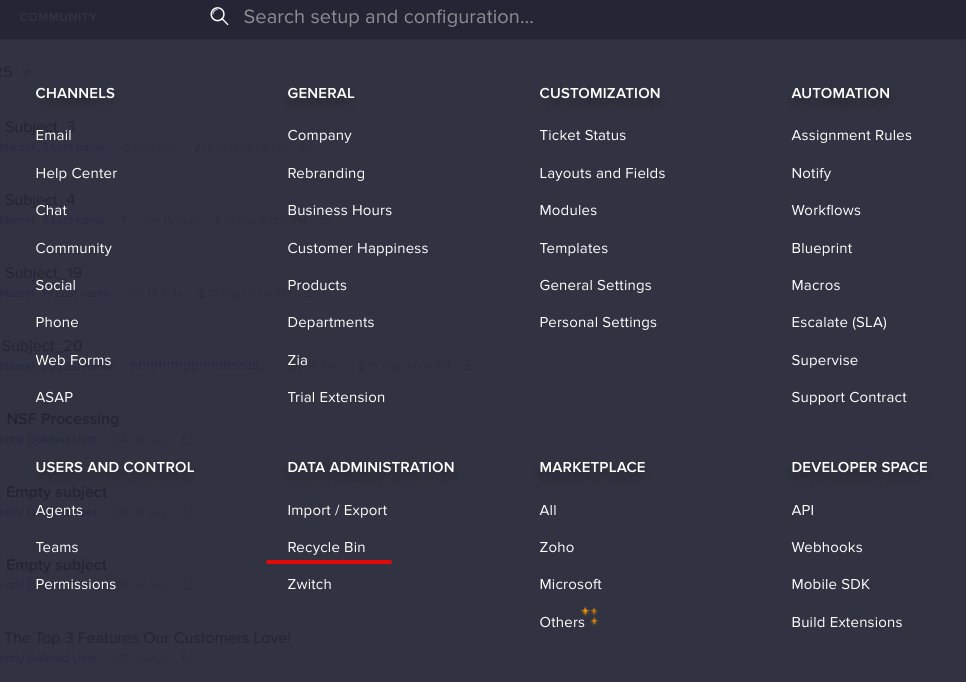
3. In the options available, find the Recycle Bin under DATA ADMINISTRATION column.
4. Now, you can view all the deleted data from your Zoho Desk account.
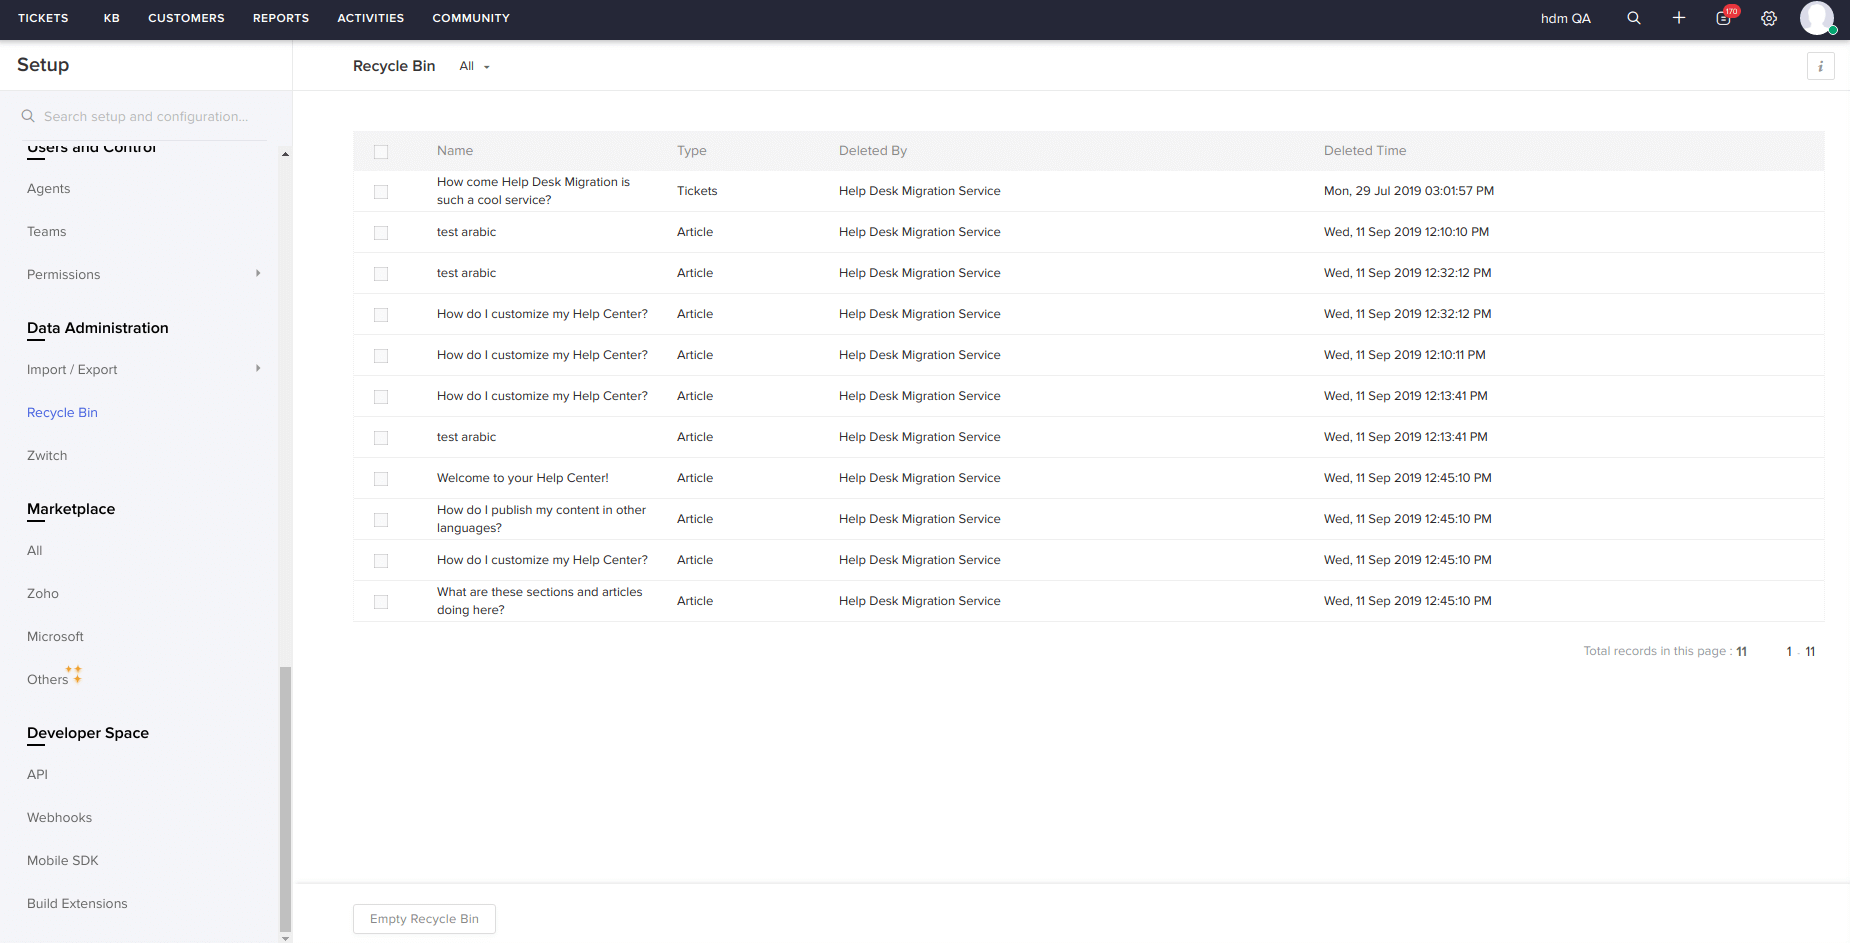
5. To restore any record from the Recycle Bin (including Categories), check the boxes next to the necessary fields.
How to find Portal name in Zoho Desk?
You can easily find Portal name in Zoho Desk by following this guide:
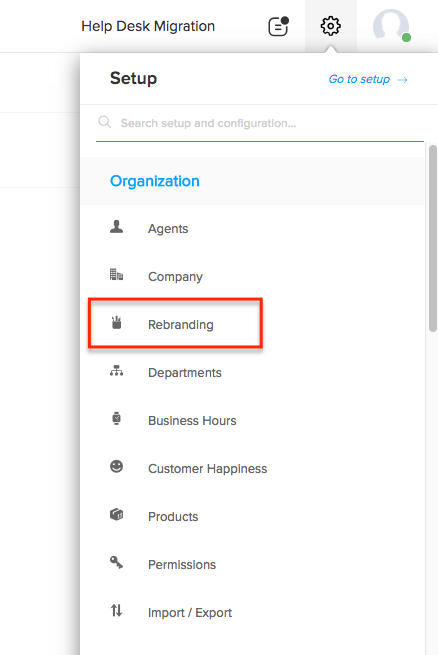
1. Go to Setup and Choose Rebranding
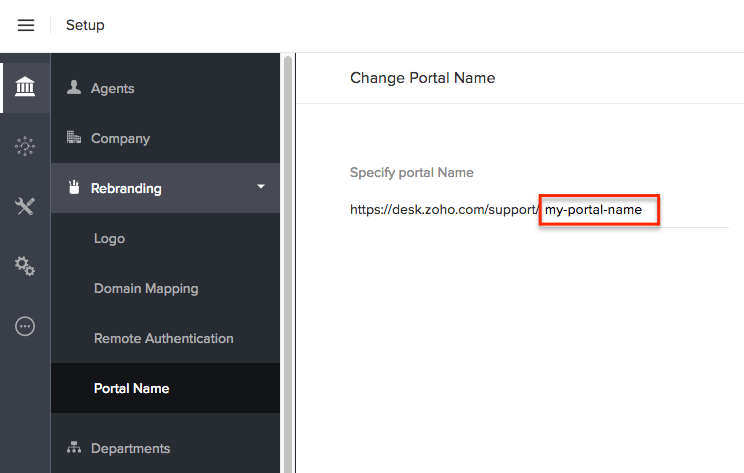
2. In the left menu, choose Portal name and find the necessary link.
How can end-users access a portal in Zoho Desk after the data migration?
When it comes to accessing a portal in Zoho Desk after the data migration, even experienced users get stuck. To help you out, we prepared a detailed article covering the process from A to Z. We hope it will make things more clear.
For the users to receive Portal invites, you’ll have to enable the ‘Auto-Invite permission’ trigger in Zoho Desk beforehand. Go to Setup & Channels &; Help Center & Access Settings & Auto-invite Permission.
To open the invitations, log into your email and open the needed email. Then, click the ‘Accept the Invitation’ button.

You will then be redirected to a new landing, where you’ll have to provide the email and password. After inserting the needed credentials, you’ll see the ‘Edit Profile’ page, where you can fill in the personal details.

Having completed all the previous steps, the end-user in Zoho Desk can:
- Create tickets
- View tickets (only the ones where he/she is a requester)
- Search tickets
- Update certain fields in tickets
- Comment on Tickets
- View articles, folders, and sections
How do I migrate custom fields from Zoho Desk?
When mapping ticket fields, at the very bottom of the form you will find all custom fields that our service has retrieved. Map them according to your needs. Note that you should only map fields of the same type. i.e., the text field on Zoho Desk should only be mapped with a text field on a target platform.
How to add, edit and delete custom fields on Zoho Desk?
Before setting up your data migration to Zoho Desk, create custom fields since they cannot be created automatically. Here’s how you do it.
How to create custom fields in Zoho Desk
Step 1. Log into your Zoho Desk and click the Setup icon at the very top of a page. The icon is placed next to your profile picture.
![]()
Step 2. Under Customization, choose Layouts and Fields.
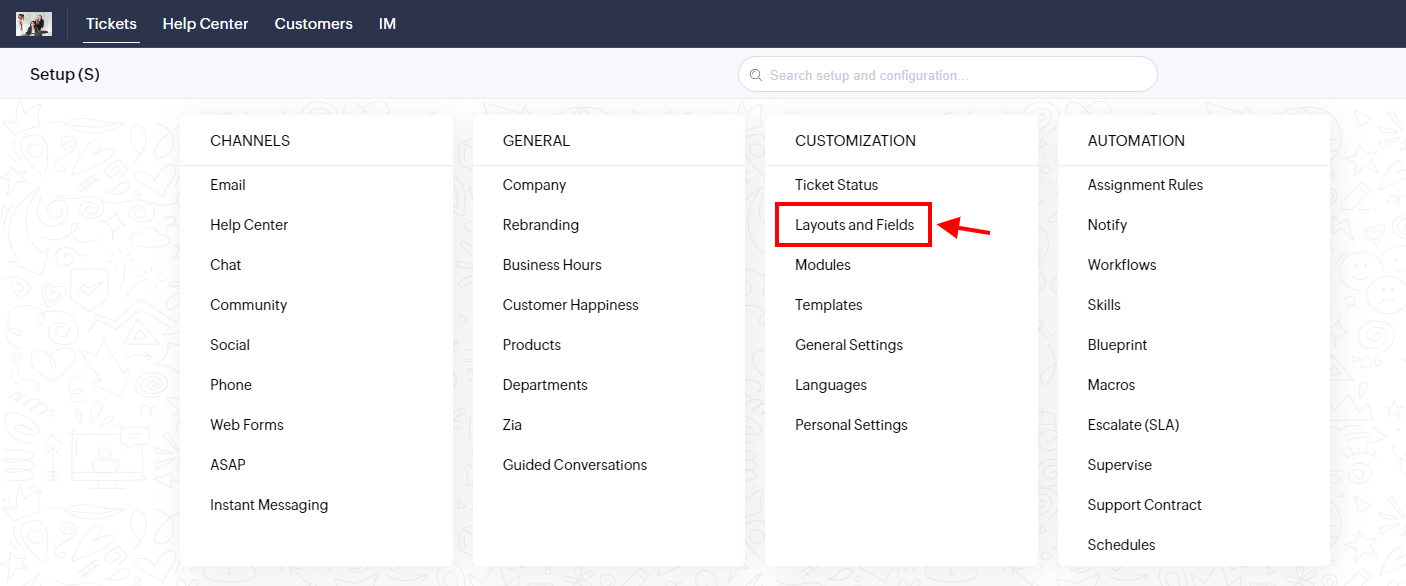
Step 3. Select the field list. Then click on Create Or Edit Fields.

Step 4. From the Add Field Section on the right, use the drag-and-drop technique to move a field of your choice to the module section on the left. You can rename the field and set Field Properties for it. Note that Zoho Desk does not allow changing the field type. When moving custom fields you should be aware that some specifications are required. For instance, for Date/Time – current or needed date and time, for Email – Email addresses.
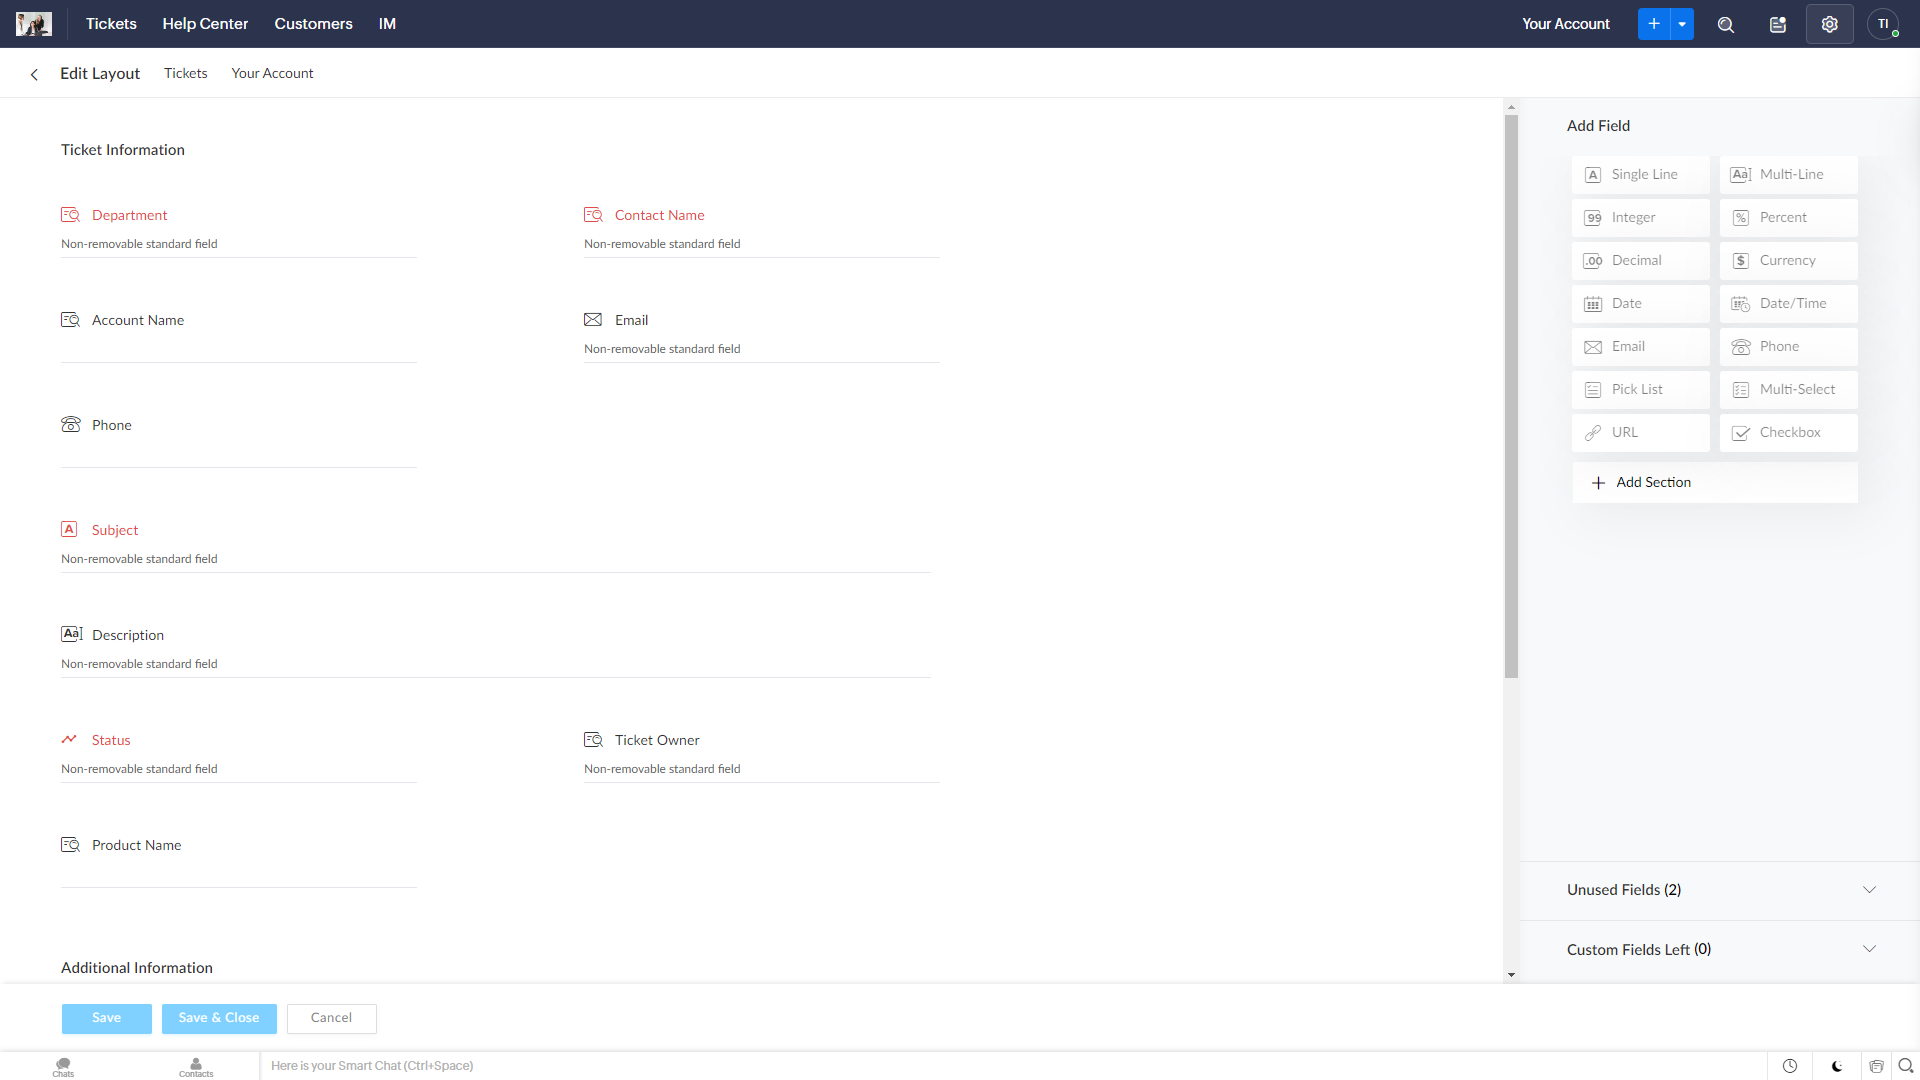
Step 5. Click on a Gear icon. Let’s work on the following features.
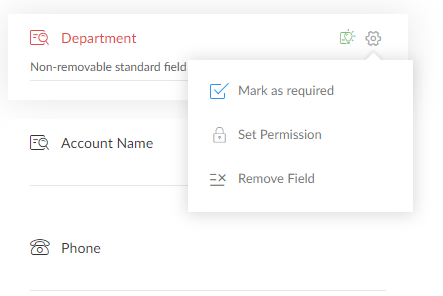
5.1. Mark as required can be used to make any custom field mandatory.
5.2. In set permission, define which function will be allowed by staff members in your company. Note that only when a certain field is marked as Read & Write for everyone can it be made mandatory.
5.3. There is a Tooltip tool that may show hints. However, it can only be set to Pick List, Multi-Select Pick List, Checkbox, Date, and Date/Time.
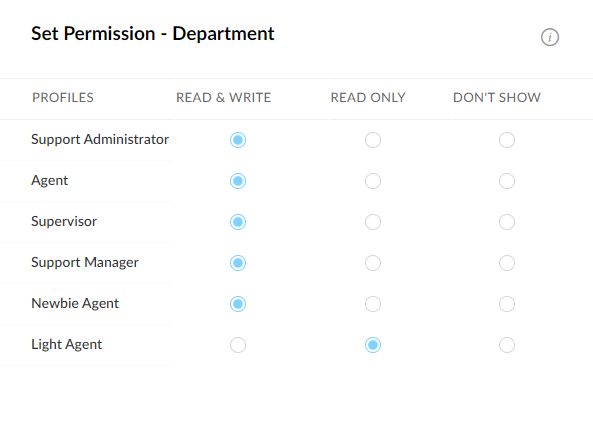
Step 6. If you are satisfied with the outcome, click Save Layout.
How to edit custom fields on Zoho Desk
Step 1. Log into your Zoho account and click the Setup icon at the very top of a page. The icon is placed next to your profile picture.
![]()
Step 2. Under Customization, choose Layouts and Fields.

Step 3. Select the field list. Then click on Create Or Edit Fields.
Step 4. In the right corner, click on Create or Edit Field.
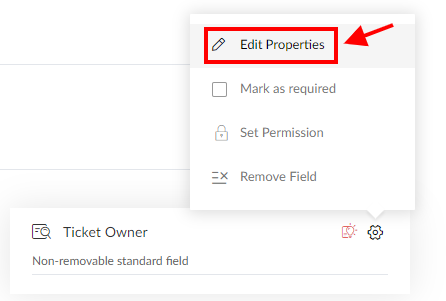
Step 5. Make the needed changes concerning mandatoriness, providing hints and names.
Step 6. If you are satisfied with the outcome, click Save Layout.
How to delete a custom field in Zoho Desk
Step 1. Log into your Zoho account and click the Setup icon at the very top of the page. The icon is placed next to your profile picture.
![]()
Step 2. Under Customization, choose Layouts and Fields.

Step 3. Select the field list. Then click on Create Or Edit Fields.
Step 4. Choose between two options:
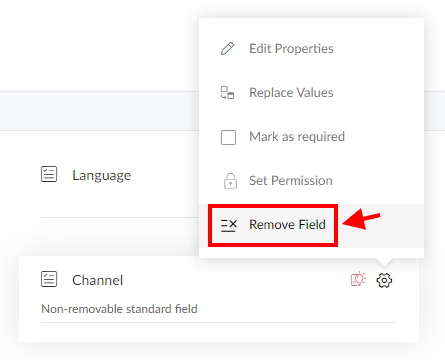
4.1. Choose the field you want to delete and click on the Gear icon and click Remove Field. This way the field will be permanently deleted. Keep in mind that once deleted, it can not be restored. Also, you can not delete basic fields, only to remove them from a certain layout.
4.2. Use the drag-and-drop technique to move the unwanted field to the Unused Fields section. It does not delete it forever, just removes it from a certain department layout and not from Zoho Desk. You can restore it, by using the same technique to move it to the required section.
How to Find a Ticket ID in Zoho Desk?
When preparing for your data migration with Help Desk Migration, it’s essential to locate the correct ticket ID in Zoho Desk. Here’s why:
- Run a Demo with Custom Data–You can add up to 20 ticket IDs to see how they’ll migrate during a demo.
- Check Your Migration Results–After the migration, compare the original and migrated tickets to make sure everything looks good.
Find a Ticket ID in Zoho Desk
- Log in to Zoho Desk and open the Tickets section.
- Click on the specific ticket you need to reference.
- Check the URL in your browser. The ticket ID appears at the end of the URL (e.g., https://desk.zoho.com/agent/customer-support/tickets/details/345119000036853837)
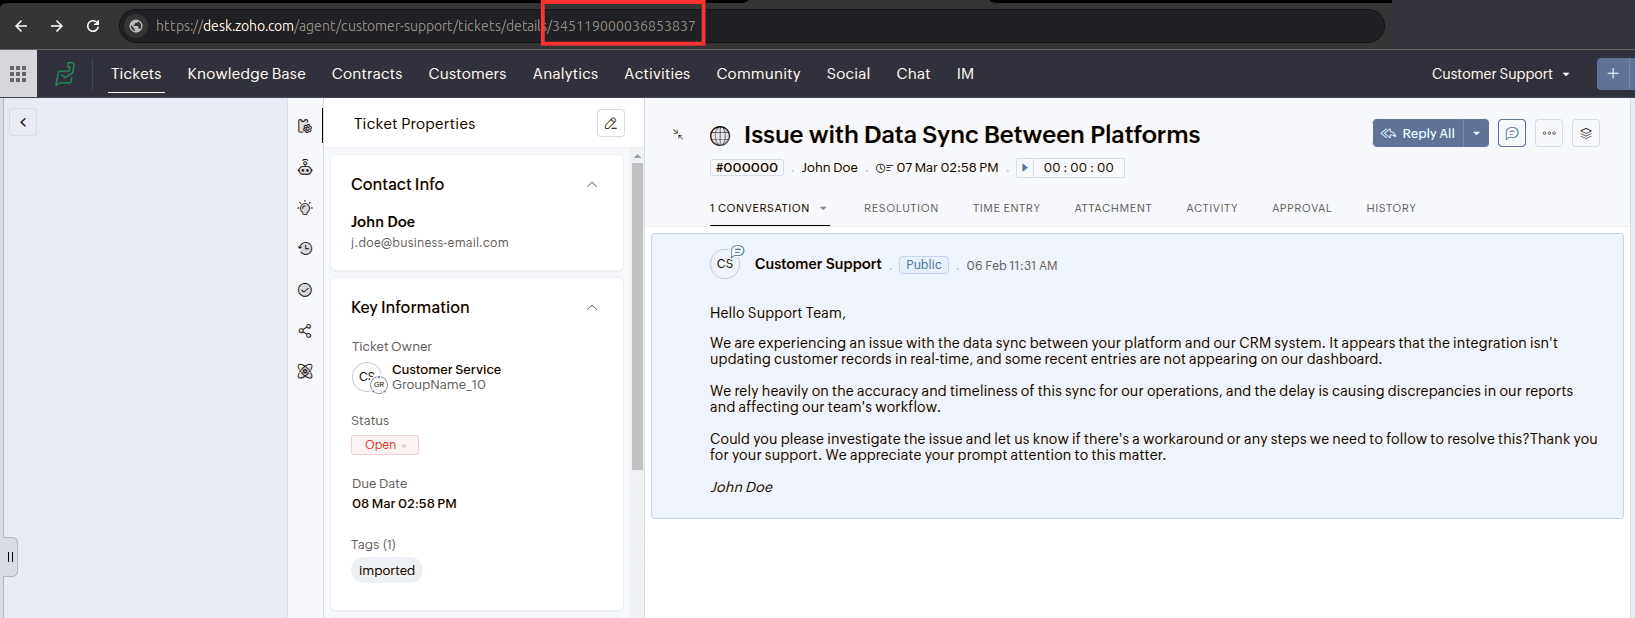
Once you have the ticket ID, you’re ready to use it in the Help Desk Migration demo or to check the data migration results.