Halo Service Solutions Data Migration Checklist
Moving your data to Halo Service Solutions might seem challenging, especially when leading with large records. But fear not! With a migration plan and an automated Help Desk Migration service, your Halo data transfer is on track for success. Move incidents, agents, contacts, and more with just a few clicks, all without downtime.
What Migration Wizard Can Import to Halo Service Solutions
| Entity | Related data |
| Tickets |
|
| Contacts | |
| Agents | |
| Organizations | |
| Groups | |
| Articles |
|
What Data Won’t Be Imported
Our data migration tool can’t shift ticket tags, custom fields for organization and contacts, macros, triggers, automation, and other settings.
Before You Start Data Migration
To ensure a successful Halo data transfer, go through these preparation steps.
Data Migration Process Planning
Every data migration is unique, and there's no one-size-fits-all solution for every data transfer. From our experience, we've pinpointed two methods:
- Automated data migration or DIY migration
- Custom data migration
- Automated or custom data migration + Delta migration
If you require assistance with planning and carrying out your data migration, reach out to us. We're here to help you build your migration project.
Pre-migration Settings on Halo Account
For a smooth Halo Service Solutions data migration, follow these steps:
1. To connect Halo, you need to fill in
- Authorisation Server: Go to Configuration → Integrations → Halo Service Solutions API (i.e., Halo PSA API, Halo ITSM API, or Halo Service Desk API) → Authorisation Server.
- Client ID: Navigate to Configuration → Integrations → Halo Service Solutions API (i.e., Halo PSA API, Halo ITSM API, or Halo Service Desk API) → View Application → New.
- Client Secret: Hover over to Configuration → Integrations → Halo Service Solutions API (i.e., Halo PSA API, Halo ITSM API, or Halo Service Desk API) → View Application → New. Check the sample for Halo ITSM below:
2. Add all source agent profiles you need to shift to Halo Service Solutions API (i.e., Halo PSA API, Halo ITSM API, or Halo Service Desk API) and ensure they have accepted the team invitation. Go to Configuration → Teams & Agents → Agents → New → Details → Preferences → Save. Check the sample for Halo ITSM below:
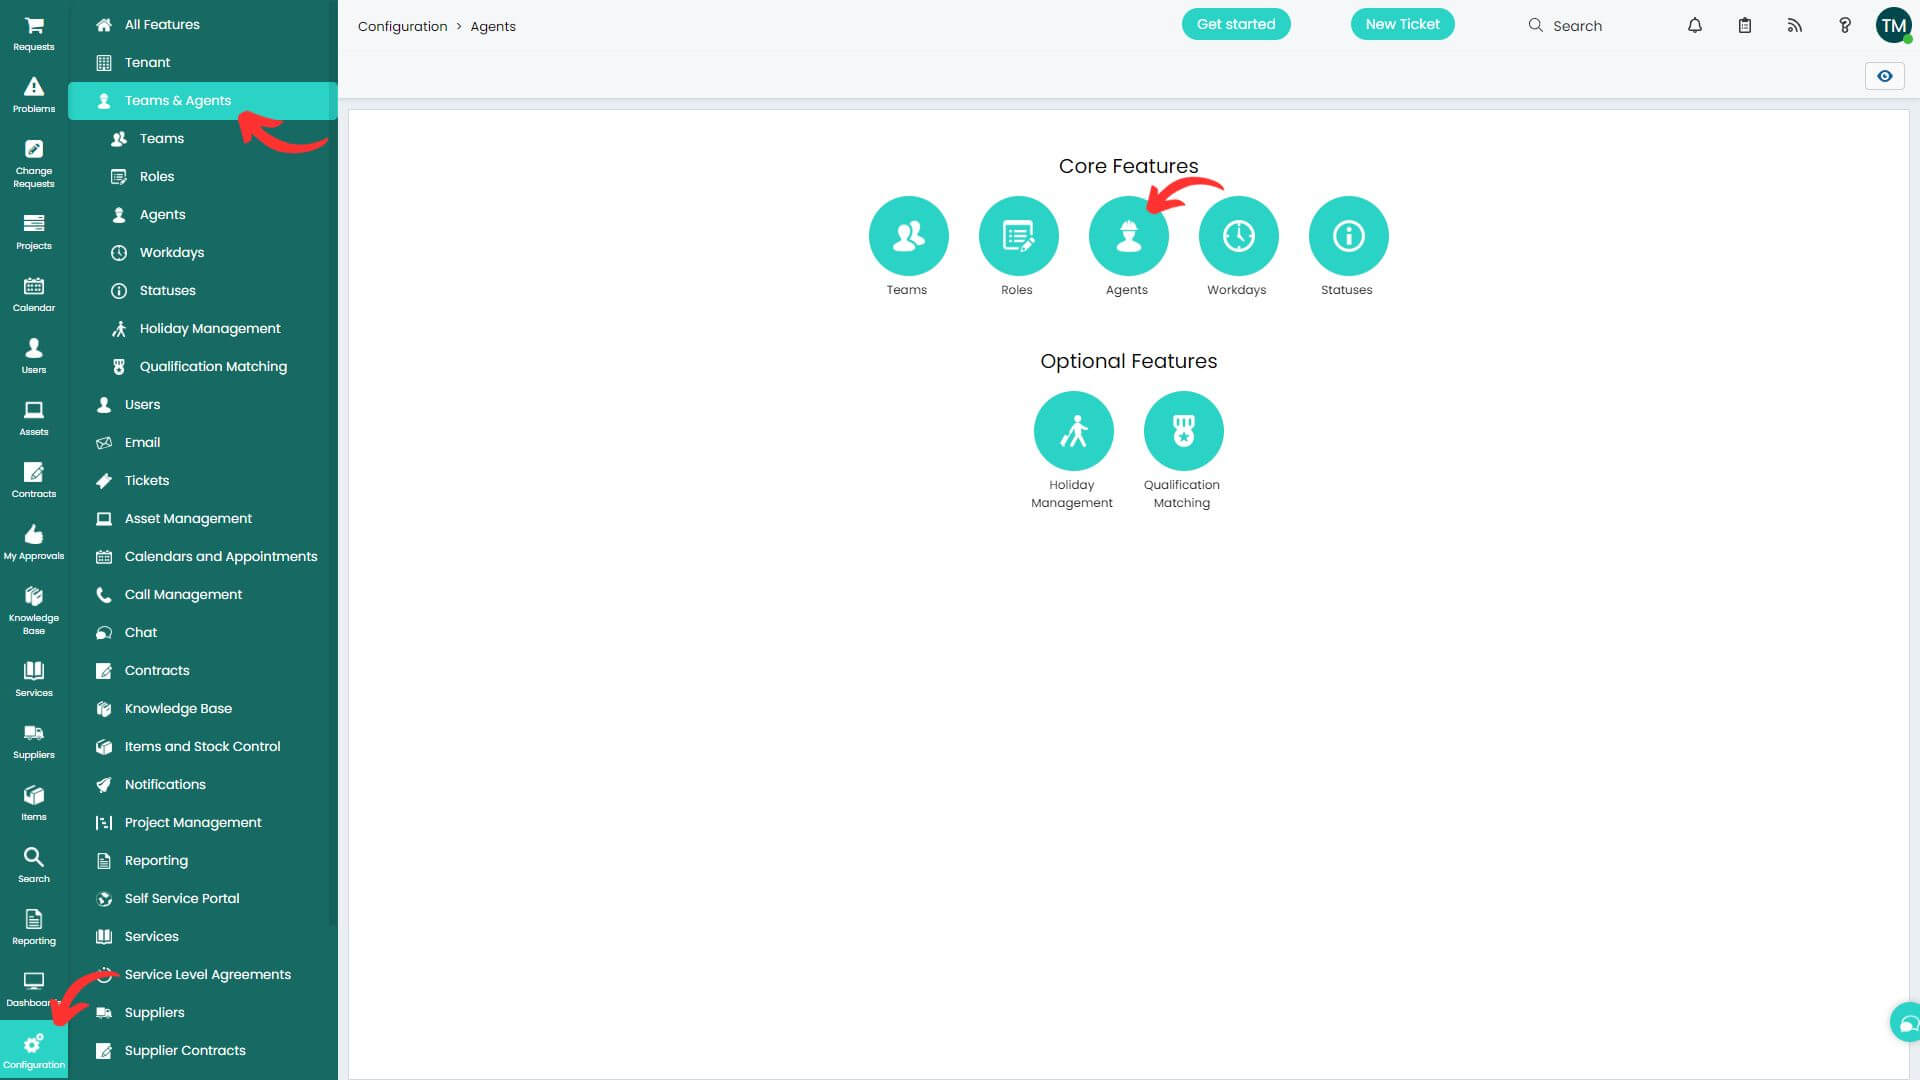
Note:
- Halo Service Solutions have sample users without emails. Adjust existing agent profiles or set up new ones as needed.
- During a Free Demo setup, you can also create any missing agents using Migration Wizard.
3. Set up all source groups you need to move to Halo to enable group matching. Navigate to Configuration → Teams & Agents → Teams → New → fill in Details, Agents, and Other → Save. Check the sample for Halo ITSM below:
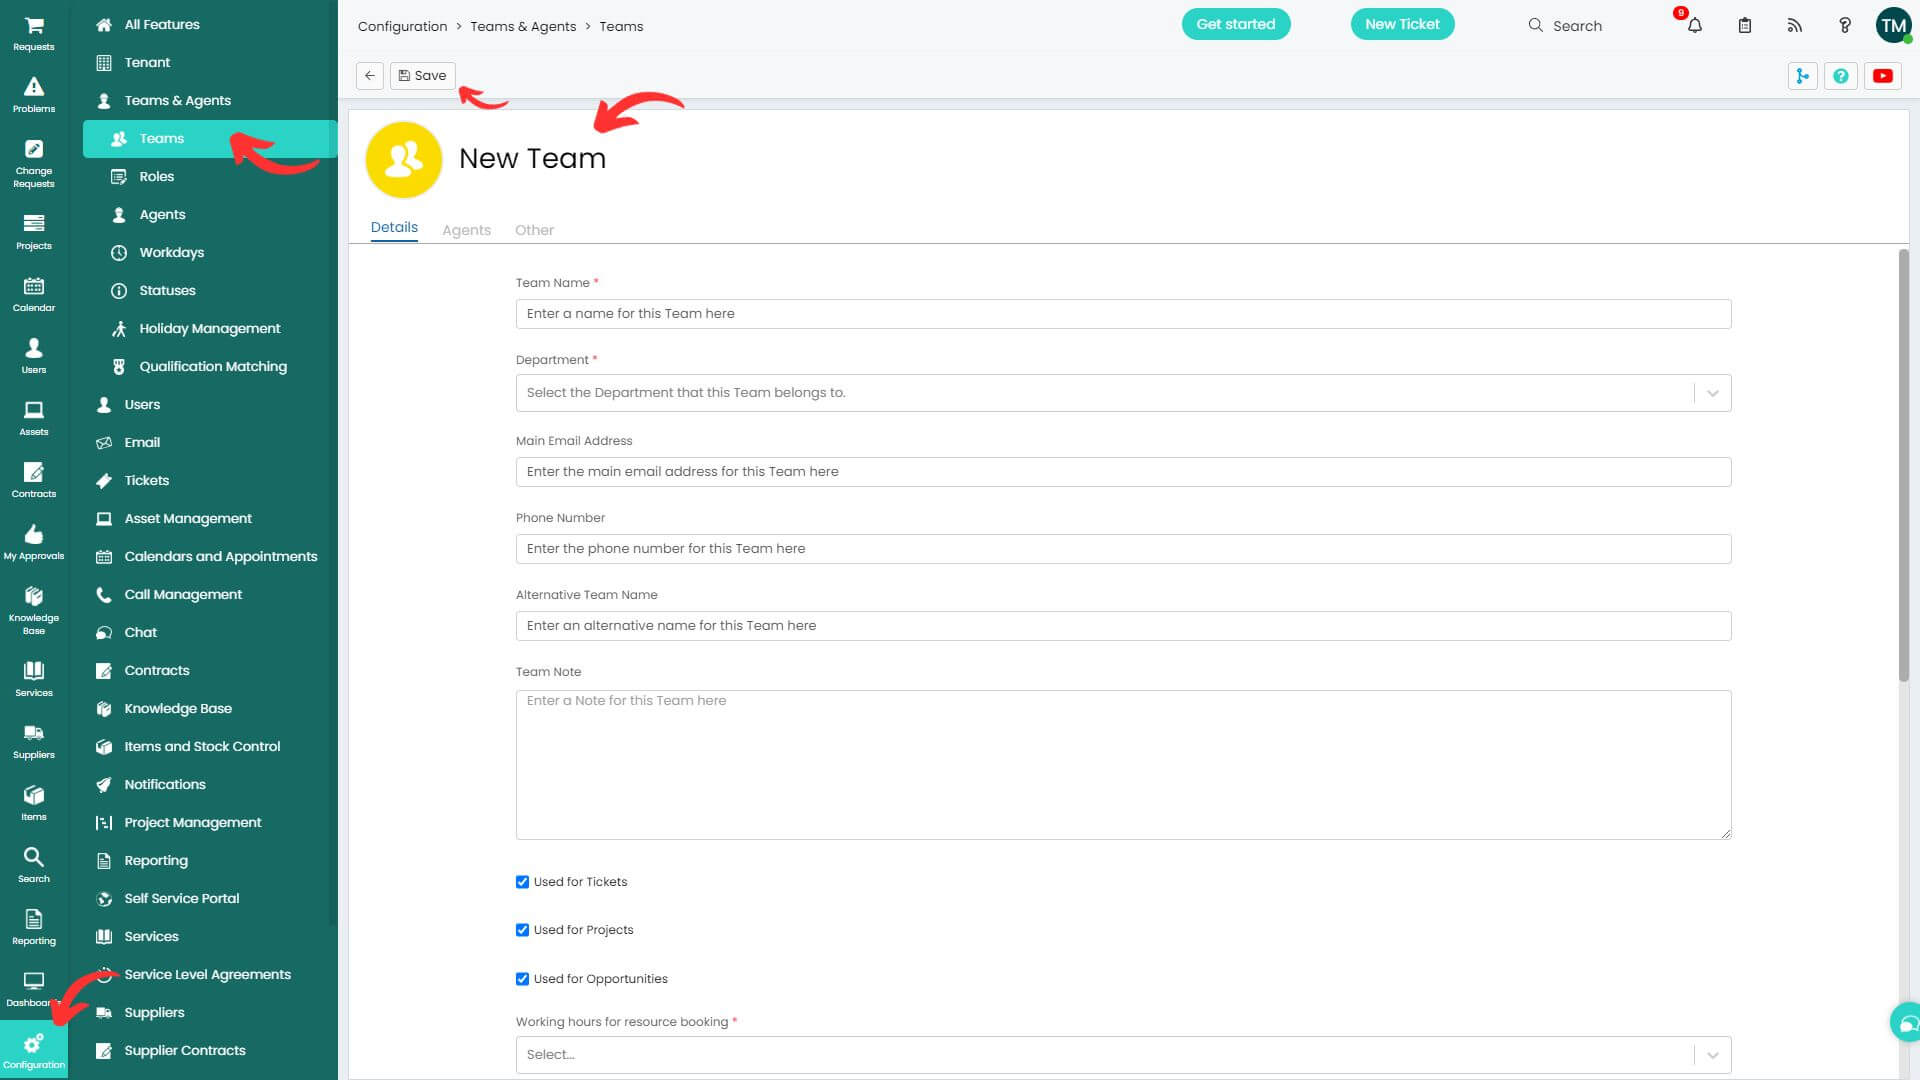
Note:
- Halo comes with three default groups. Modify them or establish new ones.
- During Free Demo setup, you can create any absent groups using Migration Wizard.
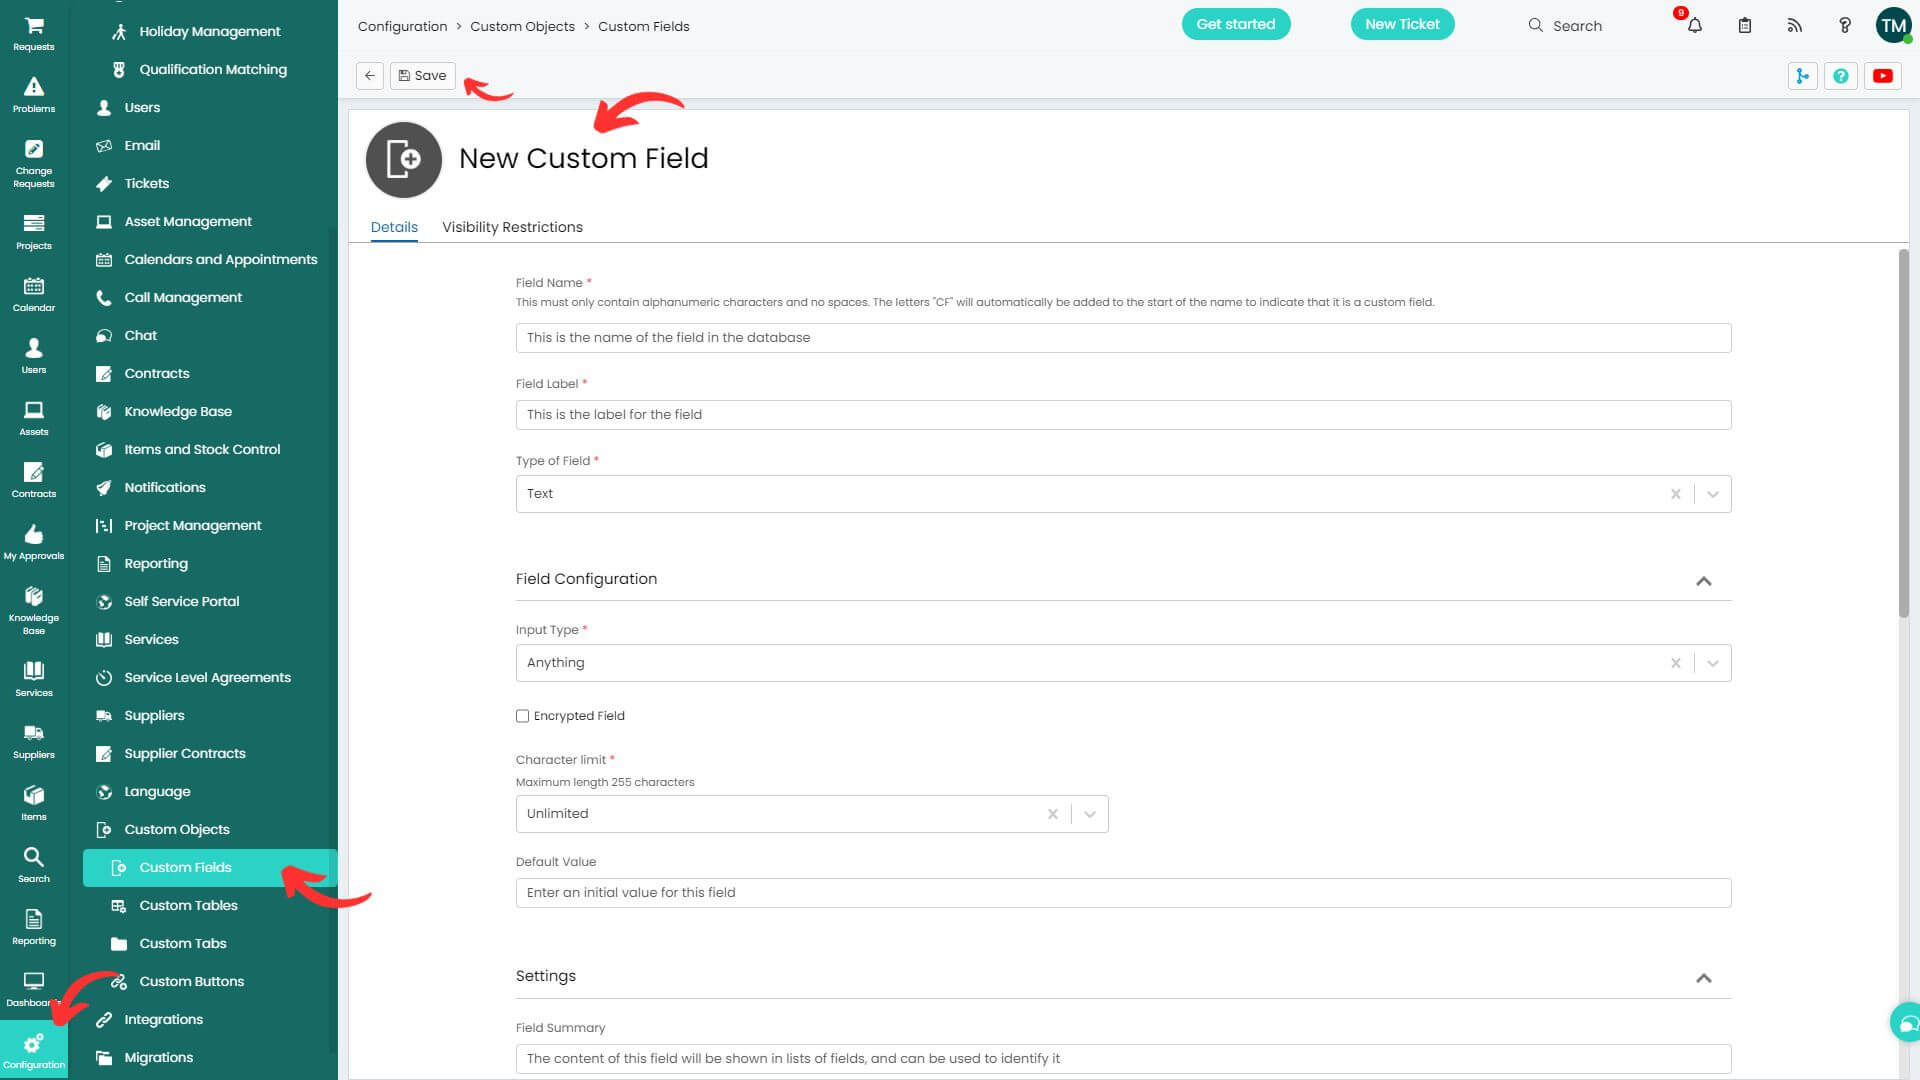
4. Create custom fields that correspond to the source values. Hover over to Configuration → Custom Objects → Custom Fields → New → provide Details and Visibility Restrictions → Save. Check the sample for Halo ITSM below:
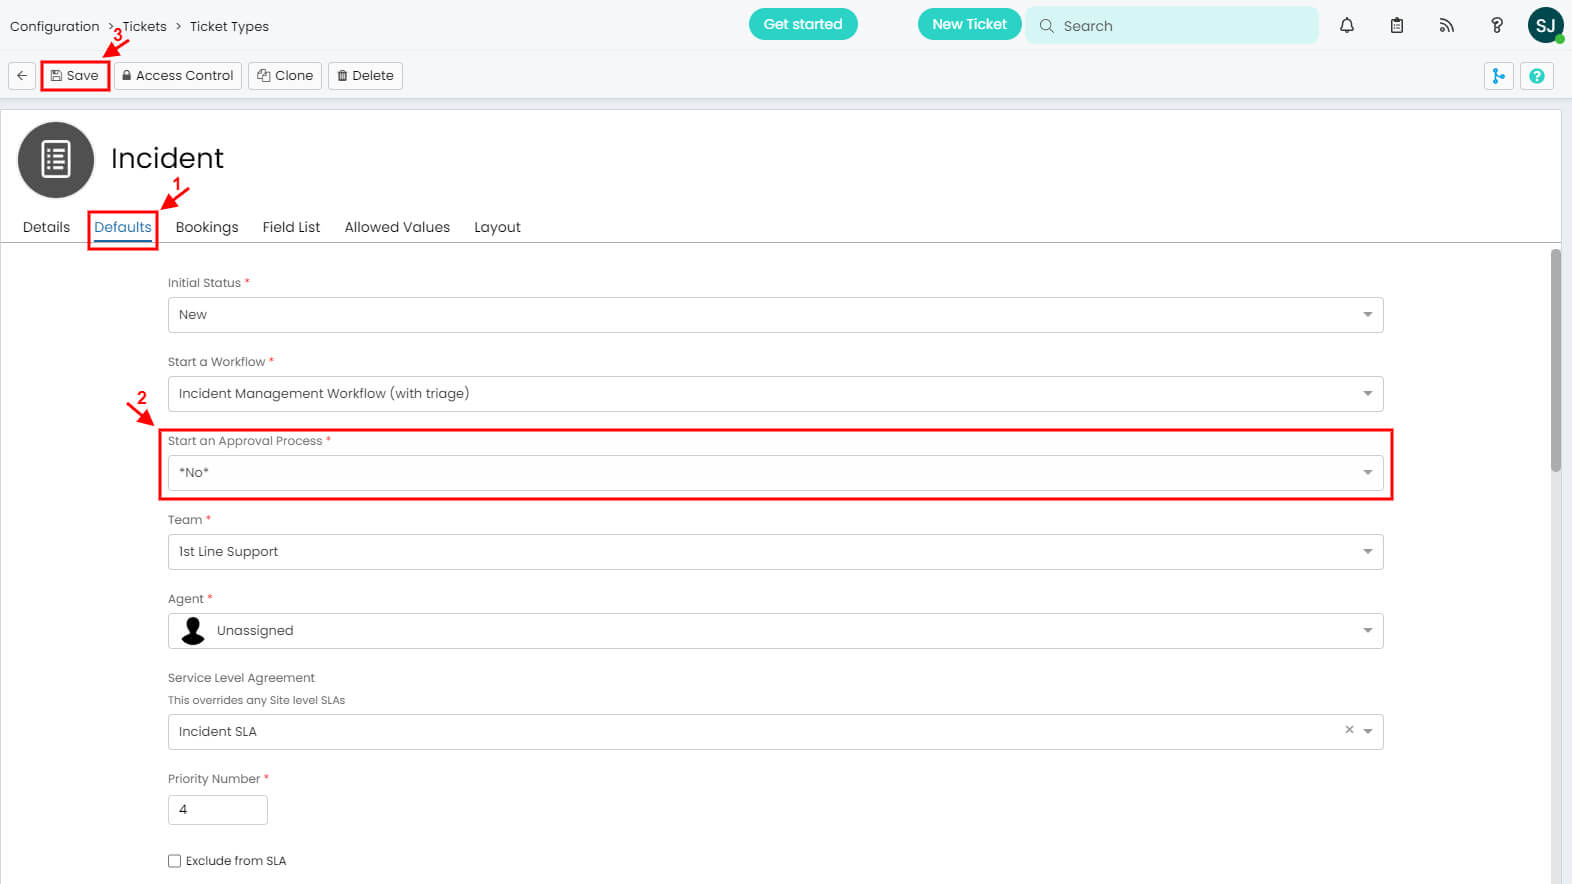
5. Deactivate the Approval Process to ensure incident tickets are transferred accurately. Click Configuration → Tickets → Ticket Types → open a ticket type → Edit. Choose No in the Start an Approval Process field. Then press Save.
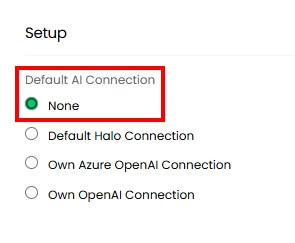
6. Disable AI to prevent migrated data getting modified. Go to Configuration > AI and select None under Default AI Connection, then turn off AI Ticket Matching and any other active AI features.
Setting Up Data Transfer to Halo Service Solutions
Start your smooth data migration by setting up a free Demo Migration. It helps you test-drive migration settings before the big move. You can re-run your Demo as many times as needed to perfect everything.
Here's a simple guide to begin your Halo data migration:
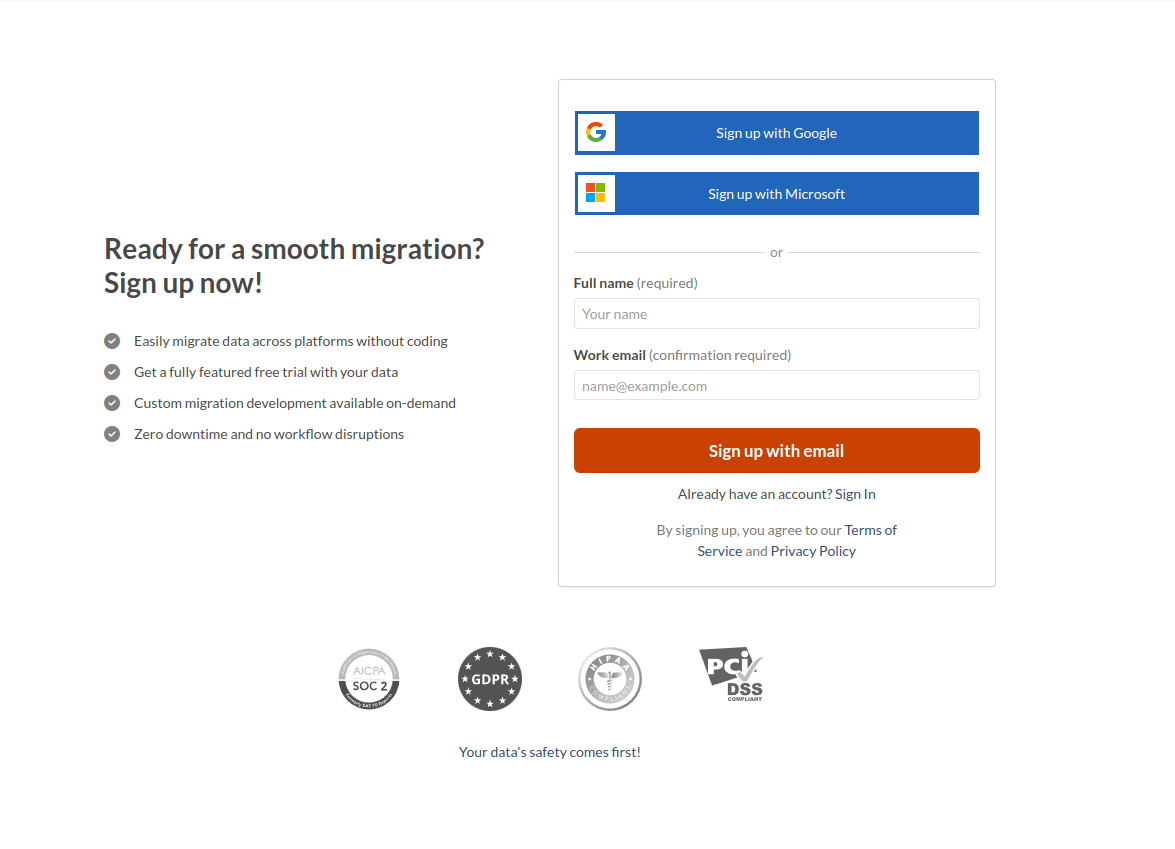
Step 1. Sign Up for the Migration Wizard Account
Set up a Migration Wizard account using Google, Microsoft, or your work email. If you choose the work email, confirm it by following the instructions sent to your email.
Step 2. Connect Your Source and Target Platforms
Depending on your help desk or service desk, you may need various access credentials (i.e., a URL, API token, or logging in with your platform account) to connect your source and target platforms.
The Migration Wizard gives handy tips as you go, making the connection process smooth.
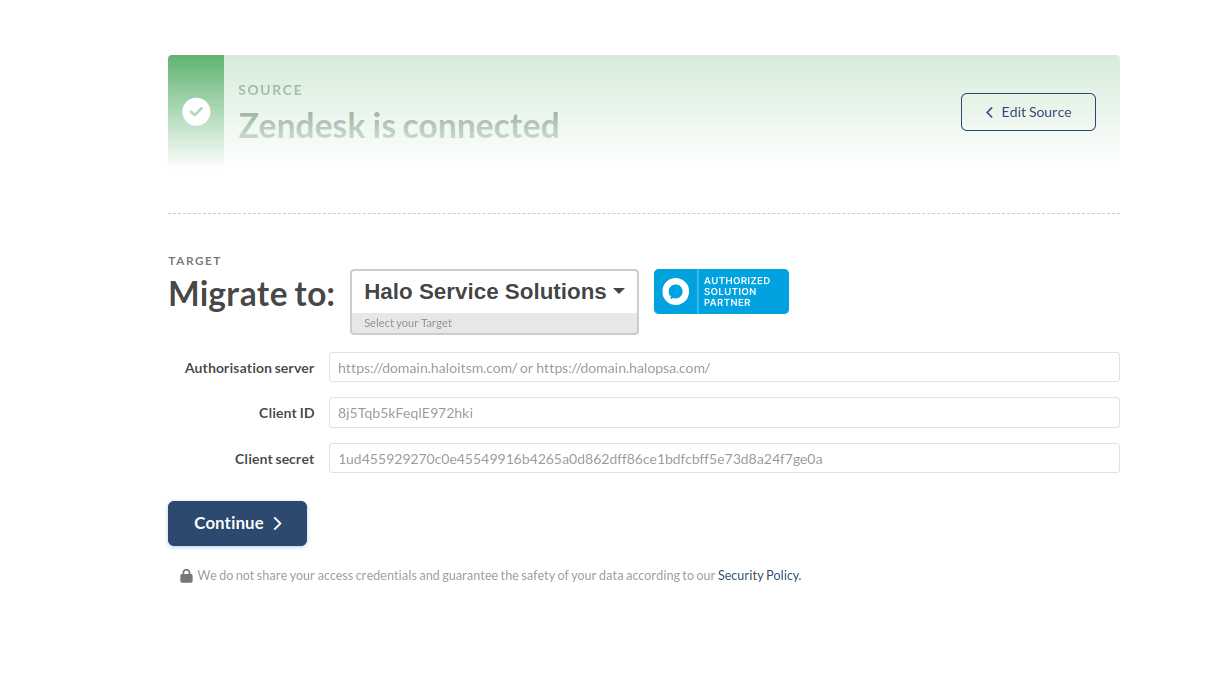
To connect Halo Service Solutions as your Target platform, provide Authorisation Server, Client ID, and Client Secret.
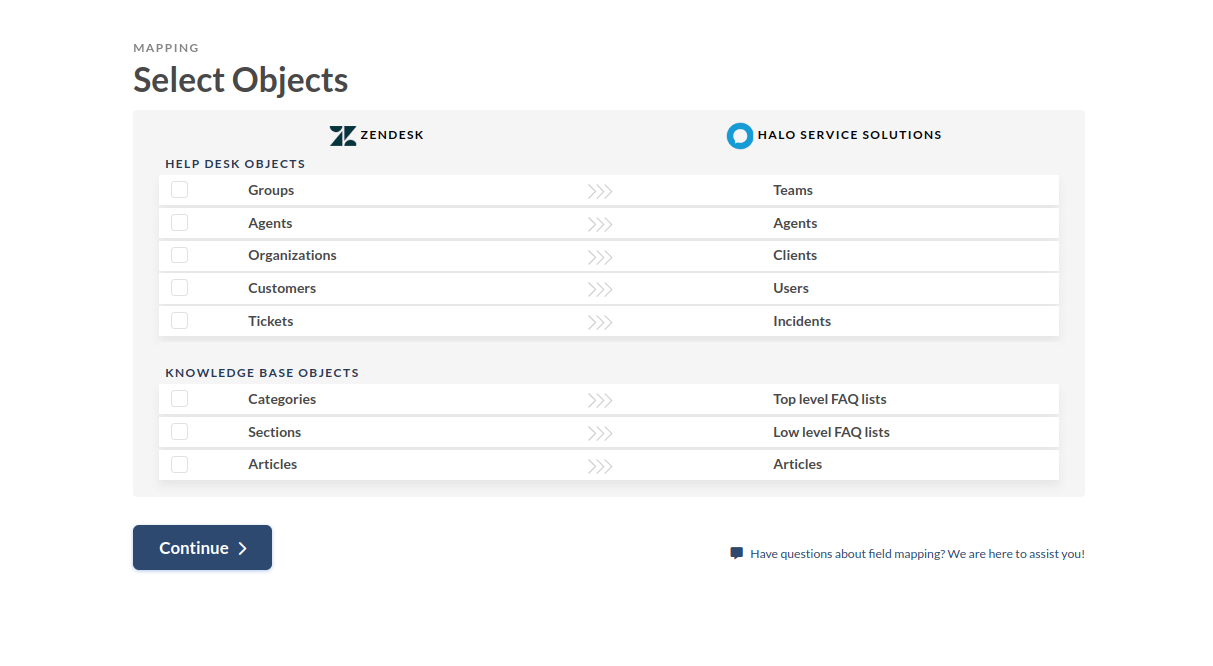
Step 3. Choose What Data Object to Transfer
Pick the customer service data you want to move to Halo Service Solutions, then map groups, agents, tickets, and articles.
Step 4. Match Groups
Select 'Match items' to map groups between the Source and Halo. For unassigned tickets or deleted groups, choose a default one. Plus, you can create any missing groups -whether it's one or multi-select!
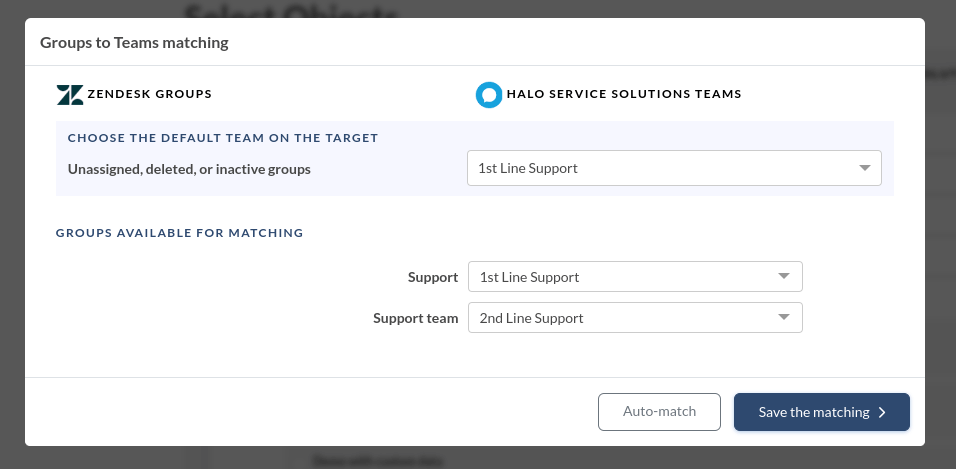
Click 'Save matching' to proceed. Use 'Auto match' for groups if you run the Free Demo again.
Step 5. Match Agents
Match agents between Source and Halo agents. If you've any unassigned, inactive, or deleted agents, pick a default agent for those records. In Migration Wizard, you can add any missing agent profiles right to Halo while matching.
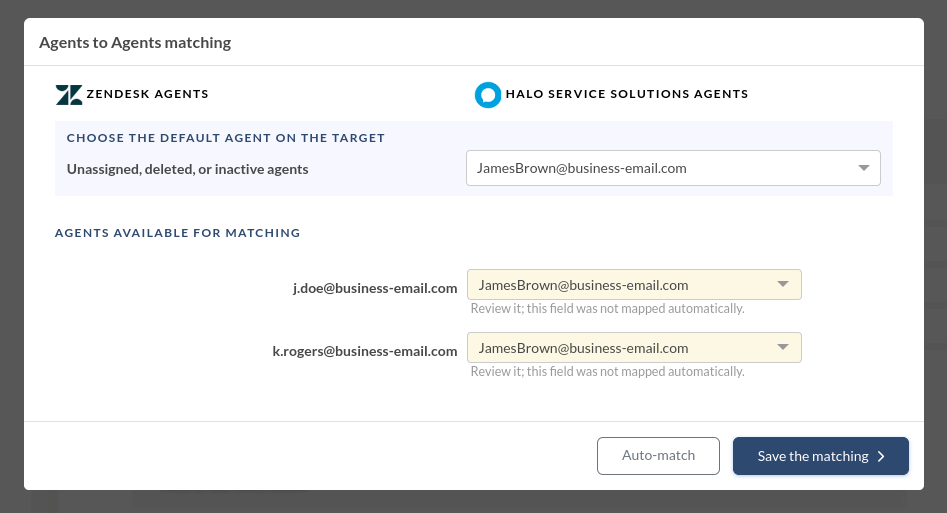
Hit 'Save matching' to move on to the next step in mapping your data.
Step 6. Map Tickets
Selecting the ticket checkbox opens a window to map ticket fields. System fields like subject, organization, and group are automatically mapped. Navigate to default and custom ticket fields.
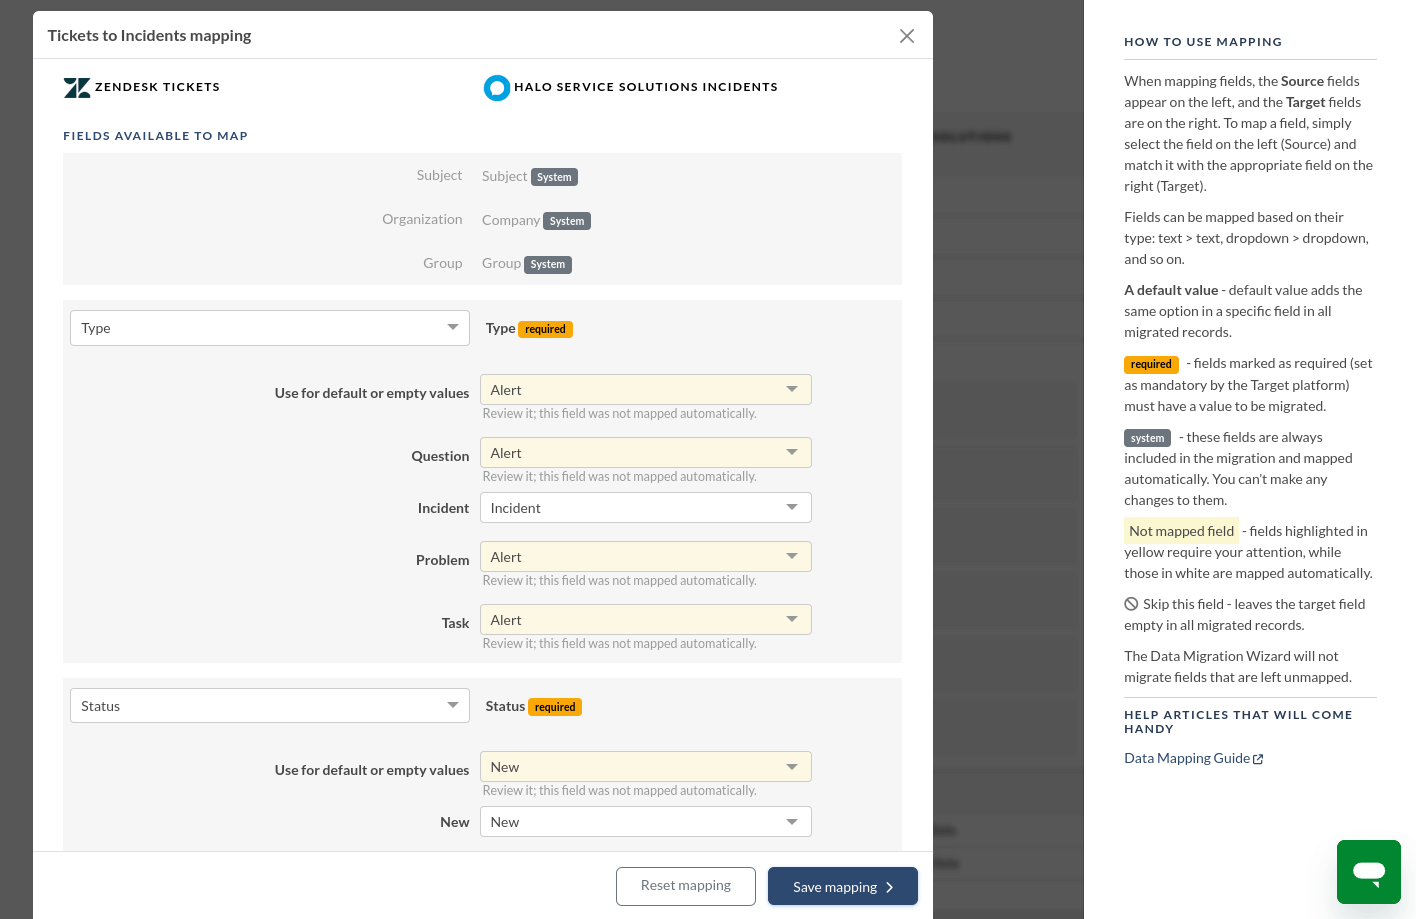
For custom field mapping, make sure to set them up in Halo ITSM beforehand. Once everything is set, click 'Save mapping' to proceed.
Step 7. Map Articles
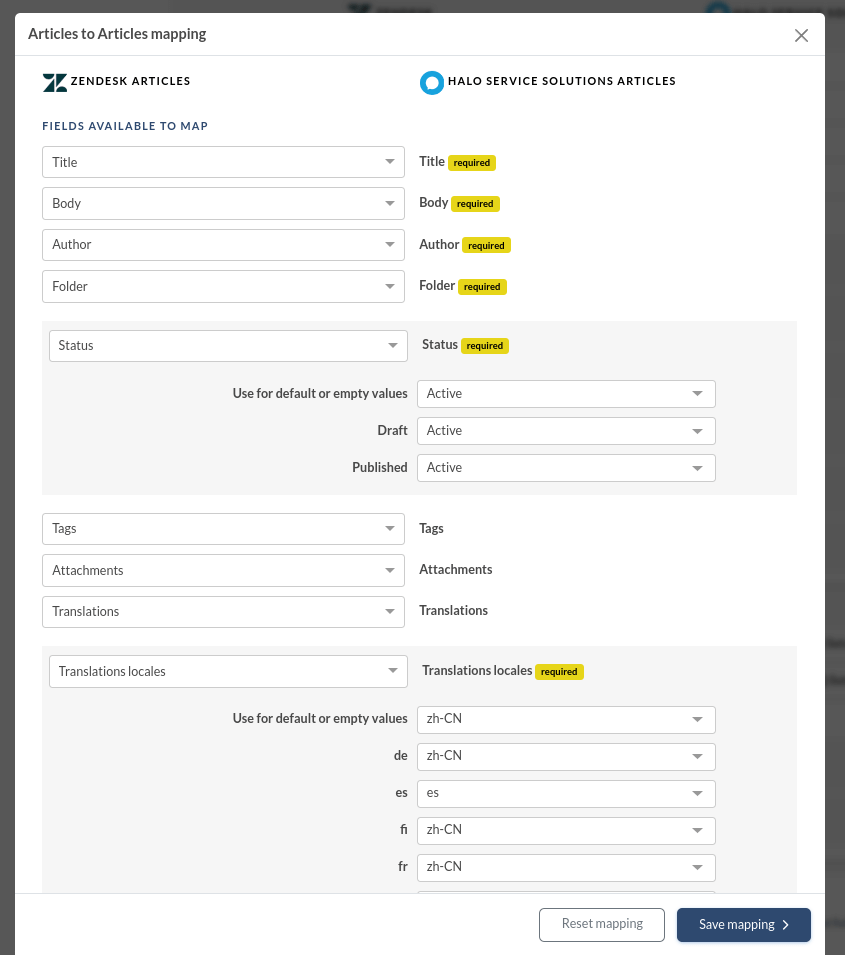
Select ‘Map items’ to match article fields. Here, you can map article statuses between your Source and Halo accounts. Once finished, hit 'Save mapping' to move forward.
Step 8. Out-of-the-box Customization Options
The pre-built customization options depend on the specific data migration pair. For example, if you're moving from Zendesk to Halo, here are your customization choices:
- Import inline images as ticket attachments. Keep all details of your customer communication history even if your Source platform is down.
- Skip attachments. By default, Migration Wizard moves all attachments, but you can skip them for storage efficiency or quicker data migration.
- Move call recordings as attachments for easy future access.
- Use "Demo with custom data" to move 20 chosen tickets and articles for a preview.
- Transfer side conversations into private notes to keep customer context.
- Migrate content translations to keep your Help Center multilingual.
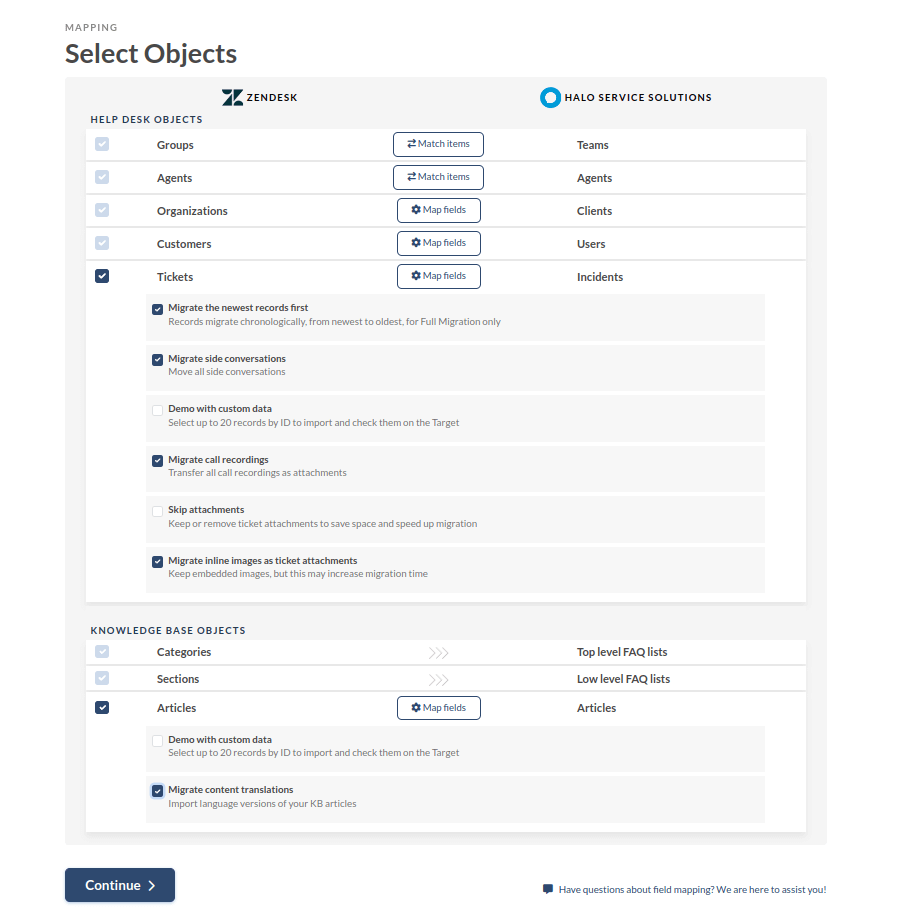
Once you're done mapping data, click 'Continue.' If you missed anything, the Migration Wizard will remind you to review it.
What to Do After the Demo Data Migration
After finishing your Free Demo to Halo, follow these steps.
Assessing Demo Results
It's important to check the Demo migration results because the process mirrors the Full Data Migration. If some records weren’t imported in the trial migration, they wouldn’t be extracted in the Full Data Migration.
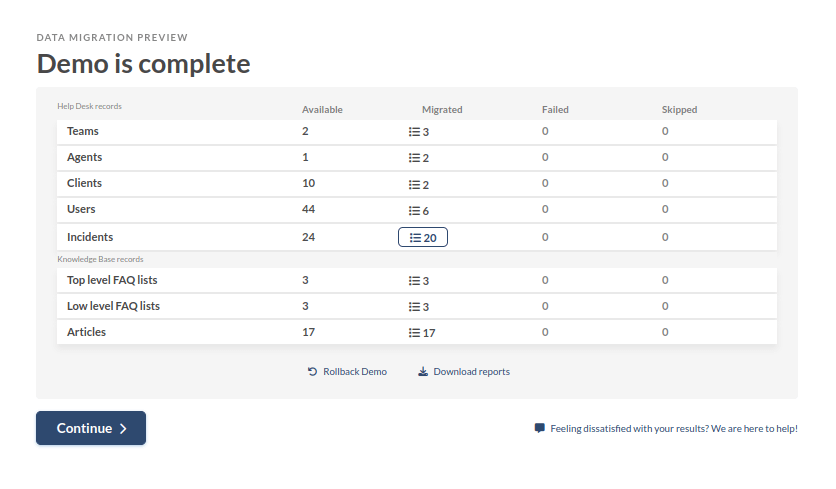
Open reports for migrated, skipped, and failed records, then verify each by checking IDs on the Source platform and Halo.
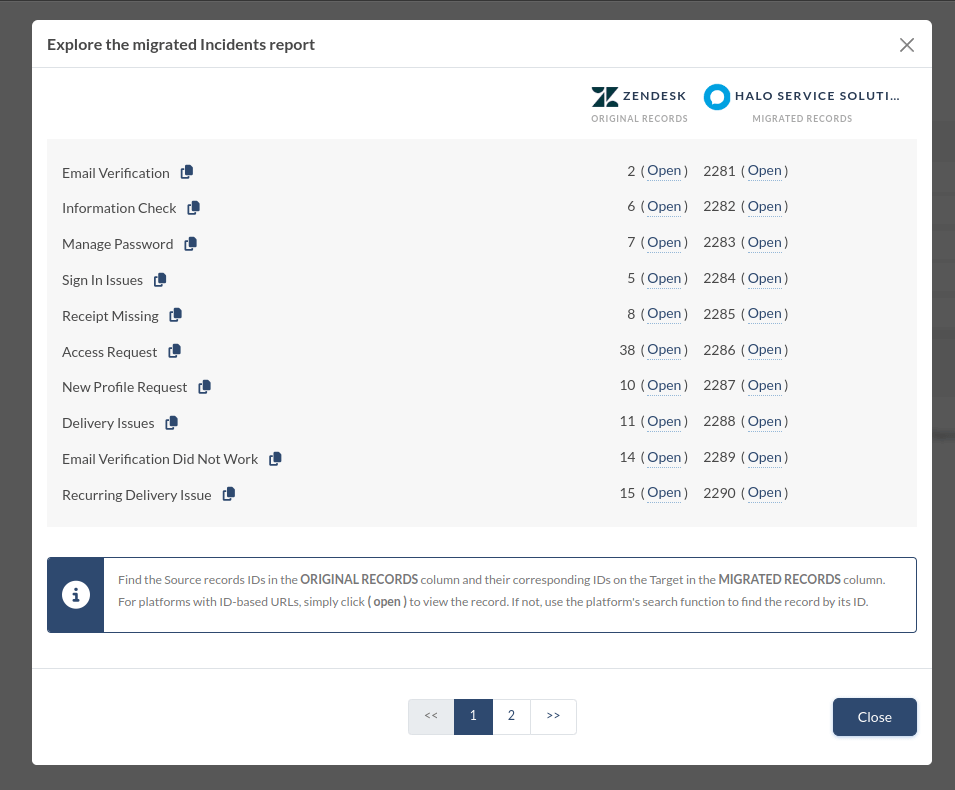
What to Look for When Checking Migrated Records
- All comments were moved, and the authors remain the same.
- Tickets are correctly assigned to users.
- Contacts and organizations migrated accurately.
- Articles migrated with their original statuses.
- Attachments were transferred as expected.
- The Demo data wasn't affected by automation rules.
Managing Suspended Demos
If your Free Demo gets suspended, stay calm and let our support team assist you in resolving the issue. Ensure they have access to your Halo Service Solutions data migration for a quick resolution.

If you encounter any failed reports, identify the issue by checking record IDs. If possible, fix the problem, tick the 'I've fixed errors' box, and restart the Demo.
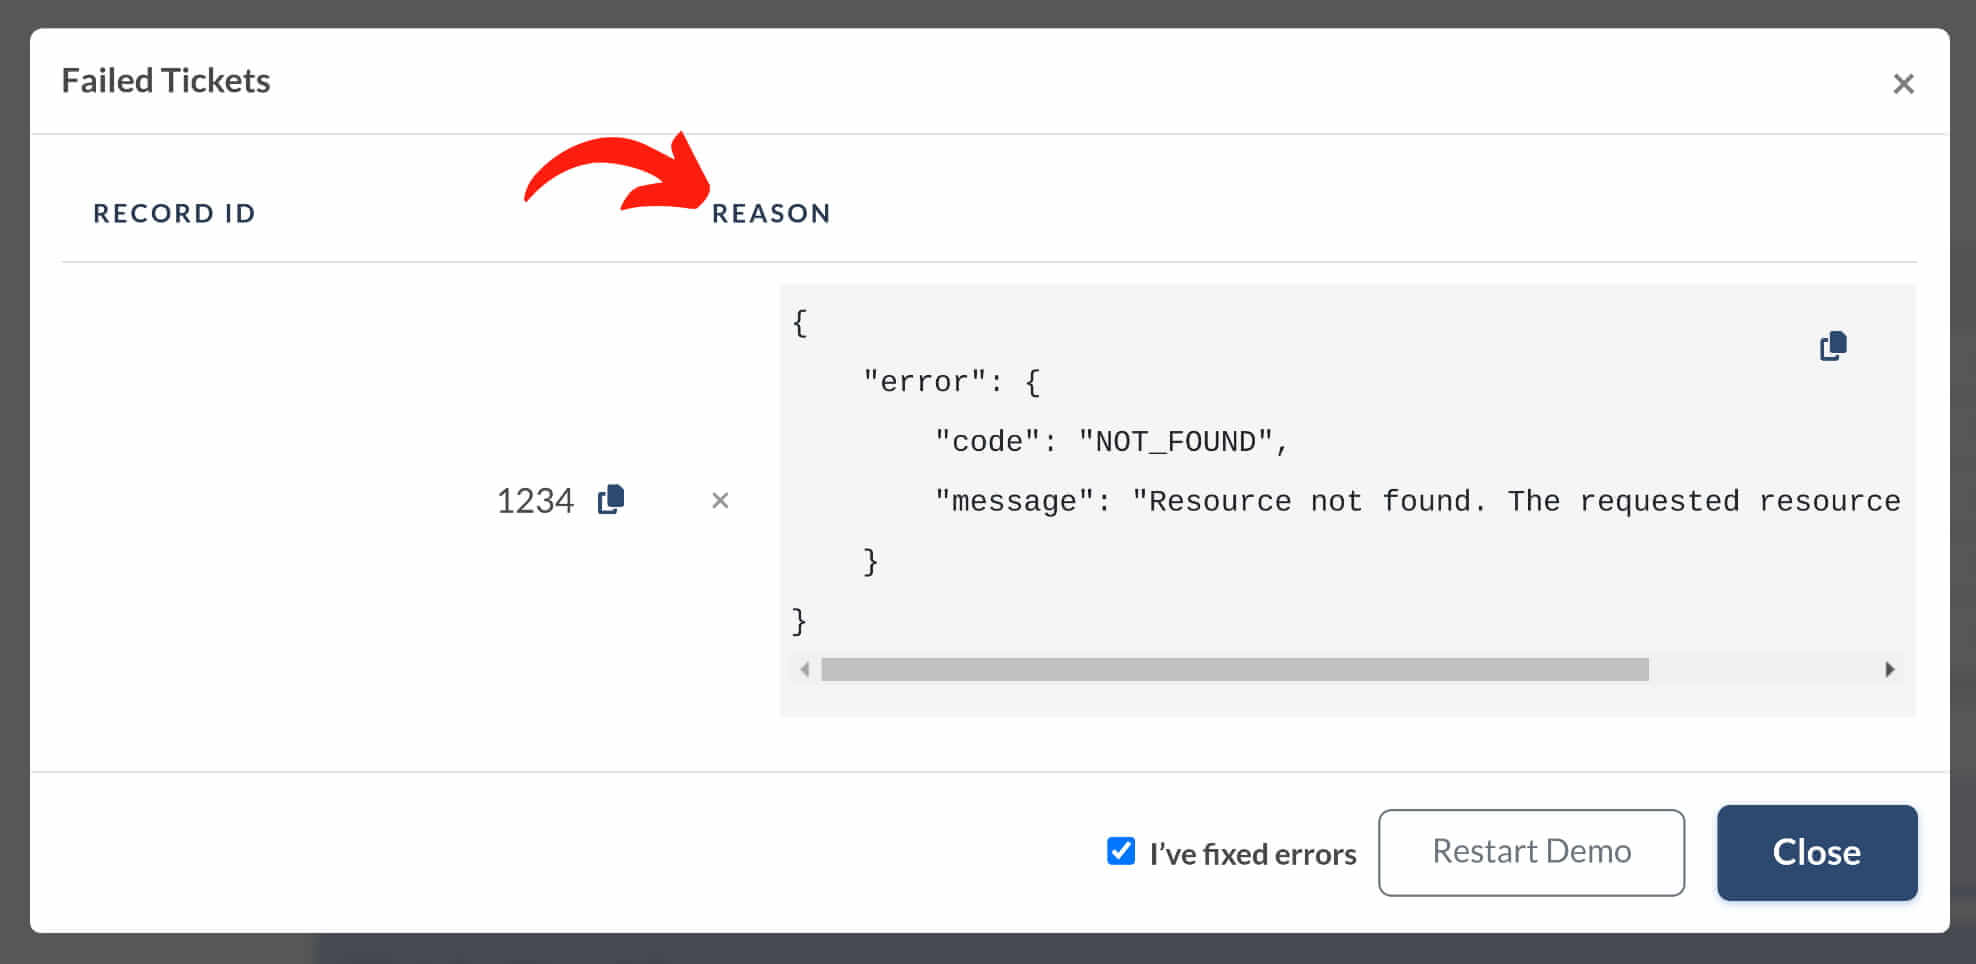
Choose Support Package
No matter the size of your data migration project, Help Desk Migration has support that fits. Whether you prefer basic help or need extras like Delta, re-migration, or Interval migration, pick the support plan that suits your data transfer requirements.

Explore the extra perks provided in Premium and/or Signature plans:
| Data re-migration | Re-migrate your data within 5/10 days after the Full Migration. |
| Interval Migration | Pause your migration on workdays and resume on weekends or schedule your data transfer. |
| Delta Migration | Update or add tickets created during or after the Full Migration with Delta Migration. Be cautious about potential duplicates if you continue working on the source platform. |
| Skipped/Failed Records Check | Use the Skipped/Failed Records Check for a comprehensive custom migration. |
Price Breakdown and Payment
Review the detailed price breakdown to get a clear explanation of the Full Migration cost.
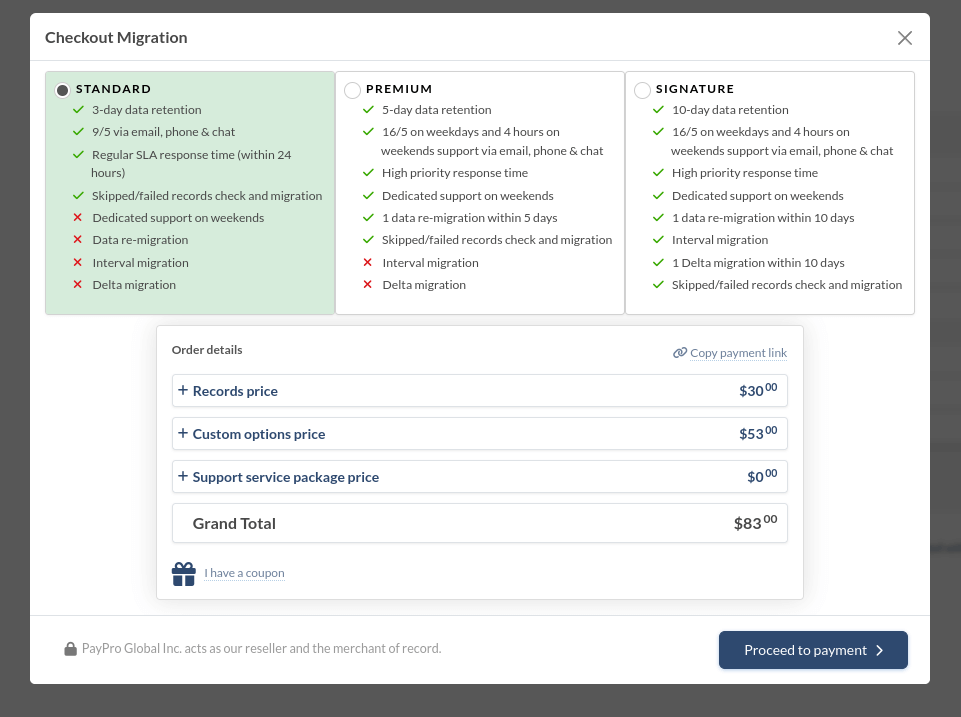
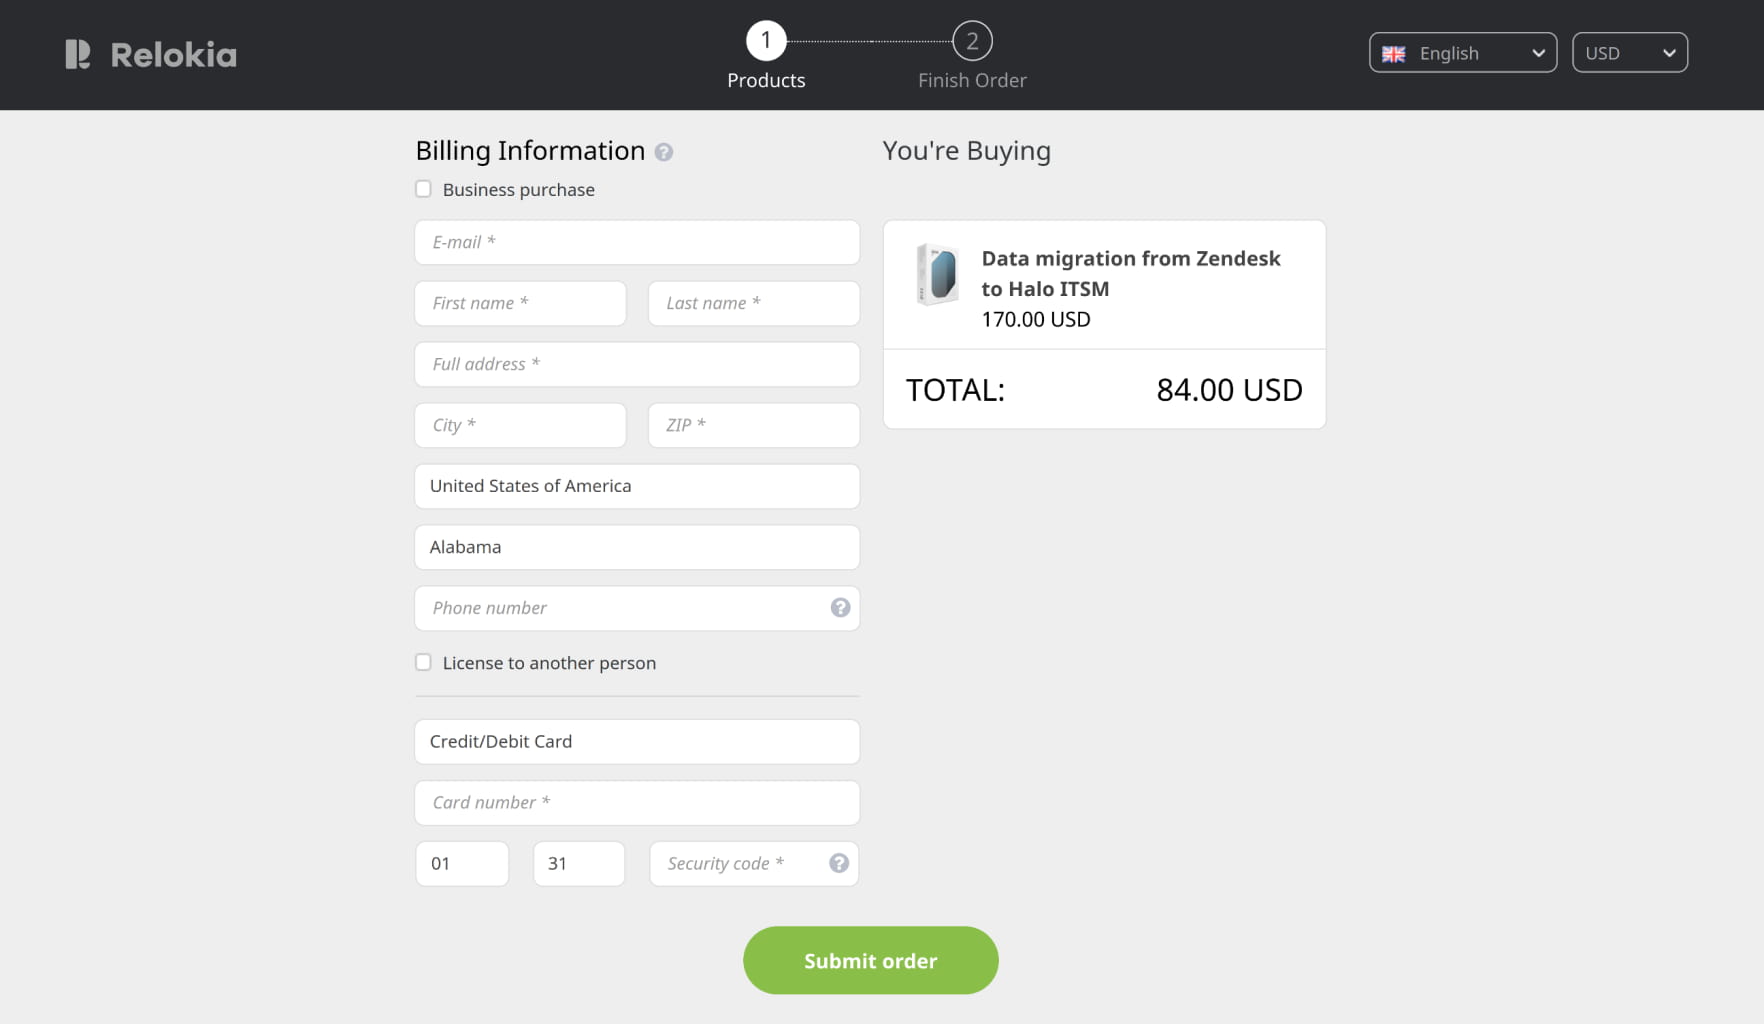
Once you're ready, input your billing details and click ‘Proceed to payment’ to finalize the payment.
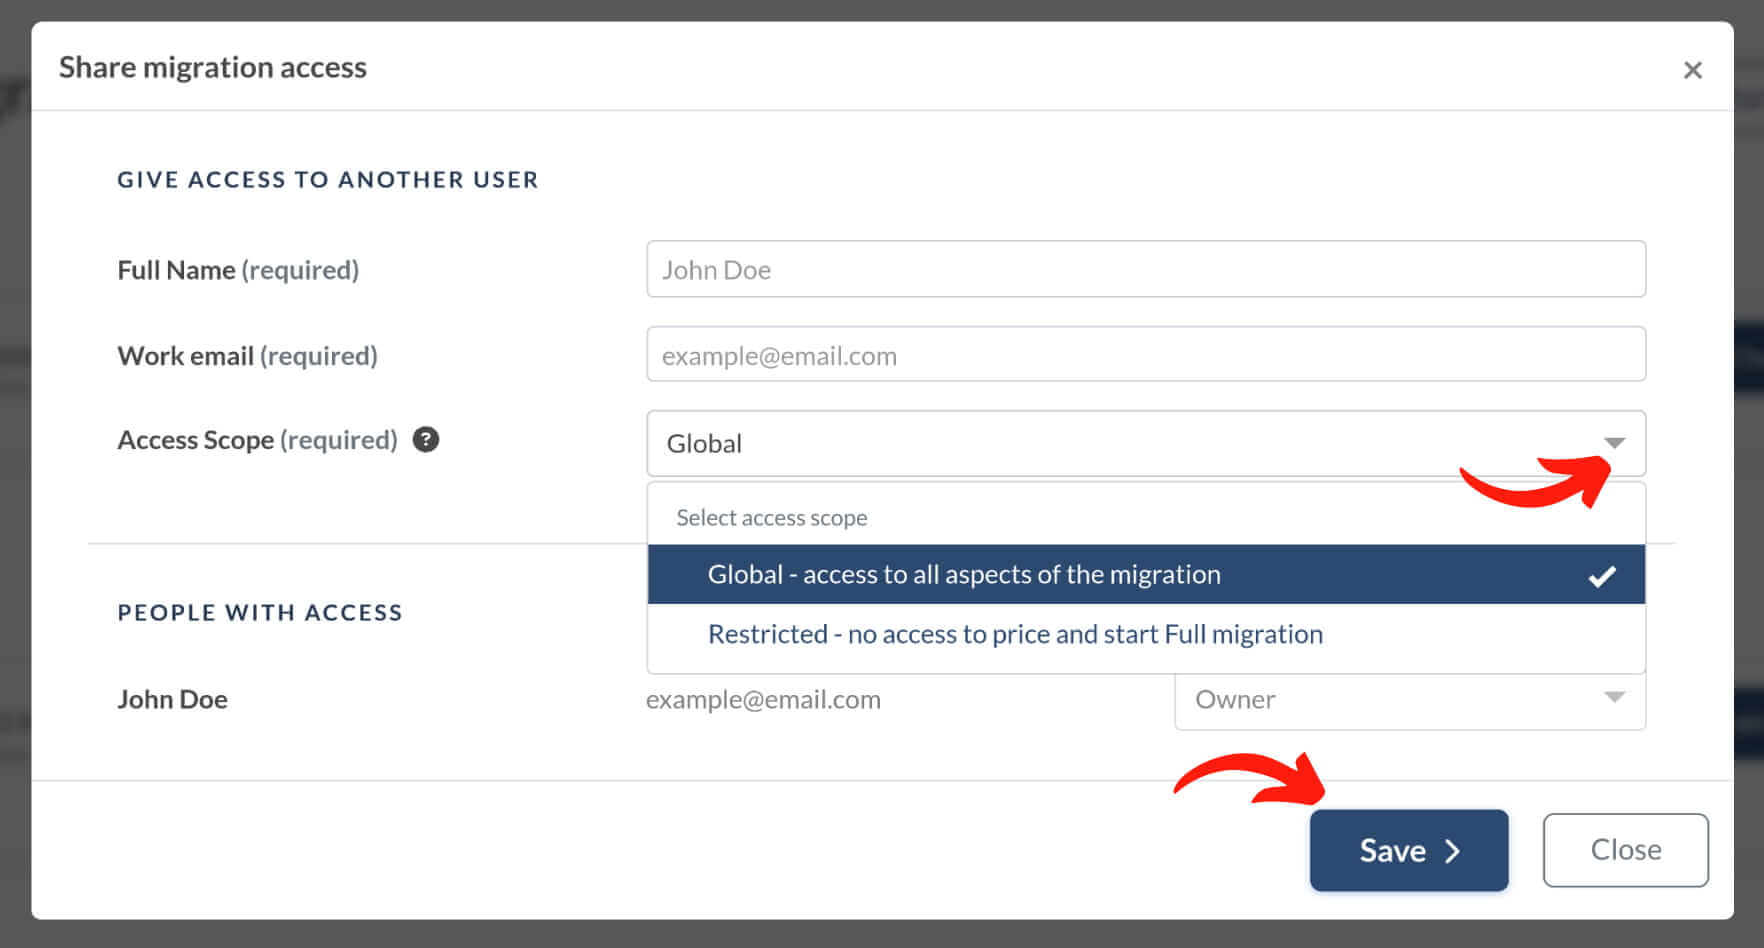
Grant Access to Your Team and Customize the Migration Name
The mapping step might seem a bit tricky, so feel free to get a hand from a colleague by sharing your Halo ITSM data transfer.

You're in control—you can grant full or restricted access, and if needed, you can revoke it.
If you're handling multiple data migrations, give each a unique name for quick and easy recognition.

Start Full Data Migration
Once your payment is confirmed, you can start or schedule your data transfer. Avoid last-minute changes in your source platform for a hassle-free migration experience.
The data migration duration depends on the number of records; on average, about 2000 tickets per hour. Need it faster? Ask your vendors to boost your API limits—just give us a heads-up before diving into Full Data Migration.