Front Migration Guides
How to generate an API token in Front?
To set up the migration to or from Front, you need to get an API token. Follow these steps to find your API token:
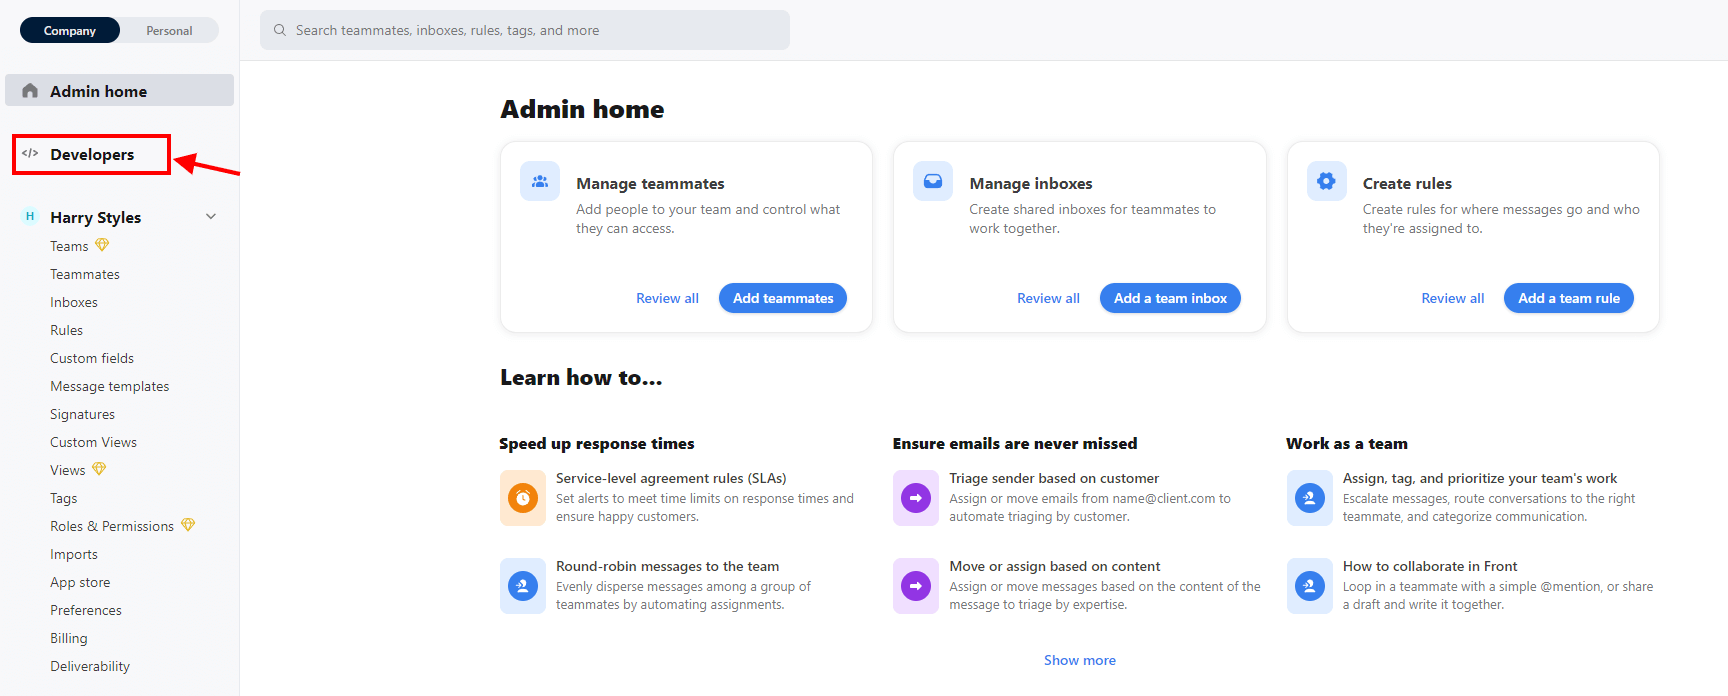
1. Click on the Settings icon and go to Settings > Developers:
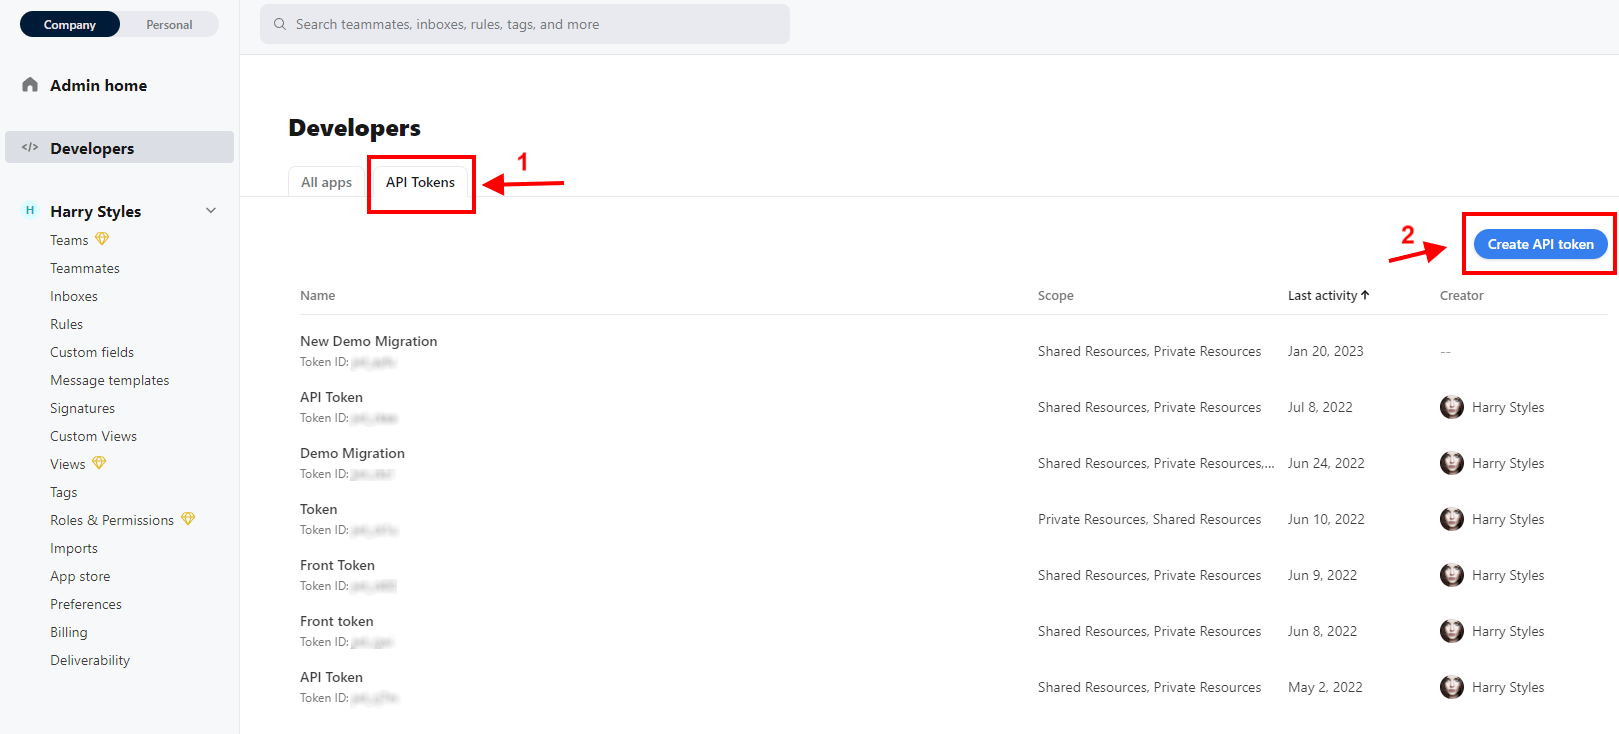
2. Then go to API Tokens and click on the Create API Token button:
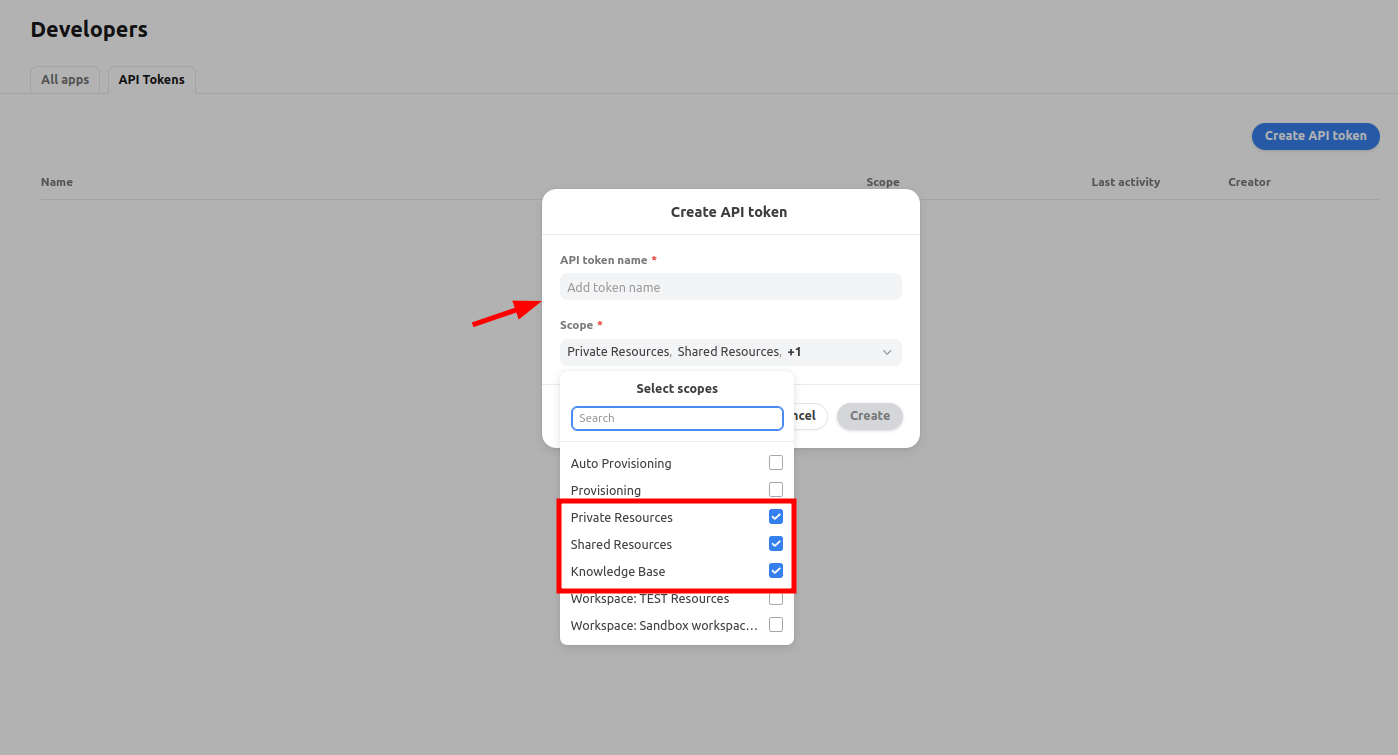
3. Fill in the API Token name and check the Shared, Private, and Knowledge Base scopes options, then click Create. If you don't plan to migrate your knowledge base, you can skip checking the Knowledge Base scope in this step.
4. The API token will appear on the list of all available tokens. Click on it to view and copy the token you just created.
5. Go back to the Migration Wizard and continue setting up the migration.
How to disable two-factor authentication in Front?
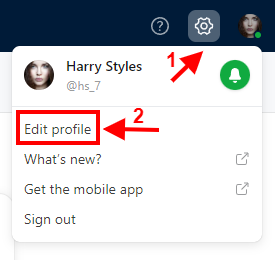
1. Log in to your Front account, click your profile picture, and then Edit profile.
2. Go to the Profile section and choose Two-factor authentication.
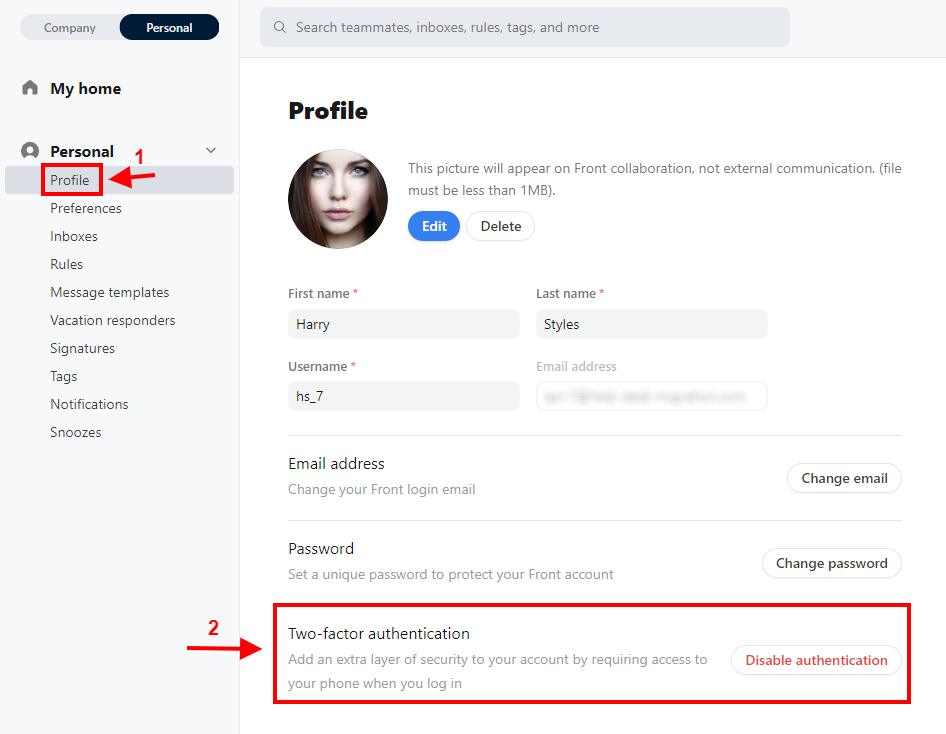
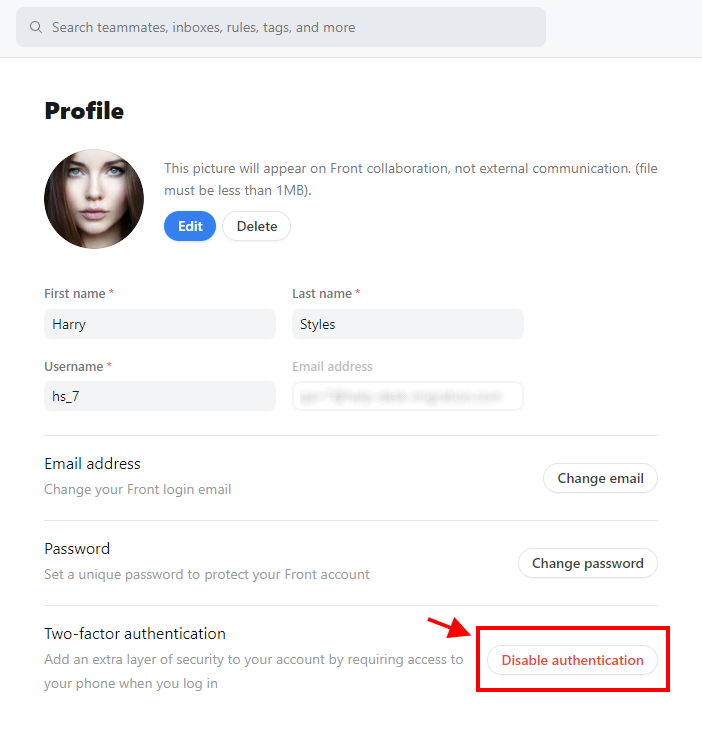
3. Click on the Disable authentication button.
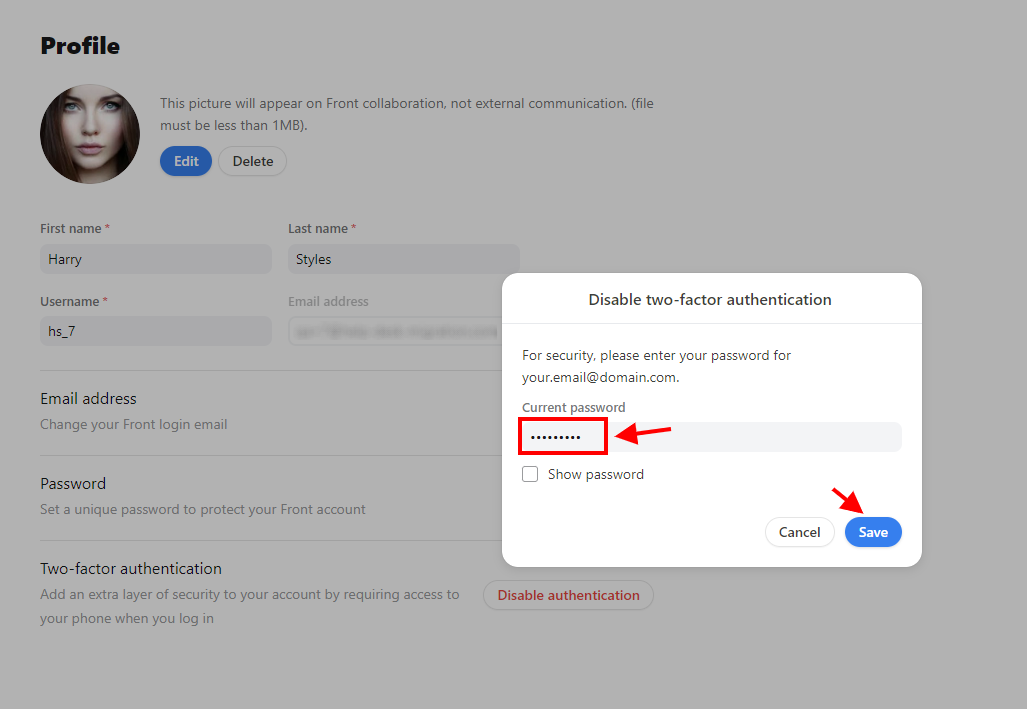
4. Provide the password from your Front account again to confirm that you want to disable the Two-factor authentication. Then, click Save.
How to add new Teammates in Front?
As a rule, you have to add Teammates in the Front App before importing data there. Here’s how you can do it:
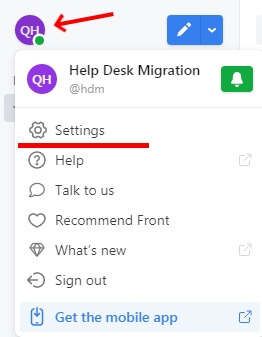
1. Sign in to your Front account. Click on your profile picture and choose Settings from the list of available options.
2. Under the Company section, go to Teammates and click the Add teammates button.


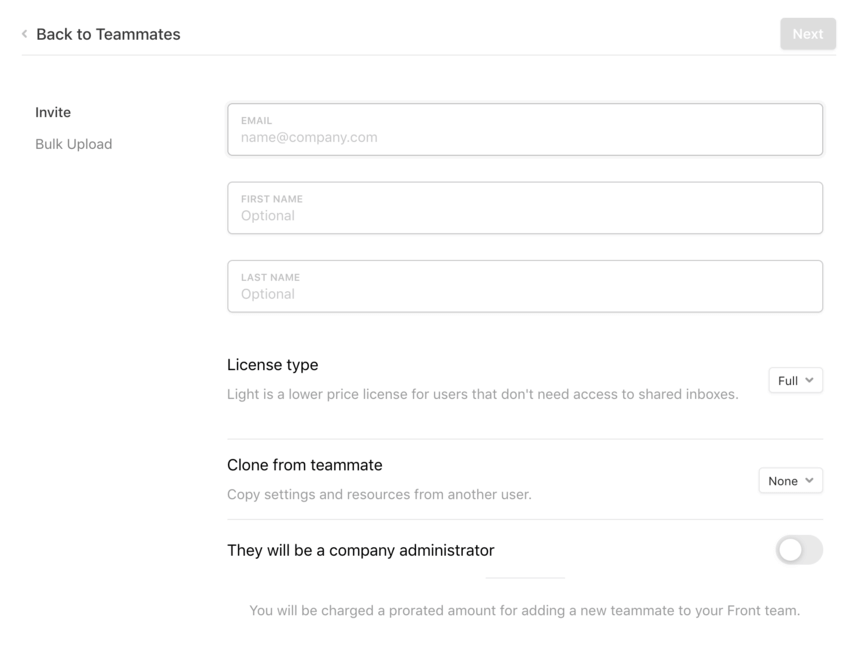
3. Then, you will see the Invite teammate form where you will have to provide the following information: teammate’s email address, first and last name. You can also choose the type of their license, and if they have administrator permissions. When you are ready, click Next.
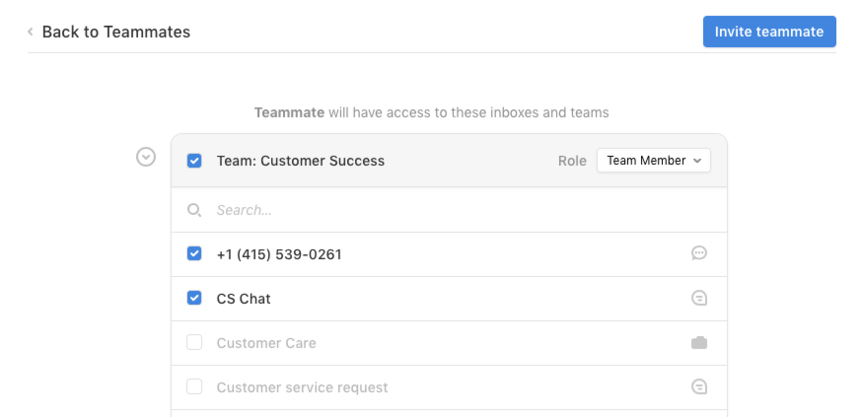
4. Lastly, you will have to choose one of several team inbox instances the teammate will have access to. When finished, click the Invite teammate button.
5. After this, your teammate will receive an email invitation. To accept the invitation and later be able to access the team inbox instances, they will have to click the link in the email and go through the required steps.
How to filter data in Front?
To filter data in Front, you can use their analytics tool and create a new view.
1. Click on the Analytics button located at the top left corner of Front. It resembles a graph icon.
2. Use the workspace selection dropdown menu on the left navigation panel to choose whether you want to create an individual report or a workspace report.
3. Choose the report type from the list on the left navigation panel. The report will load the All data tab or the pinned view that you previously clicked on.
4. Click on the "+ Add view" button next to the report tabs. This will create a new tab named "New view."

5. Adjust the date, inboxes, and teammates filters, which are automatically added for you. Click "More filters" to add additional filters. As you change filters, the report will refresh with the data matching the filters.

6. If you want to save the view, click on the "Save View" button that appears after adjusting your filters. Then click "Save as new."

7. In the popup window, fill out the following fields:
- Name: The name of the view.
- Access: Select “Individual view” to make it private to your account or choose the workspace's name if you’d like other teammates to use the view.
- Pin to my favorites: Check the box if you’d like to pin the view to your dashboard so that it appears every time you open Analytics.
- Make default view: Check the box if you’d like this view to be the first one displayed when you open Analytics.
8. Click "Create" to save the view. Once a view is created, it will be available for all report types, and its filters will be applied when you click into other reports.
By following these steps, you can effectively filter data in Front using their analytics tool and create a new view to customize your data analysis.

