
If you work in Hubspot Service Hub, then you’ve probably already known full well that this tool can be quite intimidating for newcomers. This is especially relevant for those people who haven’t seen a service desk in action. It is packed to the brim with many different functions and toggles, and to add insult to injury, the terminology doesn’t make it easier either.
That is why many companies opt to implement a proper HubSpot onboarding program. It helps them move new employees to work much faster and avoid service errors caused by poorly trained personnel. Implementing an onboarding process can prove to be effective if done right.
And right it should. Creating a powerful HubSpot onboarding timeline can be difficult, so we are here. We know what your HubSpot onboarding process should look like, and we will tell you how to do it.
Benefits of Hubspot Service Hub
Now, some of you might still be on the fence as to why someone should need a dedicated onboarding program. And we understand the resistance. This isn’t a common practice, and often, the expenses might seem too much, but trust us, that is not the case. The benefits you get will completely outweigh the cons. But before we can outline the benefits of a proper onboarding process, let’s take a closer look at what benefits you can expect from HubSpot Service Hub.
Why Opt for HubSpot?
Designed to improve customer engagement and satisfaction, HubSpot Service Hub is an all-in-one customer support system that integrates a wide range of service desk features. The system's core premise is to help you help others more effectively. It does this by delivering a myriad of functions, each of which can be used to target specific needs and preferences.
As a secondary focus, HubSpot Service Hub also helps you transform your current customer base into your marketing assets. There’s no better marketing than word-of-mouth, and the system incentivizes its users to do this. Through clever rewards and gamification, you can reach audiences never before possible.
The system is relatively new on the market, but the vendor is not. HubSpot is known to provide some of the best marketing technology out there. By using HubSpot Service Hub, you can rest assured knowing that you not only get a powerful system but access to many incredible articles, business cases, etc.

Source: hubspot.com
Where Does Onboarding Fit In?
HubSpot Service Hub is incredible; there is no doubt about it, but it is also very complex. This is a powerful system that grants access to top-of-the-line tech but said tech requires you to know a lot of stuff in advance. Otherwise, you won’t be able to leverage the benefits properly, so a robust onboarding process is essential.
Onboarding will ease new users without intimidating them, helping them tackle different tools at their own pace. It will also help them get acquainted with your business processes and organizational structure.
Connecting Gmail or Outlook to Hubspot Service Hub
We hope that our previous section answered some of your questions, but now it is time to look at how you can connect your email account to HubSpot Service Hub. This is an important step in the HubSpot onboarding process because it unifies data between different communication channels. Removing one roadblock from the equation will make customer management easier for new people.
Prep Work
To connect a new inbox to HubSpot Service Hub, you must ensure the following three requirements are met. Otherwise, we cannot guarantee that everything will work as intended:
- Verify that you either have Account access permissions or a Sales Access type of account.
- Ensure your email is only accessible to you and not to your team members or anyone else in the company. Also, ensure the address line represents your name and/or company.
- Identify what email provider is tied to the address (in our case, Gmail or Outlook), and then follow the instructions to connect the box to HubSpot Service Hub.
Setting up Gmail
Setting up Gmail is not something that you should have problems with, but it is highly advised that you make sure that Google's Advanced Protection Program is disabled in your Gmail account. Otherwise, you won’t be able to connect the box to HubSpot Service Hub. If the service is disabled, then do the following:
- Navigate to your HubSpot Service Hub account. Locate and click the settings icon at the navigation bar.
- On the left side, you’ll see Integrations > Email Integrations.
- Click Connect an inbox.
- Pick Google / Gmail.
- A window will pop up asking you to connect to your Gmail account.
- Pick the one you want to use (if you have many).
- Make sure that you review all the permission requirements and only then click the Allow button.
- This will take you back to where a message will appear that all is connected.
Setting up Outlook
When it comes to connection, Outlook is pretty much the same as Gmail, with a few omitted steps here and there.
- Navigate to your HubSpot Service Hub account. Locate and click the settings icon at the navigation bar.
- On the left side, you’ll see Integrations > Email Integrations.
- Click Connect an inbox.
- Next, pick Outlook.
- A window will pop up asking you to connect your Outlook account.
- This will take you back to where the connection between the two systems will be verified.
- Once done, you will see a window stating that your HubSpot and Outlook accounts are connected.
And that’s pretty much it. Now that we have connected the two platforms, we need to set up a few basic but very important functions.
Setting up the Basics
To take full advantage of HubSpot Service Hub, you must first configure some basic systems to get you started. You will need to take care of a bunch of different things, specifically:
- You’ll need to install a HubSpot tracking code
- Create new users
- All shared email addresses used by your team should be converted to Conversations
- If necessary, add a separate subdomain to your knowledge base
- Set up your notifications
These are just the beginning. You will also need to make sure that your incoming tickets are assigned to the proper representatives. While you are there, it is also beneficial to have a workflow that you can use when updating priorities.
Customer Specific Setups
After you have configured the previously mentioned settings, we can proceed to your customer-specific ones. Keep in mind that these settings aren’t exactly universal for a HubSpot onboarding process, so if you see something that doesn’t apply to you, feel free to skip it.
- Start moving your knowledge base articles (provided you have some) or create new space;
- Once done, make sure that your base has enough categories and sections for easy navigation;
- After you are done categorizing, ensure that content is optimized for Google Search Engine;
- Scatter quick links to your knowledge base in places where customers gather the most;
- If possible, enrich your knowledge base with videos and audio materials;
Business Development Settings
Now that we have a good knowledge base module in place let’s make sure that all that work didn’t go to waste by presenting a proper feedback loop. Doing so will allow you to gather information about specific decisions much more effectively, as the information will come straight from your customers.
- Start building your feedback by using the NPS module. These loyalty surveys will allow you to learn what people love about your services/products;
- Set up an automation where effort surveys will be sent out automatically as soon as a ticket is closed;
- Make sure that you have CSAT surveys ready to be sent out;
- Create a flow that’ll address customers who are left unhappy;
- Create a flow in the automation settings where happy customers will be asked to leave a review;
- Take full advantage of your CSAT surveys by employing them in marketing materials;
Knowledge Base Development
Now, what’s left for our HubSpot onboarding best practices is to create a proper knowledge base system that can be used by both new and old employees. This base is different from the one you might already be using for your customers as it outlines data that can only be accessed by your staff. We can’t possibly list what you need, so instead, we did the next best thing. We’ve gathered a bunch of different resources that you can use as a base for your knowledge.
A Complete Introduction to HubSpot Service Hub
A complete overview of HubSpot Service Hub will surely come in handy. It has everything, from a deep dive into features to the pricing scheme. Make sure that you bookmark it for reference purposes.
HubSpot Community - Tips, Tricks & Best Practices
This is a community tab that you can use to check whether a new section for a specific function has appeared. This is the best place to have a quick look at what’s new and what the new feature does.
Migrating from Gmail and Outlook to Hubspot Service Hub
And now for the elephant in the room. How on Earth do you move your stuff to HubSpot Service Hub? Well. It is easy, but it is a paid solution. Don’t go running away if you aren’t willing to spend. Just hear us out. HubSpot doesn’t make it easy to move data back and forth, and often, the whole process requires extra programming and configuring if done alone. However, with our system, you can skip this altogether. You can import tickets with related data like attachments, public and private notes, and custom fields, as well as Created at, Updated at, and Closed at dates. Here’s what the entire process looks like:
1. Visit the ;
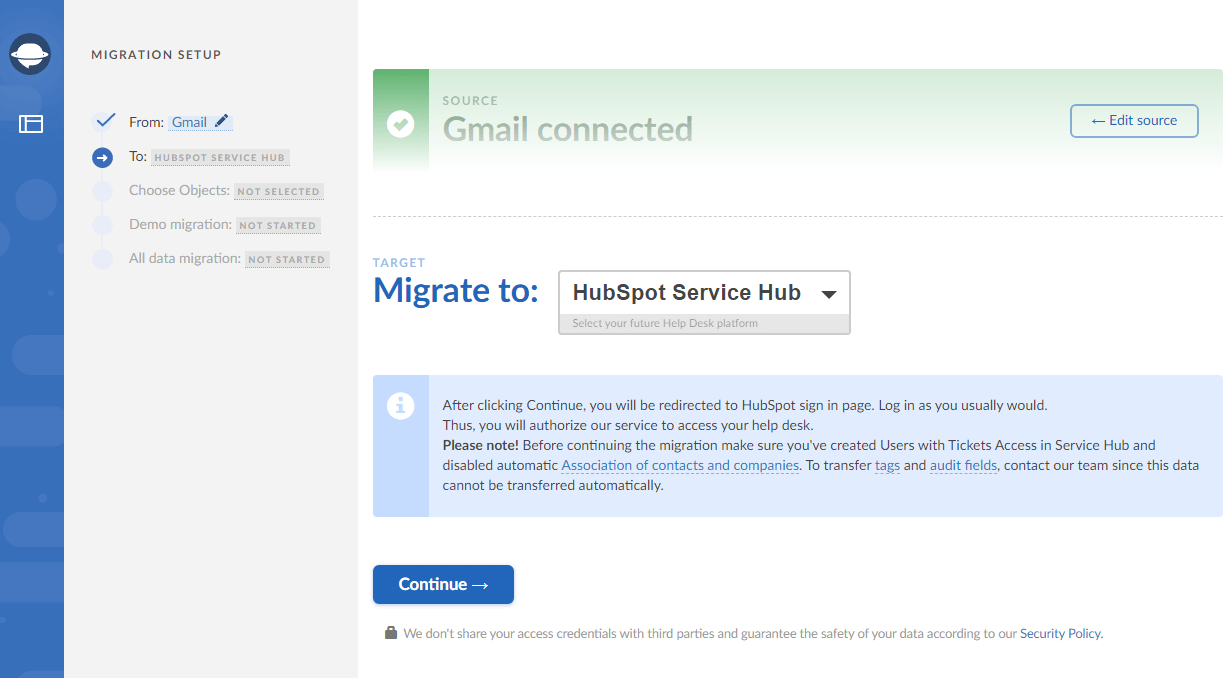
2. Once there, pick the source and the target platforms and click Continue to supply your access details to both the selected email and your HubSpot Service Hub account;
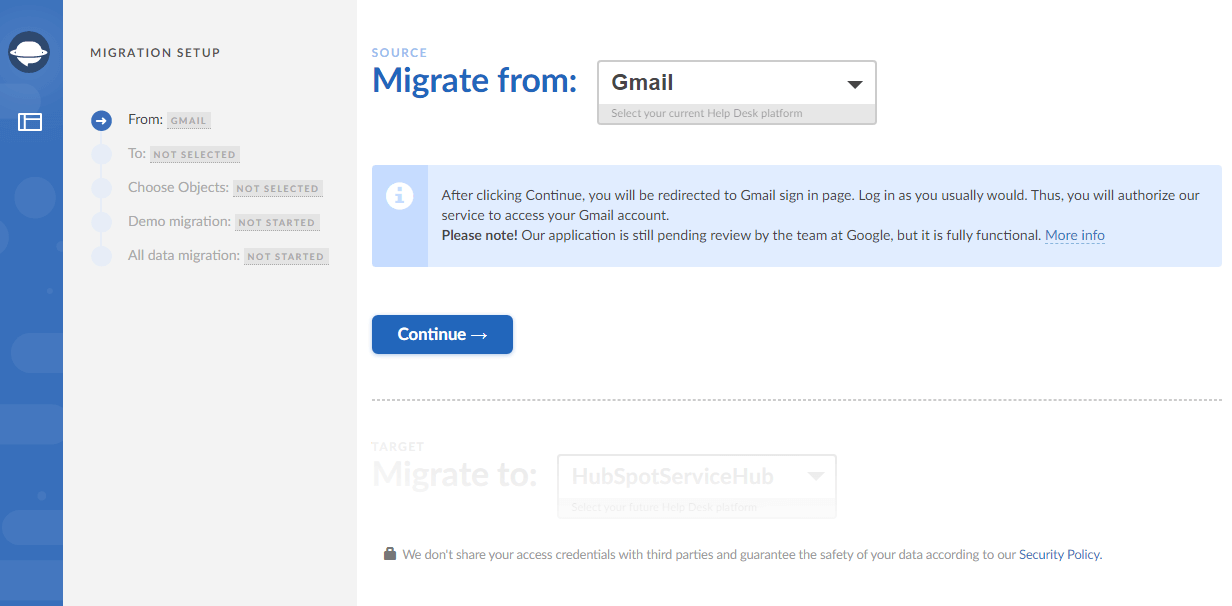
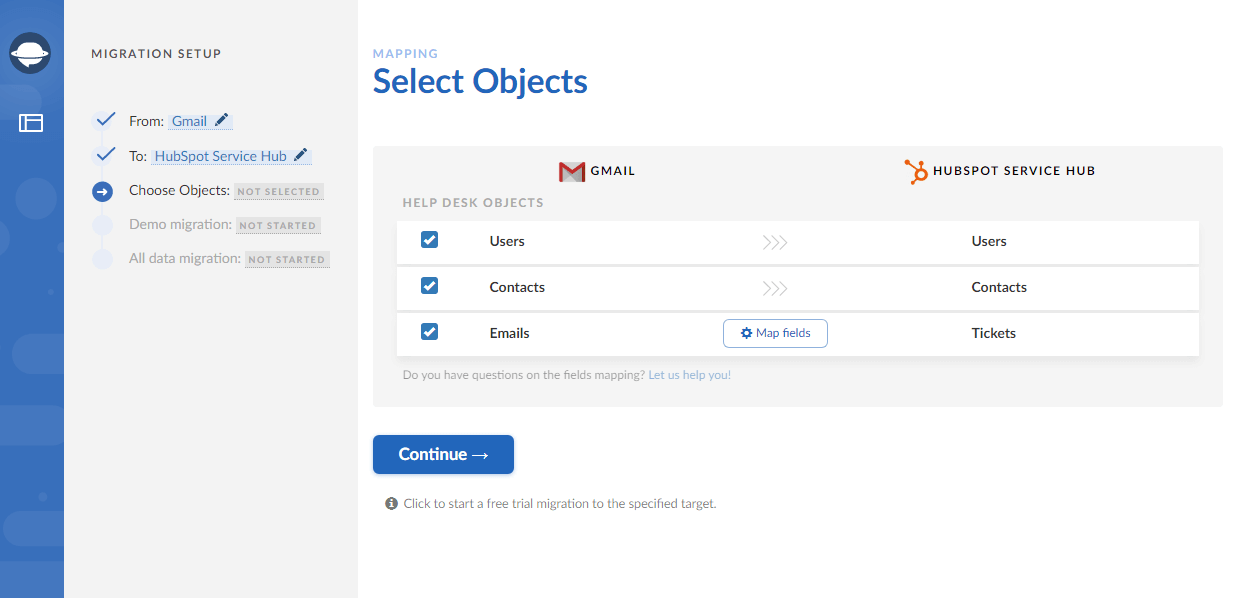
3. After you’ve provided the details, you will be asked to map the data you’d like to move. Also, you need to review the ticket fields to ensure all emails migrate correctly.

4. You then will be asked to perform a demo migration (it is done to verify that all your records can be migrated;
5. Once your info has been moved, you can review everything and commit to a full migration.
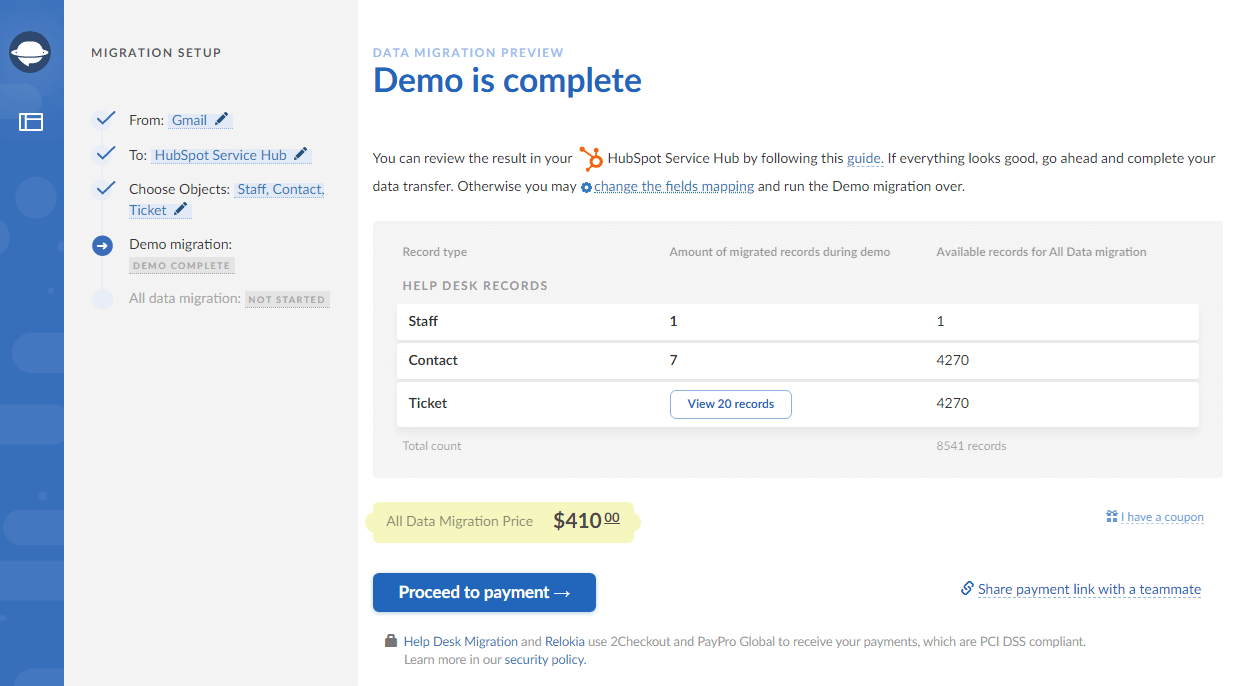
As you can see, the whole process is simple and quite fast. If you are wondering, the pricing is also pretty fair. We charge only for the records moved, meaning no hidden fees, labor expenses, etc., are present. Besides, hiring a developer to write a script will not only postpone your migration but will cost you extra, as the software engineer will have to learn the ins and outs of each system from scratch.
Don’t Waste Time, Migrate With HDM
To sum up our HubSpot onboarding checklist, we’d say, “Time is of the essence.” The less you spend on migration, the sooner you can start your work in the new system. If you need help or want some guidance, we are just a few clicks away. Book your consultation today, and we’ll get back to you as soon as possible. But for now, that’s all we have. Thanks for joining, and we’ll see you next time!


