ServiceNow Migration Guides
How to activate Help Desk Migration app in ServiceNow?
To migrate to ServiceNow using the Help Desk Migration app, check the settings first. If you haven’t chosen the application scope, you can’t proceed with the migration setup. So, you need to activate the Help Desk Migration app in ServiceNow.
Here’s how to enable the app:
1. Go to your ServiceNow instance.
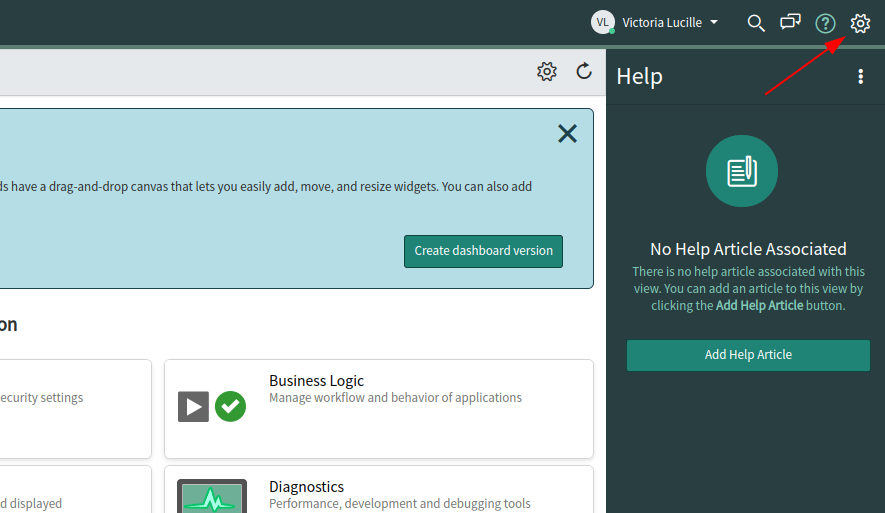
2. Click the System Settings icon in the right corner of the screen.
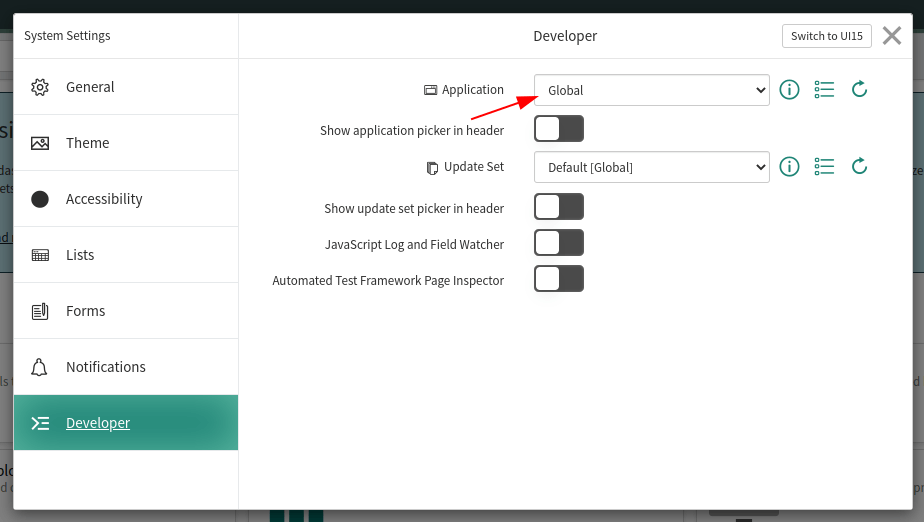
3. Under the System Settings, choose Developer.
4. Open the Application drop-down on the Developer page.
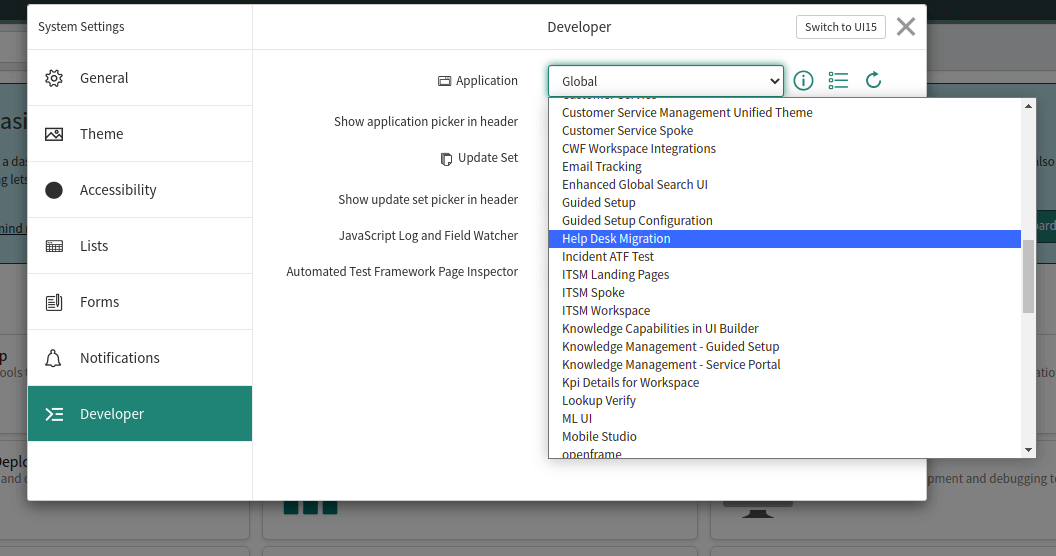
5. Pick Help Desk Migration from the list of applications.
6. Check if Update Set changes to [Default] Help Desk Migration.
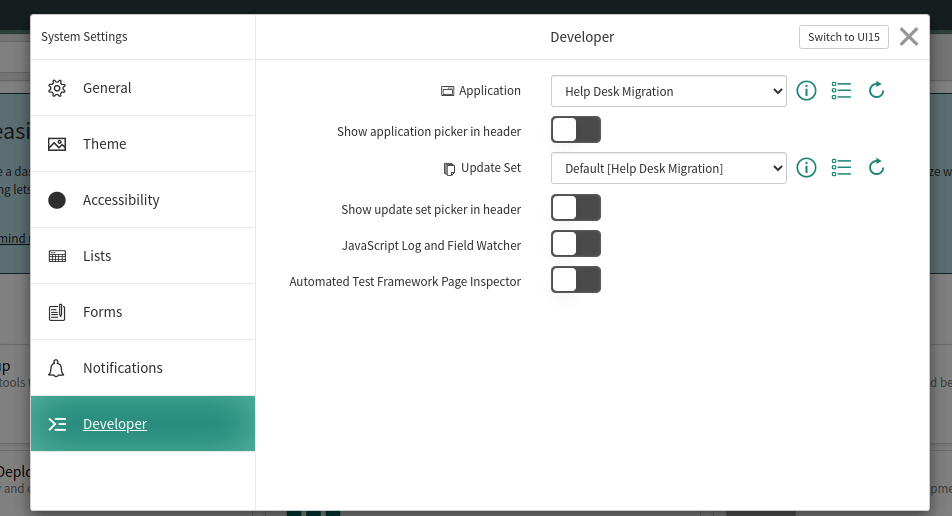
7. Now, you can proceed with the migration setup.
How to migrate tickets and article tags to ServiceNow?
Before migrating your tickets and articles to ServiceNow, you need to receive certain permissions. In such a way, you ensure that ticket and article tags migrate properly during the data import.
To receive permissions, you need to carry out the following settings:
Step 1. Go to the main ServiceNow browser window.
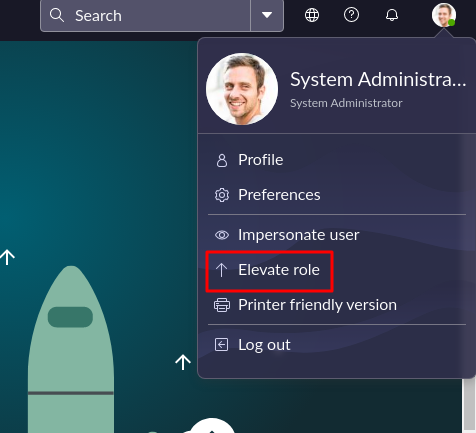
Step 2. Then, open User menu, where you need to choose Elevate Roles.
Step 3. Put a tick next to security_admin.
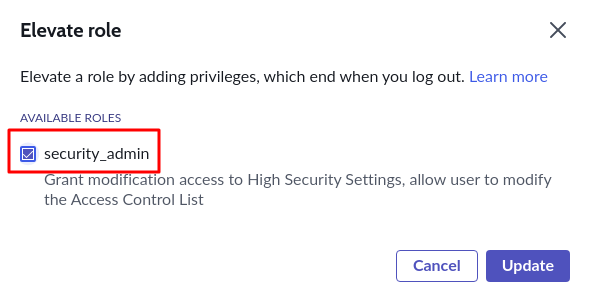
Step. 4. Click OK to save settings.
Note: Only users with security_admin roles use operations “can create”, “can delete” or “can update” for tables in Access Controls.
To enable operation “can create” you need to undergo the following steps:
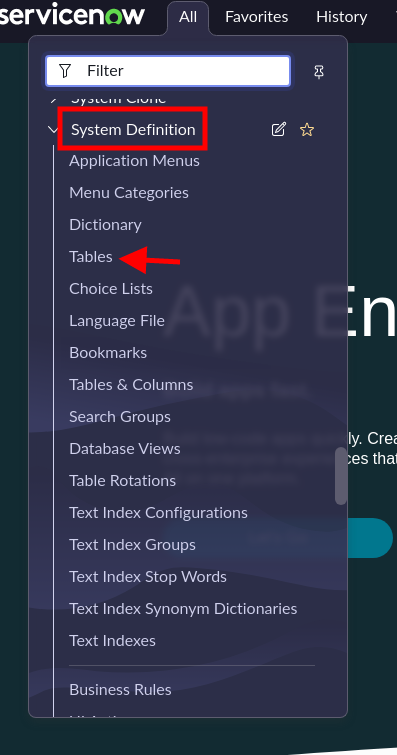
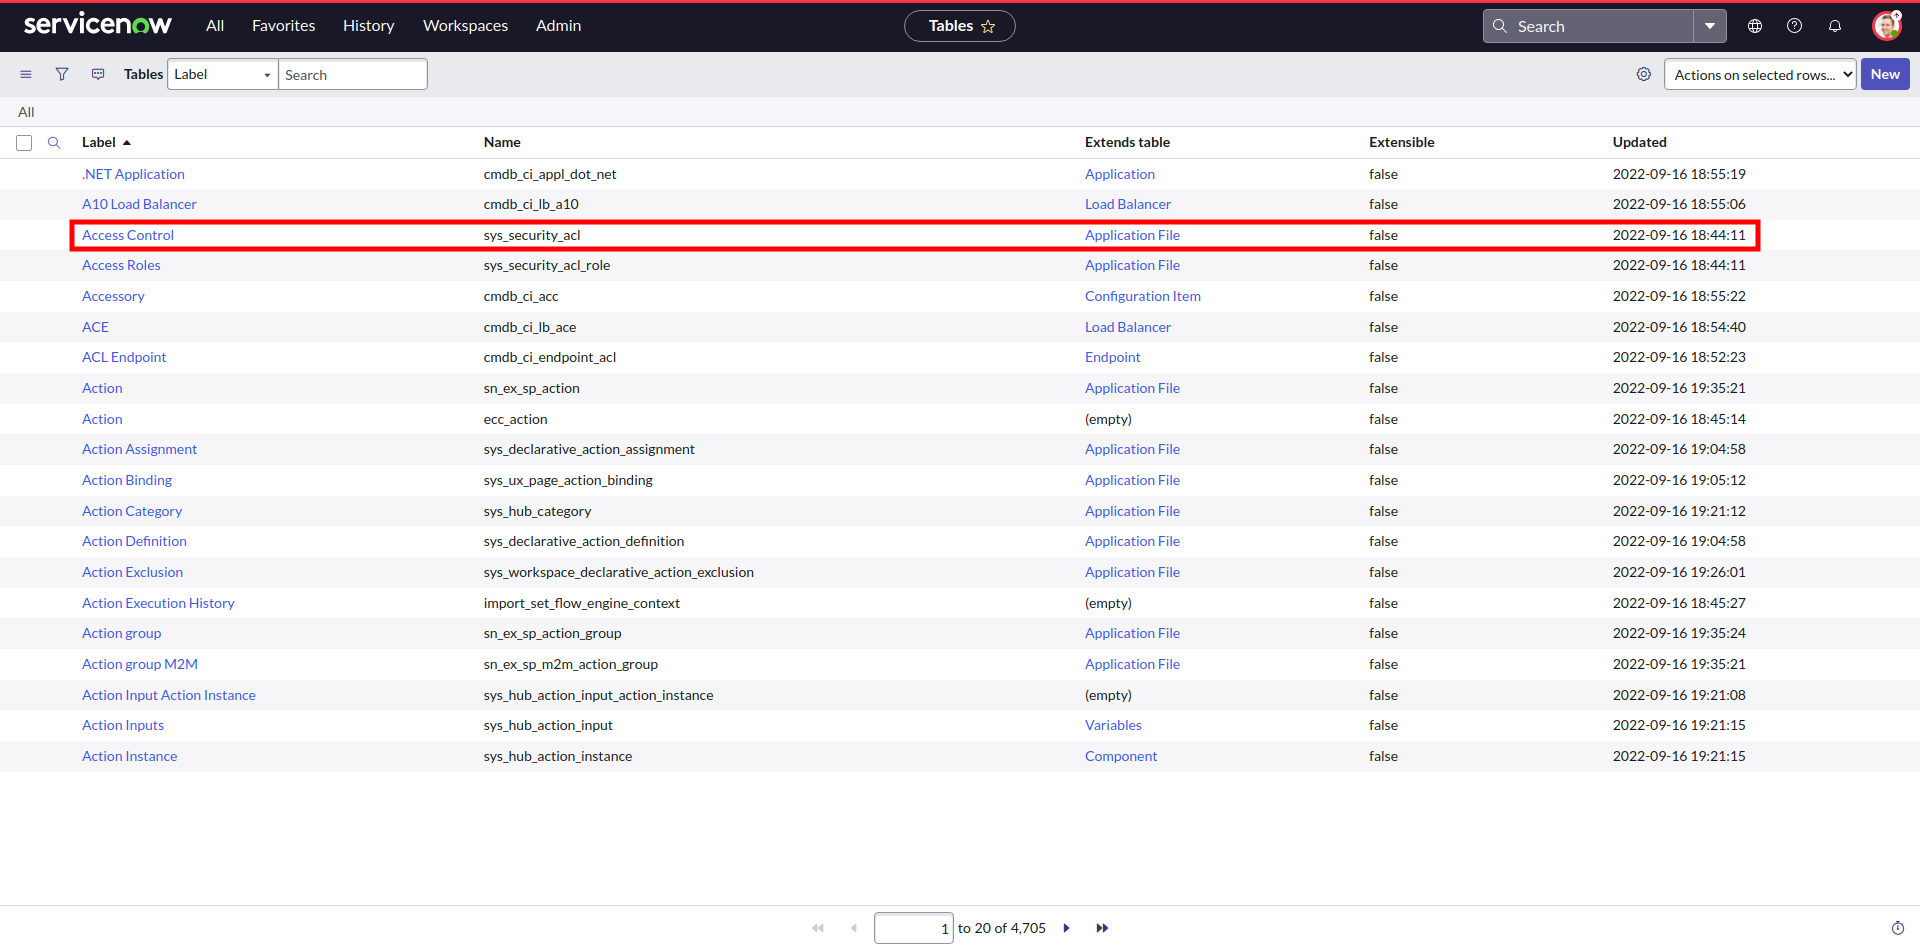
Step 1. Go to System Definition, then to Tables. Look for the table “lable_entry”.
Step 2. Go to the Access Controls and click New.
Step 3. Choose operation “Create”.
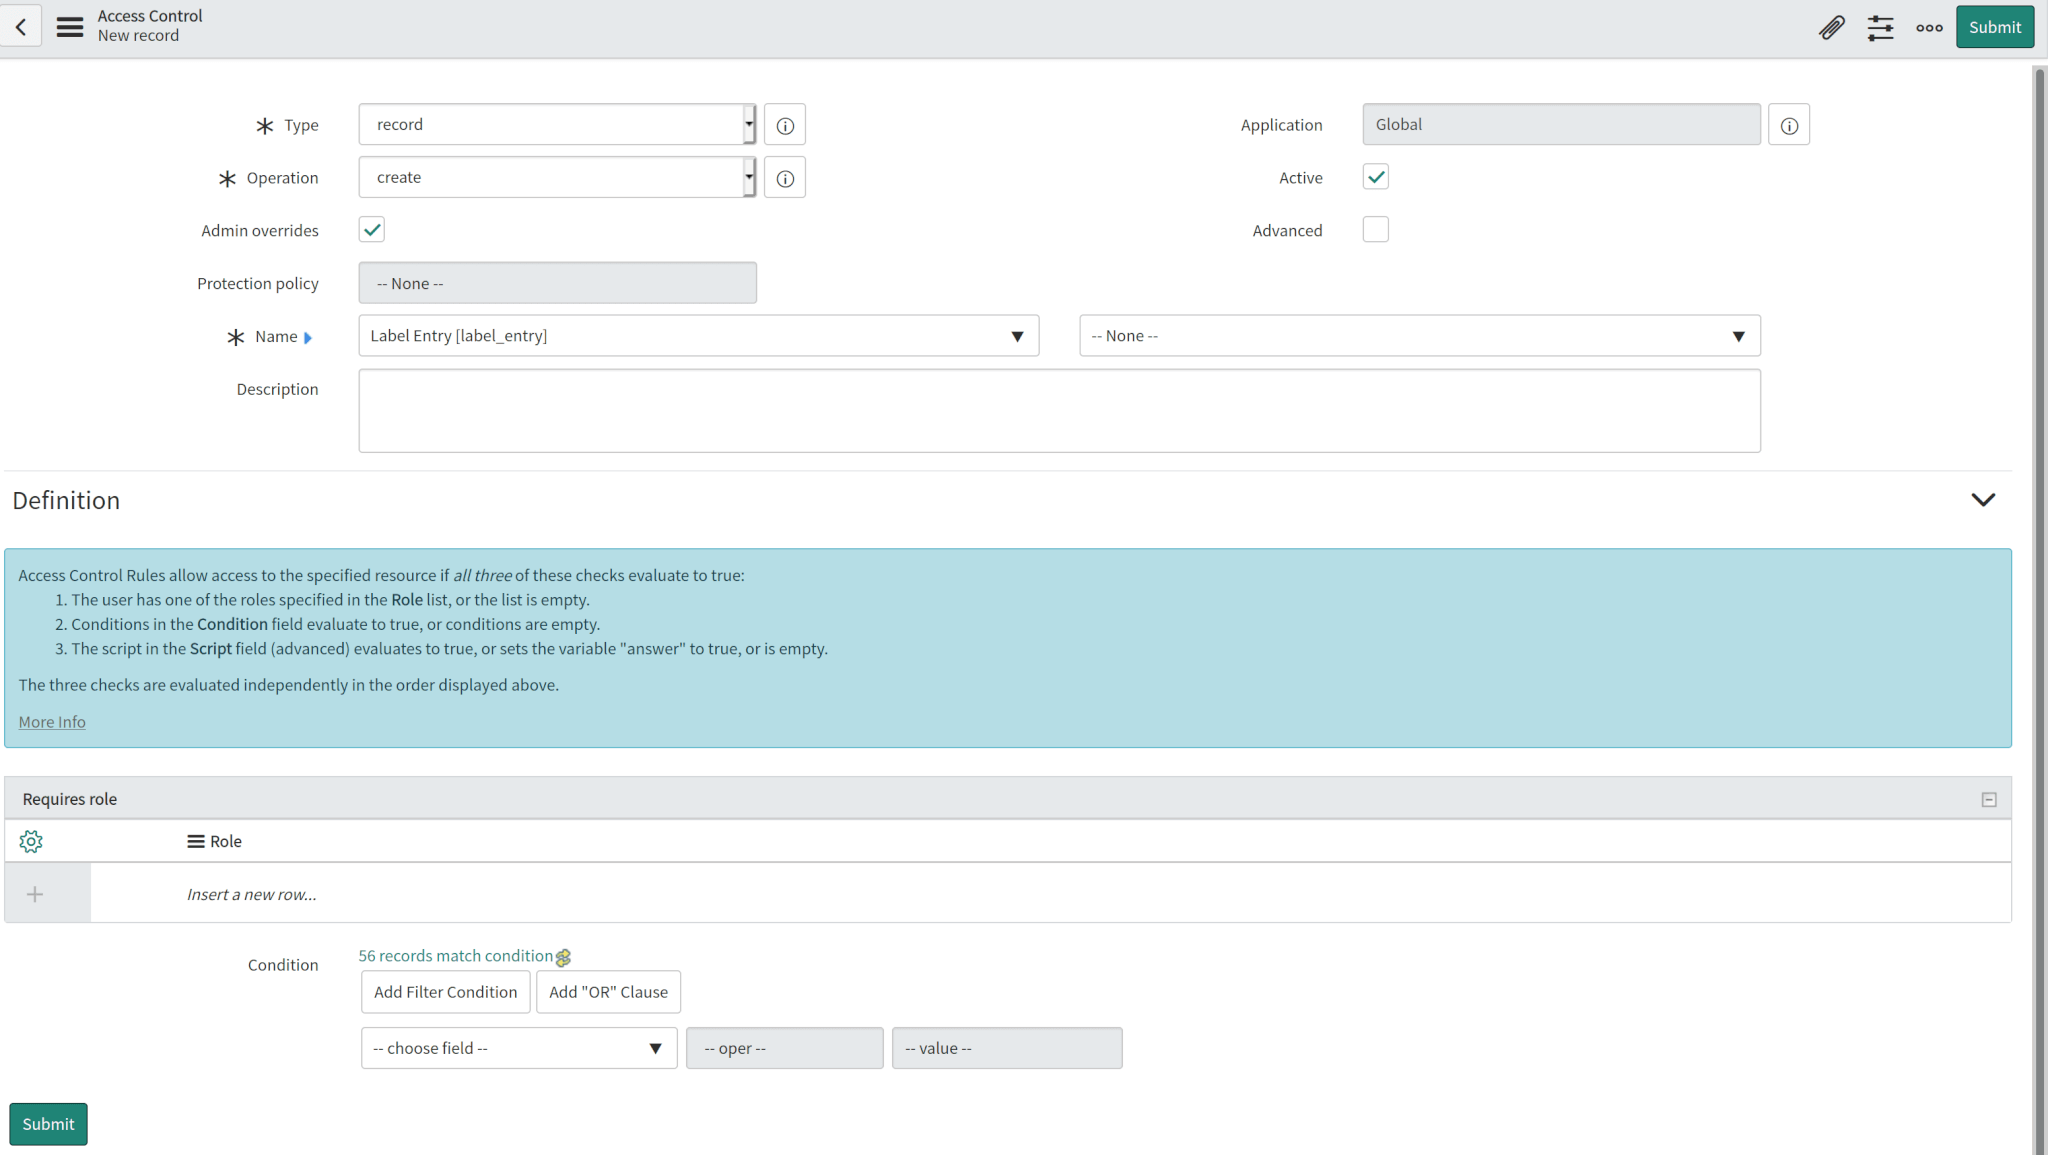
In the Access Control for label_entry, you need to create two permissions “create” for Table key and Table.

Step 4. Select “Table” next to Label Entry [label_entry] and click Submit.
![]()
Step 5. Then choose “Table key” and click on Submit as well.
![]()
Note: These permissions allow you to create and link tags to tickets and articles properly.
How to calculate customers in ServiceNow?
In ServiceNow, callers are customers who send you incidents to be resolved. To calculate the number of callers, complete the following actions.
1. Go to All and open the Service Desk dropdown list.
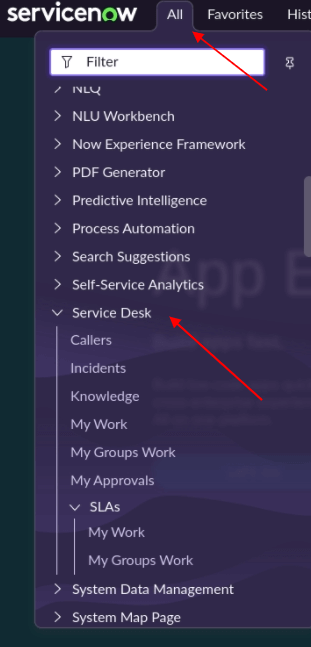
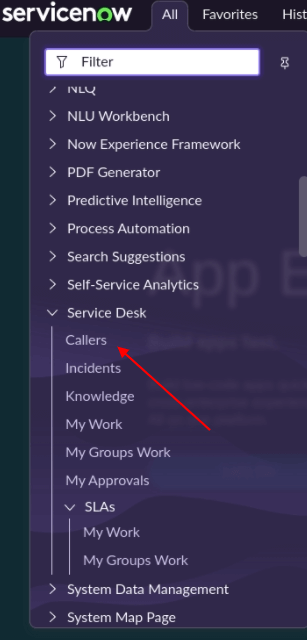
2. Then select Callers.
3. You can see the number of customers at the bottom of the page.
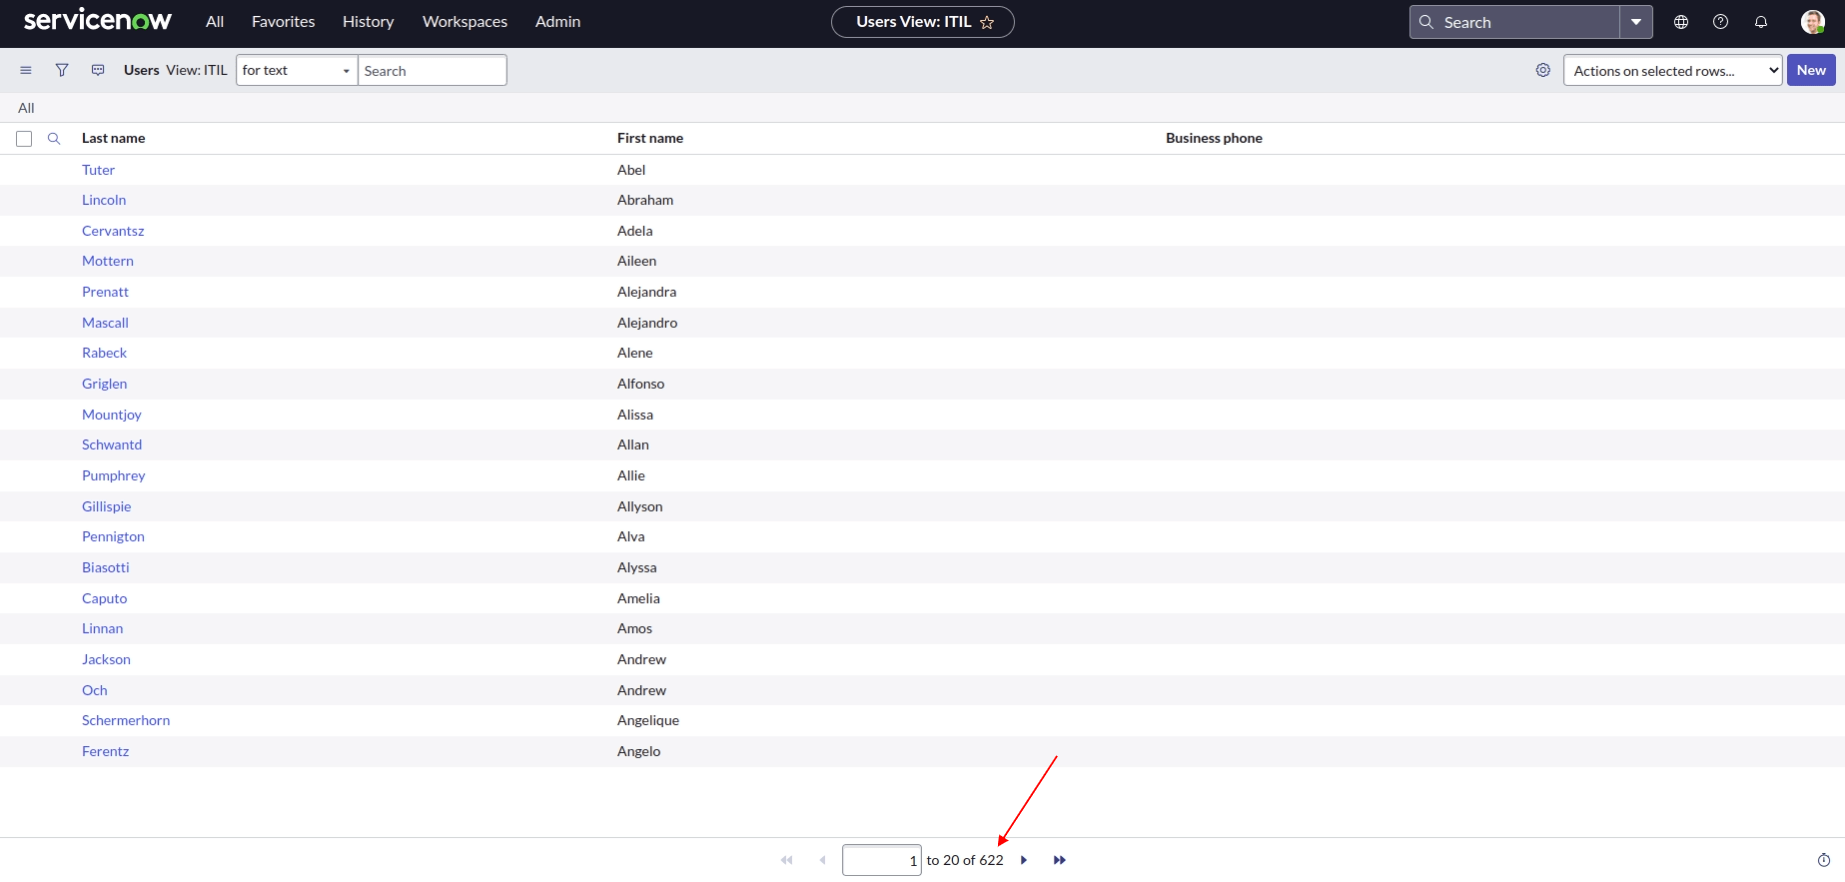
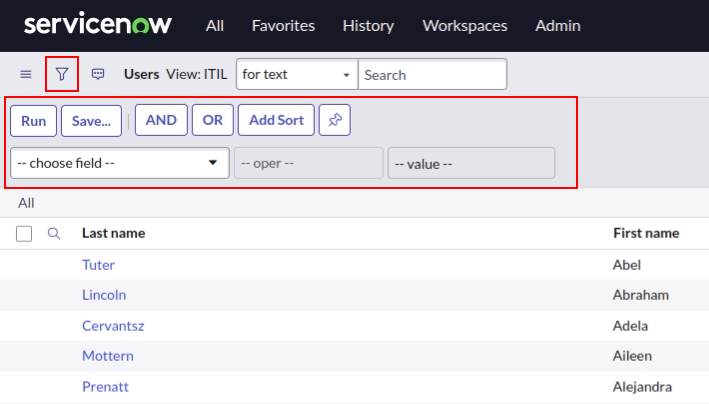
4. You can apply filters to search for specific customers.
How to calculate the number of tickets in ServiceNow?
You can find the list of your ServiceNow tickets (incidents) and calculate their number in your Service Desk.
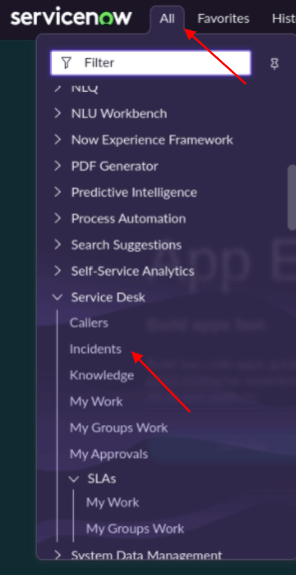
1. Select All from the top toolbar and open the Service Desk dropdown. Then select Incidents.
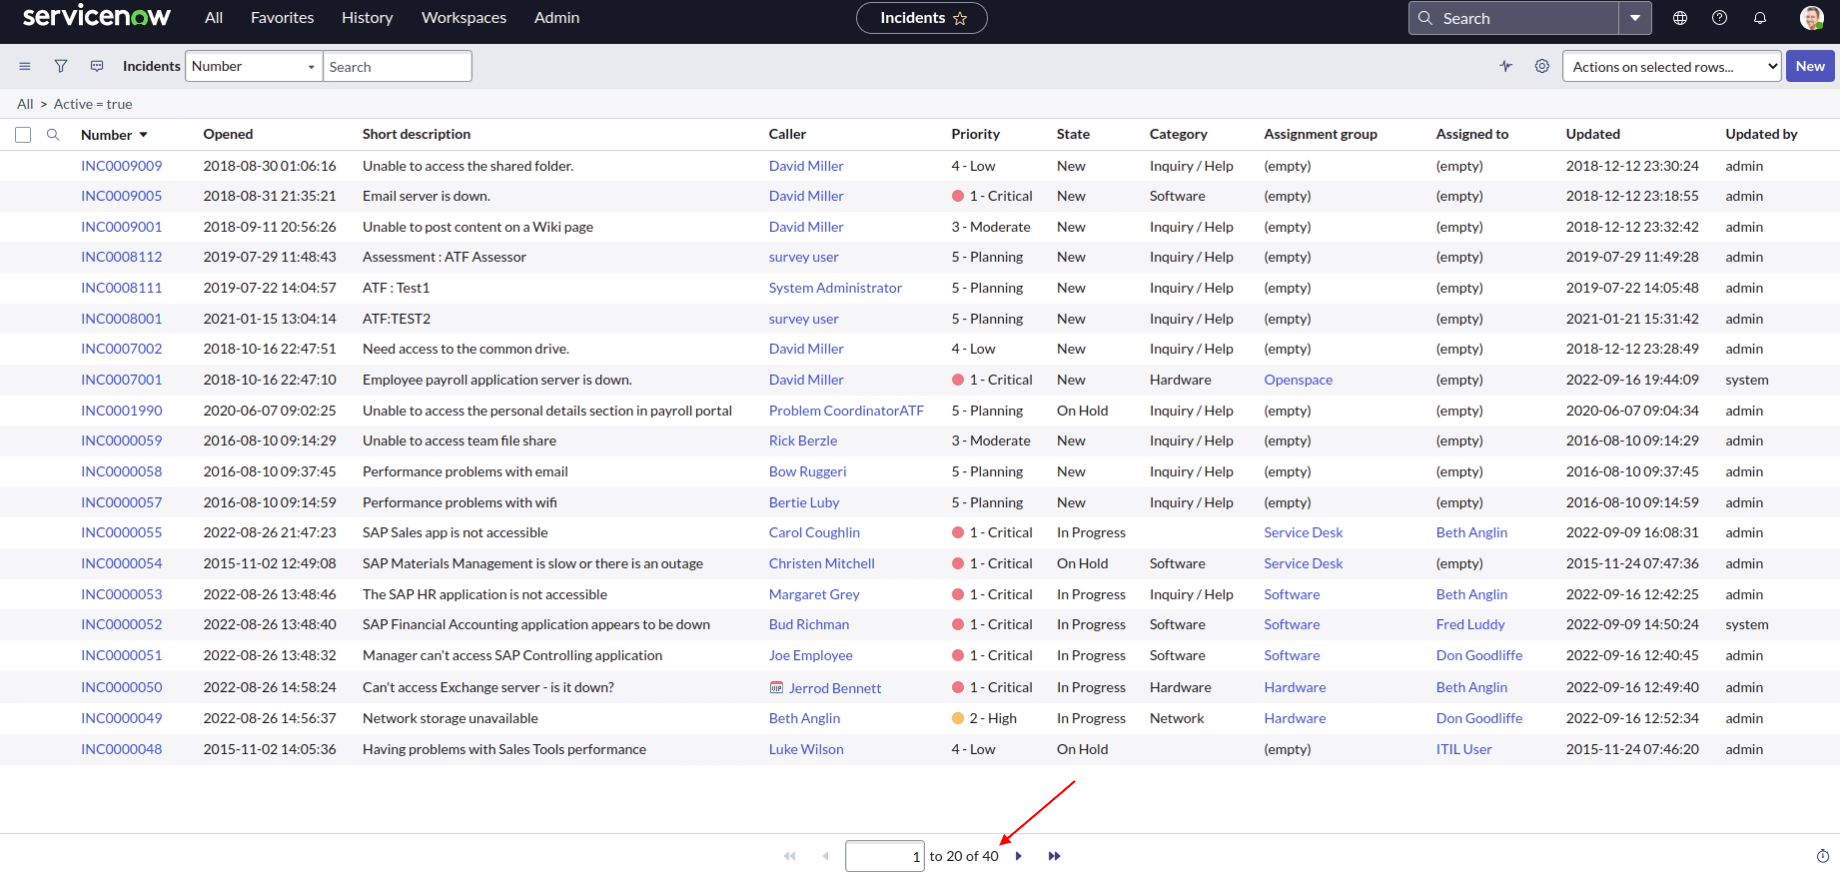
2. Find the number of tickets beneath the list.
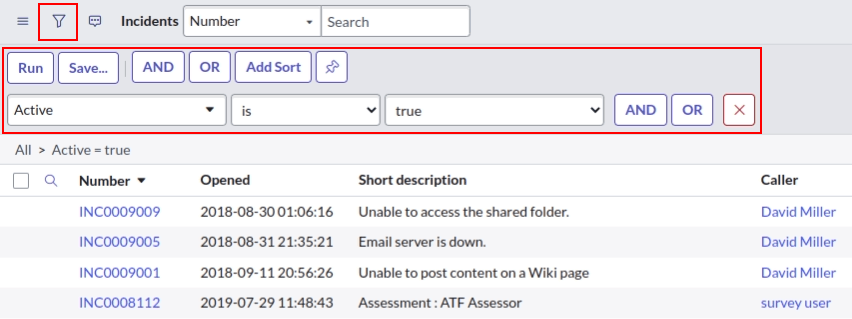
3. You can use filters to select specific incidents. To add a filter, click the filter icon and choose a field, operation, and value.
How to calculate knowledge base articles in ServiceNow?
In ServiceNow knowledge, you can have two knowledge bases (IT and Knowledge) and calculate the number of articles included in each.
1. From the top toolbar, go to the All dropdown and expand Self-Service. Then click Knowledge.
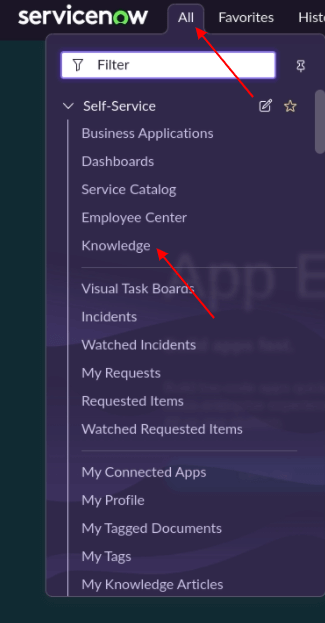
2. Check the number of articles in your knowledge base.
