Jitbit HelpDesk Migration Guides
How to disable email notifications in JitBit?
To disable email notifications in JitBit, follow these steps:
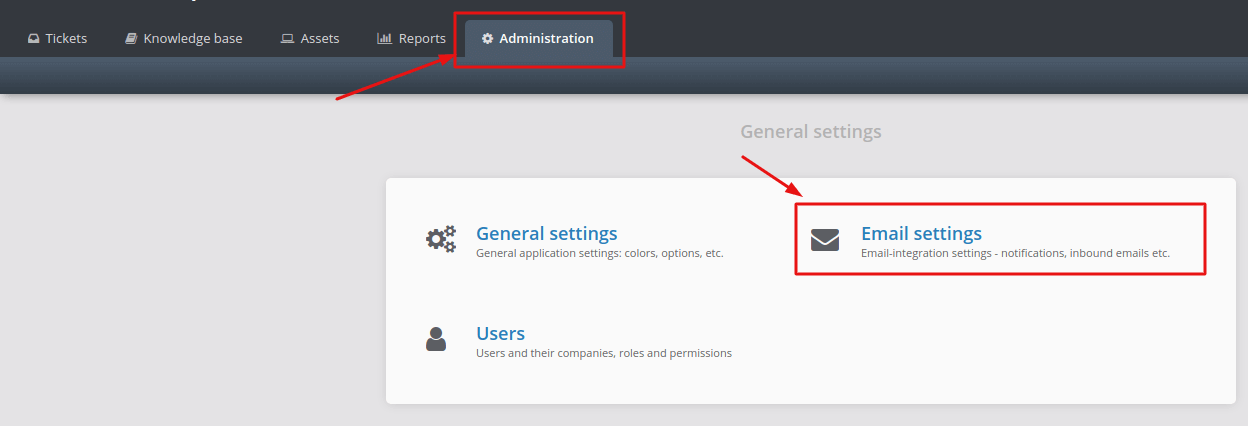
1. Open your JitBit account. On the main page, click on the “Administration” option. Under the “General settings,” click the “Email settings” button.

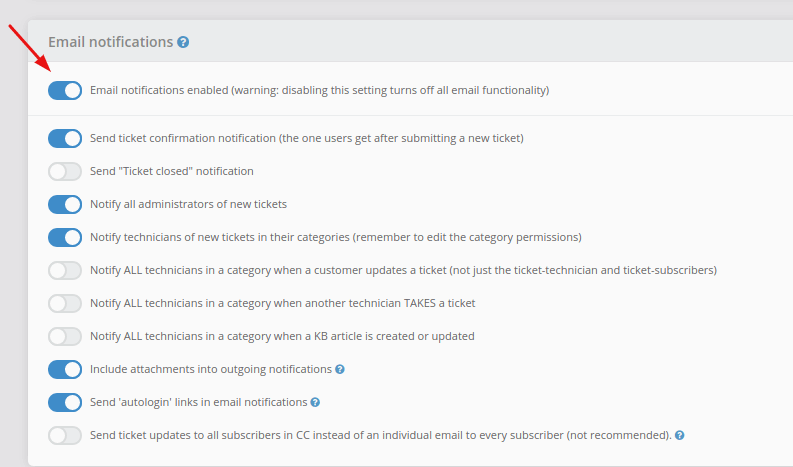
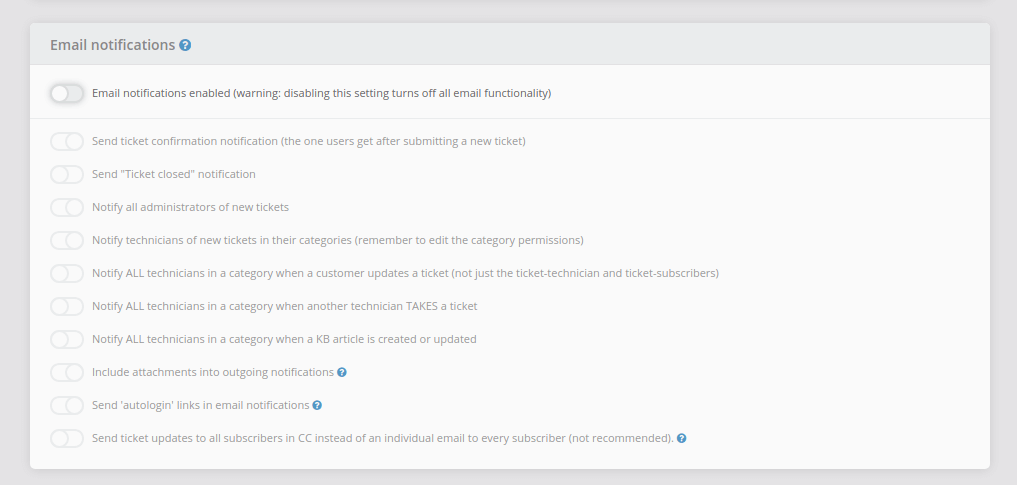
2. Choose "Email notifications." Disable the "Email notifications" option under the “Email notifications” settings.


Click the “Save changes” button above the “Email notifications.”

Following these steps will prevent your customer support team from receiving email notifications during the import process, ensuring a smooth migration experience.
How to filter data in JitBit?
To filter data in JitBit using a fast advanced filter or "Jitbit Detective," you can follow these steps:
- Access the Detective Feature: Look for the Detective icon, which could be represented by a magnifying glass or detective hat. Click on this icon to activate the Detective feature.
- Choose Filter Option: Once you click on the Detective icon, a flying menu will appear with options such as CATEGORY, TAG, SUBJECT, DETAILS, and ASSETS. Choose the filter option based on your criteria. For example, if you want to filter by TAG, select the TAG option.
- Enter Search Term: After selecting the filter option, an input field will appear. Type your search term into this input field and press ENTER. For example, if you're searching for tickets with a specific tag, enter the tag name (e.g., "blue") and press ENTER.
- View Filtered Results: The tickets grid will be filtered based on the criteria you entered. Only tickets that match the search term within the selected filter option (e.g., TAG) will be displayed.
- Optional URL Query: If JitBit supports it, you may be able to use the Detective function via URL query. This would allow you to perform the same filtering operation by constructing a specific URL query with the desired filter parameters and search term.
