HubSpot Service Hub Migration Guides
How to disable automatic association of contacts and companies in HubSpot Service Hub?
Discover how to disable HubSpot's automatic association of contacts and companies in our video guide to avoid post-migration surprises and data duplication. Follow simple steps to ensure a smooth migration.
If you have the Automatically create and associate companies with contacts setting enabled, HubSpot will check domains of contacts' email addresses and create companies if it doesn’t find an existing match. With that setting enabled, after the migration, you will see new companies that HubSpot has automatically created.
How to disable the "Automatically create and associate companies" setting
Step 1. In the top right corner, select Settings.
Step 2. Under Settings, go to Data Management.
Step 3. Open up a drop-down and click on Companies.
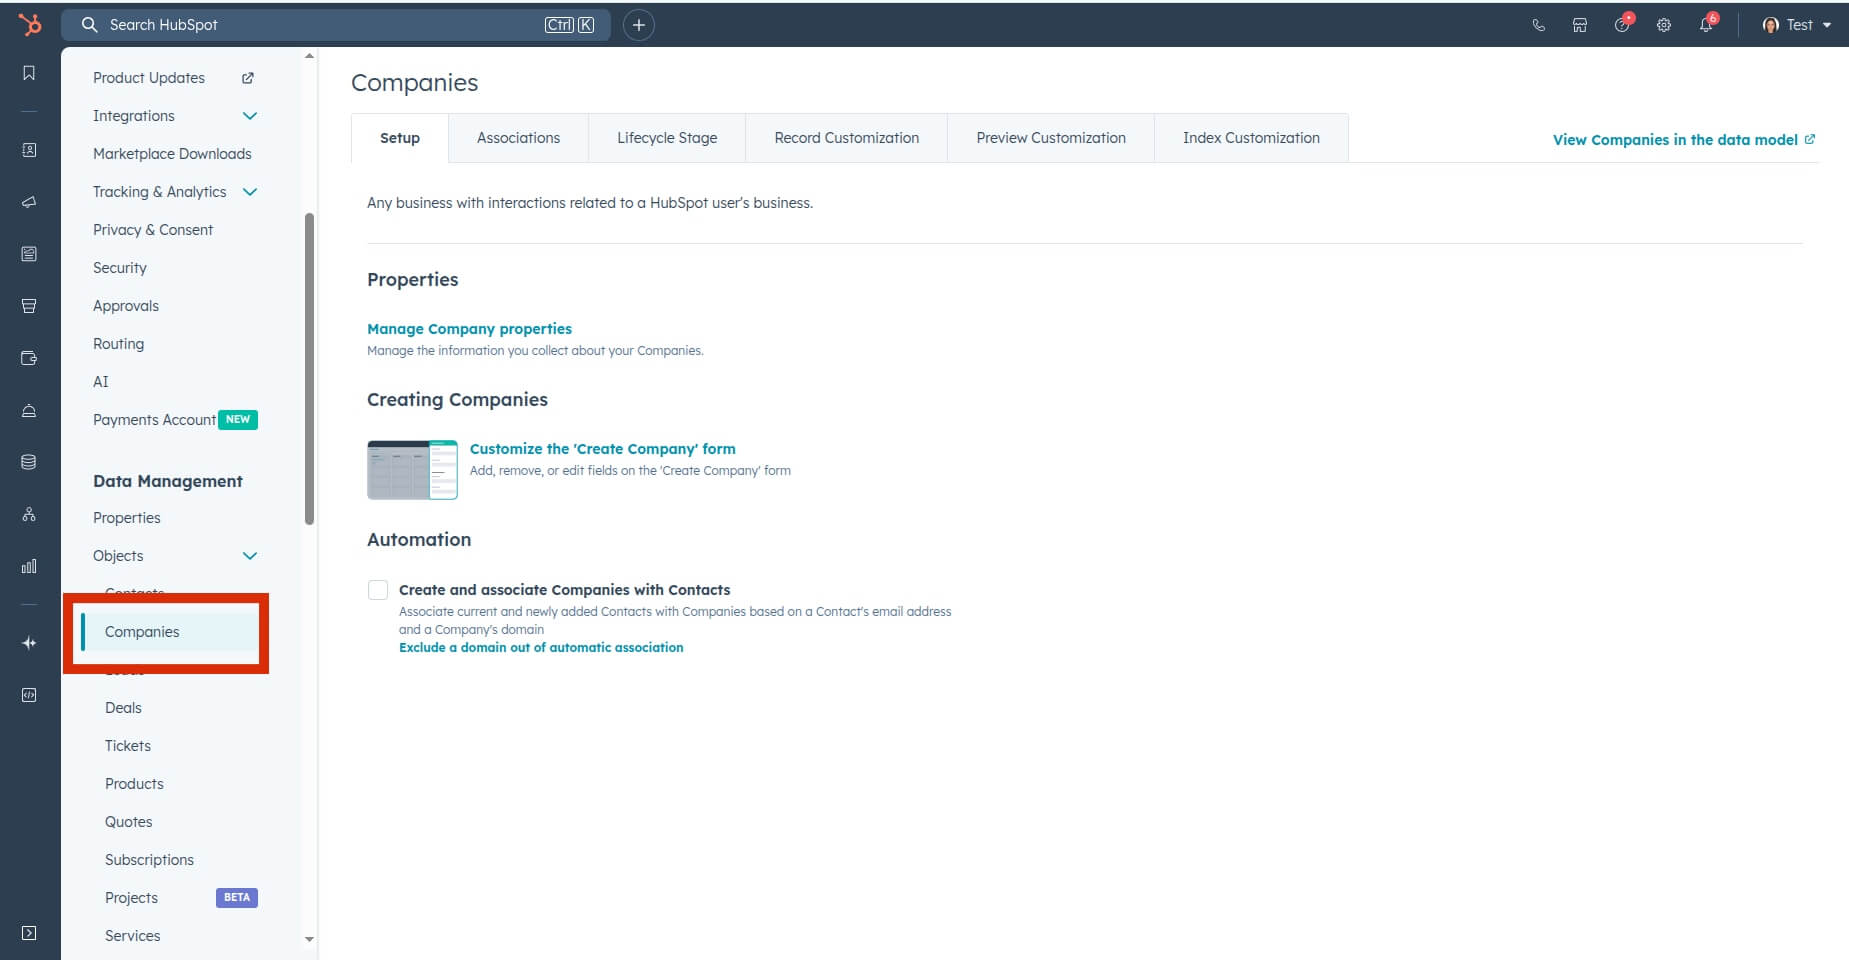
Step 4. Find Automatically create and associate companies with contacts and switch off the toggle (you know it's off if it's gray).

HubSpot will automatically save your changes. Now, you may continue your data migration.
How to disable ticket status automations on HubSpot Service Hub?
HubSpot Service Hub has several Automations that can change the statuses of all tickets to “Waiting on contact” if it’s turned on. To keep the original ticket status when migrating to HubSpot, disable these automations before starting your data migration.
Here’s the instruction for disabling these Automations:
1. Login to your HubSpot Service Hub account.
2. Go to Settings in the main navigation bar.

3. Choose Tickets under Objects in the left sidebar.

4. Click on the Pipelines tab.
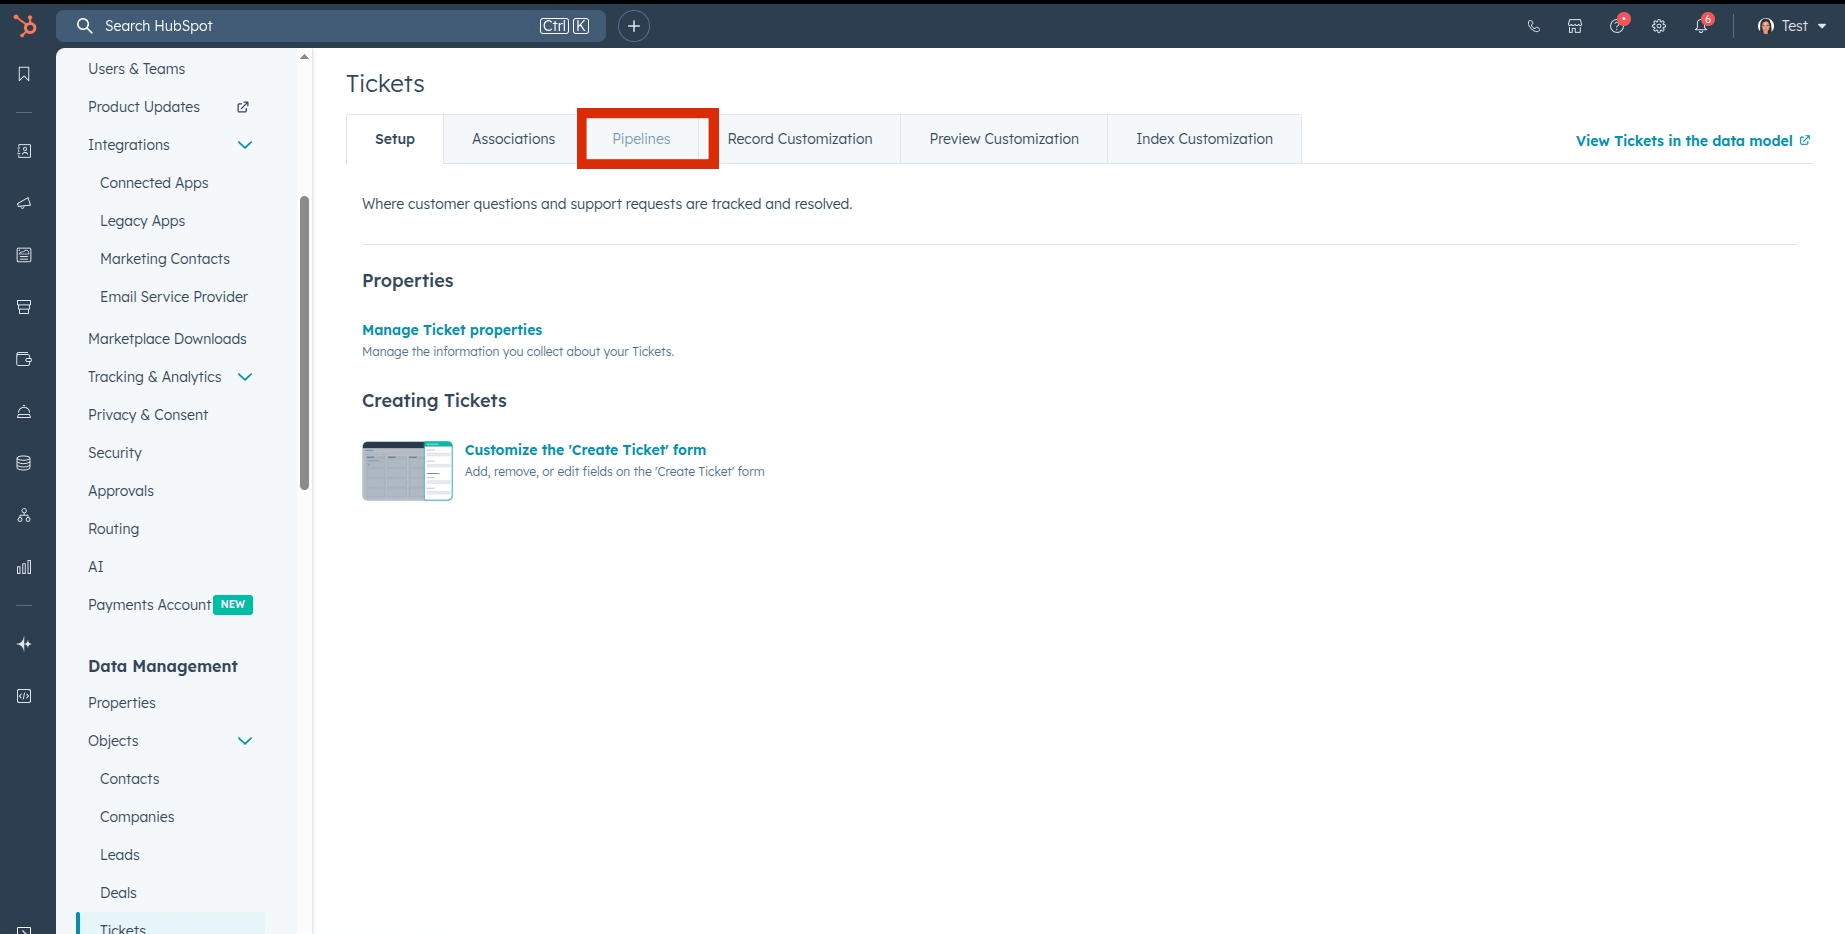
5. In the Select a pipeline section, choose the required ticket pipeline.
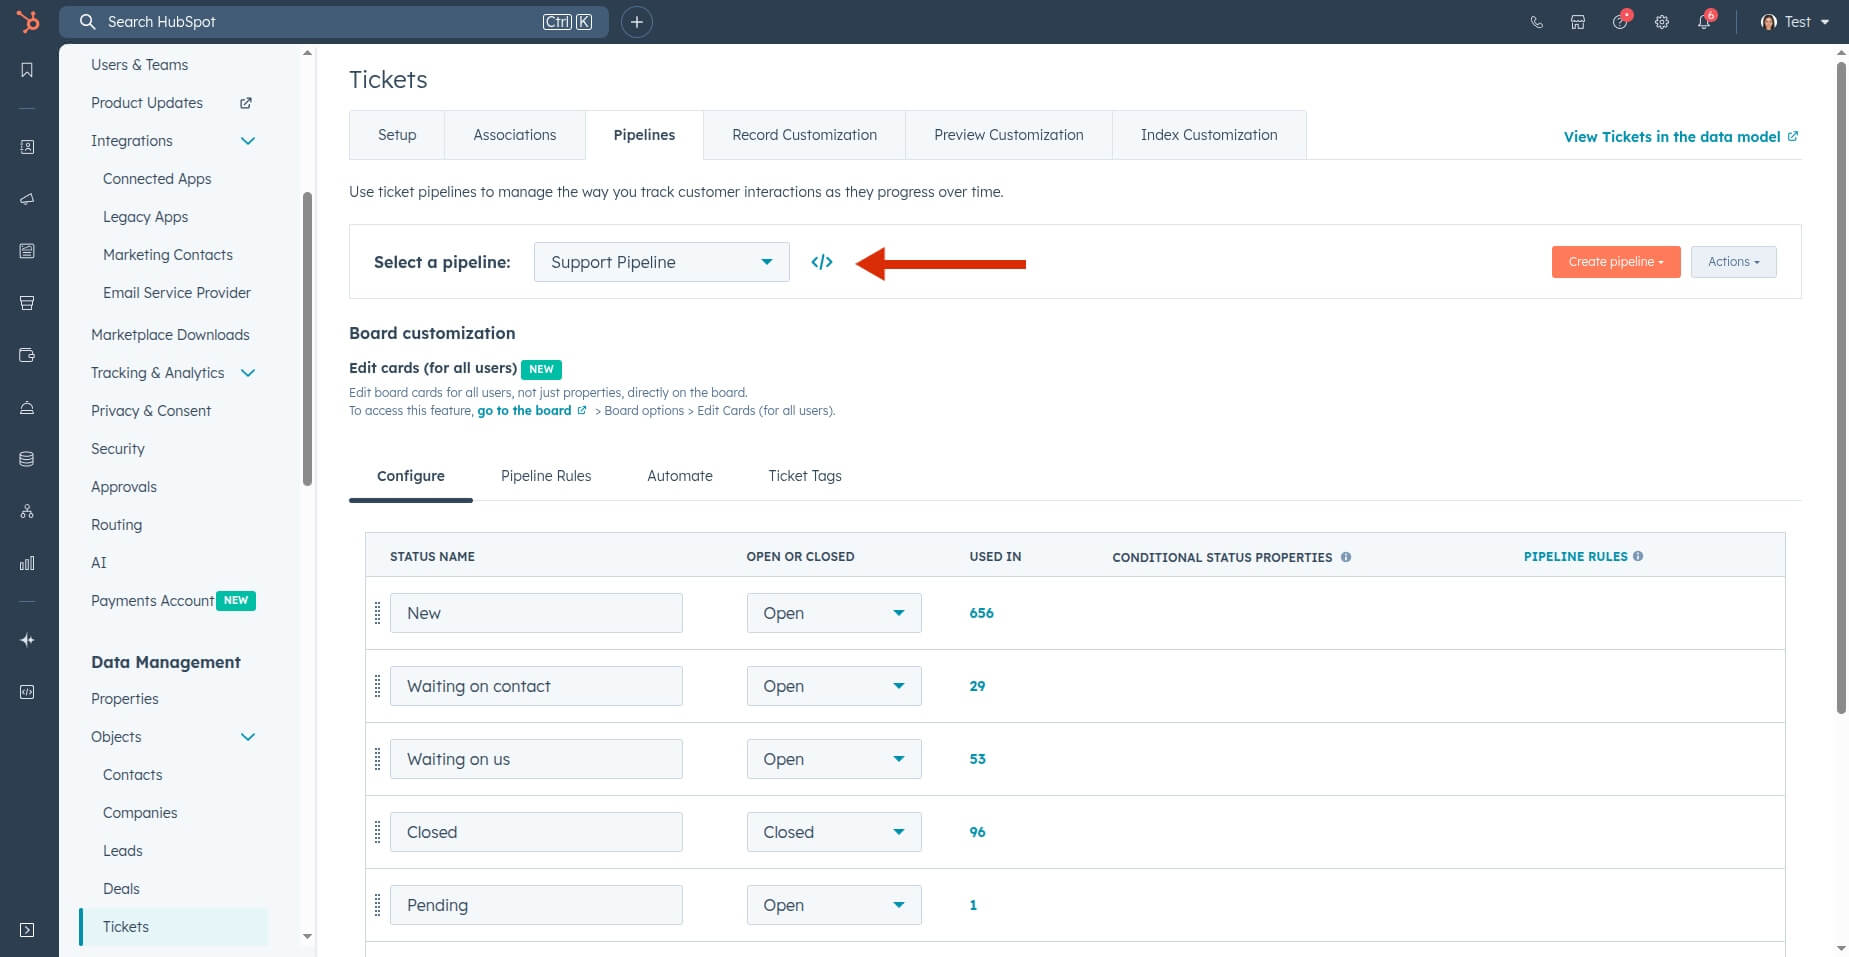
6. Then go to the Automate tab.
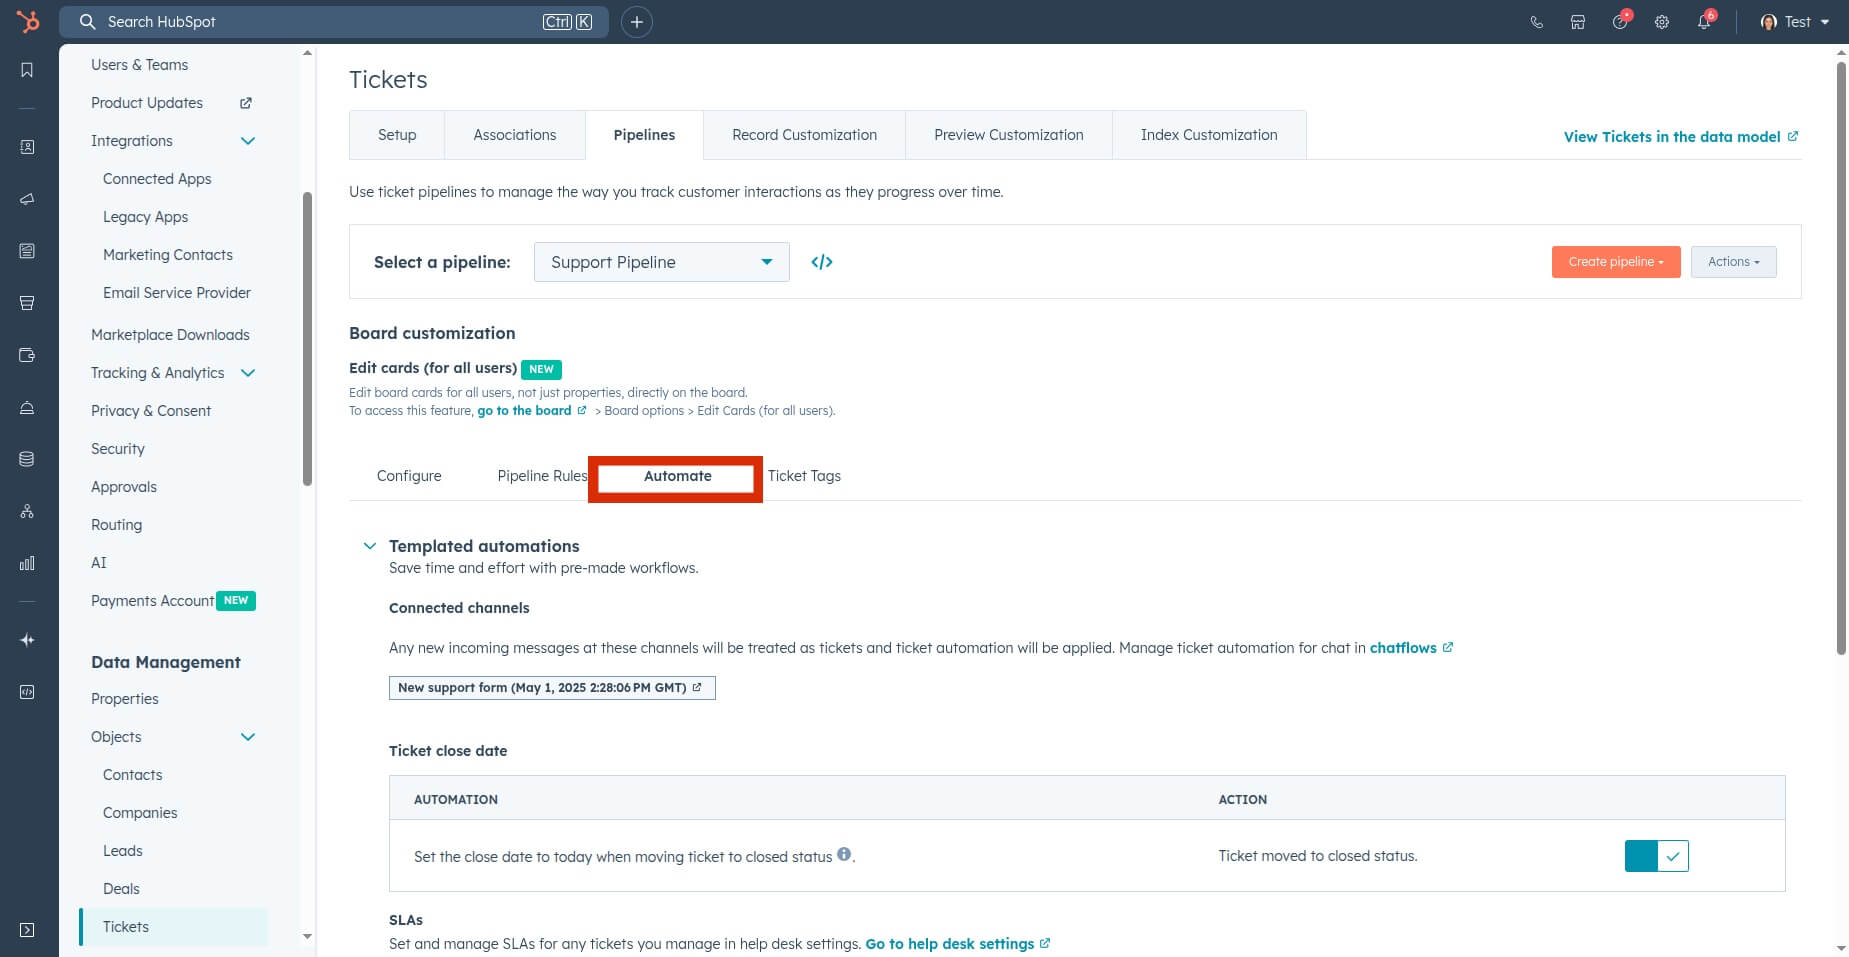
7. Hit Additional status automation to expand more automation settings.
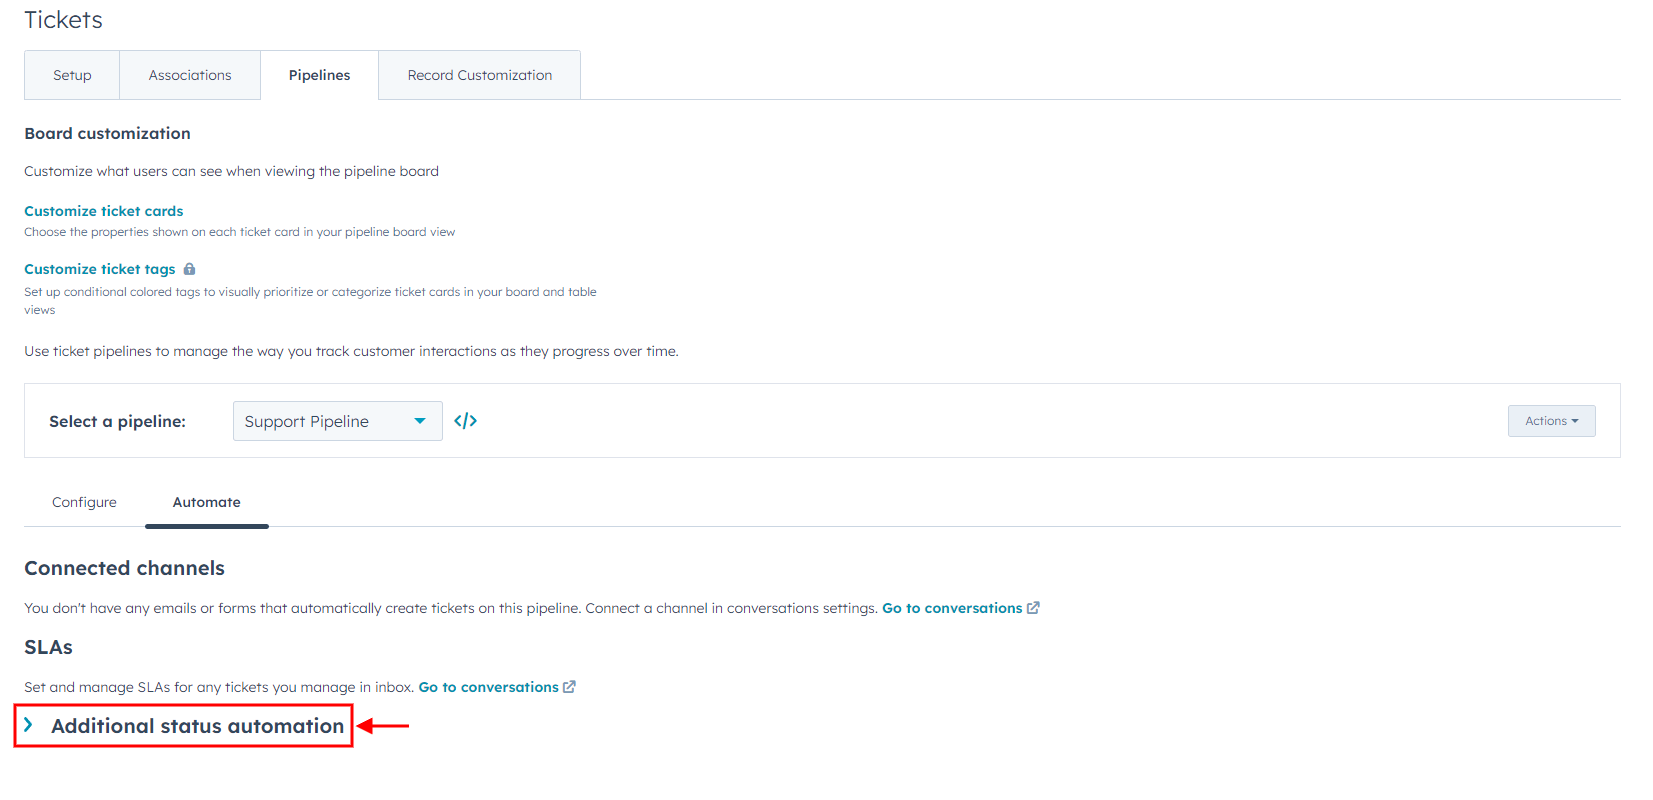
8. Check all trigger actions when a ticket reaches a certain status.

9. Then, click the Open in Workflows under a specific trigger action.

10. Select the workflow name.
11. Then disable the "Workflow is ON" switch located in the upper right corner.
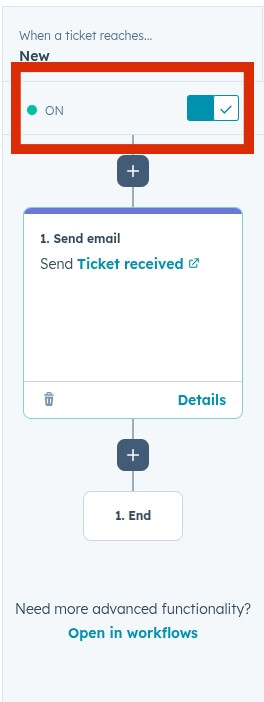
12. Repeat this process for every trigger action and its workflow.
Now, you can continue with your data migration to HubSpot.
How to calculate contacts in HubSpot Service Hub?
HubSpot Service Hub allows you to track the total number of contacts and apply filters and views to count specific contacts.
1. Open the Contacts dropdown menu and select Contacts.
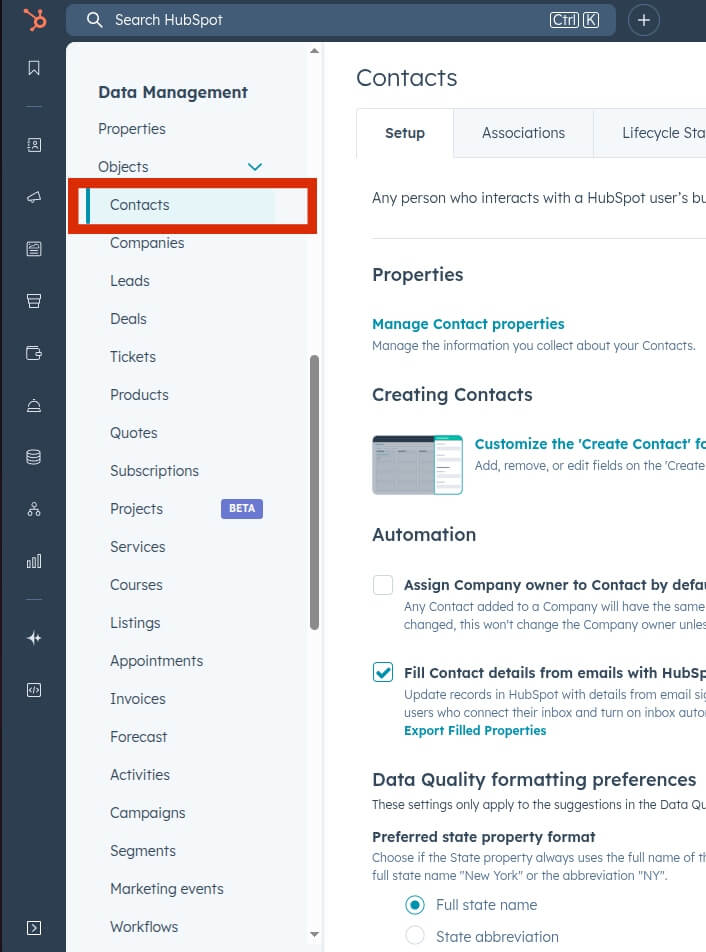
2. Find ‘View contacts in the Data Model.’
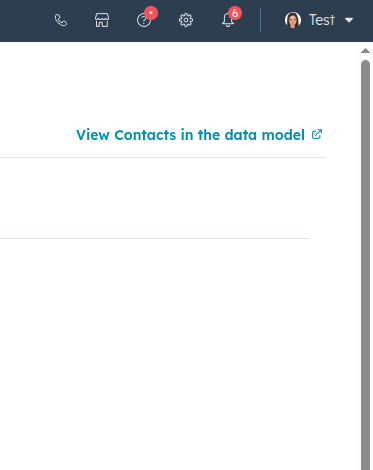
3. Click and Open Data Model.
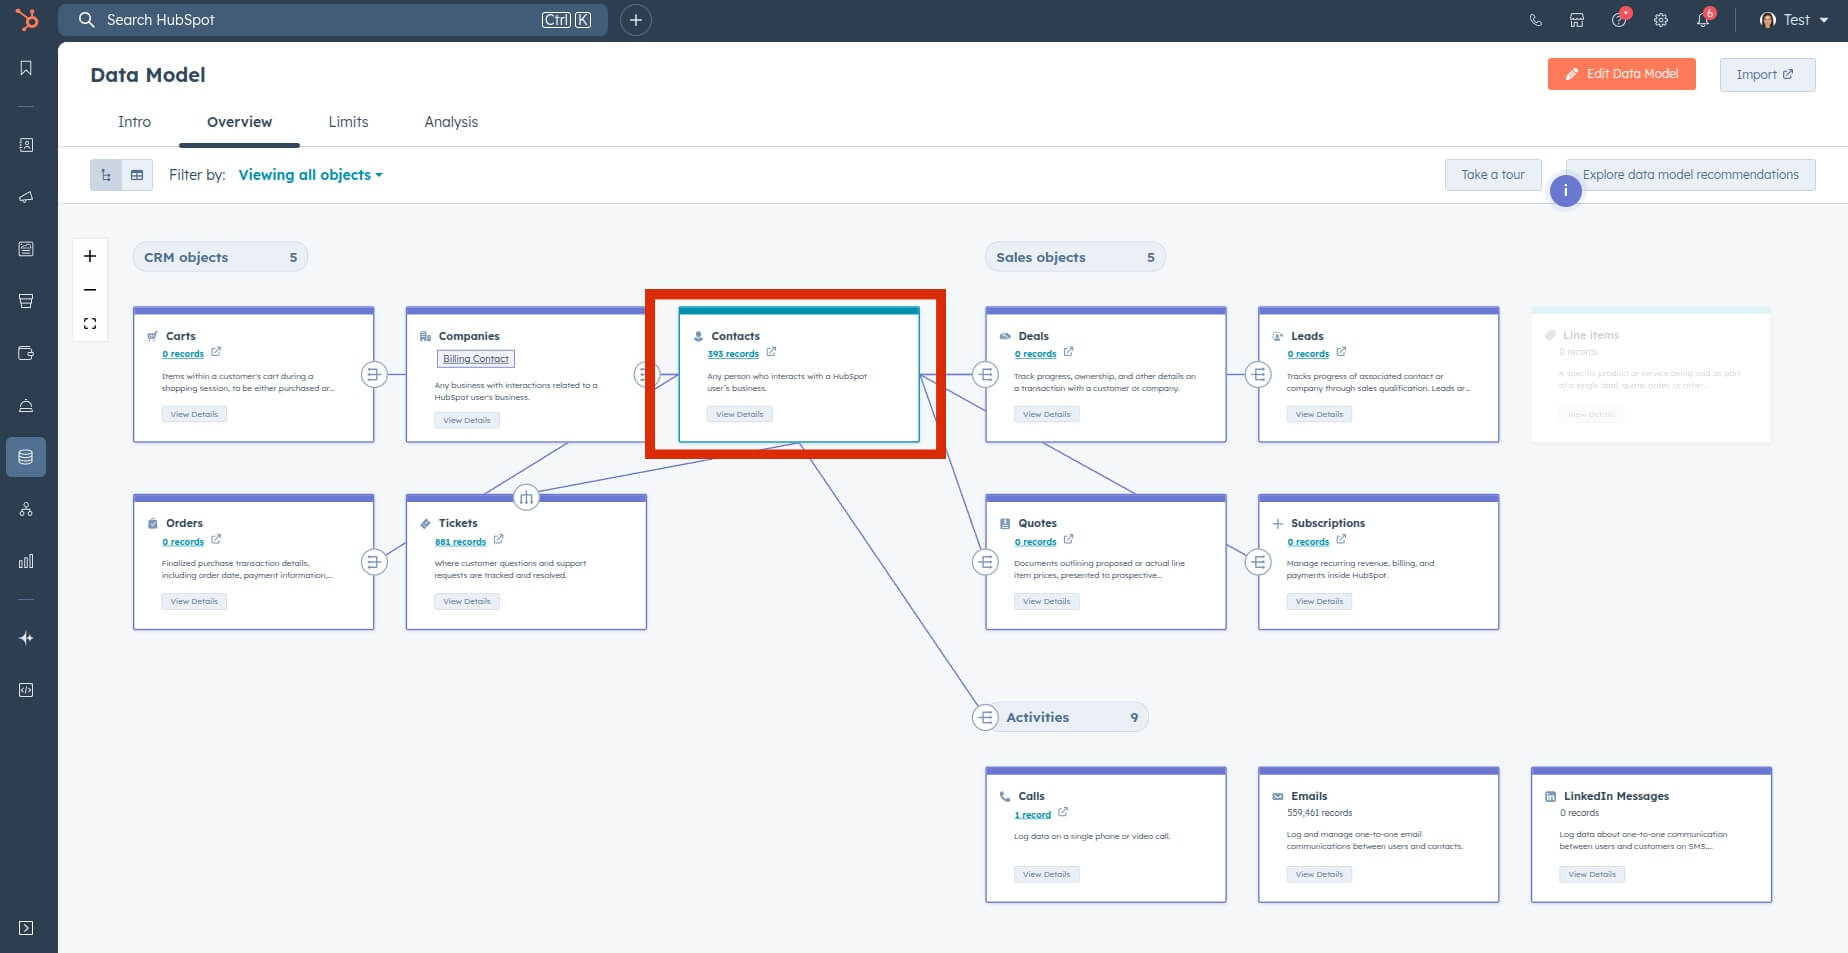
4. Click on Contacts and find the total number of contacts.
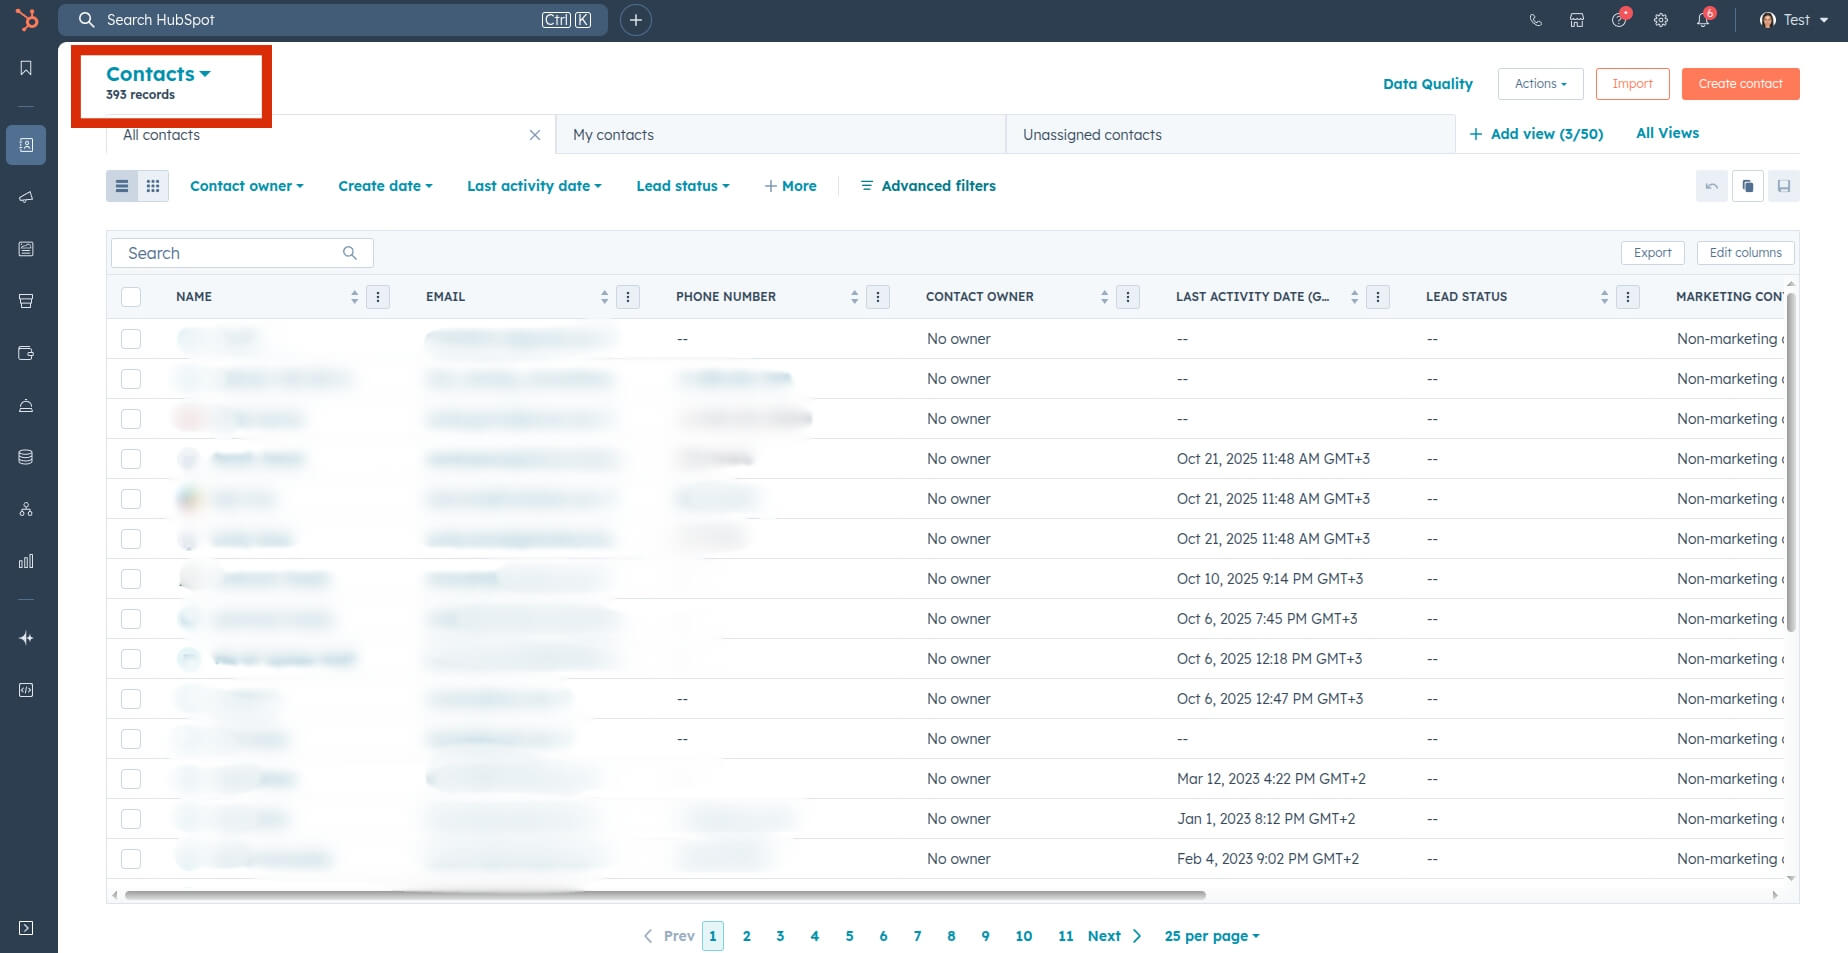
5. Use views and filters to calculate specific contacts.

How to calculate conversations in HubSpot Service Hub?
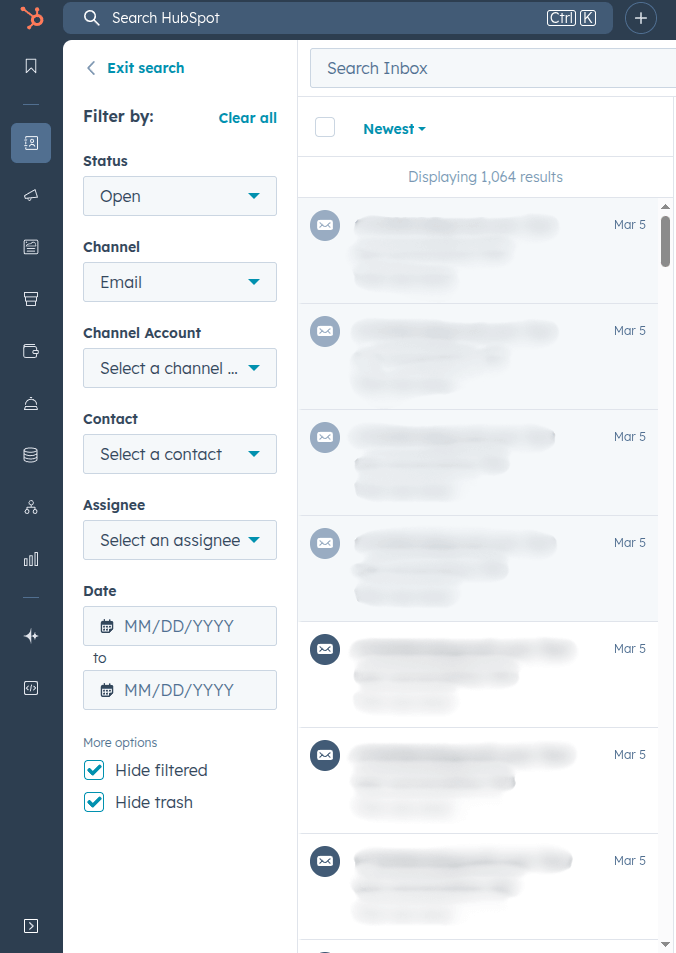
Once you filter conversations by status, channel, contact, assignee, or date, HubSpot counts them for you.
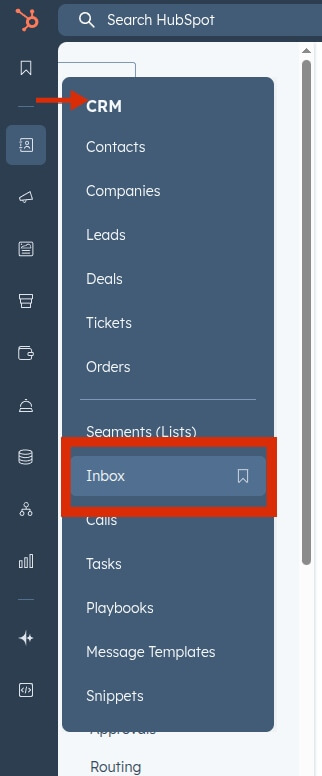
1. Go to CRM, and choose Inbox.
2. Apply filters to find specific conversations.
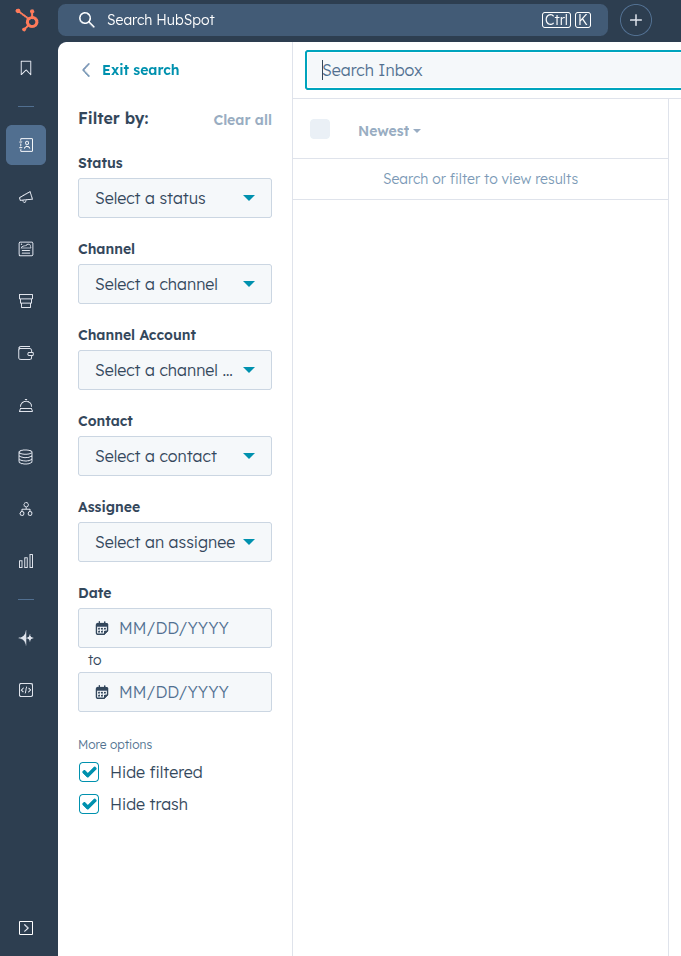
3. Check the number of conversations above the conversation list.
How to check the result of Demo Migration in HubSpot Service Hub?
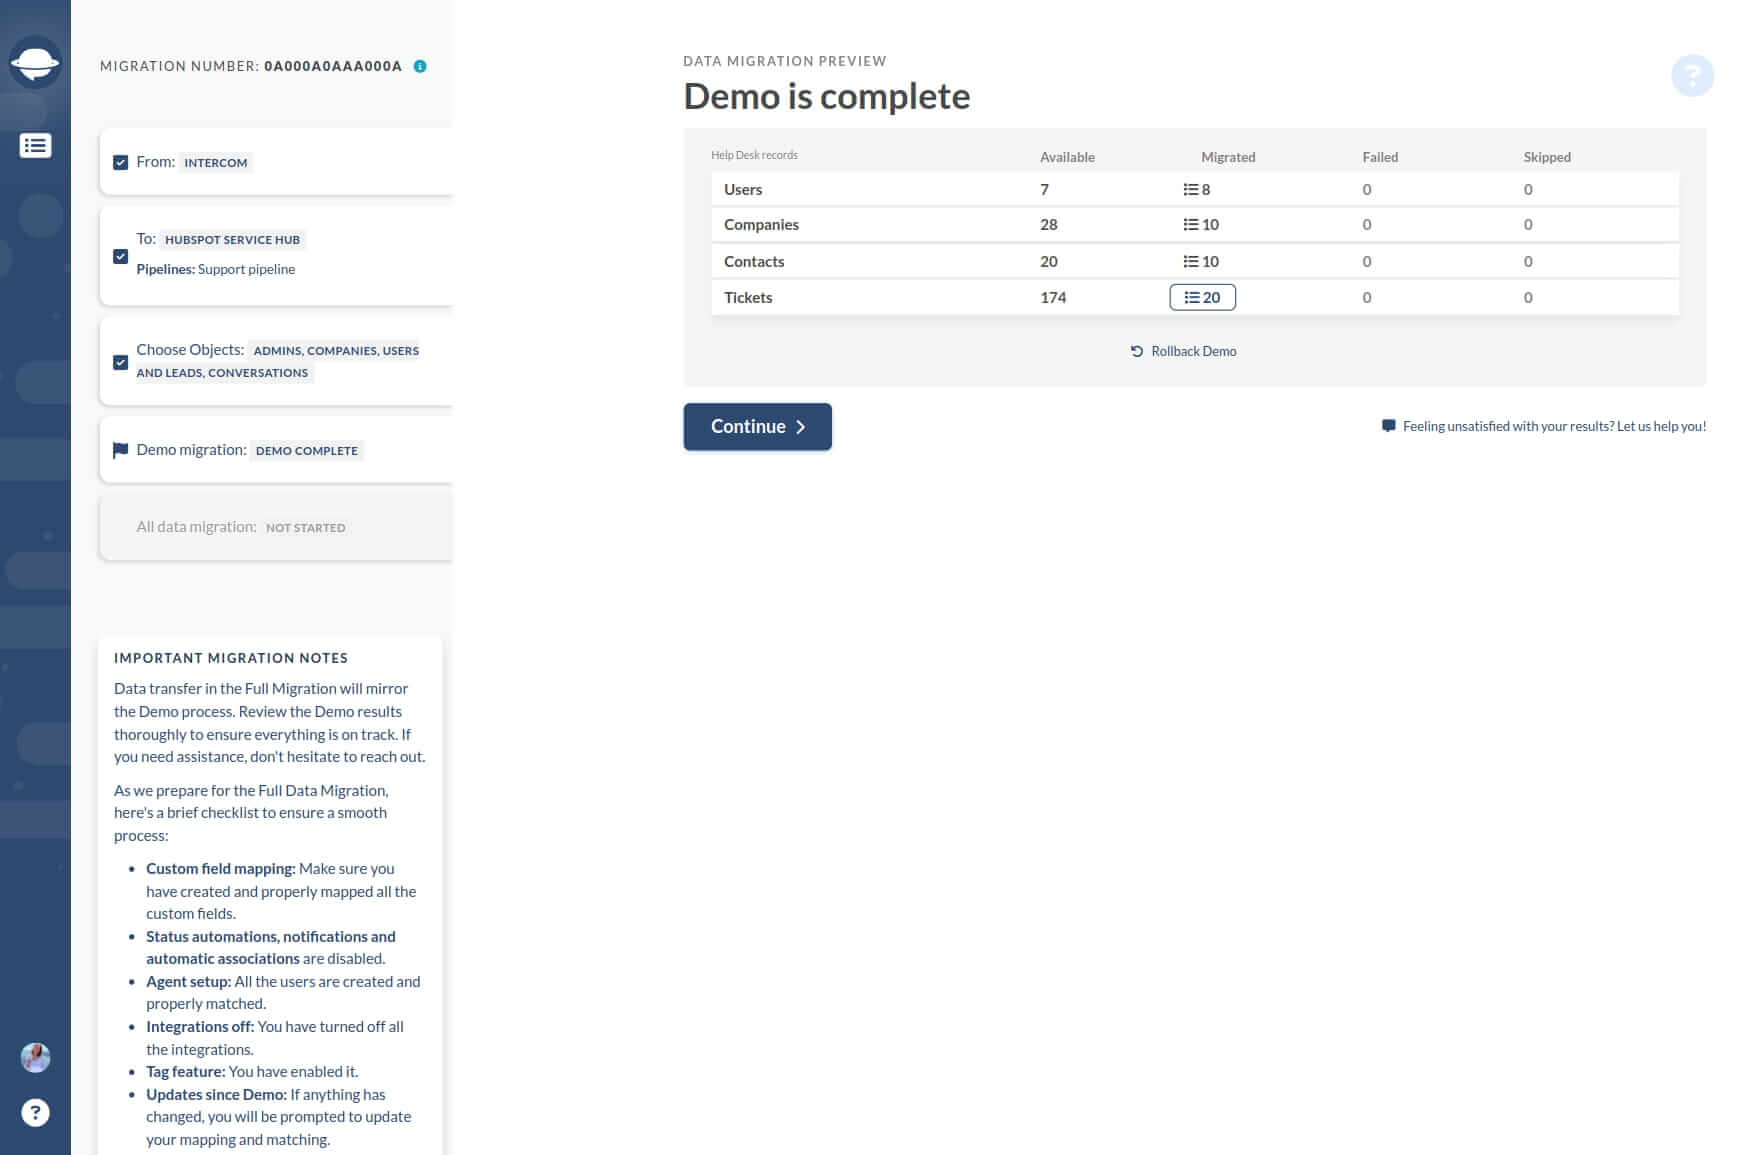
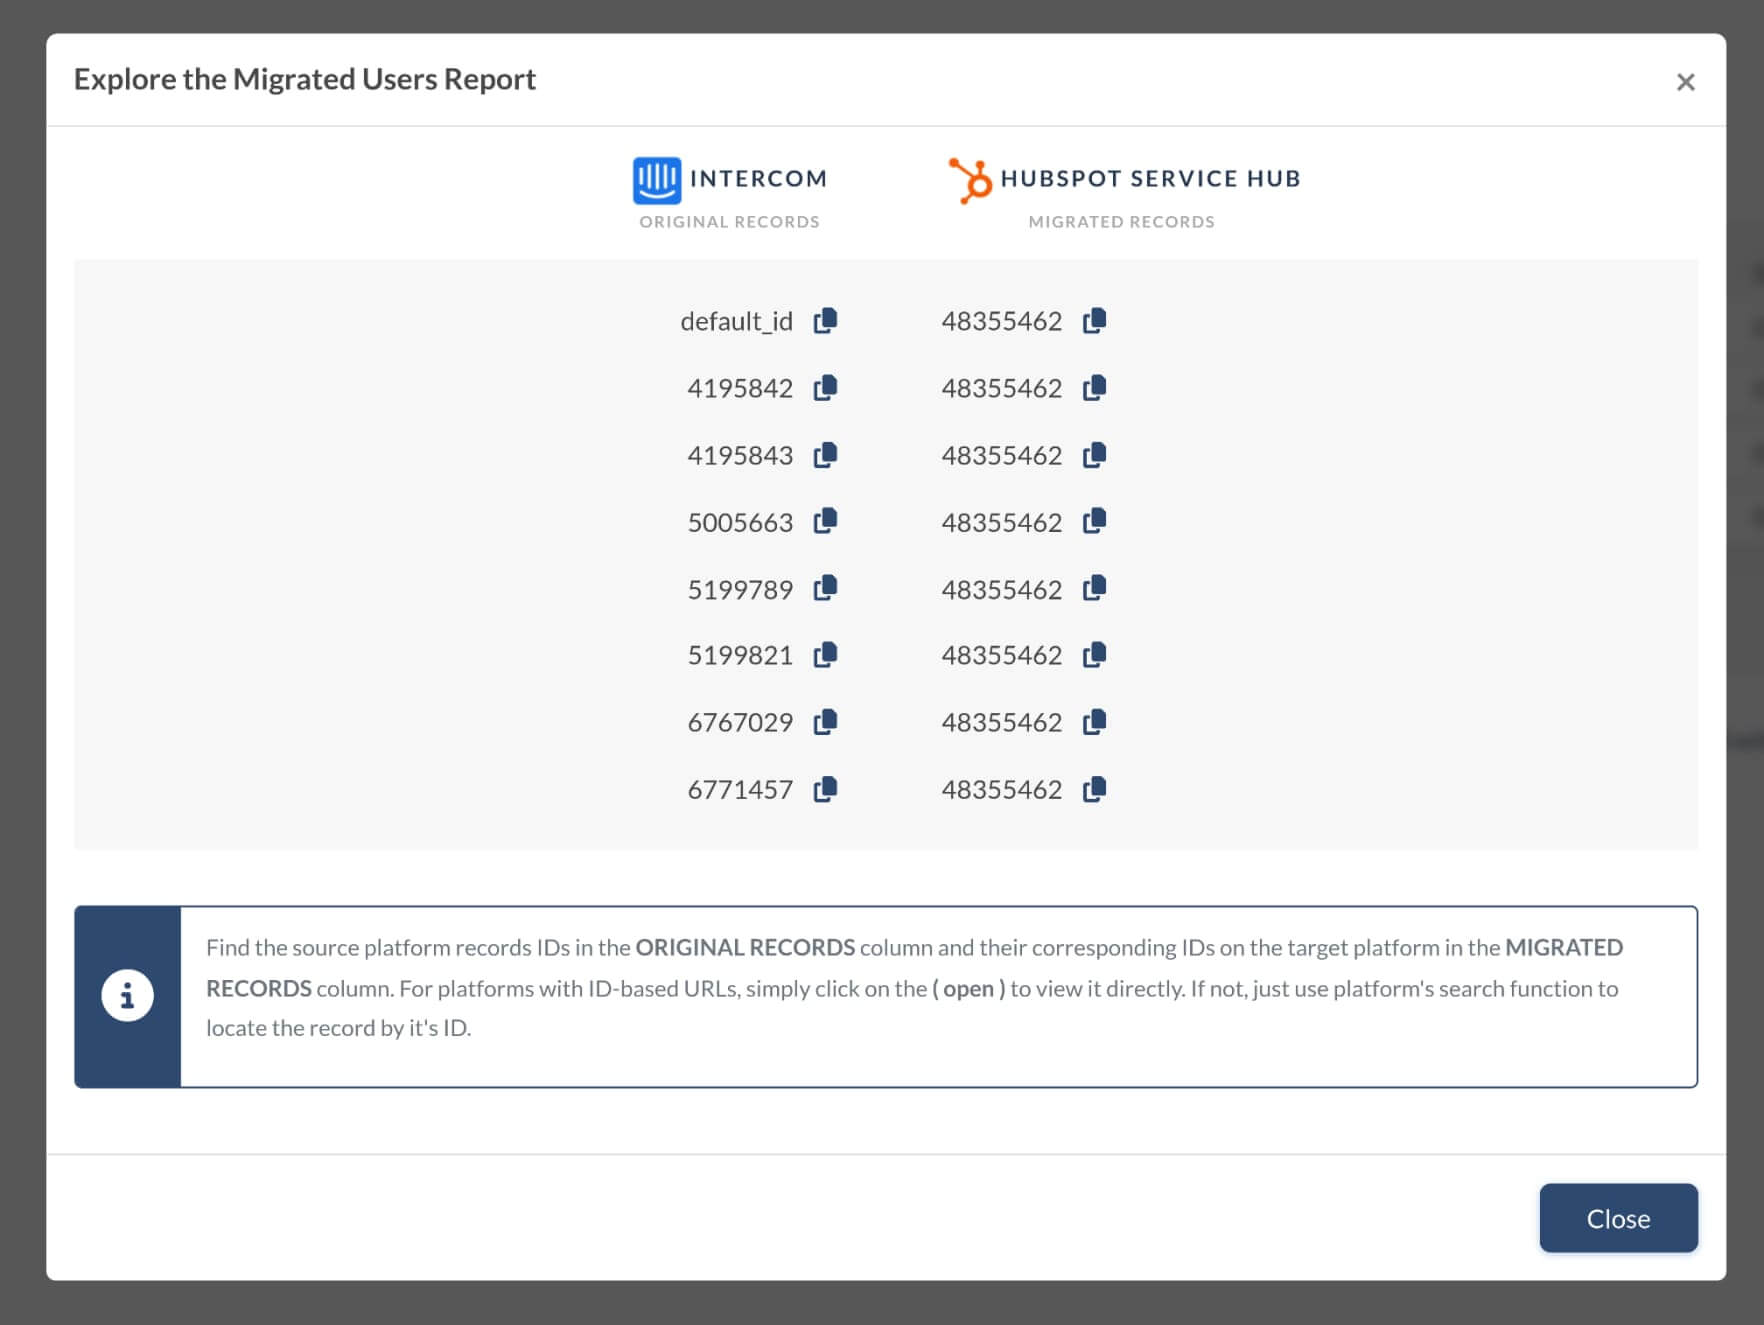
After the Demo Migration to HubSpot Service Hub is complete, you will see a table with the reports for all migrated record types. They include the IDs of transferred entities in the source platform and HubSpot Service Hub. For example, the available reports may be for the migrated, failed, or skipped data.
Once you click on the button next to a certain record type, a CSV file will open. Try to find and check each record in your new help desk. The report should look like this:
The Demo Migration and the Full Data Migration migrate all records in the same way. It means that if Demo Migration fails to migrate some data, the Full Migration won't either.
That’s why you need to go through each ticket and check if everything along with Type, Status, Priority, Source and Custom Fields, Requester, Agent, and Tags.
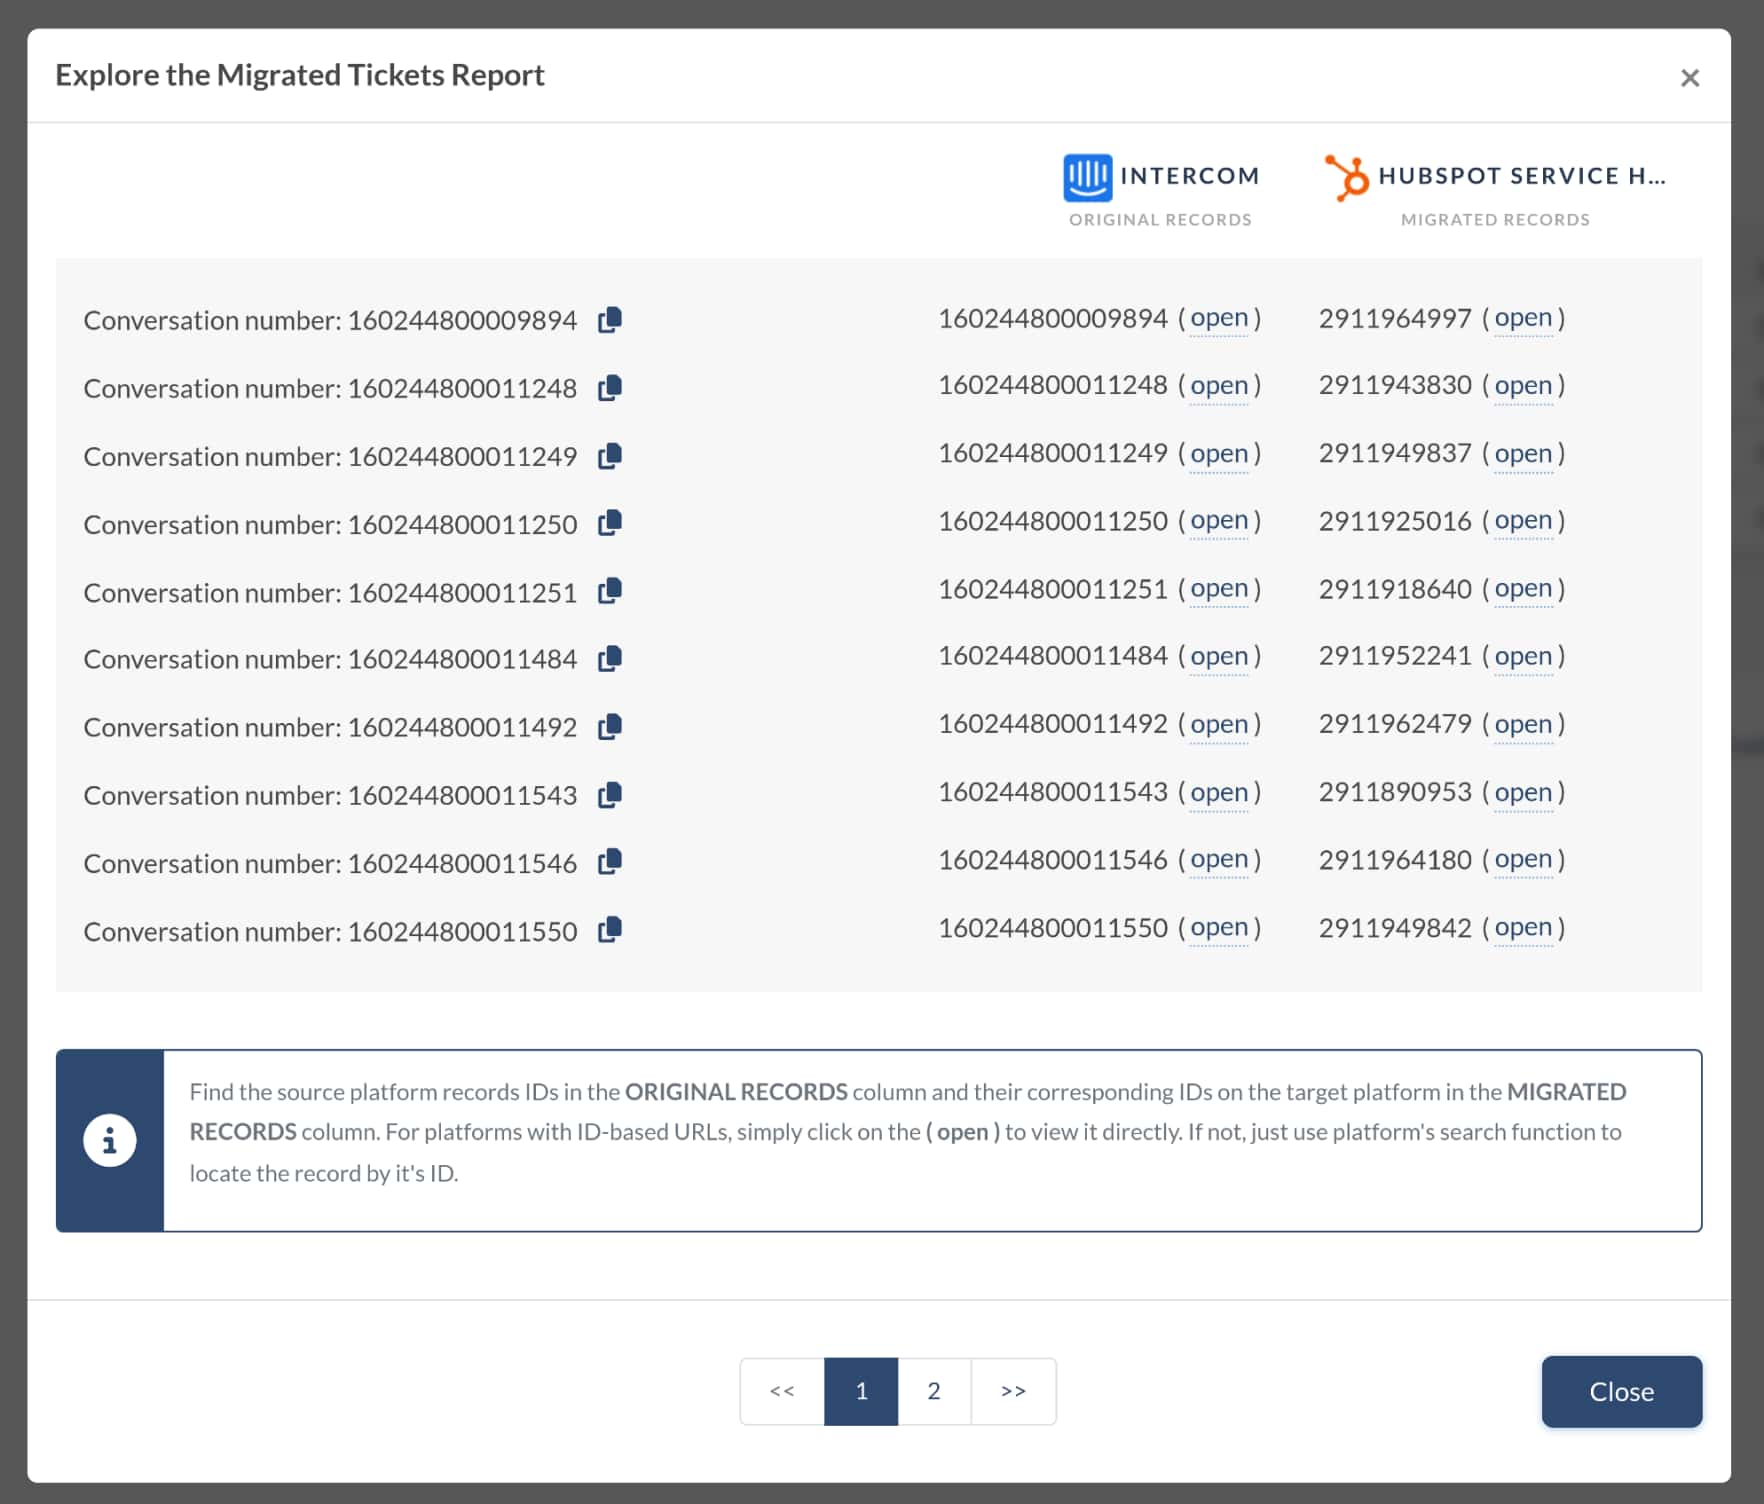
Similar reports will also appear after the Full Data Migration, so ensure you go through them as well.
Why I can’t see Tags in HubSpot Service Hub?
When migrating from your source platform to HubSpot Service Hub, you need to set up ticket tags for your pipelines. This way, Migration Wizard can retain the source tags in your HubSpot account.
Keep in mind the following peculiarities:
- To create ticket tags, you need a Service Hub subscription. Starter subscriptions allow tags that apply to all pipelines, while Professional or Enterprise subscriptions enable creating tags for individual pipelines.
- Each account can have a maximum of 10 tags per object, and super admin permissions are required to create or edit object tags.
Here’s how to create ticket tags in HubSpot:
1. Hover over to the Settings icon in the main navigation bar.

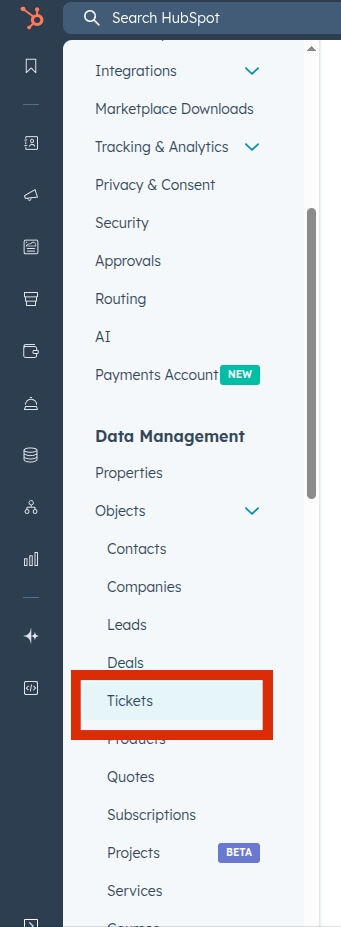
2. Go to Objects > Tickets in the left sidebar menu.
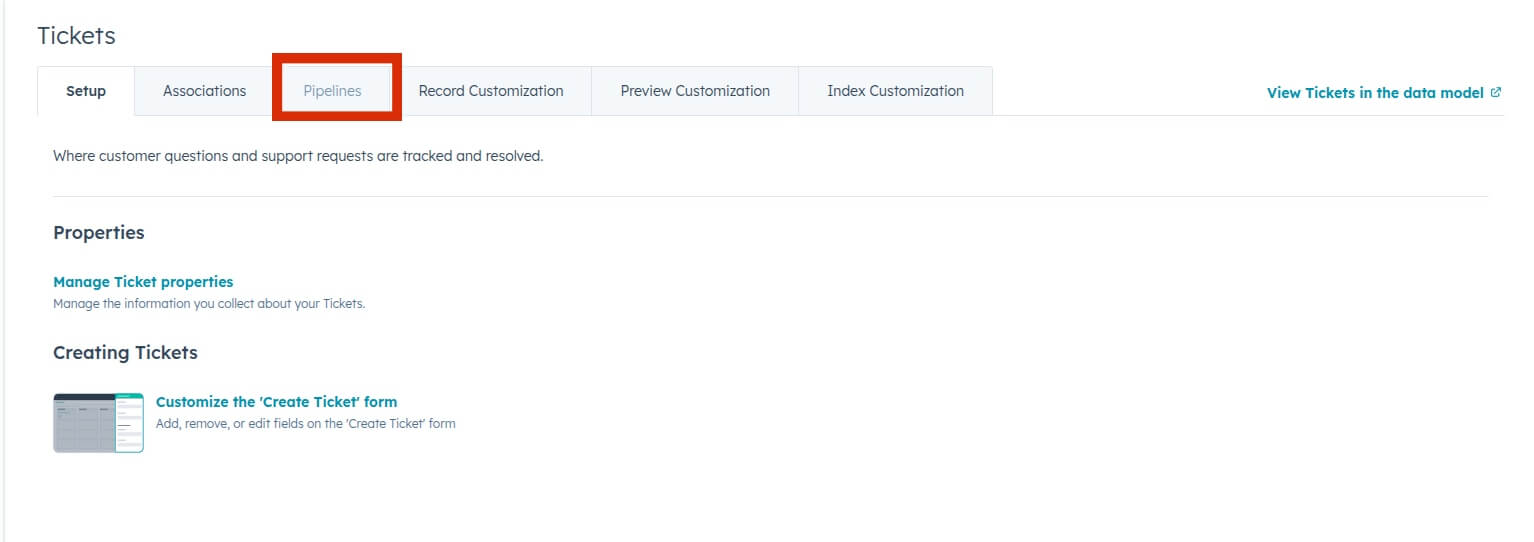
3. Click on the Pipelines tab.
4. Select Customize ticket tags.

5. Click on Add tag to create a new object tag.
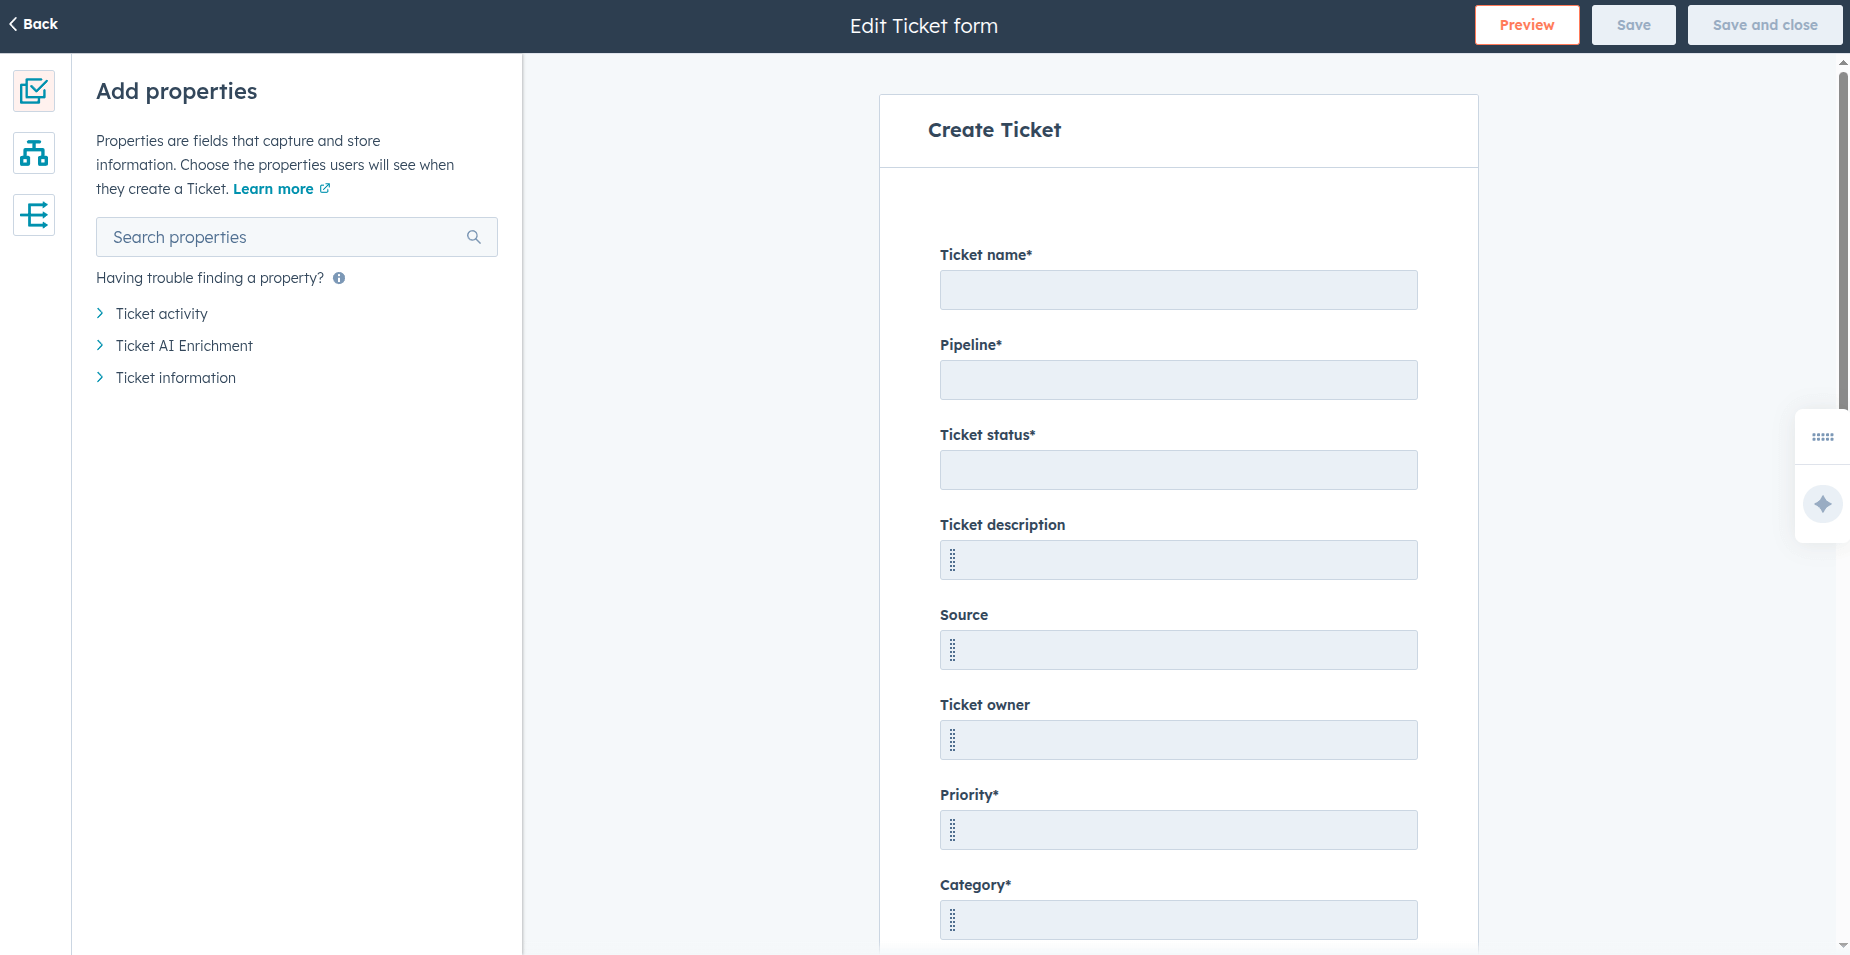
6. In the right panel, set up the object tag settings:
- Enter a name and an optional description for the object tag.
- Choose a color from the dropdown menu to assign to the object tag.
- By default, an object tag applies to all pipelines. For specific pipelines (Professional or Enterprise only), select Specific pipelines, and choose the checkboxes for the pipelines where you want the object tag to appear.
7. Click Next: Add Filters.
8. Set up filters for when the object tag should appear on a ticket card:
- Click +Add filter to add the first filter group.
- Search for and select a property, then set the criteria based on that property.
- Click +Add filter to add additional criteria within a group. All criteria in a group must be met for the object tag to appear (AND logic).
- Hit +Add filter group to create a new group with its own criteria. At least one group's criteria must be met for the object tag to appear (OR logic).
9. Your changes are saved automatically. To undo changes, click Discard changes. For new object tags, this clears all filters, and for existing object tags, it reverts to the previously set filters.
10. Click Next: Review Tag.
11. Preview how the object tag will appear on a deal or ticket card, review the settings and filters.
12. Finally, click Save to apply the changes.
How to create users in HubSpot Service Hub?
To create new users in HubSpot Service Hub, first of all, make sure that you have the necessary Add and Edit users permission. Admins have this permission by default. All the other users have to be granted this permission to be able to add new users. So, if you’re not an Admin, here’s how to give the Add and edit users permission:
1. Go to Settings.

2. Go to Users & Teams tab and click on the name of the user you want to enable the permission.

3. From the Actions drop-down list, choose Edit.

4. Select Make Super Admin and click Save.
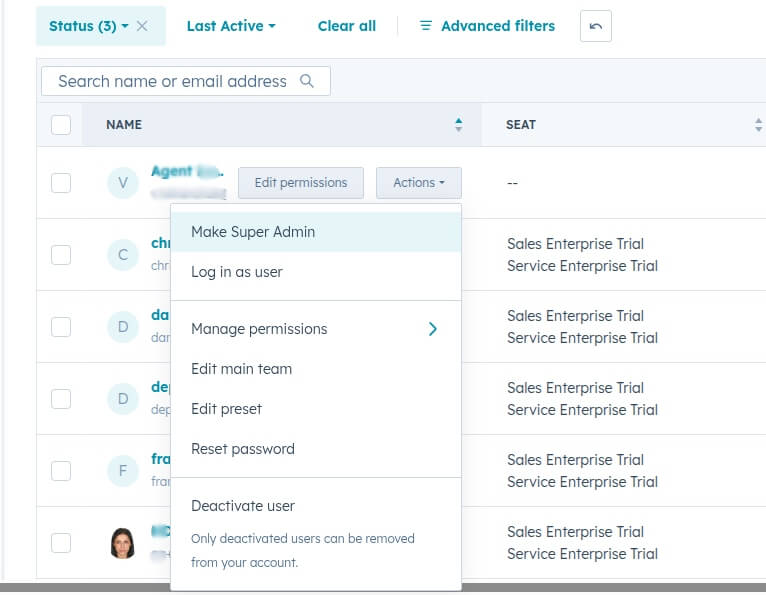
Now, you have the necessary Admin permissions to add new users to your Service Hub.
So, let’s finally see how to add a new user to the system:
1. Again, in your HubSpot account, go to Settings and then, Users; Teams.
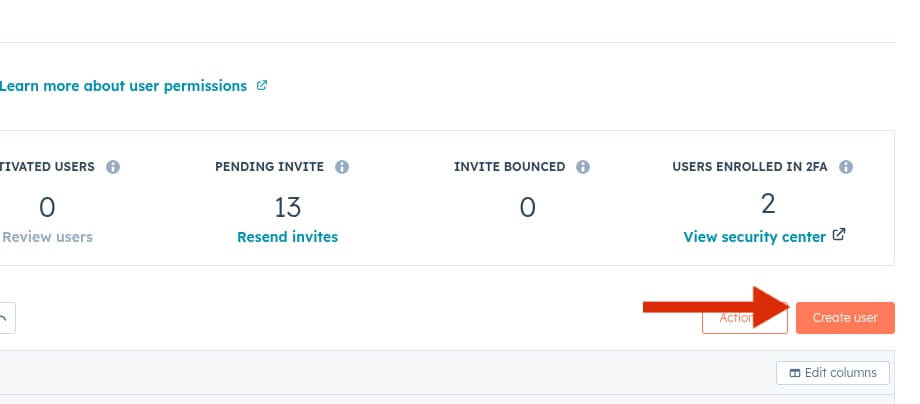
2. In the top-right corner, click Create user.
3. You can manually input one or several email addresses for all the users you want to add to your Service Hub. Or, you can import multiple users at once with a CSV file by clicking on the corresponding button. When you’re ready, click Next.

4. On this step, grant the access and permissions you’d like to give to this user.
You can read a full breakdown of HubSpot permissions here. When you’re ready, click Next again.
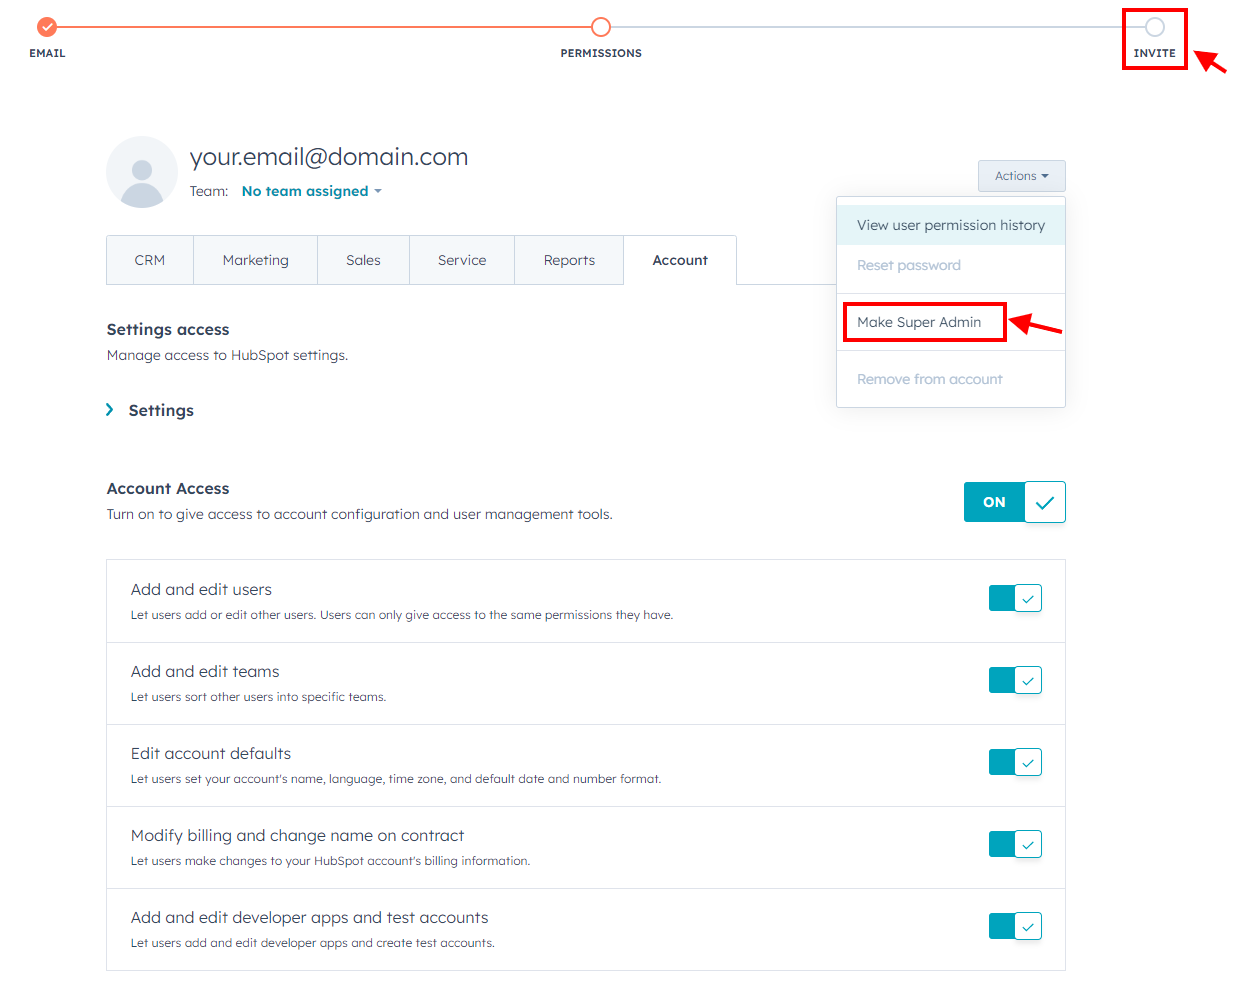
5. Finally, click Send in the last page, to send a welcoming email to the users and give them access to your account. Each email should contain their HubSpot password. Now, the users can log into HubSpot and set up their accounts.
Can I migrate tickets and conversations from HubSpot Service Hub into one ticket entity?
Switching help desk platforms shouldn't mean leaving valuable customer interactions behind. With Help Desk Migration, you can migrate tickets and conversations from HubSpot Service Hub into a single ticket entity—without the headaches.
Every inquiry, follow-up, and historical conversation stays connected, so your support team has a complete picture from day one. No messy data merging. No lost context. Just a smooth, structured migration that keeps everything right where you need it.
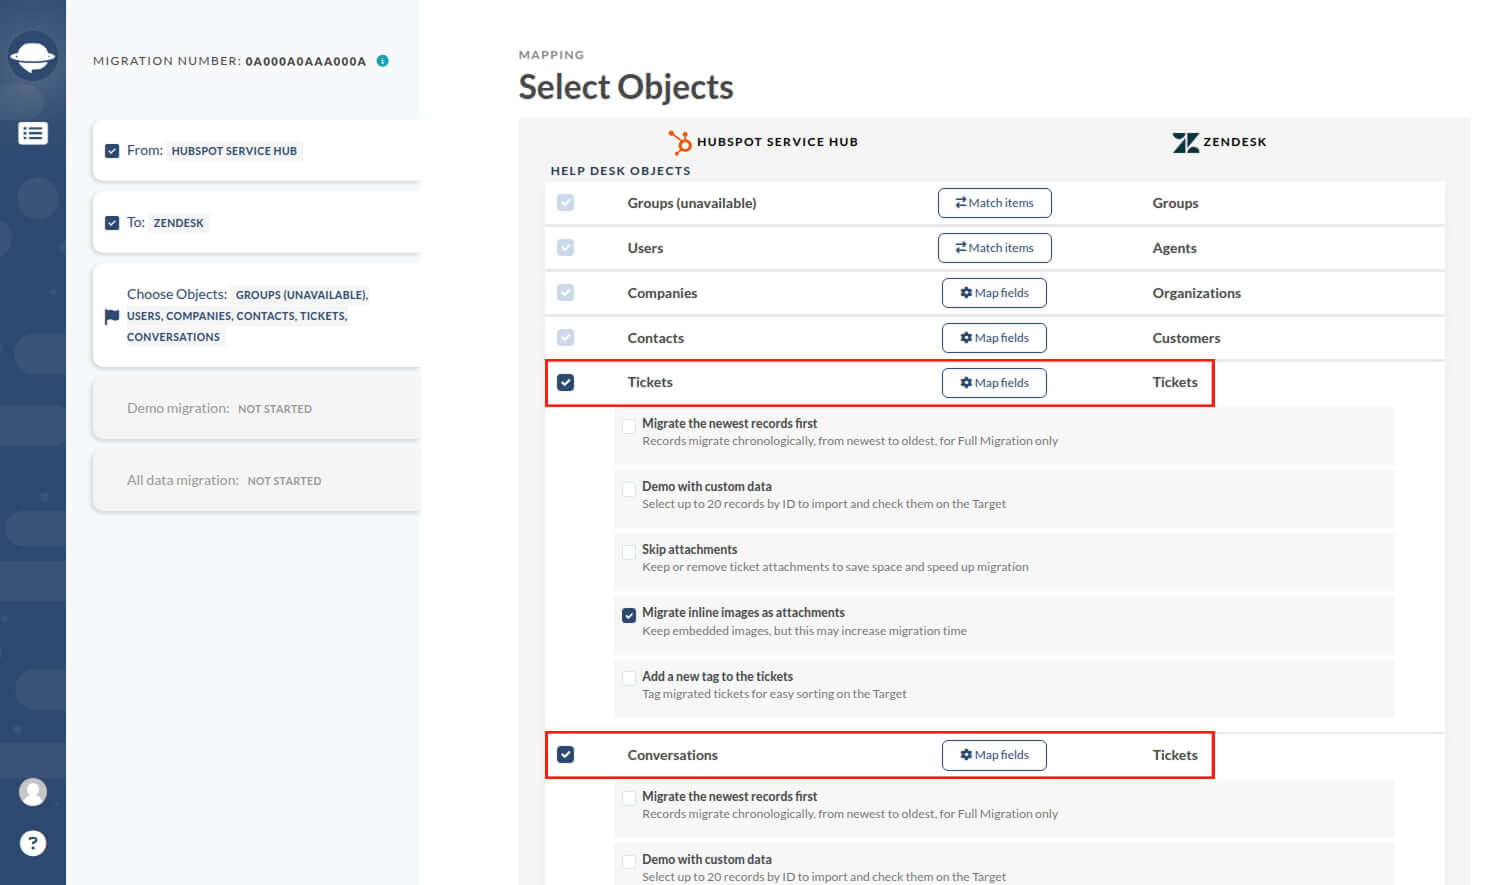
And because Help Desk Migration automates the entire transfer, you skip the manual work, reduce errors, and save hours of effort. Whether you're moving to a new help desk for better functionality or scaling up for growth, this feature makes migration faster, easier, and stress-free.
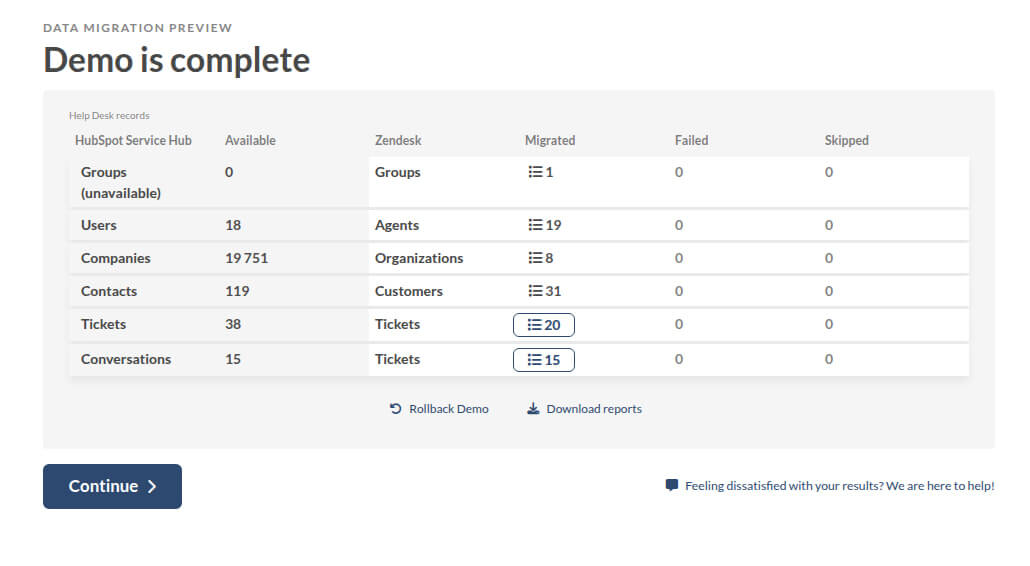
Ready to see it in action? Try a free Demo Migration and see how effortlessly you can transfer tickets and conversations from HubSpot Service Hub.

