How to Create a Data Backup in Lansweeper to Migrate Your Data

When it comes to migrating data from Lansweeper using the Migration Wizard, you will need to provide a ZIP backup file containing all your Lansweeper data. This is a crucial step in the migration process, as it ensures that all your information is properly transferred to the new platform.

Backing up your database in Lansweeper involves several steps, including the installation of required tools like Microsoft Visual Studio and the SQLite/SQL Server Compact Toolbox extension. Here's a guide on how to do it:

1. Download Microsoft Visual Studio: If you don't already have Microsoft Visual Studio installed on your computer, you'll need to download and install it. You can download the preferred version from the official Microsoft website.

2. Install SQLite/SQL Server Compact Toolbox Extension:

  1. Open Microsoft Visual Studio on your computer.
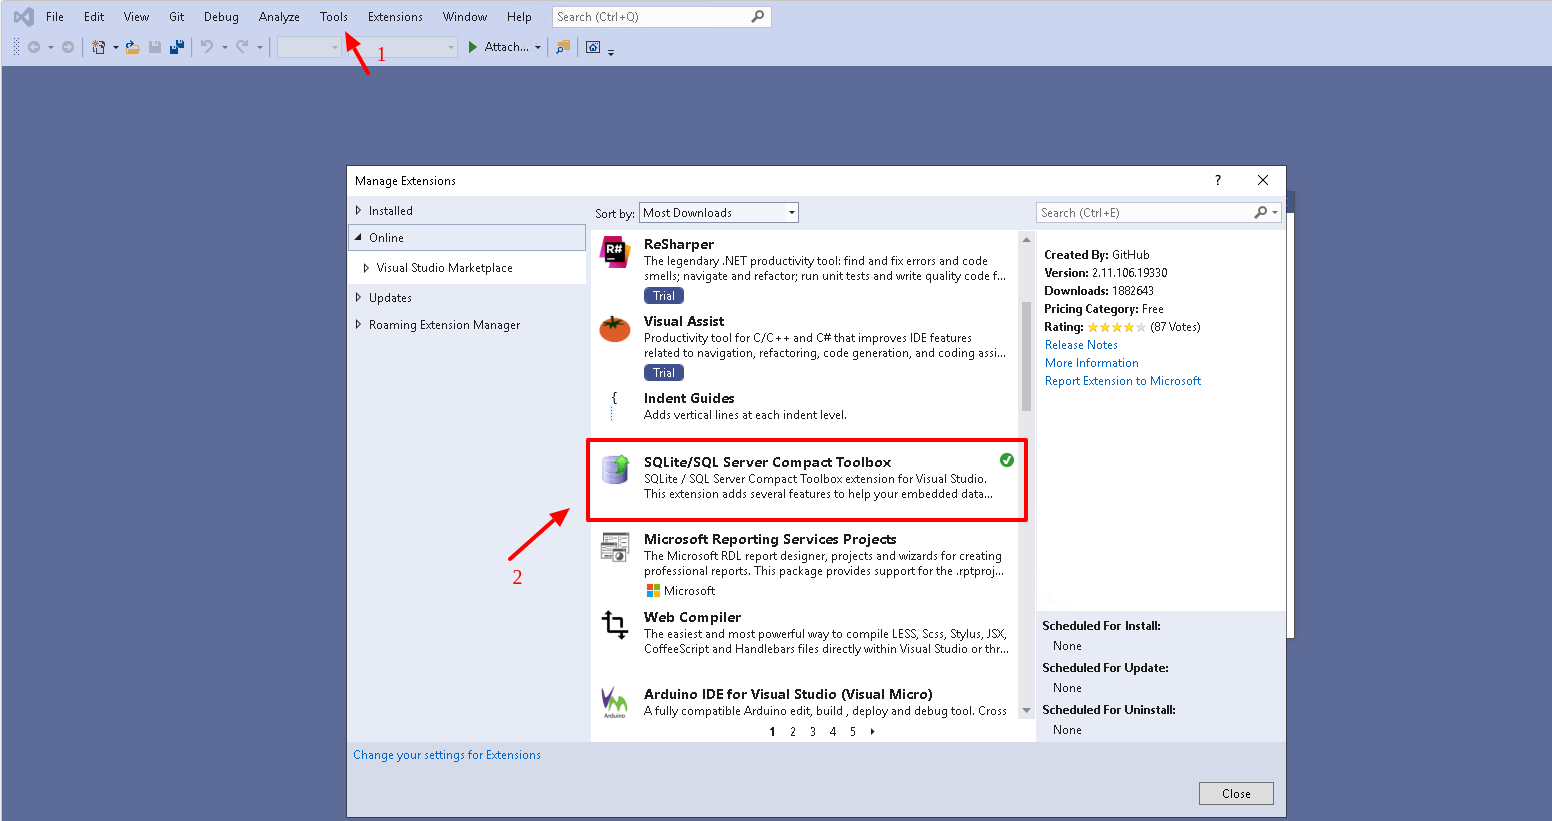
  2. Go to the "Extensions" menu at the top of the Visual Studio interface.
  3. Select "Manage Extensions" from the dropdown menu. This will open the Extensions and Updates window.
  4. In the Extensions and Updates window, you can search for "SQLite/SQL Server Compact Toolbox" in the search bar located in the upper-right corner.
  5. Once you've found the extension, click the "Download" or "Install" button to install it.
  6. Follow the on-screen instructions to complete the installation of the SQLite/SQL Server Compact Toolbox extension.

visual studio extensions

3. Open Server Explorer: Launch Microsoft Visual Studio and open the Server Explorer.
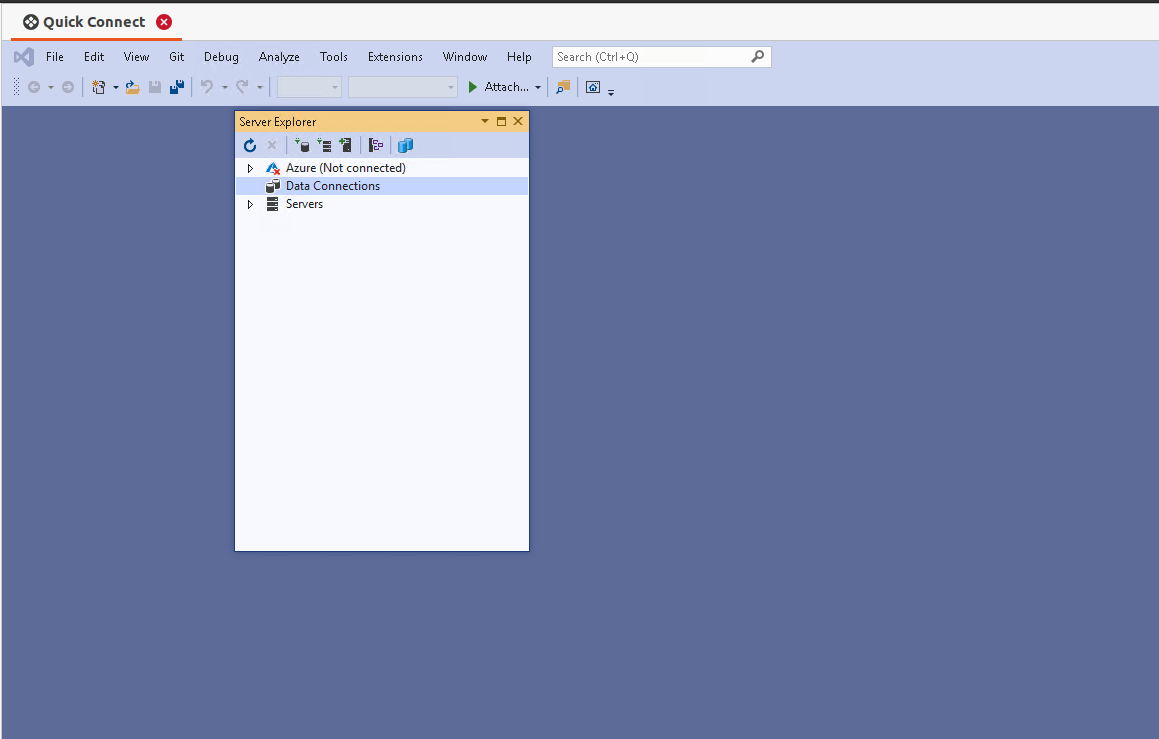
server explorer

4. Add a Connection: If you don't already have a database connection, you can add one. To do this:

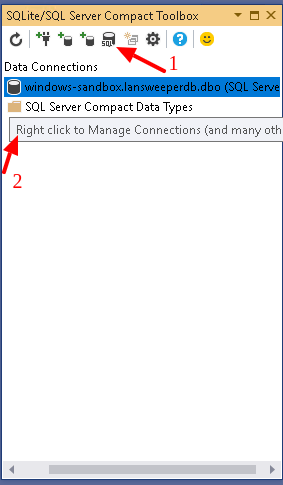
  • Click the "Tools" button in Visual Studio.
  • Open the "SQLite/SQL Server Compact Toolbox."
  • Select "Tools" again and choose "Connect to the database."
  • In the pop-up window, click on the "Server name" field to discover existing servers.
  • Select the server and enter the database name as "Lansweeper.db."
  • Test the connection to ensure it works correctly and click "OK" to add the server to your connection list.
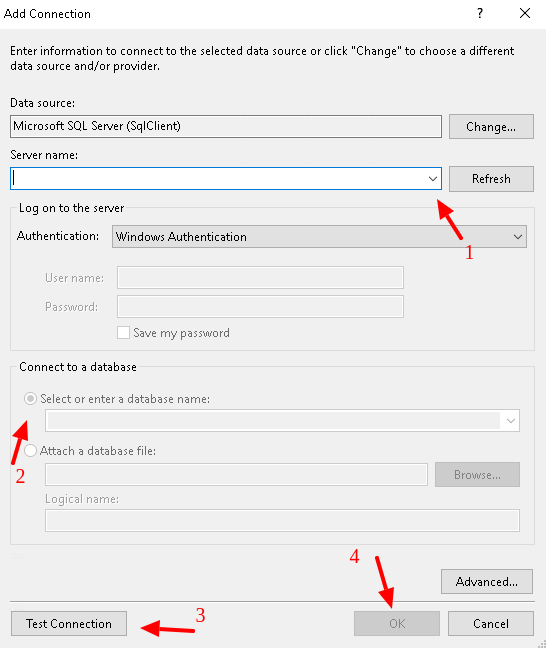
adding connection to server

5. Add SQL Server Connection: Now, click the "Add SQL Server connection" button in the toolbox. Select the server you created earlier and add it to the toolbox.

6. Migrate to SQL: With your connection in place, right-click on the connection name and choose "Migrate to SQL..."

  • Select all the tables you want to migrate and click "OK."
  • Name the file (e.g., "lansweeper") and save the dump to your computer

adding sql server connection

Note: Ensure that the dump file has the proper structure, with a folder named db containing the lansweeper.db (file).

Expert tip

When preparing your backup for migration, it's a good practice to select only the tables that are related to customer service tickets. This not only reduces the backup size but also speeds up the export process.

Set up a Demo
Sales manager

Keep in mind that you will not be notified about the end of the import. However, there are two signs to look for to make sure your dump is ready to be used:

  • The size of your dump remains stable for a long time;
  • You see only one file in the db folder instead of two:

lansweeper dump

The import is still in progress

lansweeper dump import complete

The import is complete

7. To export attachments from Lansweeper and include them in your backup, follow these steps:

  1. In your Lansweeper installation directory, navigate to the following path:
    C:\Program Files (x86)\Lansweeper\Website\helpdesk\files
  2. Inside the "files" folder, you'll find attachments related to your Lansweeper data. Compile all these attachment files along with the database dump file you created earlier (usually named "lansweeper.db") into a single ZIP file.
  3. Once you have the ZIP file containing (a backup file) both the database dump and attachments, go back to the Migration Wizard. In the Migration Wizard, look for the option to upload your backup file. Upload the ZIP file you created in the previous step.
  4. After uploading the ZIP file, click the "Continue" button. This action will establish a connection between the Migration Wizard tool and the backup file you provided.

By following these steps, you should have successfully exported your Lansweeper database and attachments, allowing you to proceed with the migration process using the Migration Wizard. If something wasn’t clear enough, or you’d like to get into more details, feel free to browse our Help Center or contact our team for help.

Looking for more data migration details?

Let’s talk now
Was this article helpful?
%s
— %s