Help Scout Migration Guides
How to gain access to all mailboxes in Help Scout?
Before importing your data to Help Scout via the Migration Wizard tool, you’d need to check two following things:
- Make sure that you are either an Administrator or an Owner of your Help Scout account.
- Verify that you have access to all the mailboxes that exist on your Help Scout platform. It is essential because it will help you to avoid the failures of your data migration.
In order to do it, follow these steps:
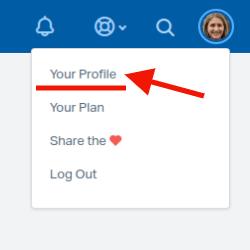
1. Log in to your Help Scout account and go to your profile.
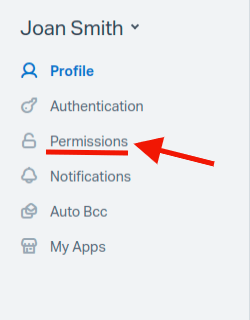
2. Open “Permissions”.
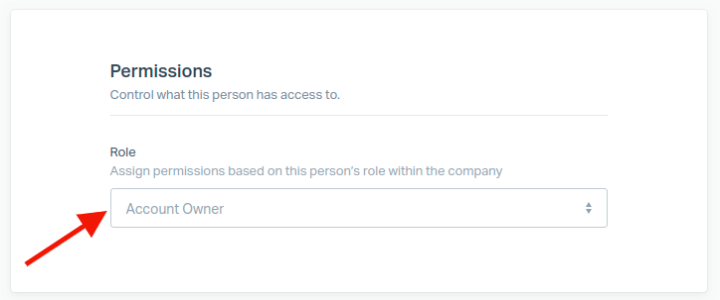
3. Make sure that you are either an Account Owner or an Administrator.
4. Verify that there is a checkmark next to every mailbox on a list.
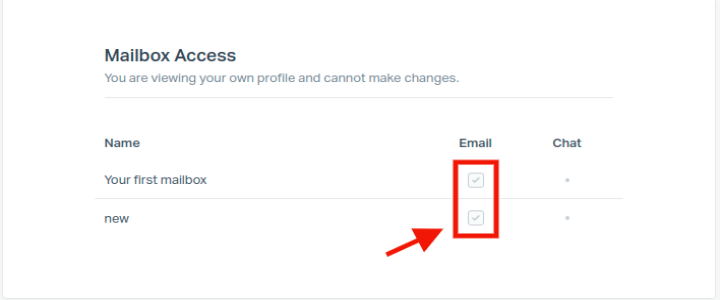
Go to Settings; Manage; Users; Select a user who is setting up the data migration; Permissions; Mailbox Access; Choose all the mailboxes that exist on your Help Scout account.
After doing the above-mentioned steps, return to the Migration Wizard tool and continue to transfer data from your current source to Help Scout.
How to migrate from one Help Scout account to another?
How to authorize both Help Scout accounts
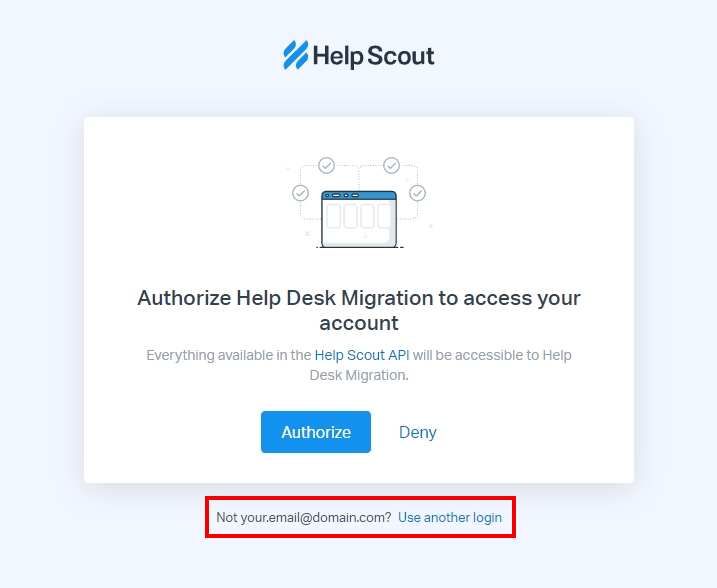
To avoid an error during your authorization on the TARGET stage in Migration Wizard, you have to click ‘Use another login’. On the SOURCE stage, you had to complete the identical authorization only with your source Help Scout account. So, now you have to choose your other account in order to avoid any errors.
Here is how you do it:
1. Connect the Help Scout account you want to migrate FROM and authorize Help Desk Migration to access your account.
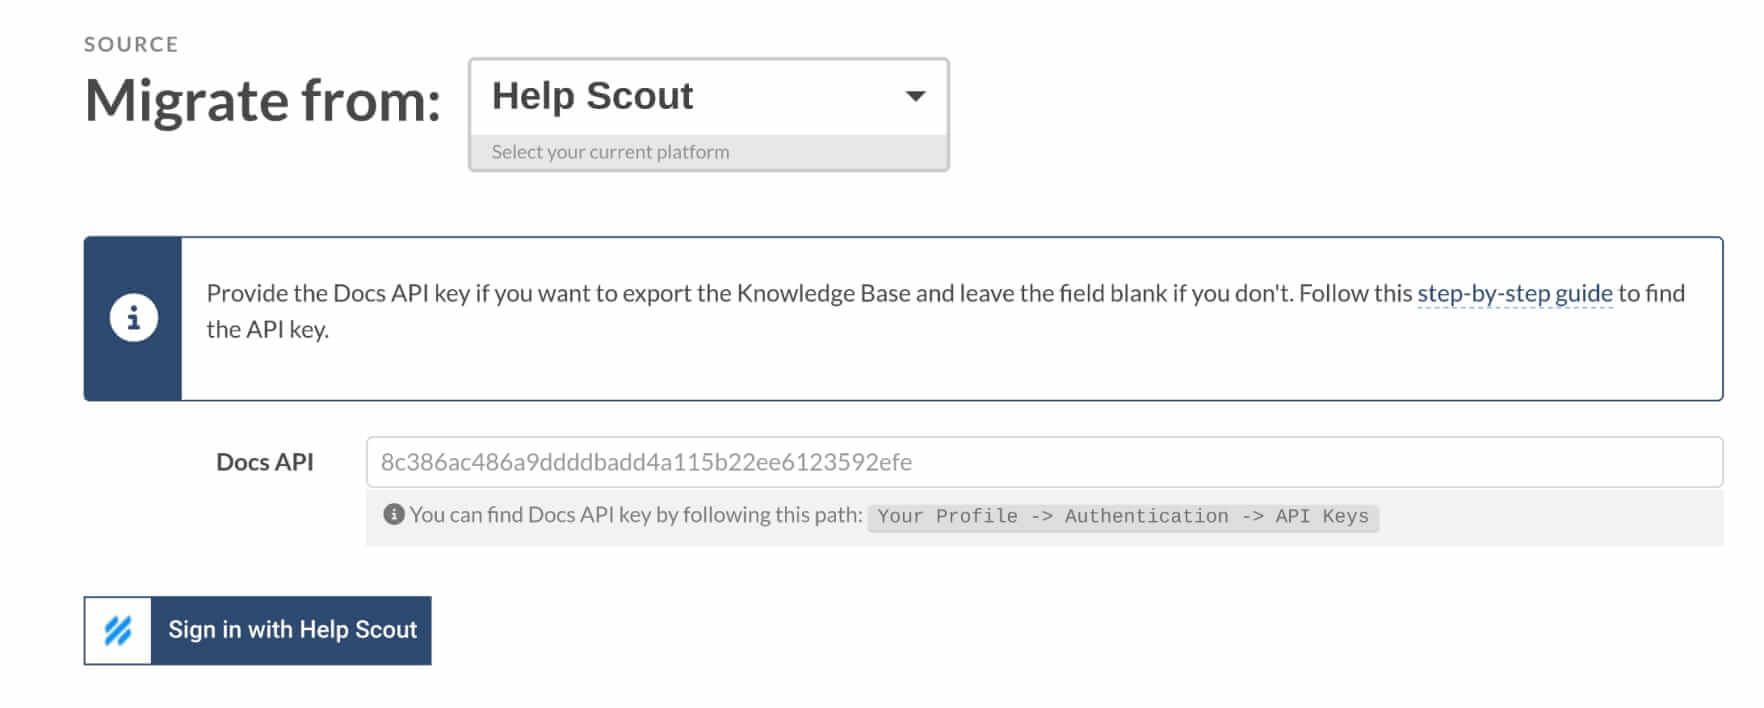
2. Specify the credentials for the new Help Scout account and click ‘Continue’.
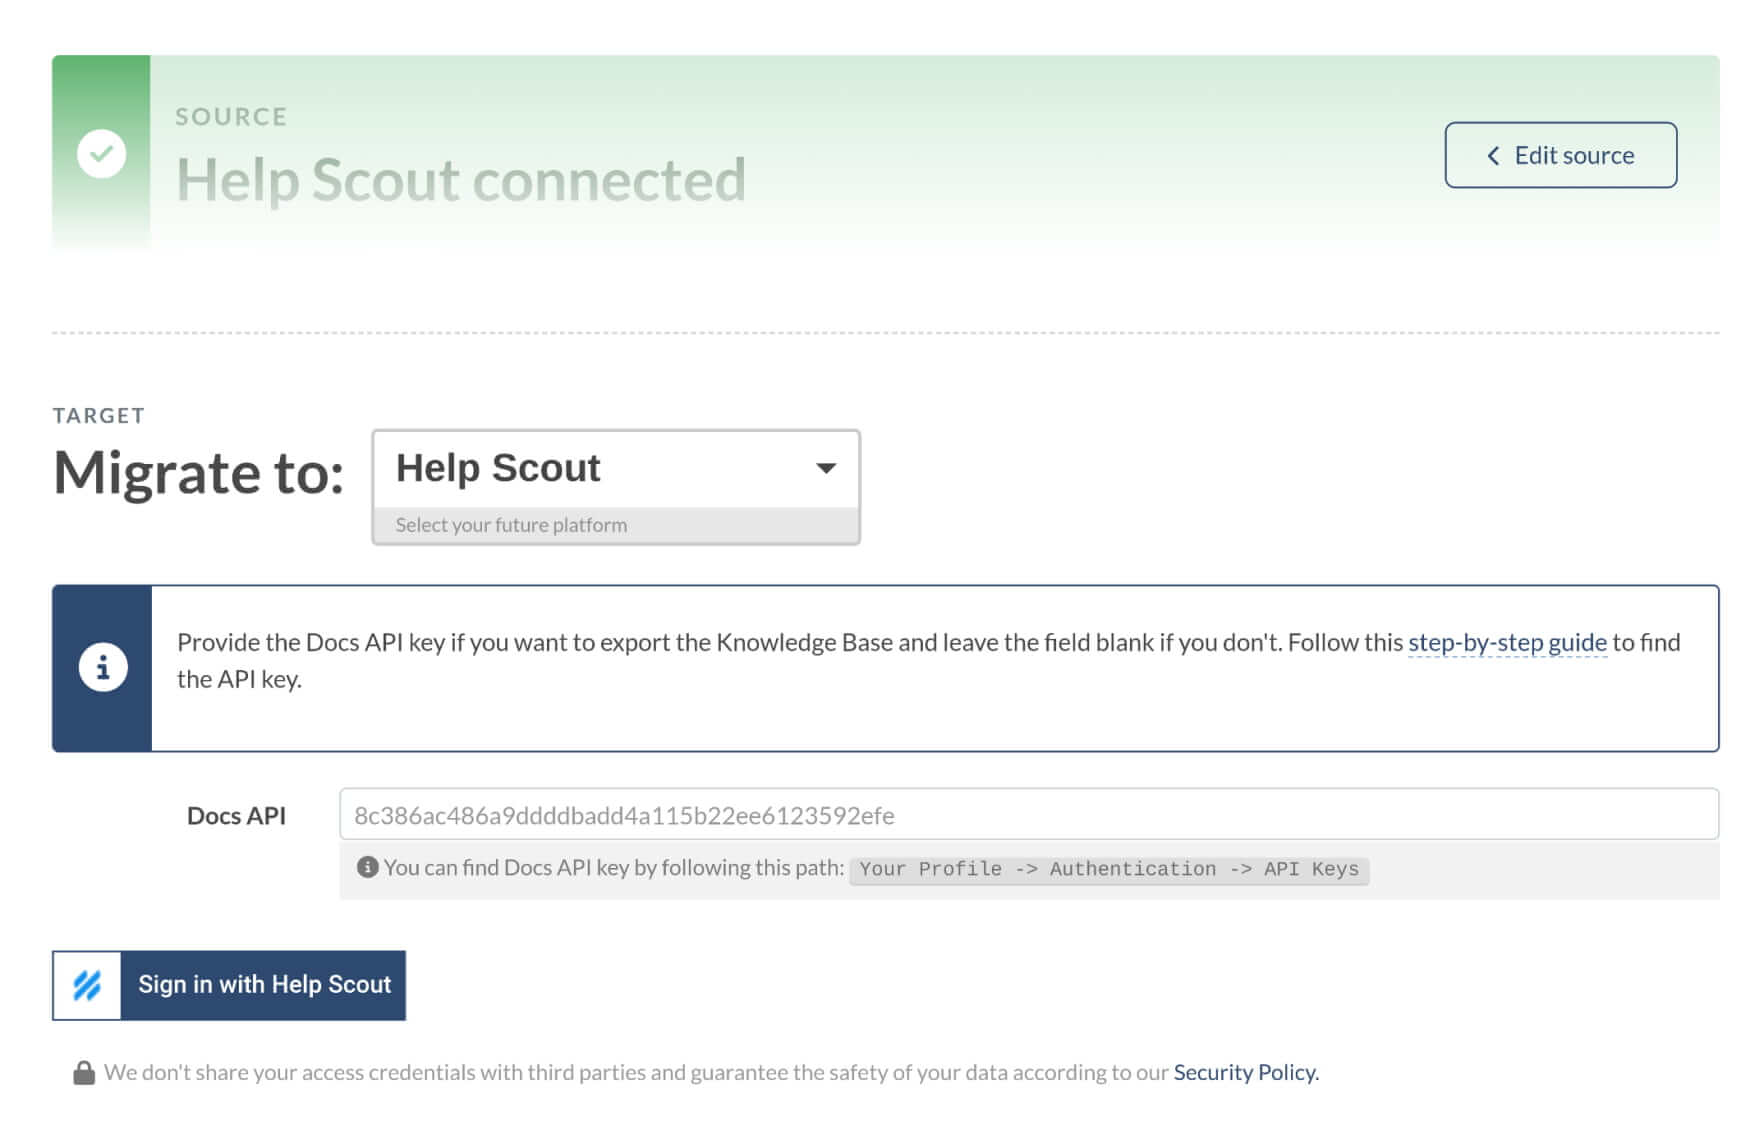
3. During the Authorization click ‘Use another login’.
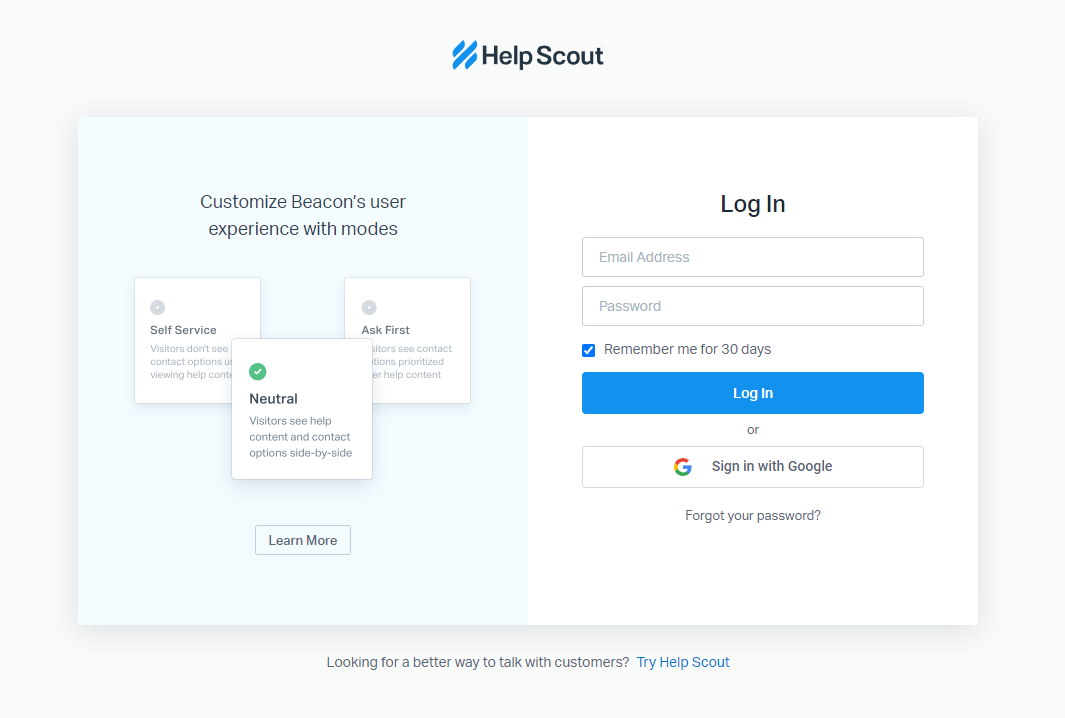
4. Log into your target Help Scout account and then authorize our service.
5. Now, you can go on with your migration.
How to bypass the email restriction
To be able to use the same email for agent accounts in the new account, there’s one simple thing you should do:
1. First, temporarily change Agent emails in the source Help Scout system (the one you want to migrate FROM).
Old email: admin@exampledomain.com => New email: admin+1@exampledomain.com
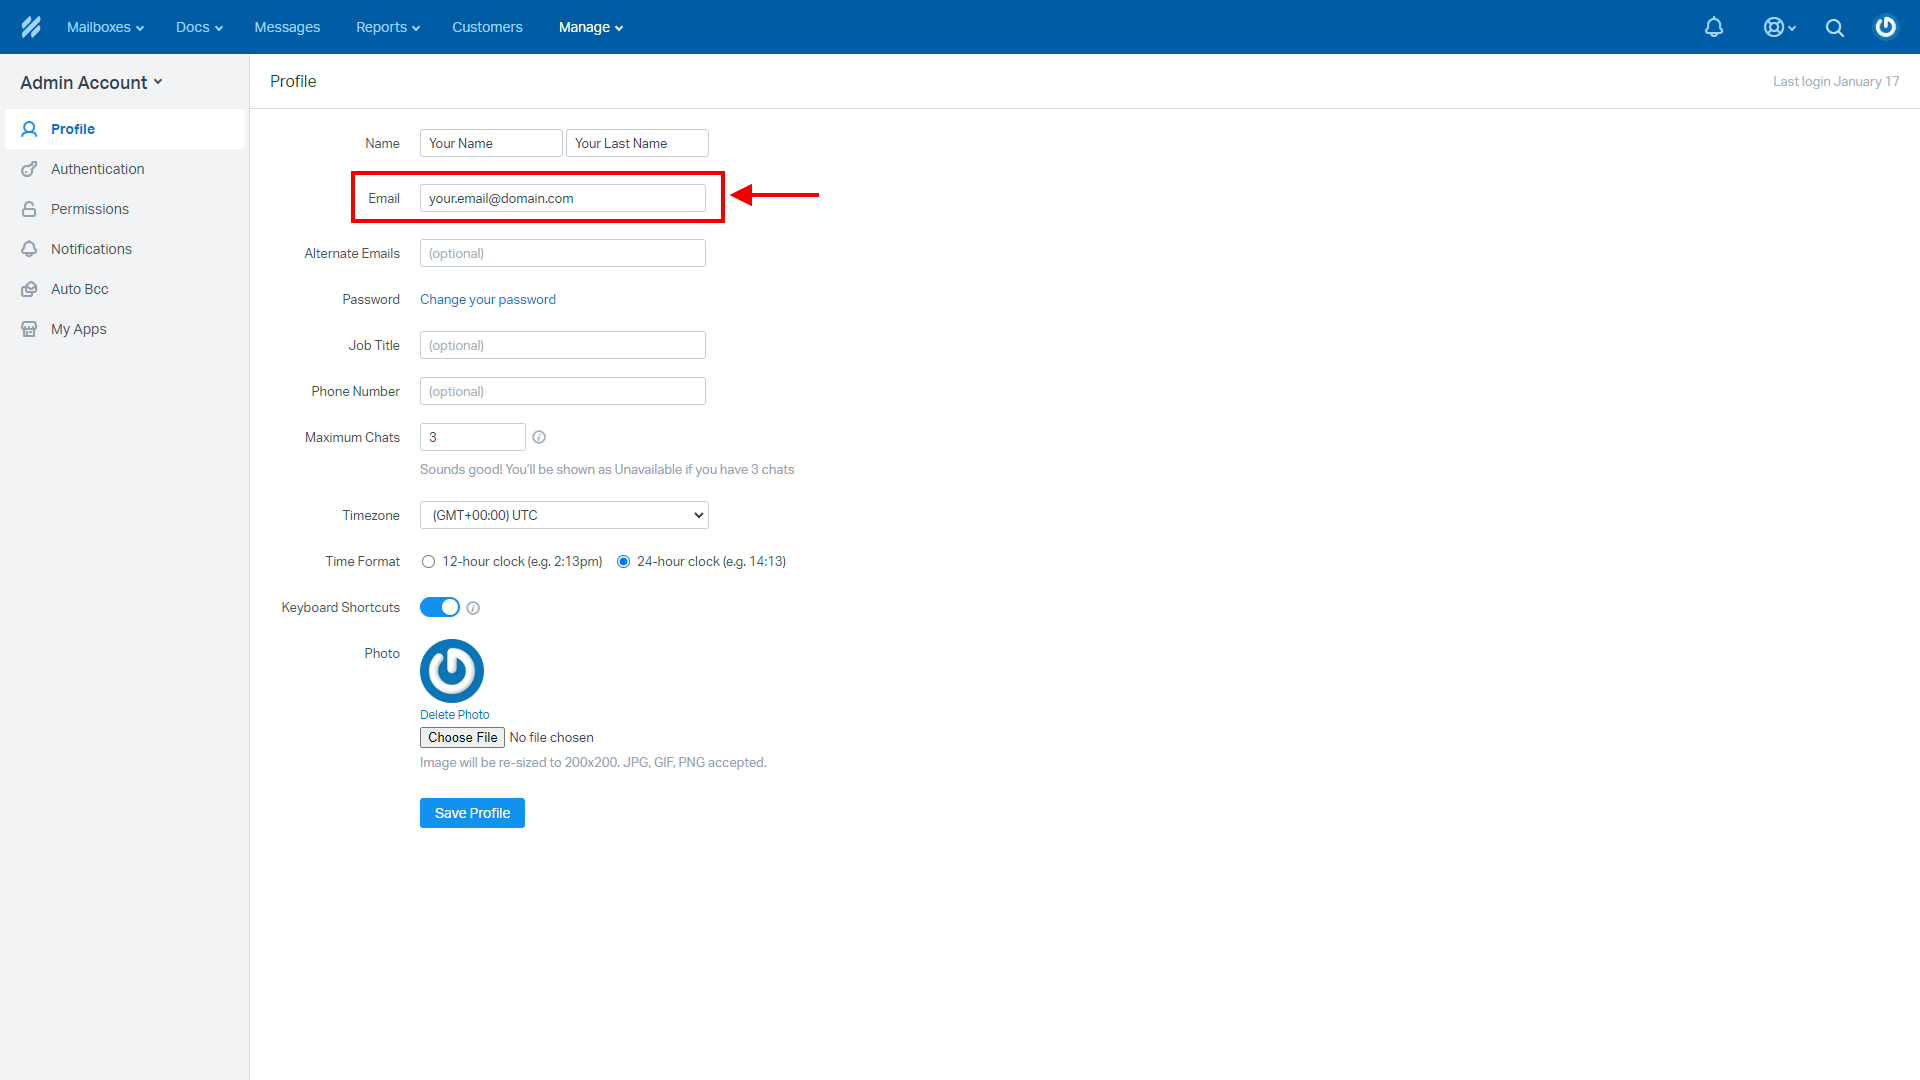
2. Then, create Agents with correct emails in the target Help Scout system (the system you want to migrate TO).
How to calculate the number of Conversations, Customers and Docs in Help Scout?
You can determine the number of all conversations in Help Scout in all Mailboxes at once. Moreover, you can also estimate the number of Customers and Docs.
1. Go to Search.
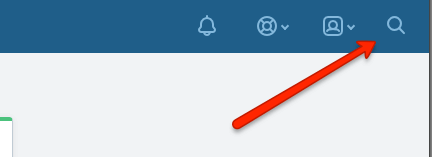
2. Type All and click the "Enter" key.
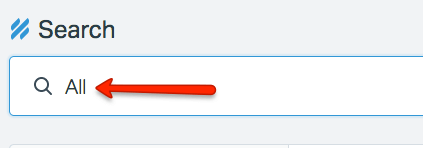
3. Find the numbers in the search results:
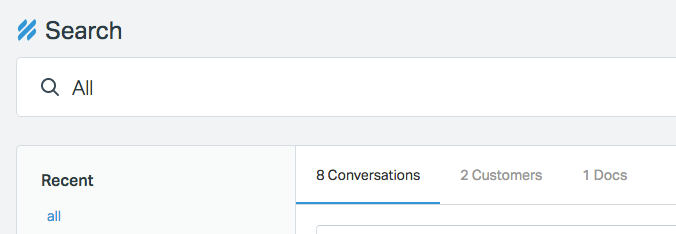
Note: You can quickly determine the number of your Conversation and estimate the cost of the data transfer during our Free Demo Migration.

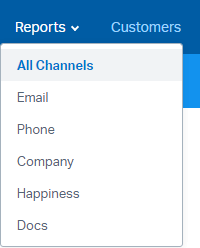
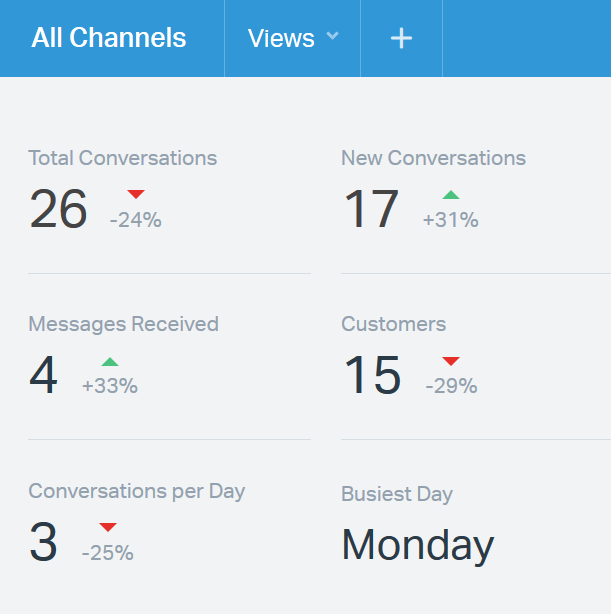
Reports come in handy when you need to analyze the productivity of the support team, support load, busy days, etc. Using the report data you can also check the number of conversations in your Help Scout account to get a migration quote.
Go to Reports > All Channels:
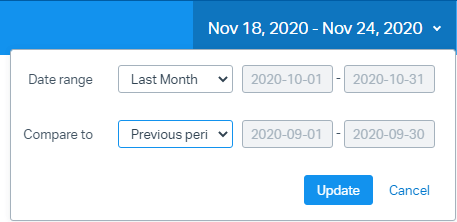
Choose the time range to filter the conversations:
Then, you will see total conversations over the chosen period of time:
How to view knowledge base articles in Help Scout?
Our customers are often worried about the results of their knowledge base data migration to Help Scout. Namely, they can’t find all their Knowledge Base articles after the Help Scout import. In this article, we will explain where to find and how to view them.
In Help Scout, Articles are divided into Collections. Usually, users check the availability of the Collections through the Docs tab. However, in this tab, you can see only a part of all available collections; this tab is rather useful for searching a specific article Collection.
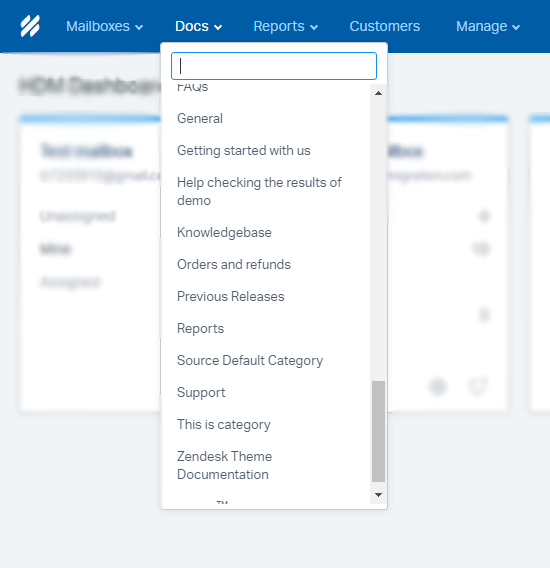
To view and manage all the Articles from a specific site, follow this path:
1. When logged in to your Help Scout account, click the Manage tab and then select Docs.

2. You will see all the active sites you have connected to your Help Scout account. Here, select the Knowledge Base of the specific site you want to view.
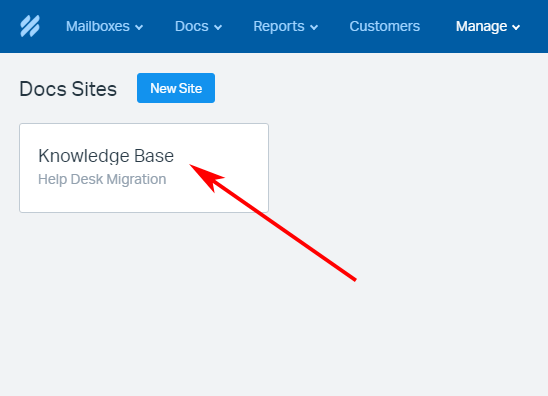
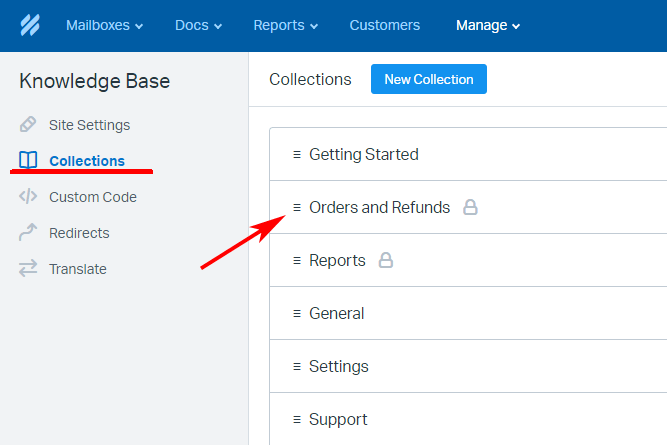
3. Click the Collections tab where you will see the list of all the Collections of this site. Select any Collection from the list.
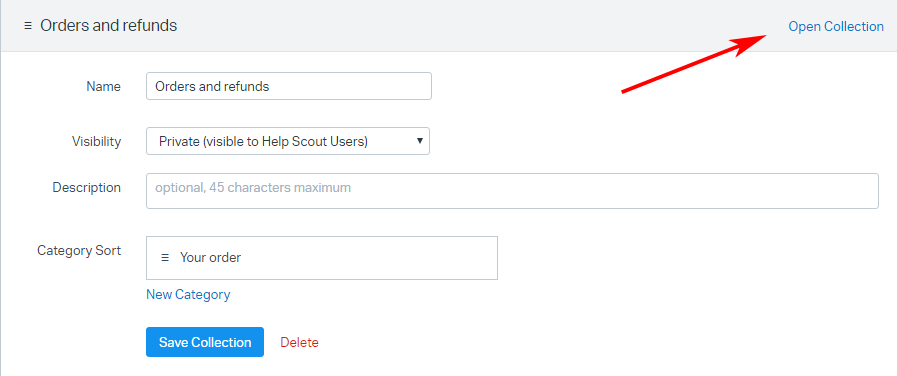
In the Collection management section that will open up, click Open Collection.
4. You will see the full list of Articles that belong to this Collection.
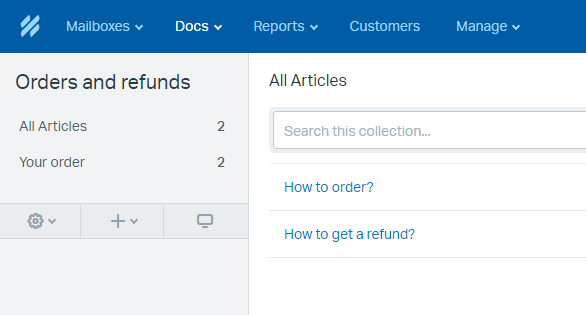
Go through the same process with all your Collections to check the availability of your Knowledge Base articles.
How to check the result of Demo Migration in Help Scout?
Once the Demo Migration is complete, the migration tool shows you a summary table with the reports on each migrated record type. They include the IDs of transferred entities in the source platform and Help Scout. For example, the available reports might be for the migrated, failed, or skipped data.
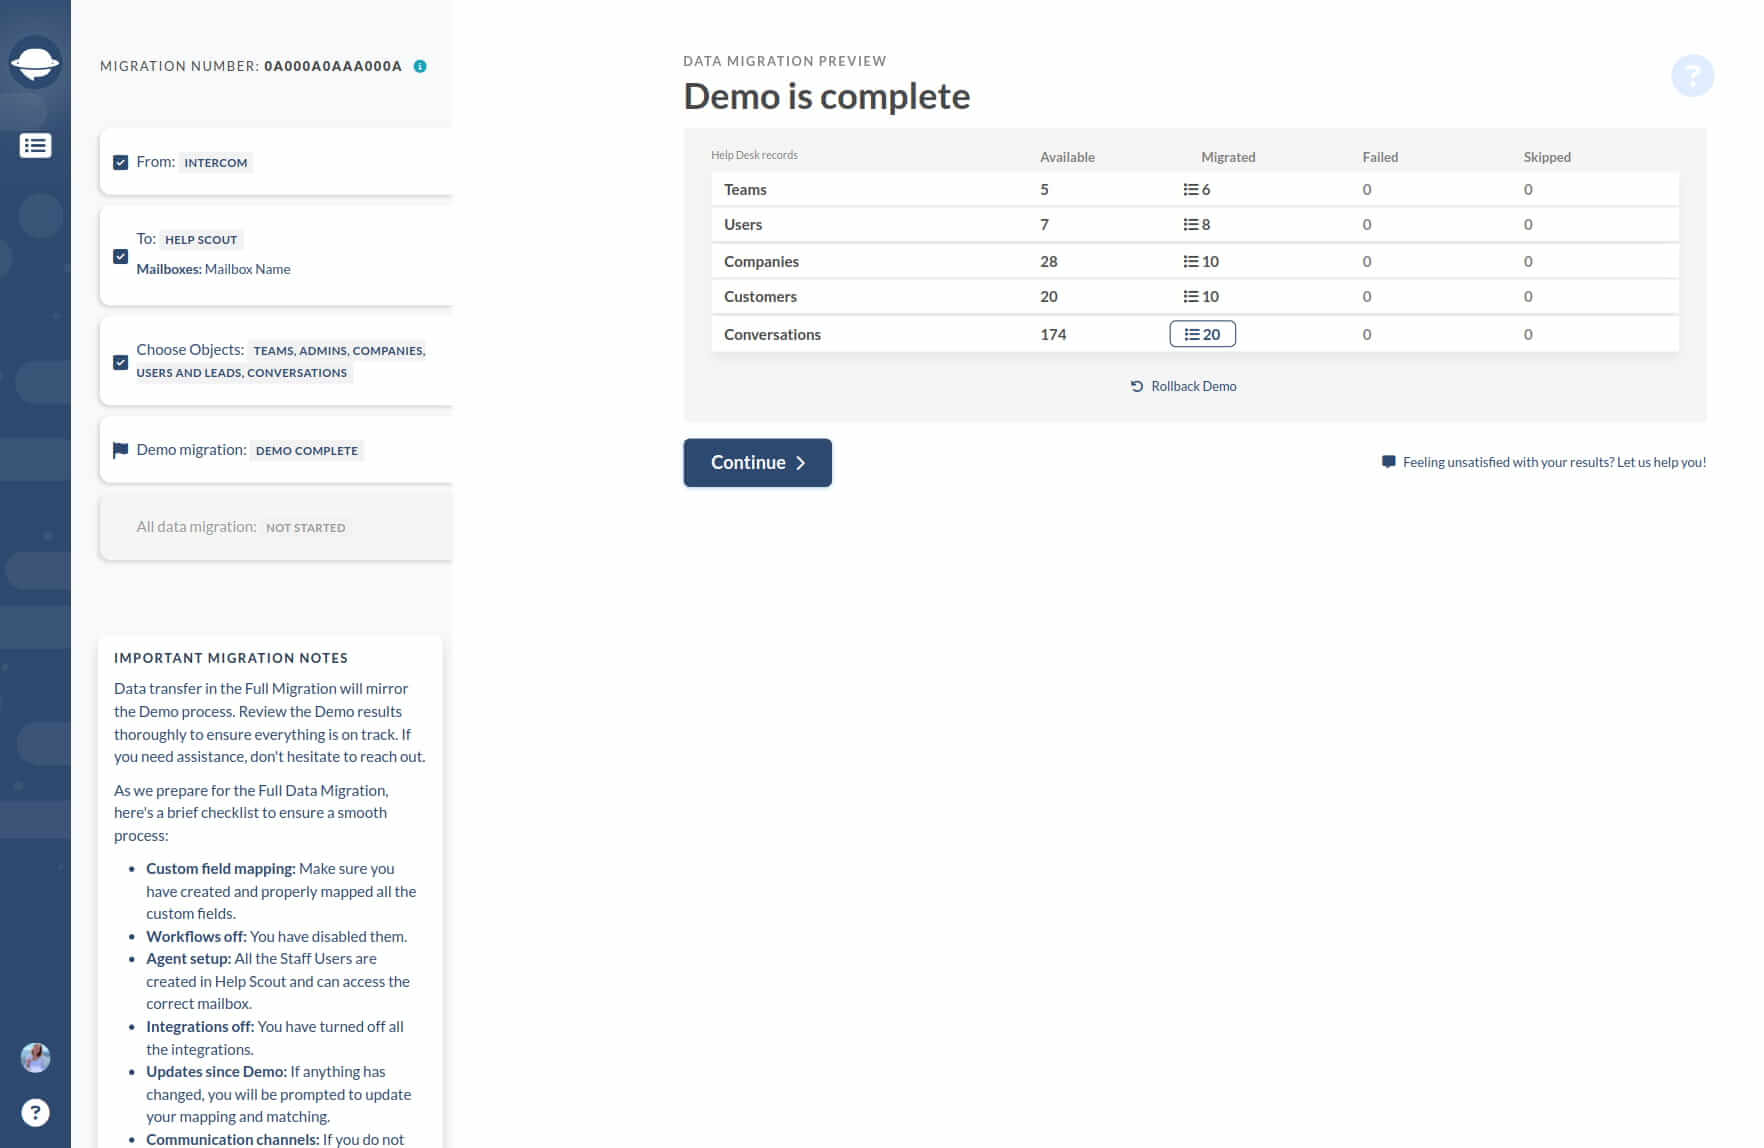
Click the “View records” button to find and check if every entity is transferred correctly. The report looks like this:
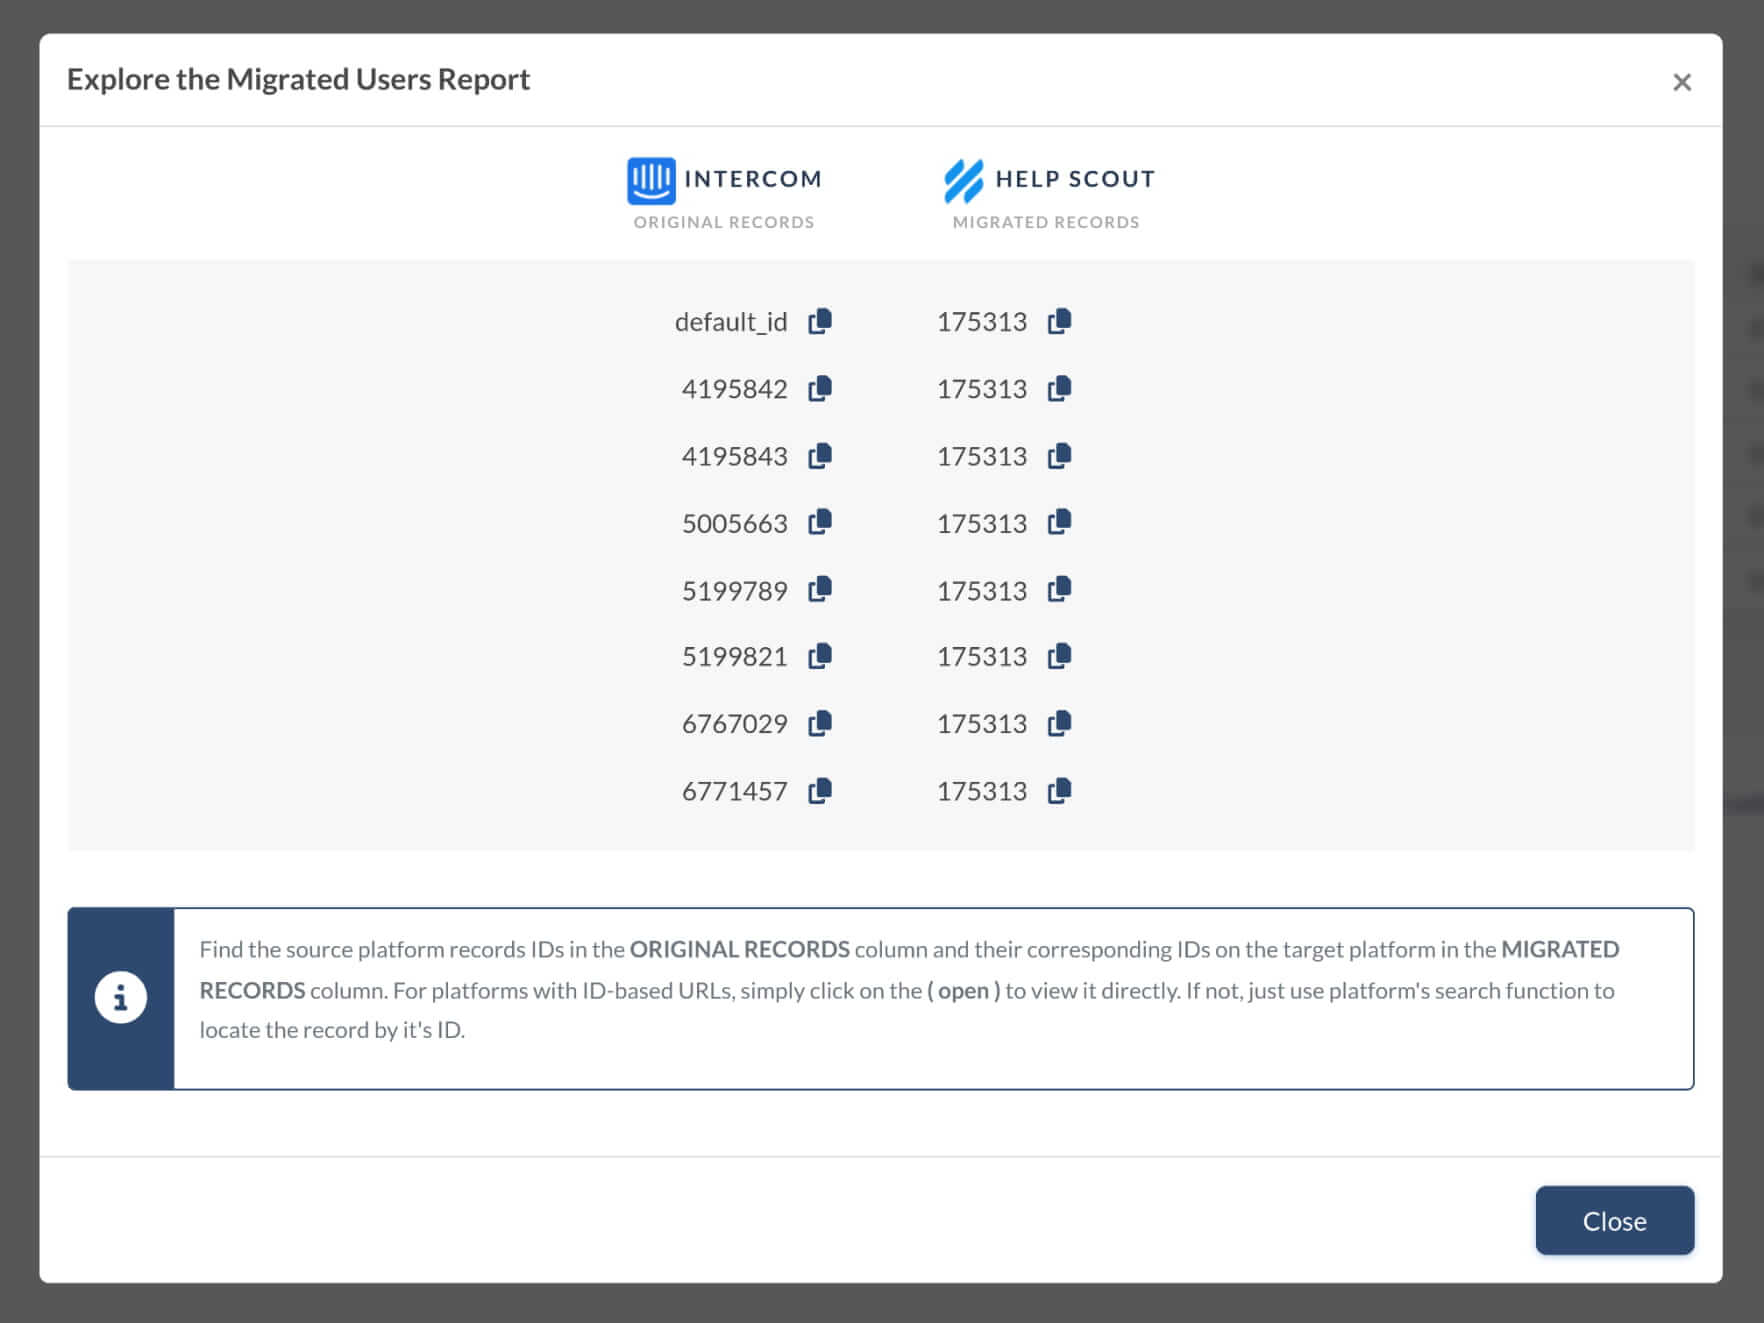
The Demo Migration or Full Data Migration migrate all records similarly. If some data weren’t migrated during the Demo Migration, it wouldn't be moved during the Full Migration.
So, you need to ensure that the Demo Migration moved the tickets along with their Type, Source, Status, Priority, Custom Fields, Requester, Agent, and Tags correctly.
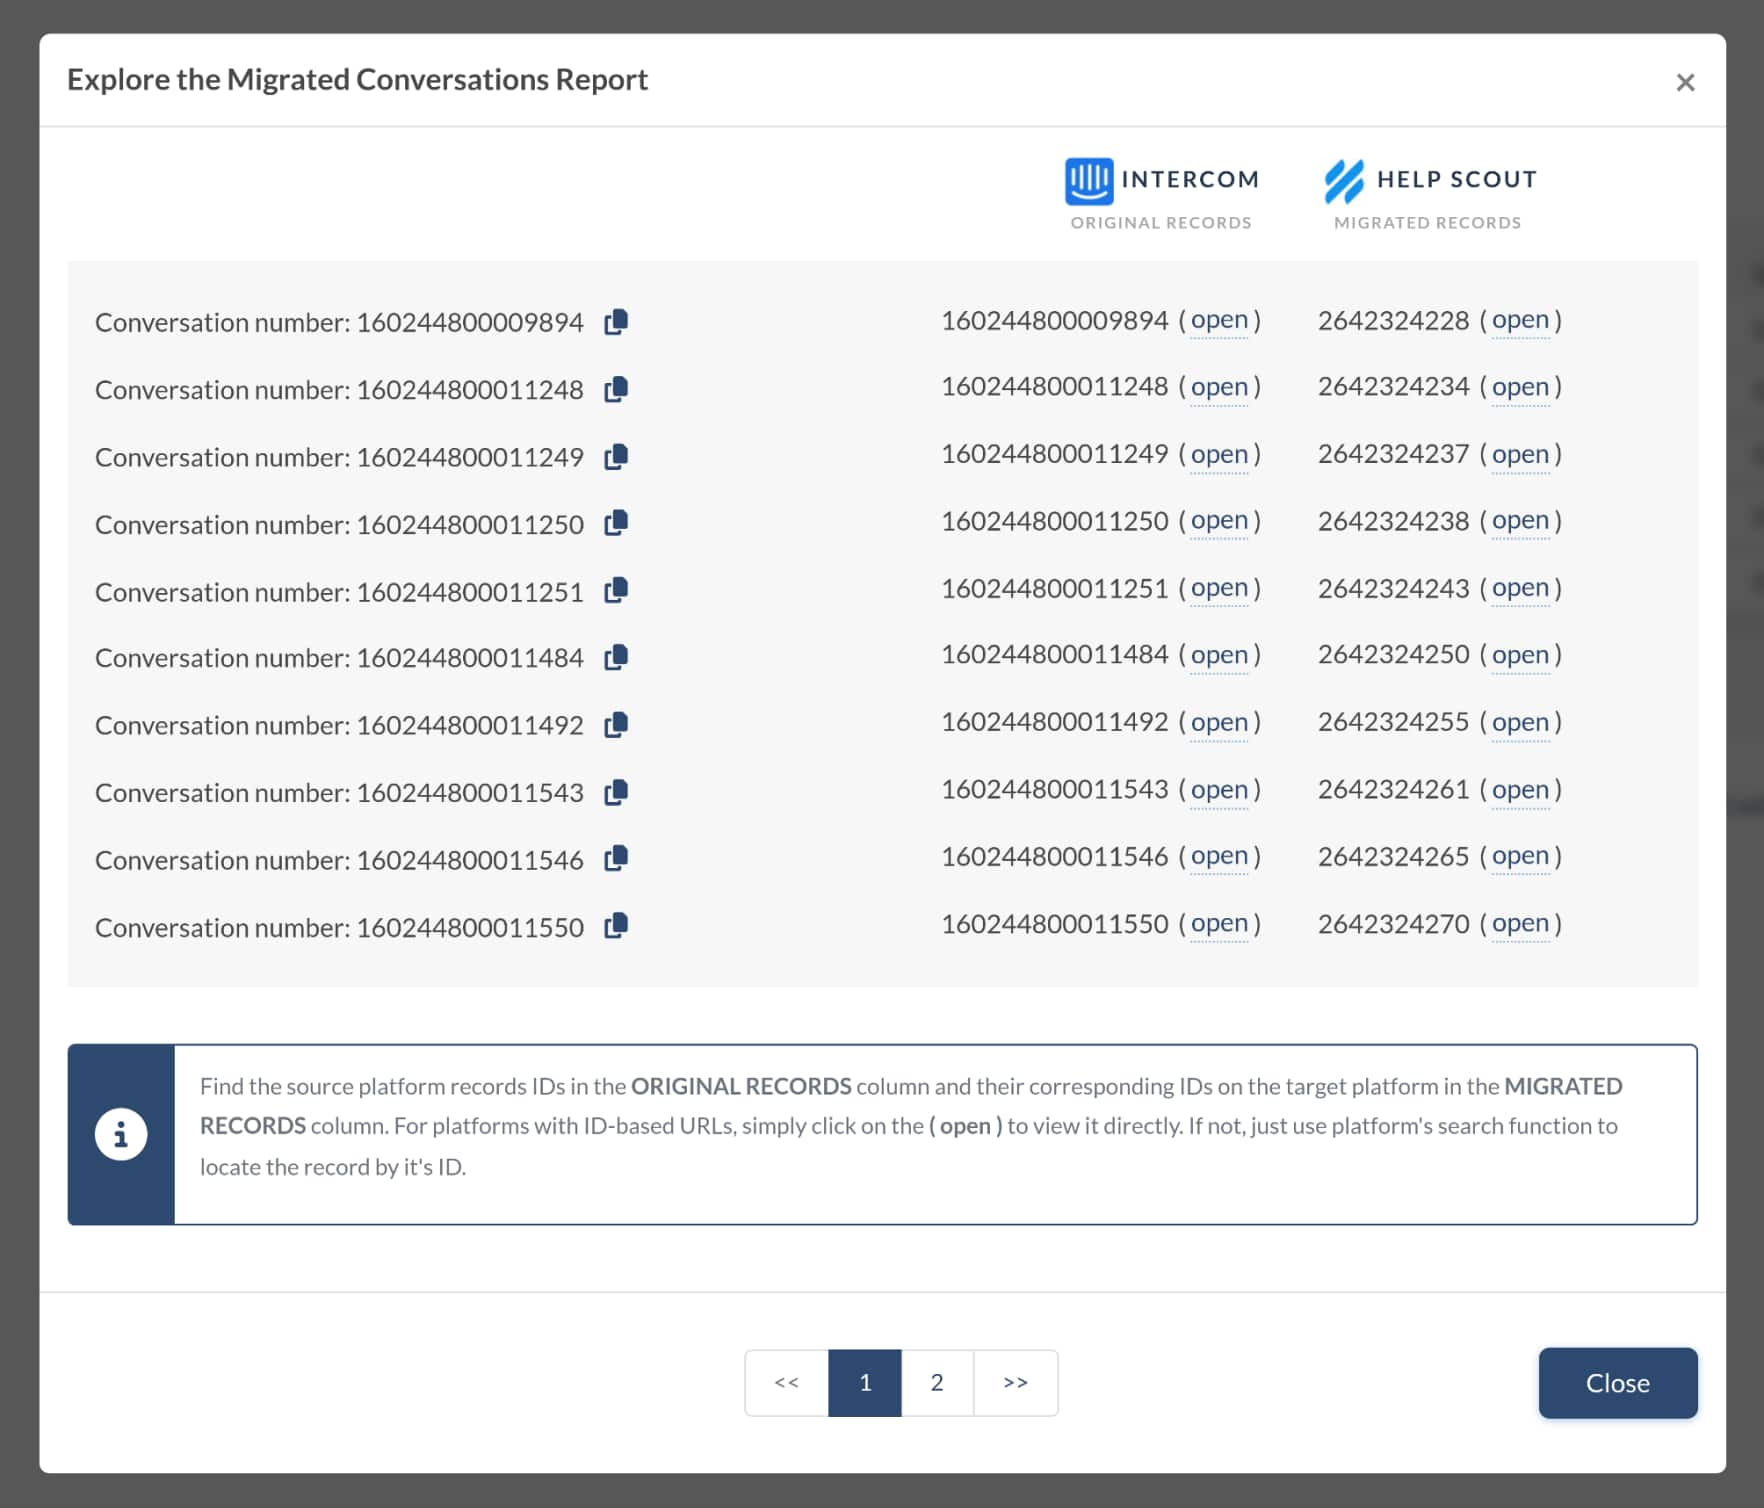
Besides, if you import the knowledge base data, check the articles’ statuses, locations, and categories. Then, once you've examined everything, run the Full Data Migration.
Also, you’ll have similar reports after the Full Migration to check the migration results. So, ensure to look through them closely too.
Where can I get HelpScout Docs API Key?
Click on your profile picture and select Your Profile.

Choose Authentication in the sidebar and click API Keys. There you will find the Docs API key.

Copy this value and continue setting up your data migration. Should you have any questions? Ping us via live chat.

