LiveAgent Migration Guides
Where to find LiveAgent API key?
To migrate from LiveAgent you need to have the following:
- URL of your company's LiveAgent account;
- API v1 key and API v3 key from your LiveAgent account
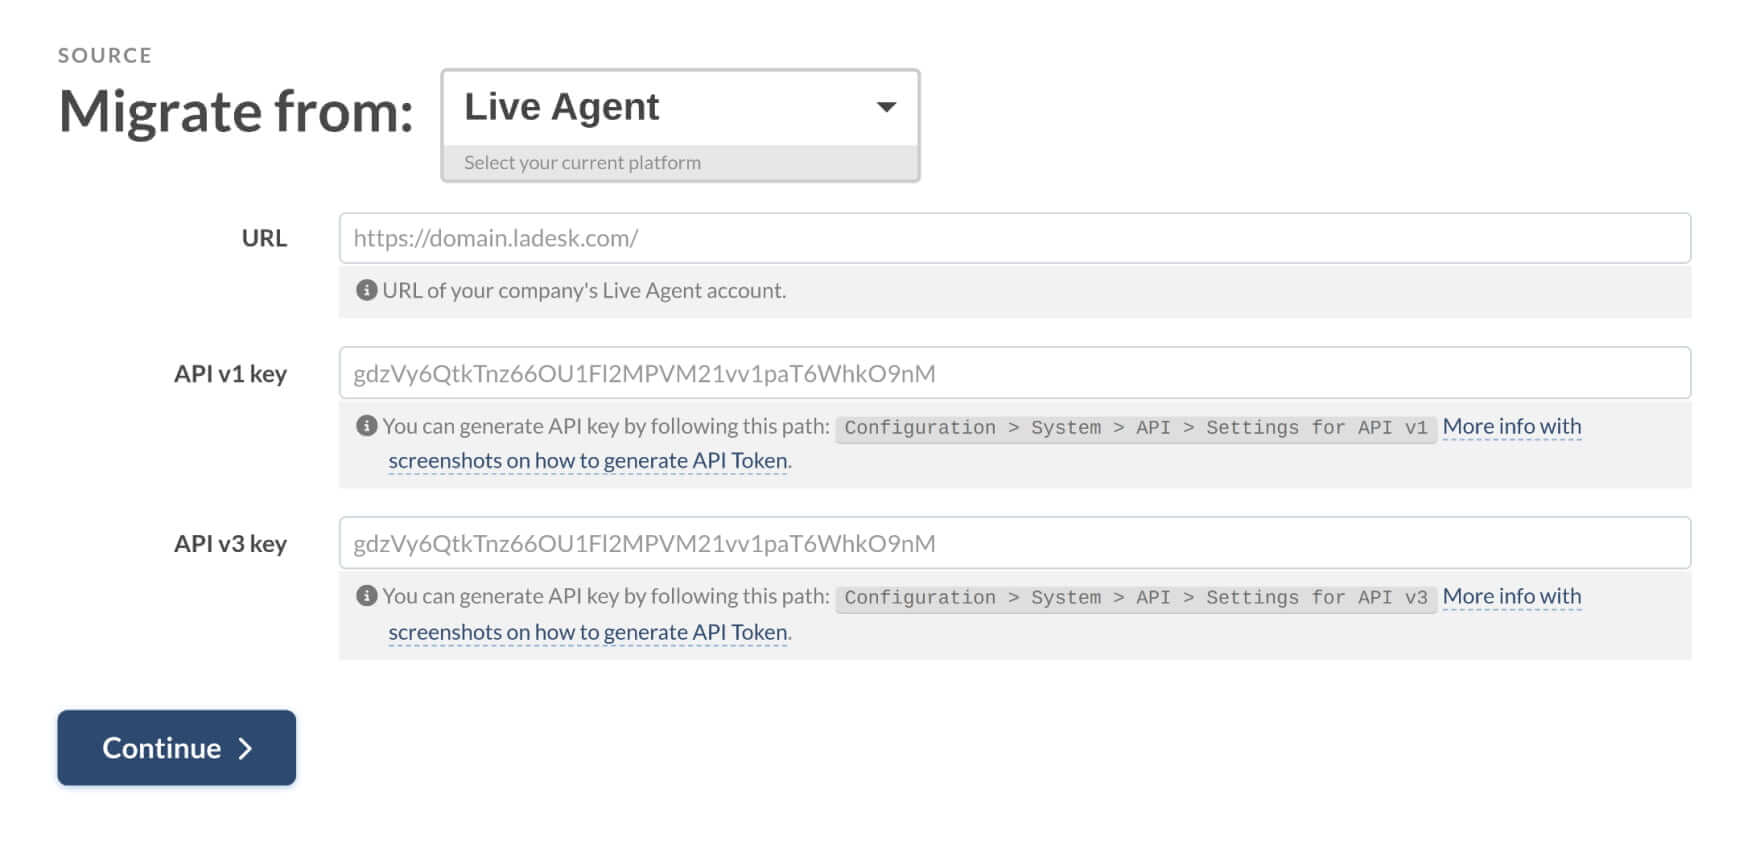
Locating the LiveAgent API v1 and v3 keys is simple. Just follow these steps:
1. Log into your account and go to the Agent panel:

2. Proceed to Configuration-System-API:
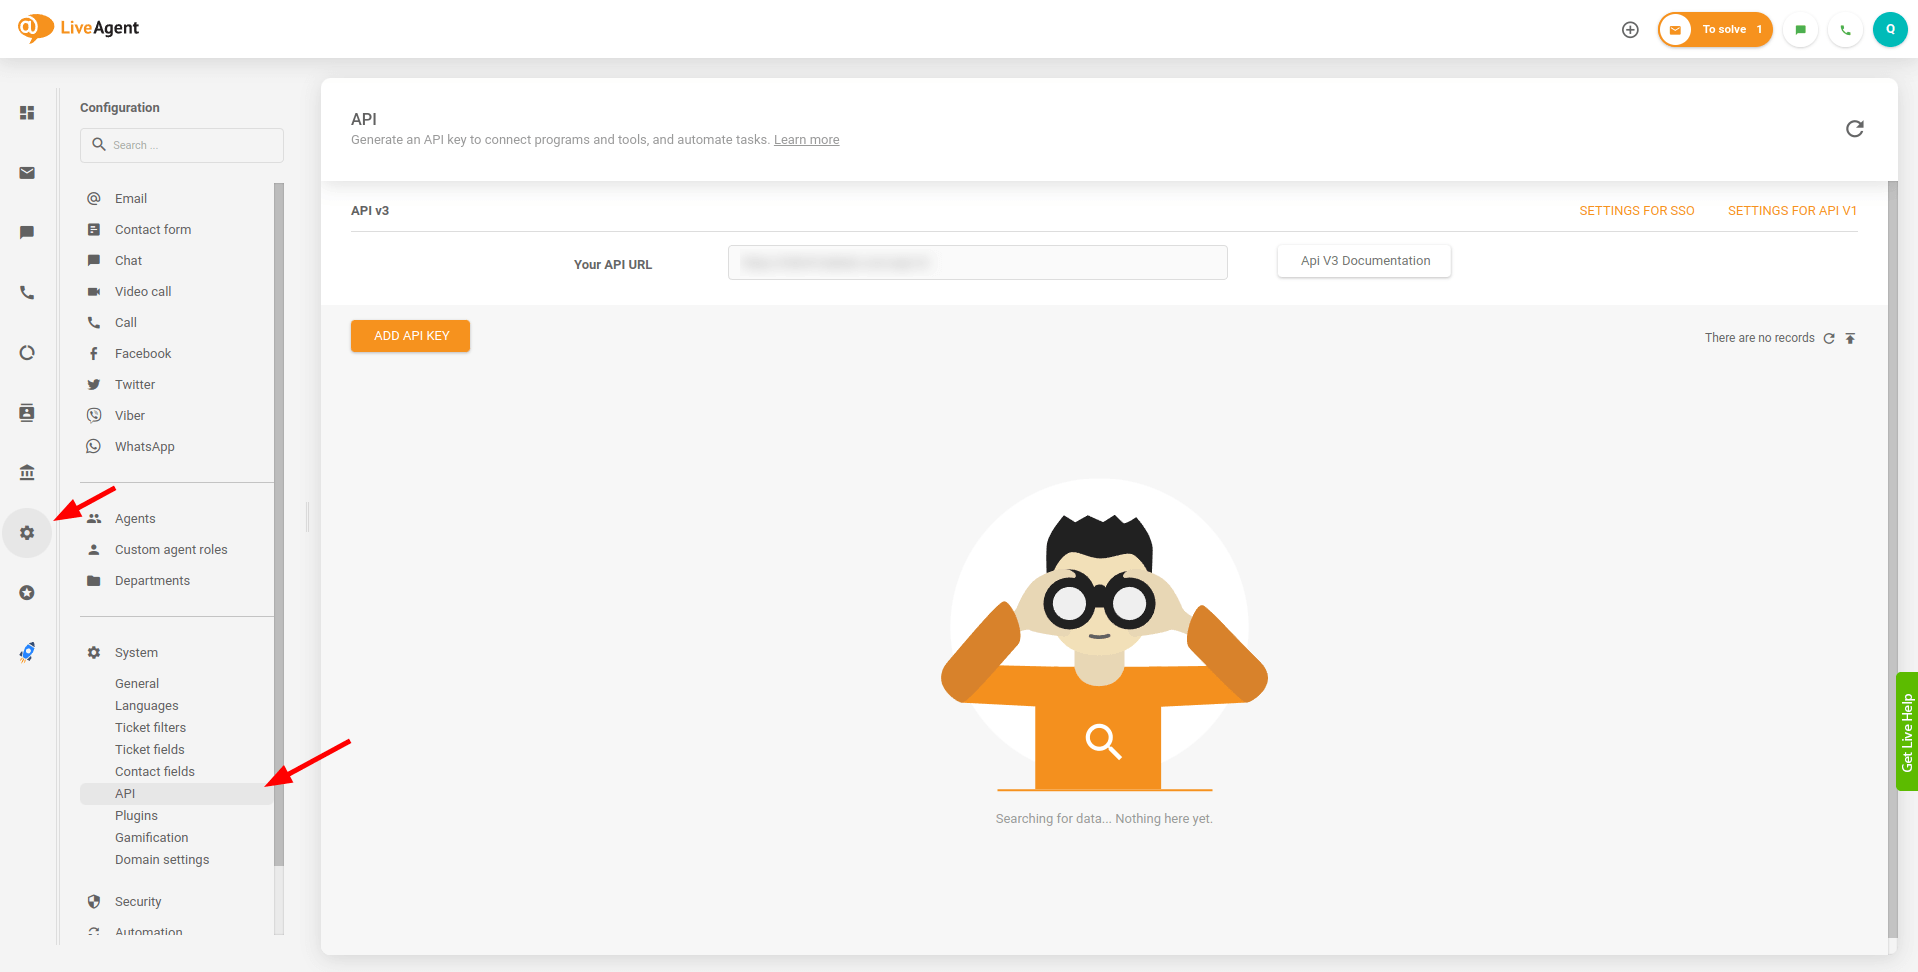
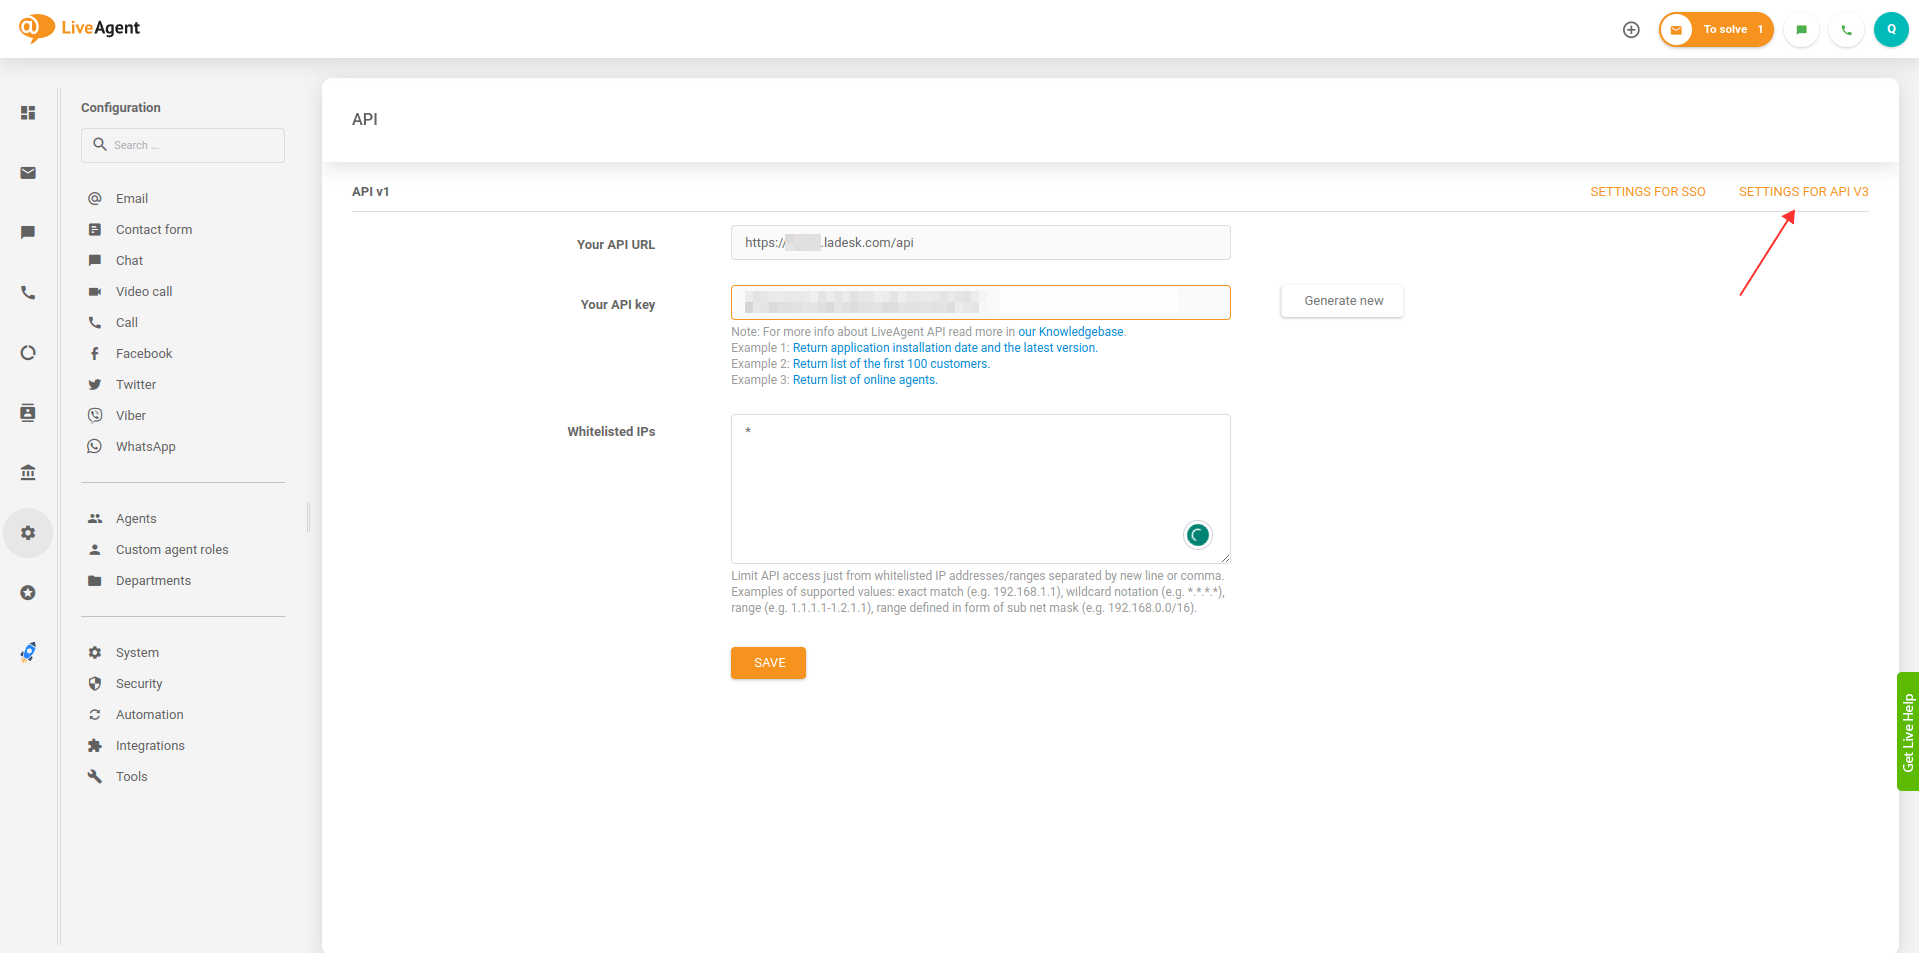
3. You will see all the API keys you have previously generated. First, click the "Settings for API v1" to find it:
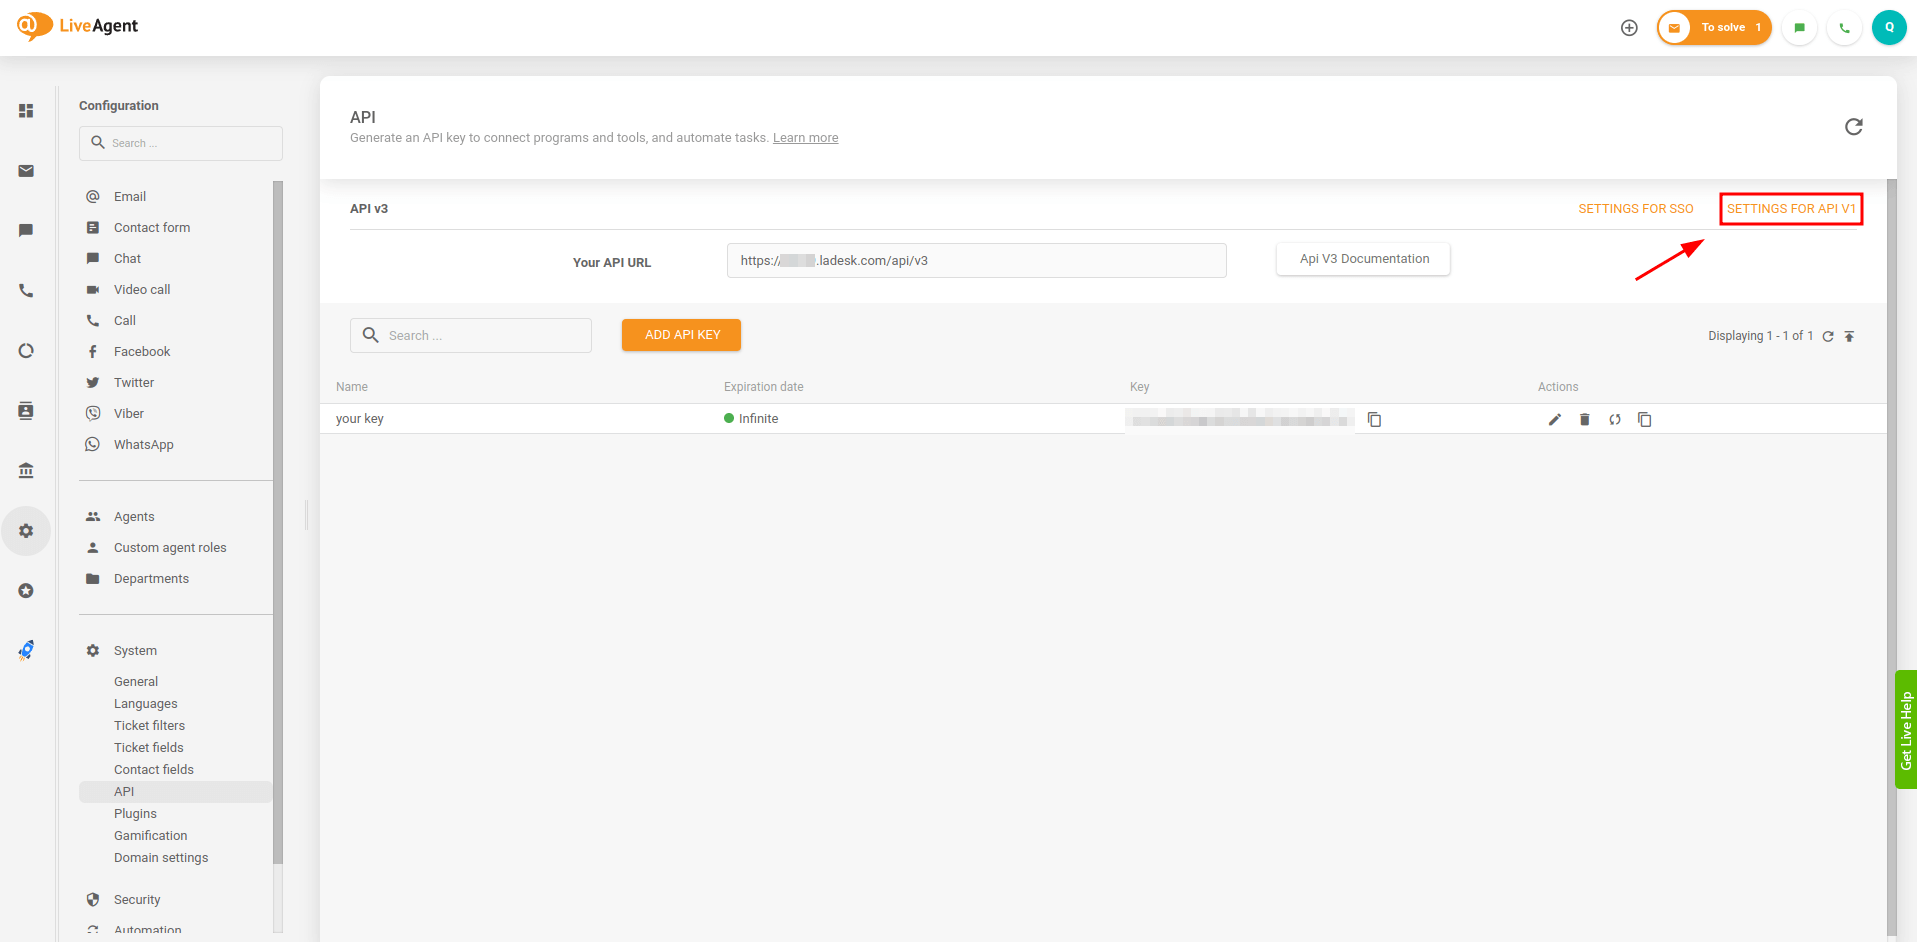
4. Copy the API v1 key:
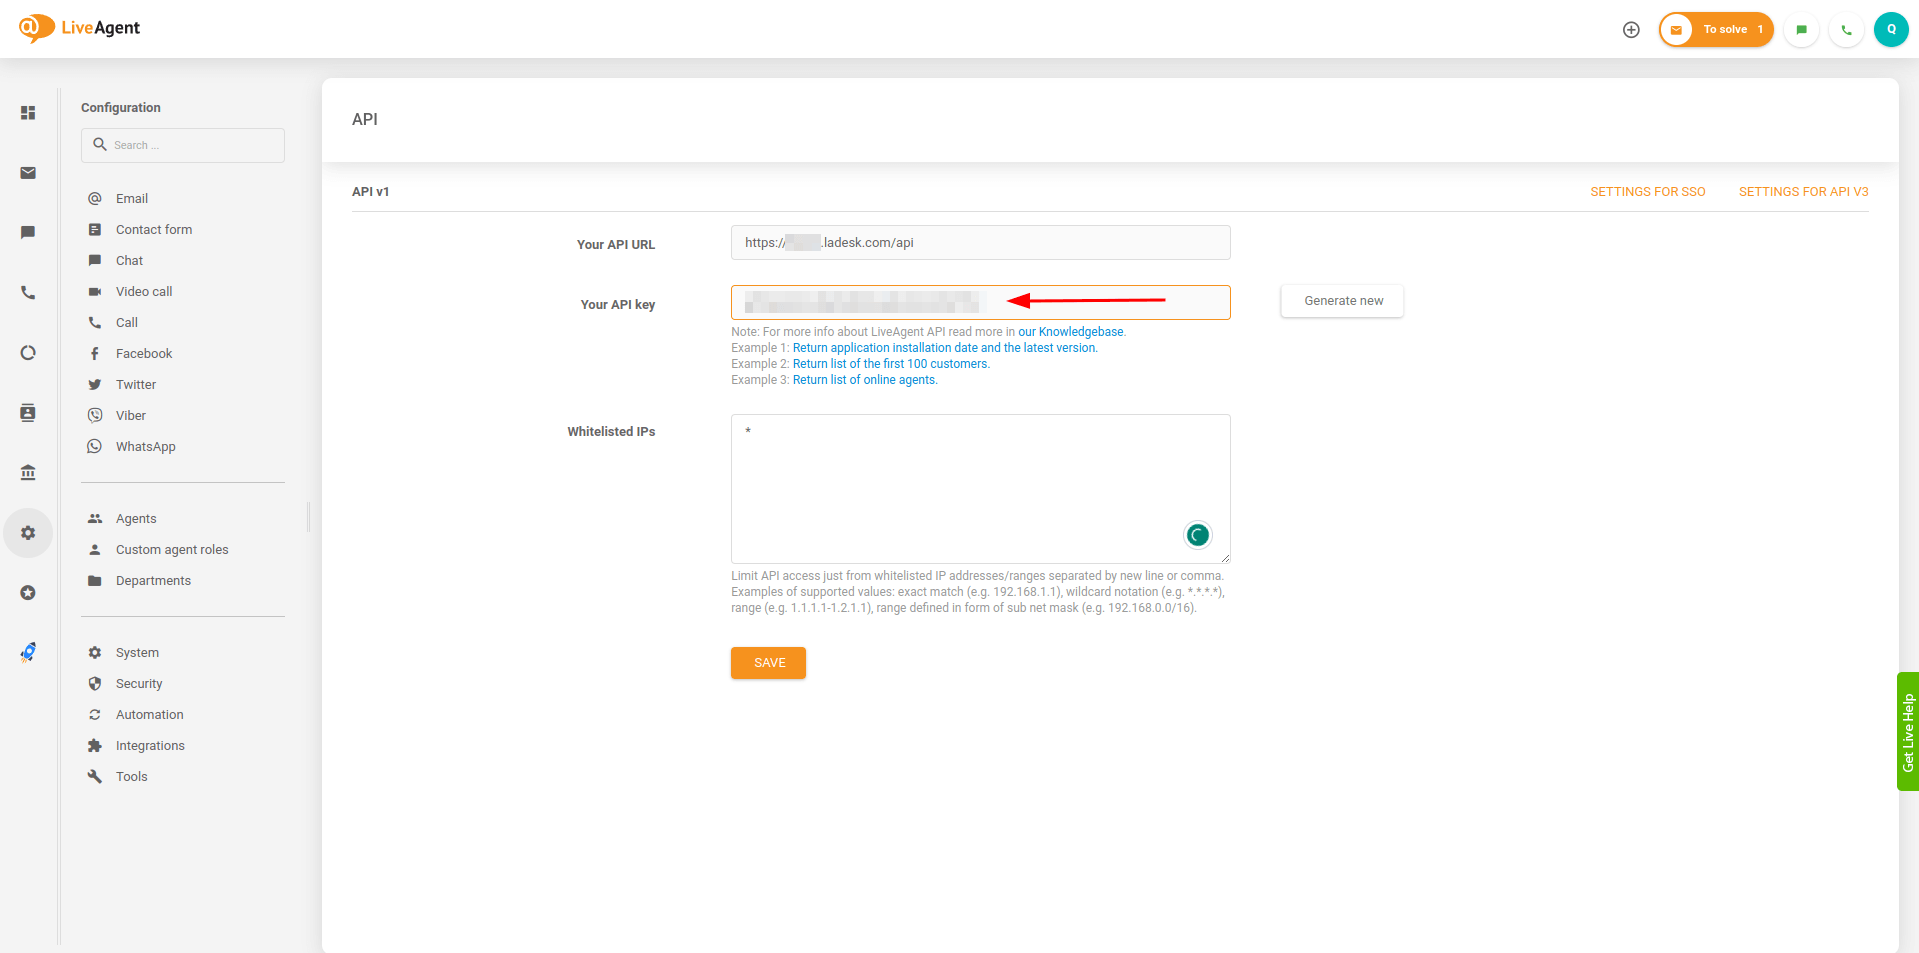
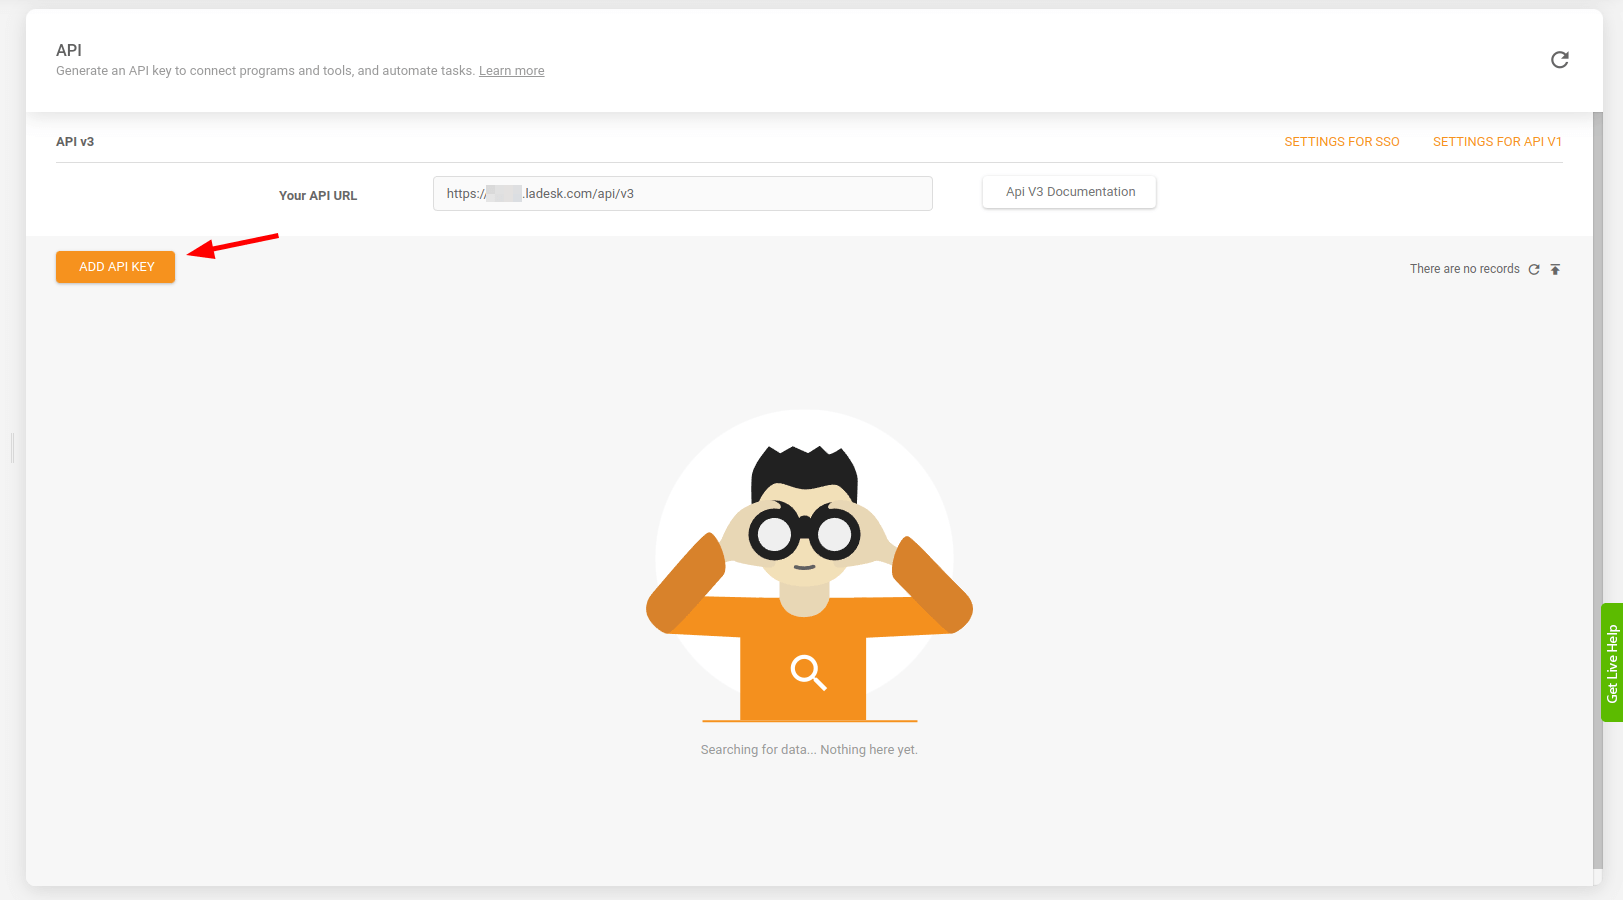
5. The same way, go to "Settings for API v3" to find and copy it.
6. If you have no API v3, click "Add API key" to create it.
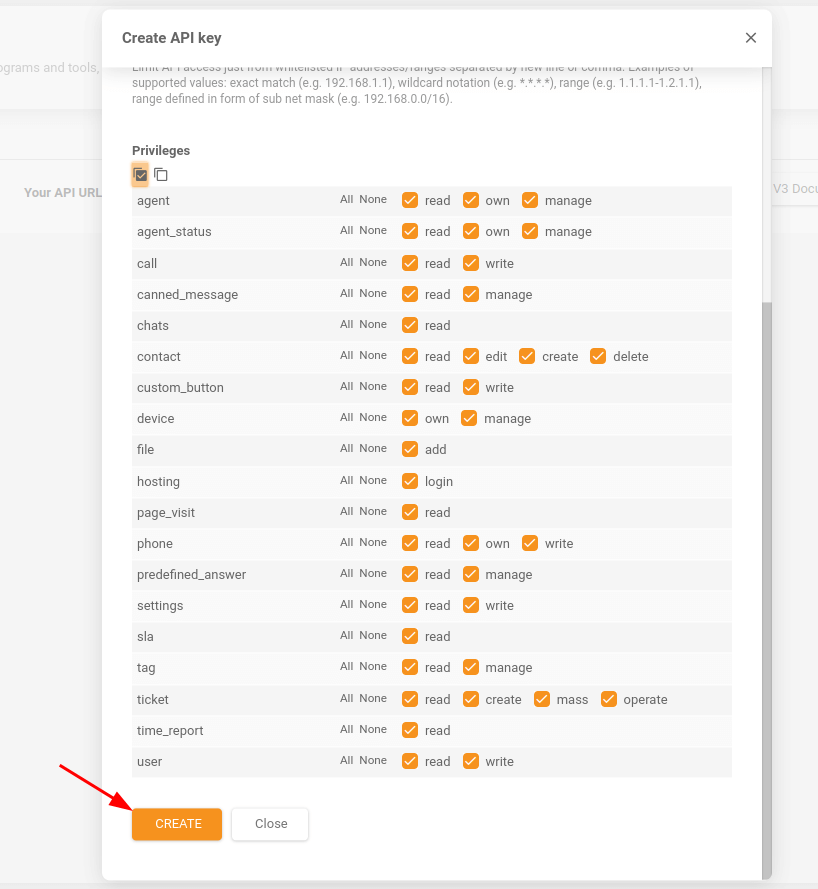
7. Enter the API key name, expiration date, and API limits.

8. Scroll down and check the privileges. Then, click "Create".
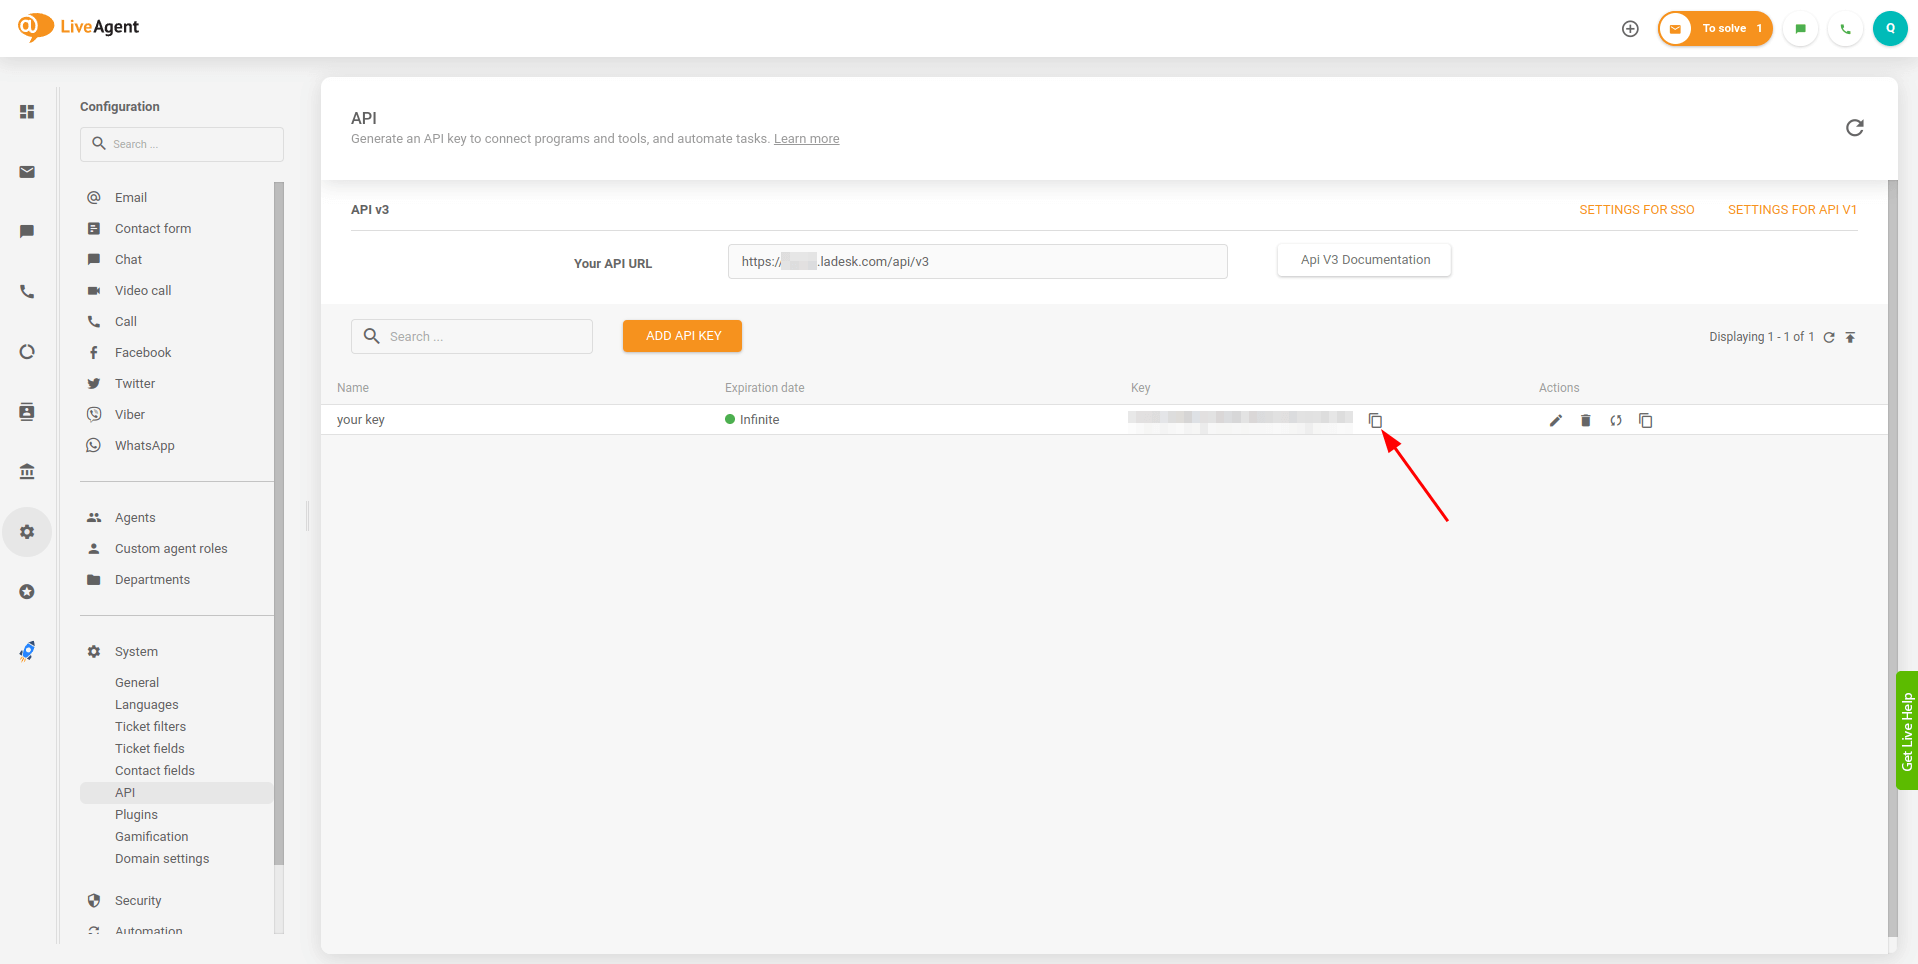
9. Now, you can copy the API v3 key by clicking the corresponding icon next to the key.
10. Continue setting up the migration.
How to filter tickets in LiveAgent?
To filter tickets in LiveAgent, follow these steps:
- Log in to your LiveAgent account and navigate to the Ticket filters section.
- Click on the "+ New filter" button to create a new ticket filter.
- In the "Create filter" window, give your new ticket filter a name that reflects the conditions you'll be setting.
- Select the conditions for your filter by clicking on the "+ Add search condition" button. You can add multiple conditions to narrow down your search criteria.
- Define the conditions based on attributes like ticket status, assigned agent, tags, etc. Only tickets that meet all the conditions you set will be displayed in the Tickets grid when you access the filter.
- After setting all the conditions, click on the "Create" button to save the filter.
- Once created, your new ticket filter will be added to the Ticket filters list. You can hover over the filter and click on the displayed Edit button (cogwheel icon) to modify its conditions, change its visibility, delete the filter, or change its position in the list.
- You can set the visibility of the filter to determine whether it should be shown in the list only if there are tickets that match its conditions. Filters can also be hidden or accessed from the "more filters" category.
- If you want to temporarily customize the results displayed by your currently used ticket filter, click on the "Customize filter" option. Customized filters are applied only until you click on any other filter in your ticket filters list or the Tickets menu item.
