Kustomer Migration Guides
How to create an API key in Kustomer?
When setting up your migration from or to Kustomer, you will have to create and provide an API key. Here’s how you can do it:
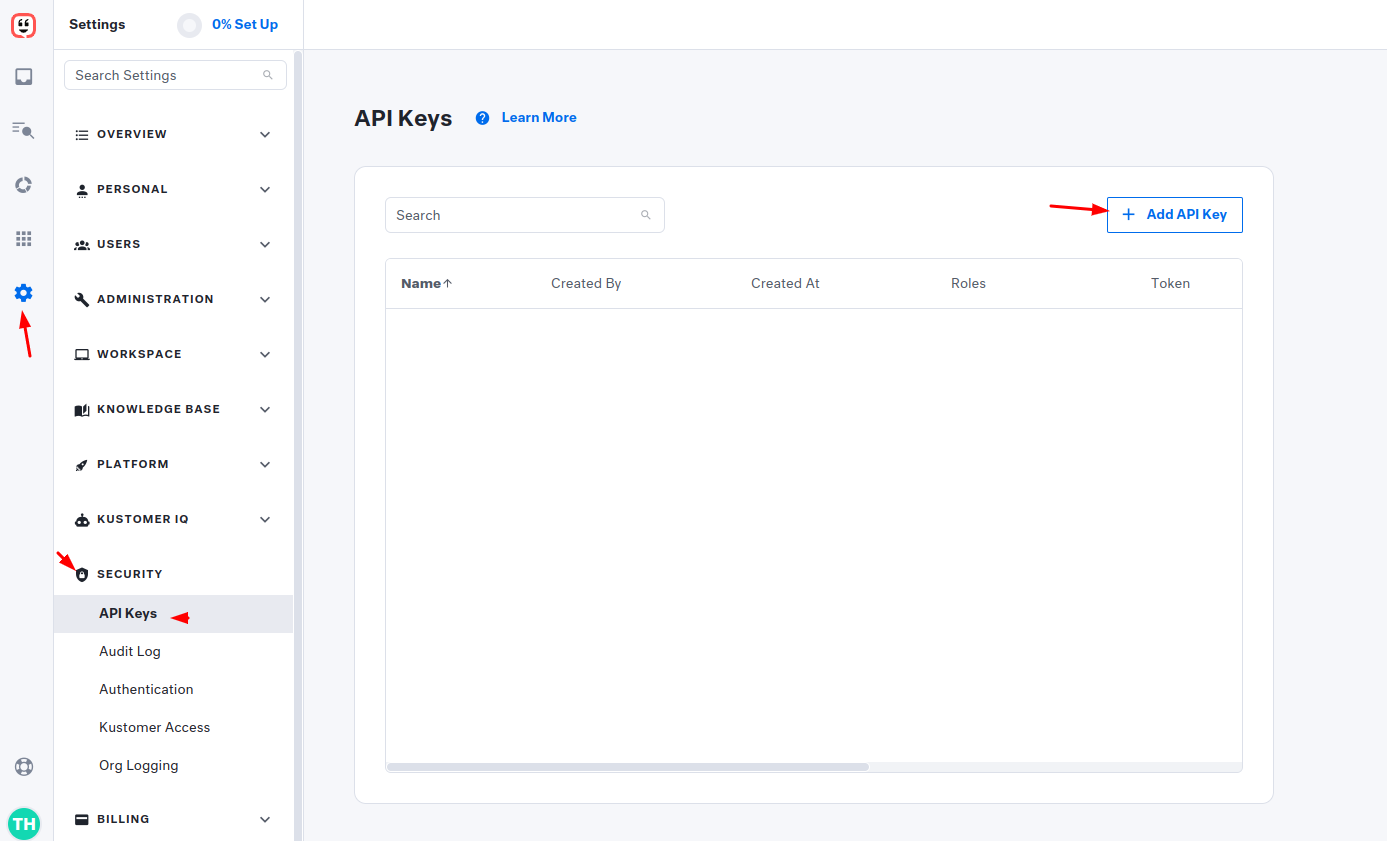
Step 1. Log in to your Kustomer account and go to the Settings section. Then pick Security and click on "API keys".
Step 2. Click the "+ Add API Key" button.

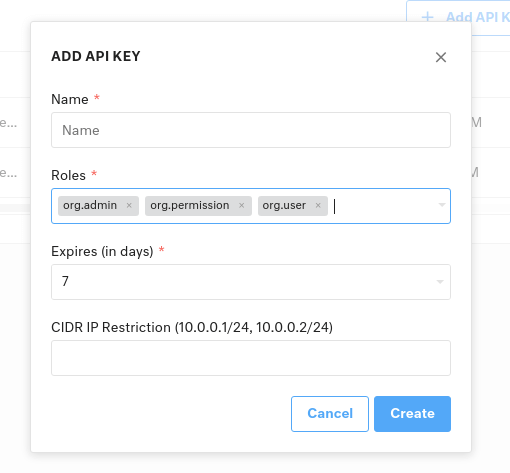
Step 3. Enter the Name of your API key and from the drop-down list select the following roles:
org.admin

org.permission

org.user
Then click the “Create” button to save your new API key.

Step 4. Once created, you will see it in the API Keys section. Just copy your new API Key and enter it in the required Migration Wizard field. Now, you can continue with your migration.
How to filter data in Kustomer?
To filter data in Kustomer, you can follow these steps:
- Access Reports: Start by navigating to the Reports section in Kustomer. You can choose from various standard reports such as Overview, Conversation, Queue, SLA, Satisfaction, and Company.
- Select Filters: Above any of the standard reports, you'll find the option to select Filters. Click on this option to open the FILTER BY component box.
-
Define Filter Criteria: In the FILTER BY component box, you can define your filter criteria. Each filter consists of three main components: Attribute, Operator, and Value(s).

- Attributes: These are the data points on a Conversation object that you want to filter upon.
- Operators: Determine how you'd like to slice your data on the selected attribute. You can choose to Include or Exclude certain values.
- Values: These are all the available options for the selected attribute.
- Apply Filters: Once you've defined your filter criteria, select Apply Filters to apply them across all applicable charts.
-
Save Filter Views: If there's a set of filter criteria that you frequently apply, you can save it for easy access. Instead of selecting Apply Filters, choose Save & Apply Filters from the drop-down menu. Give your filter view a name, and it will appear in the Saved Filters drop-down menu for future use.

-
Edit Saved Filters: You can edit a saved filter by selecting it from the drop-down menu and then selecting the Filters icon. Here, you can edit the existing criteria and save it as the same filter or create an entirely new saved filter.

- Filterable Fields and Charts: Filters can only be applied to charts that contain data based on a Conversation object. Charts based on different object types will not update when filters are applied.
- Metric Updates: Kustomer has updated metric definitions and calculations to more accurately reflect their descriptions and allow for filtering based on Conversation attributes. This ensures that the metrics provide meaningful insights into your data.
