Dixa Migration Guides
How to Generate API Token in Dixa?
To generate an API token in Dixa, follow these steps:
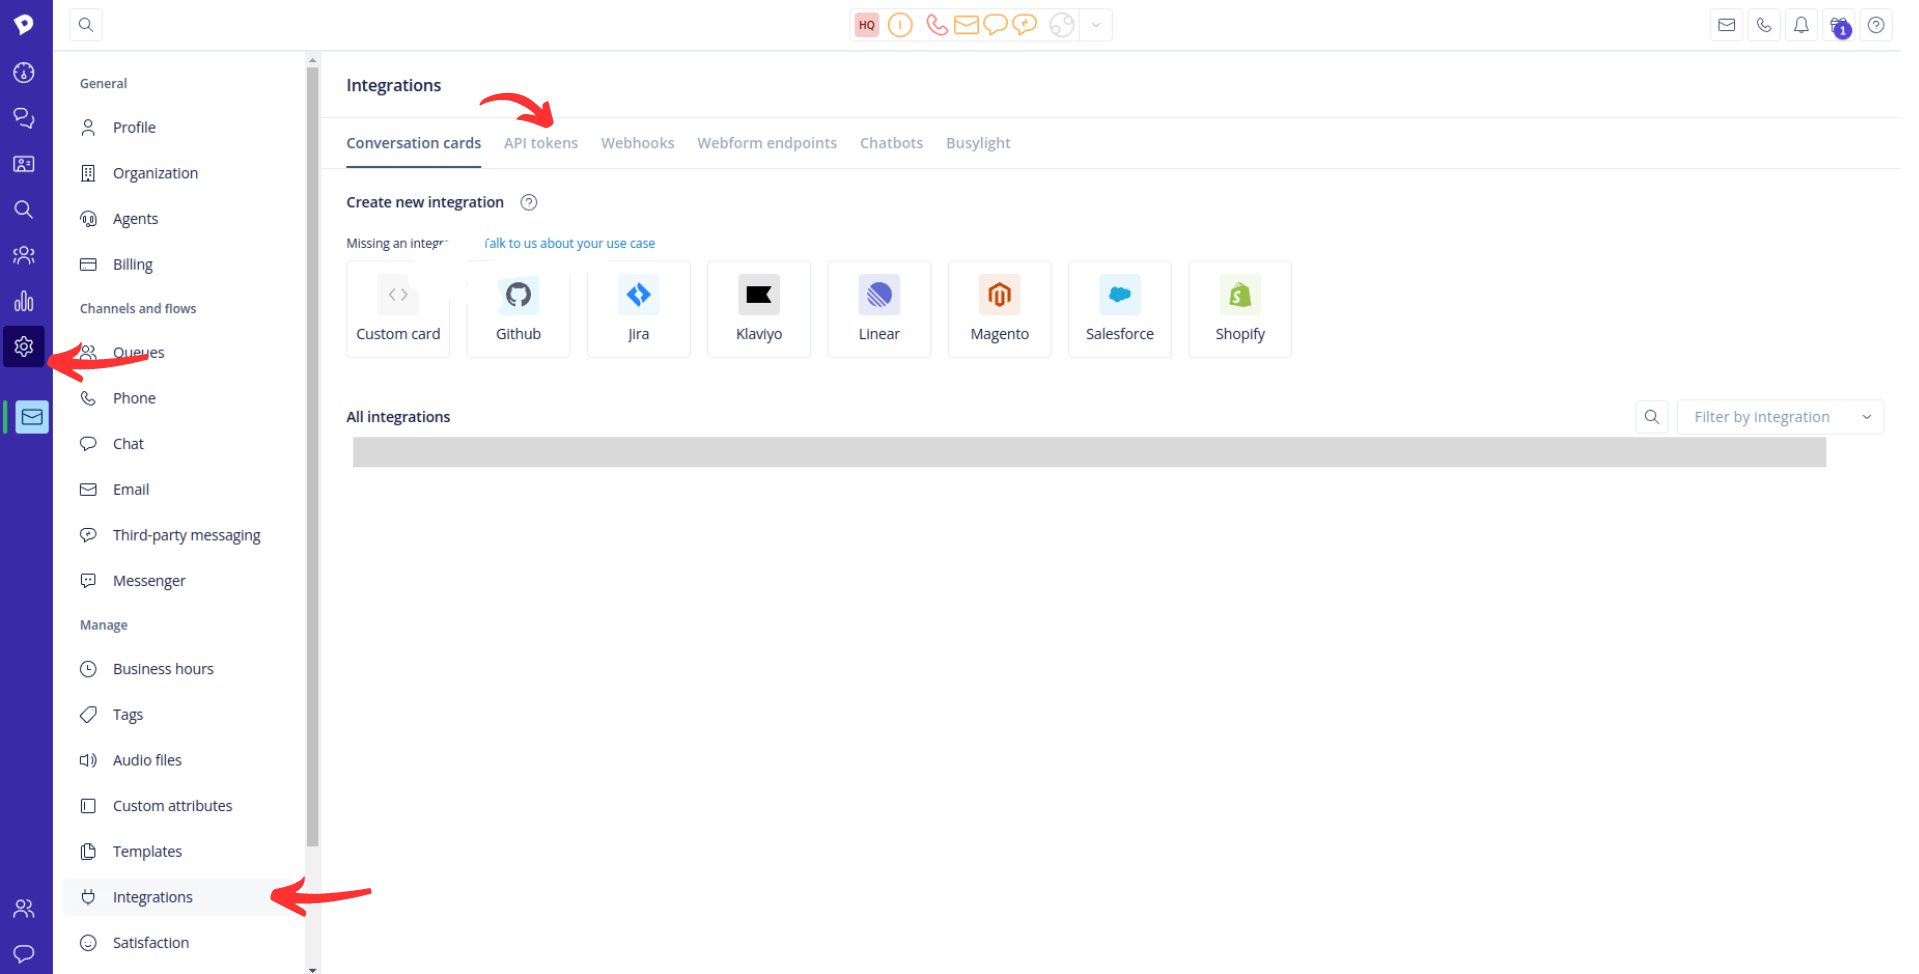
1. Go to Settings and select Integrations and API tokens from the menu.
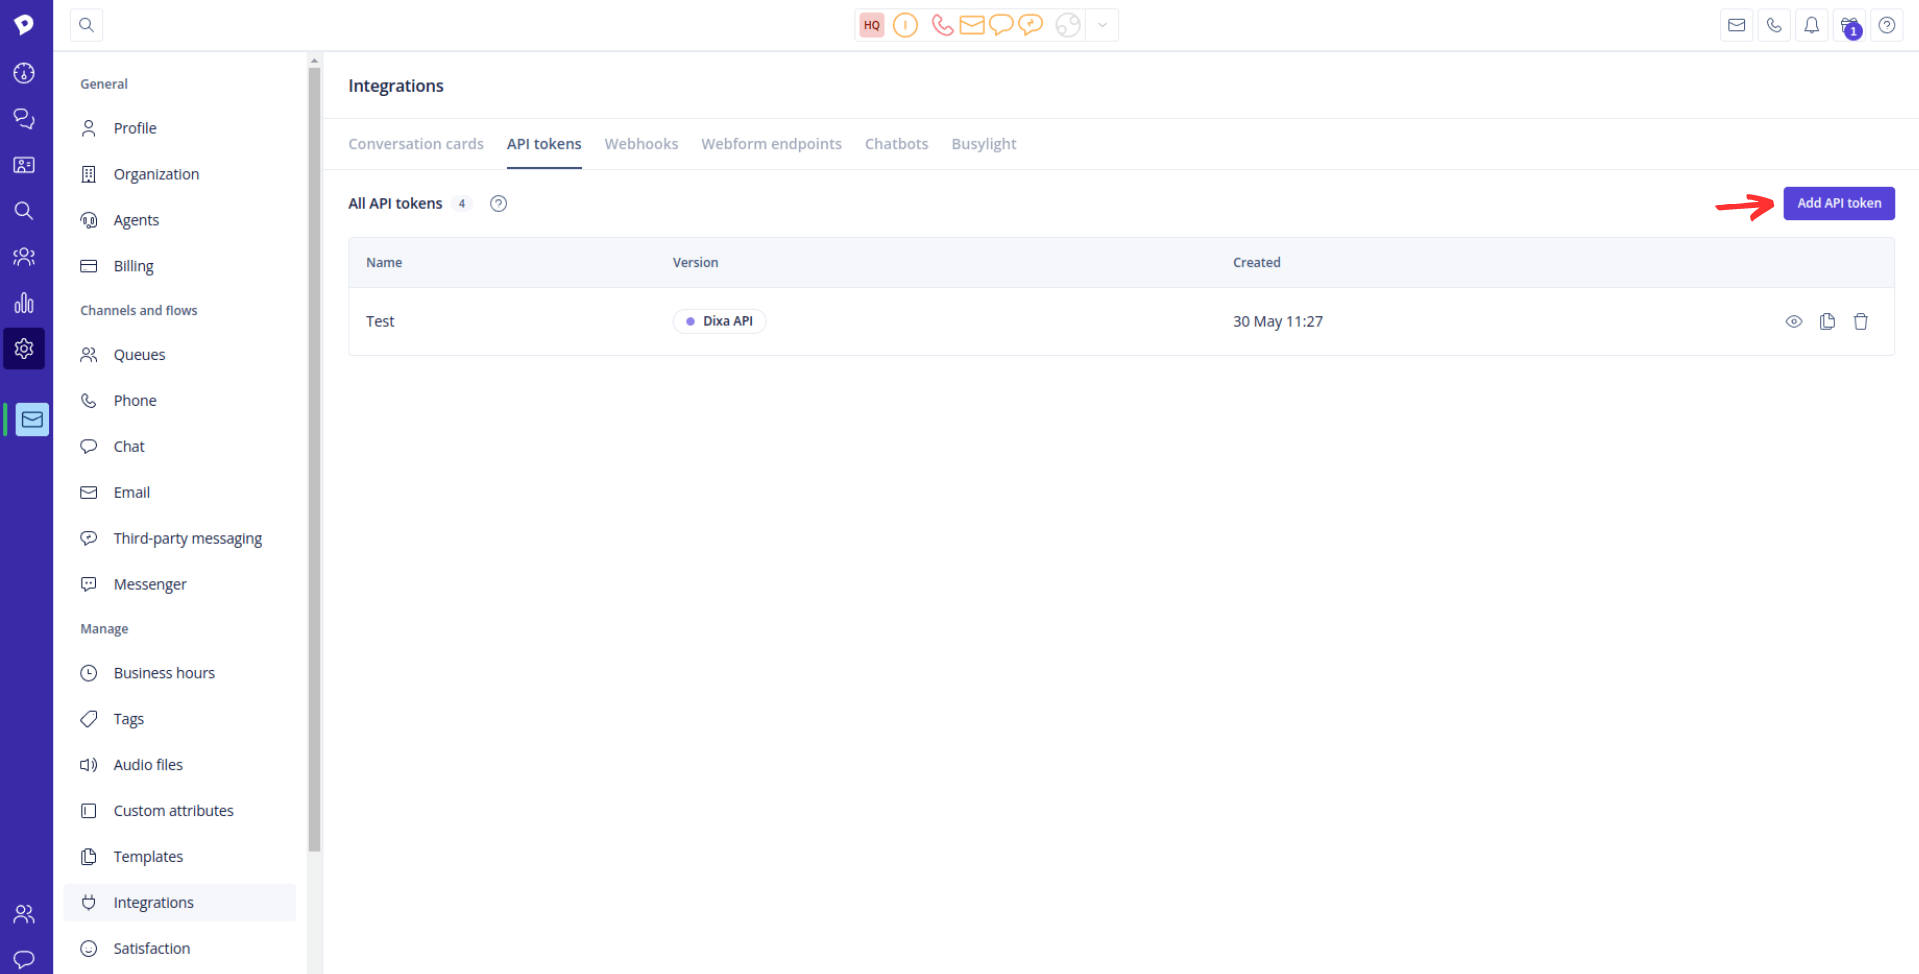
2. Click on Add API token.
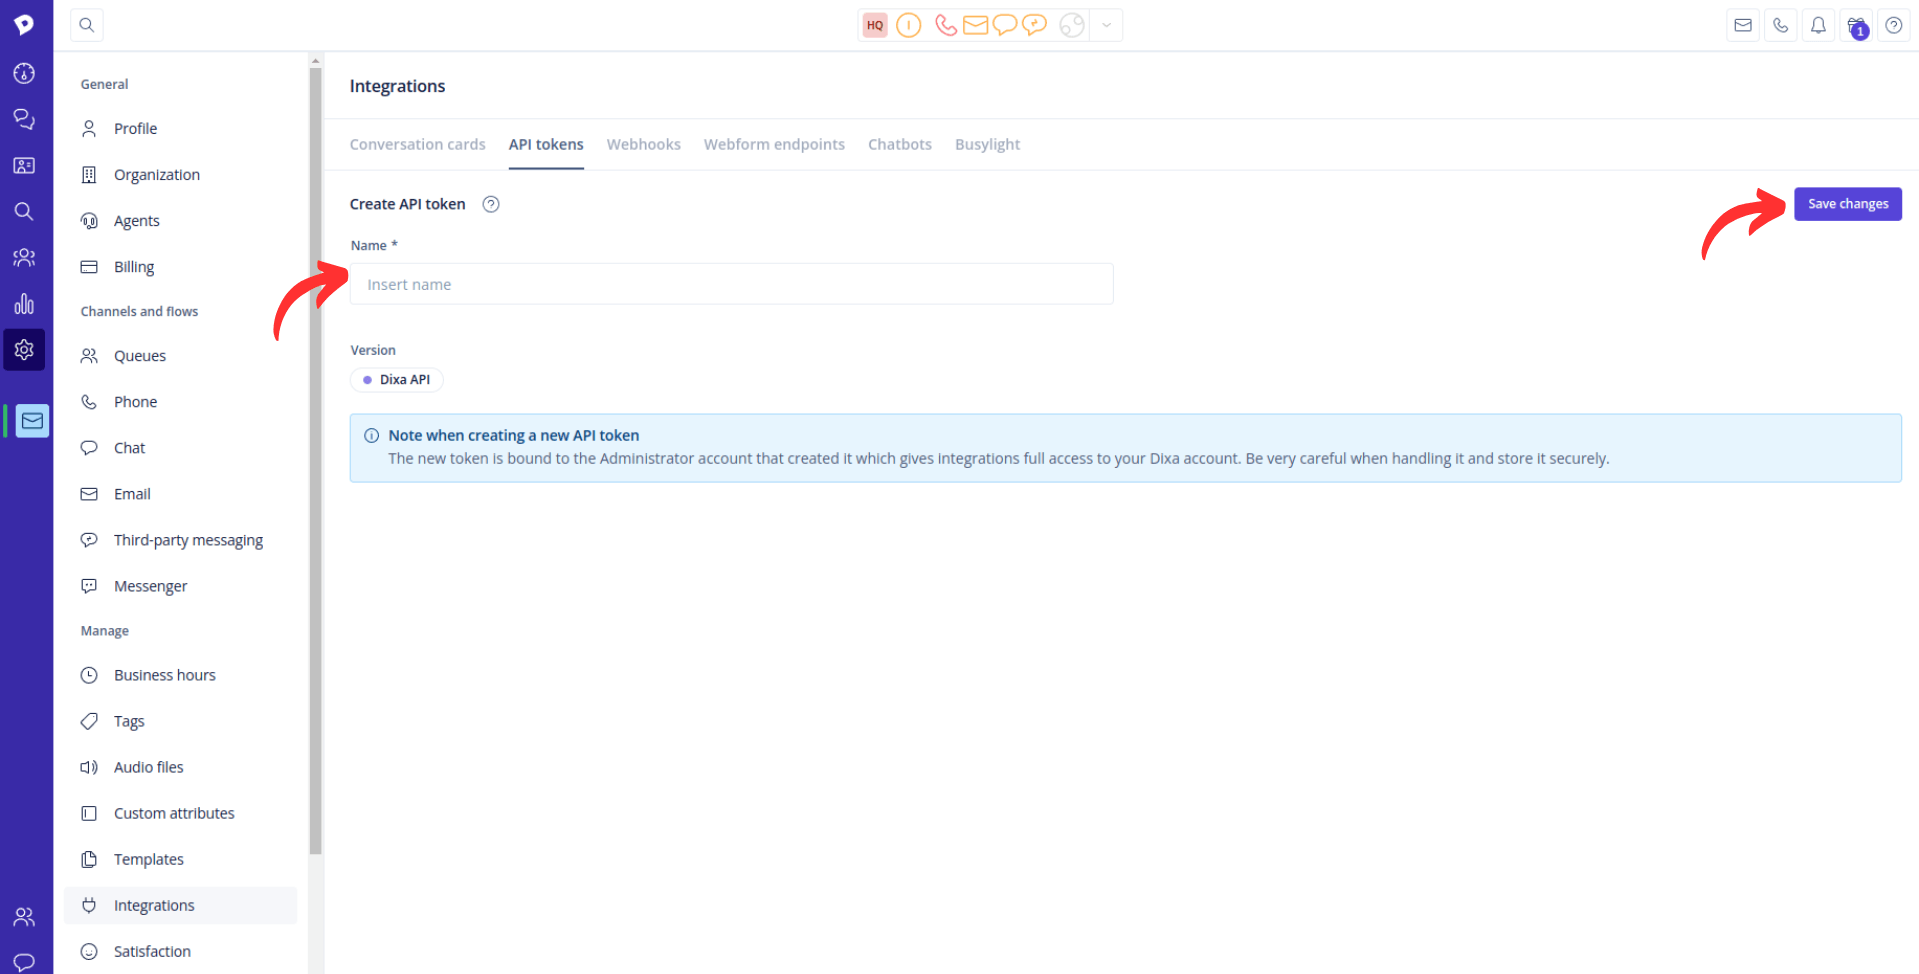
3. Enter a name for the API token and click Save.
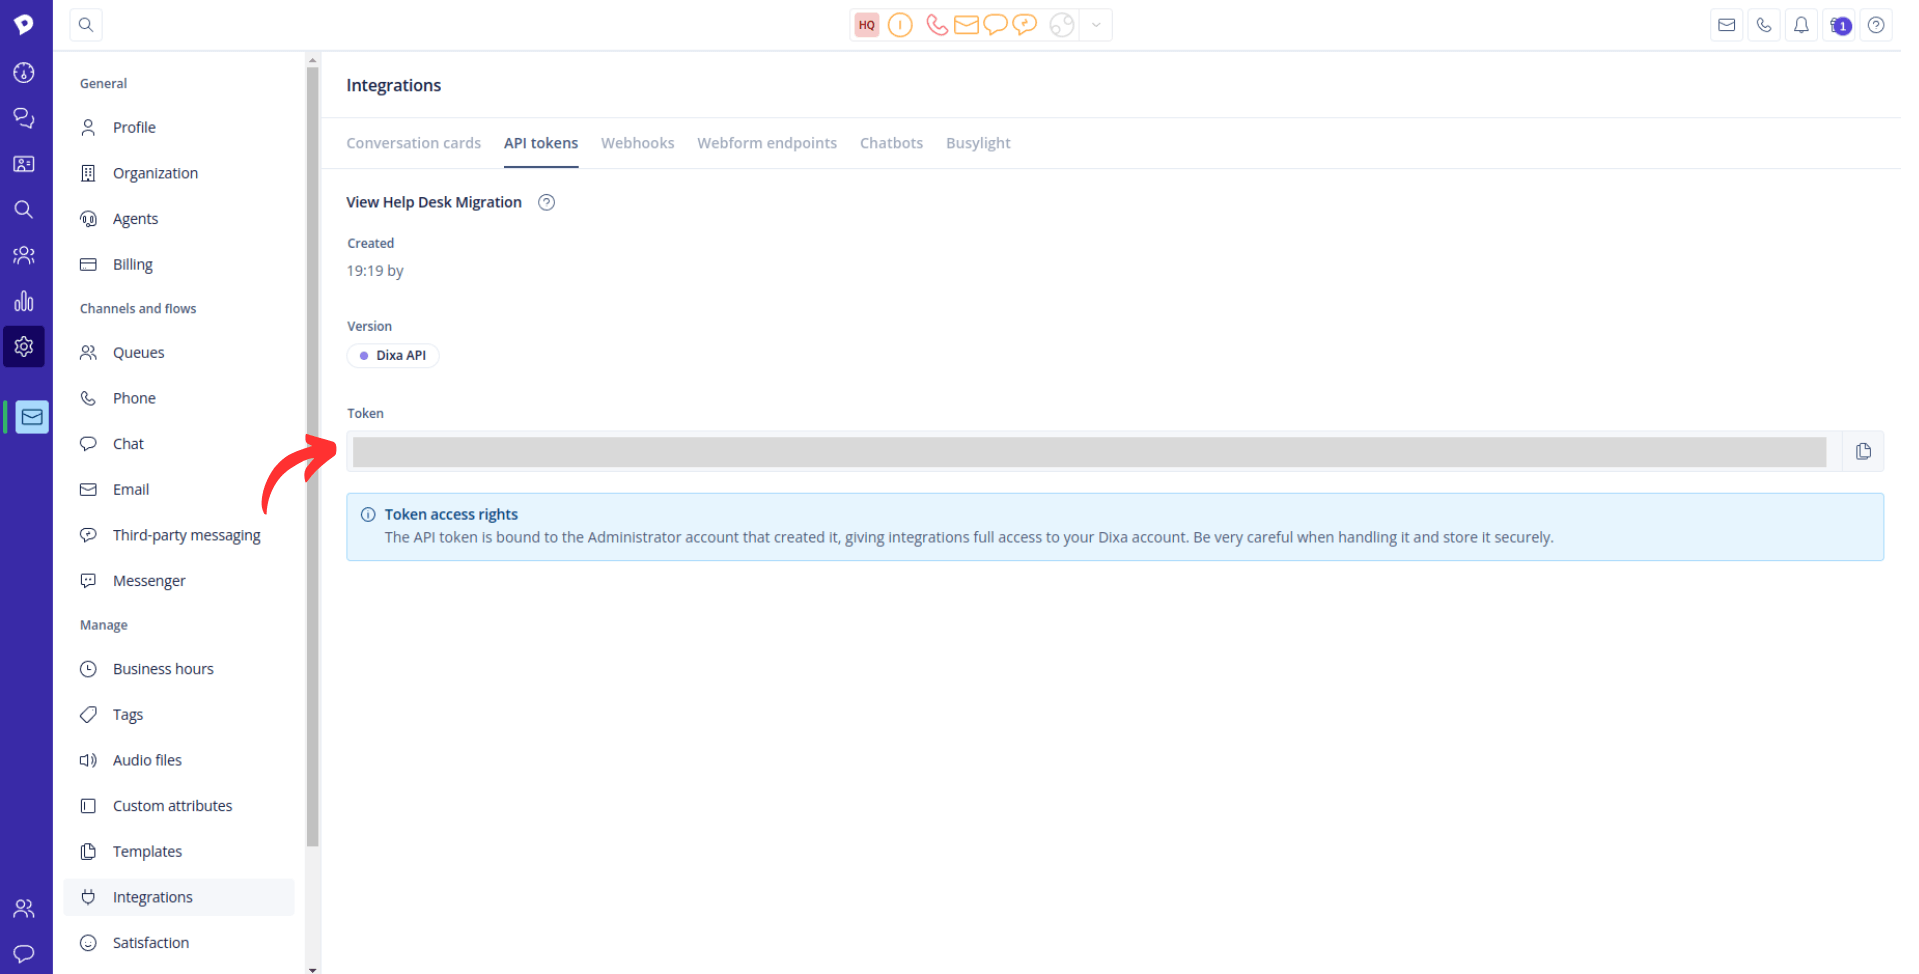
4. Copy the generated API token from the Token field.
How to Get a Widget ID in Dixa?
When migrating data to or from Dixa, you'll need to provide the API Token and Widget ID to establish a secure connection between your Dixa account and the Migration Wizard. Here's how you can find the Widget ID within the Dixa platform:
1. Log into your Dixa account.
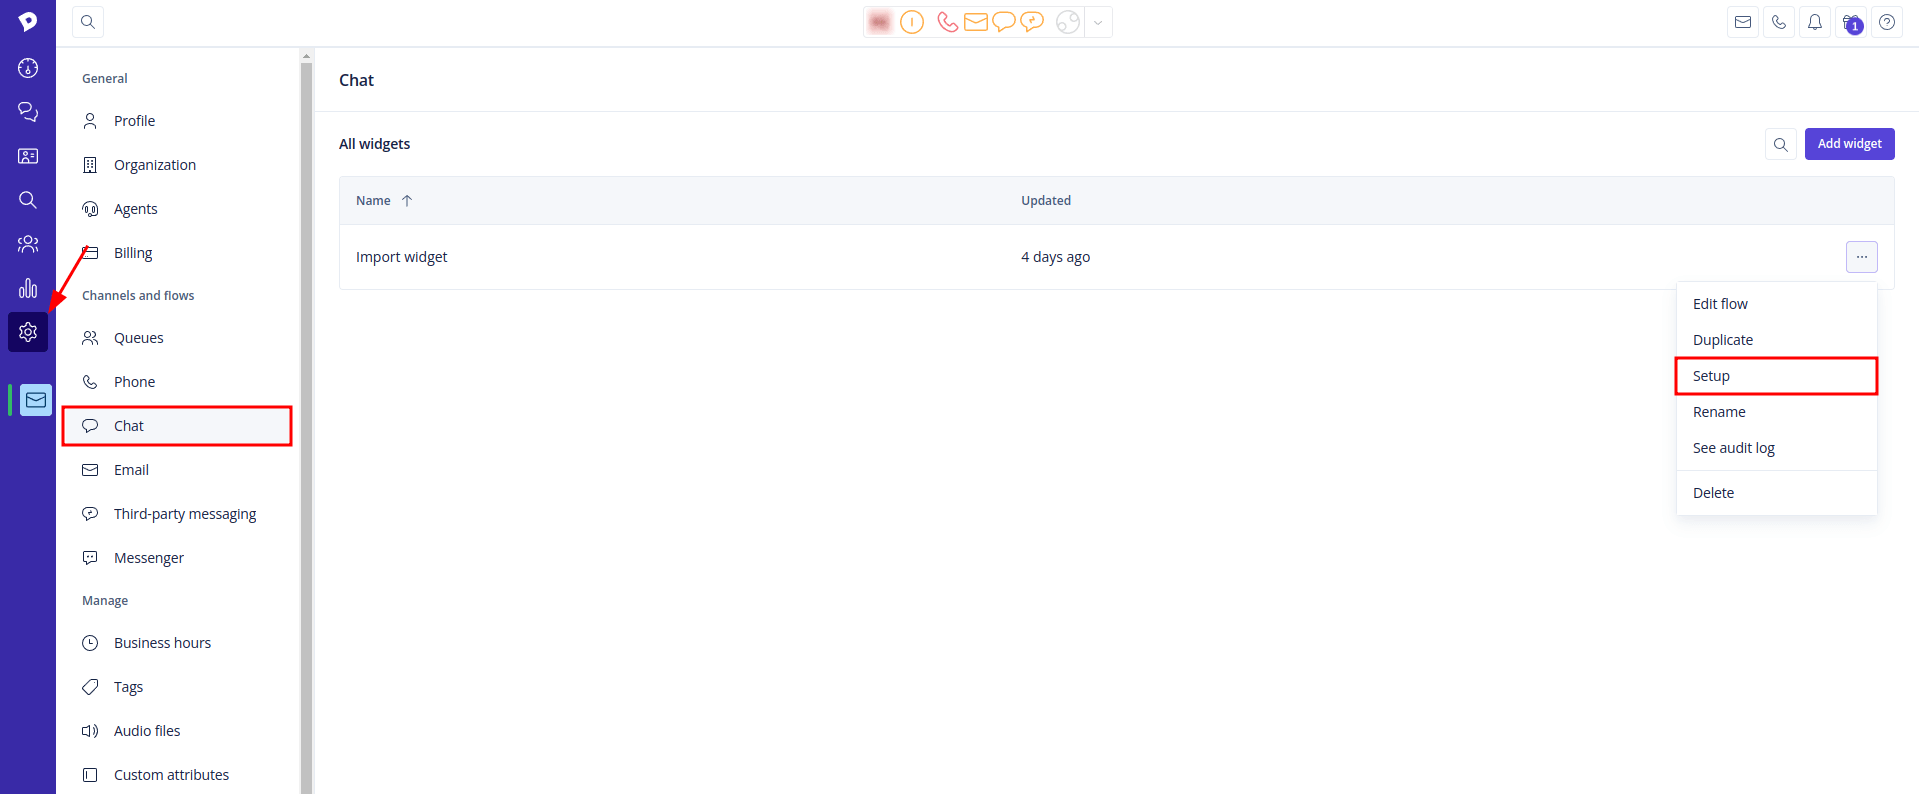
2. Hover over the Settings icon.
3. Click Chat, nestled within Channels and flows.
4. Go to All widgets and select the needed widget.
5. Hit on ellipsis (...) to open a drop-down.
6. Choose Setup from a new drop-down.
7. Copy a widget ID from a URL or the script.
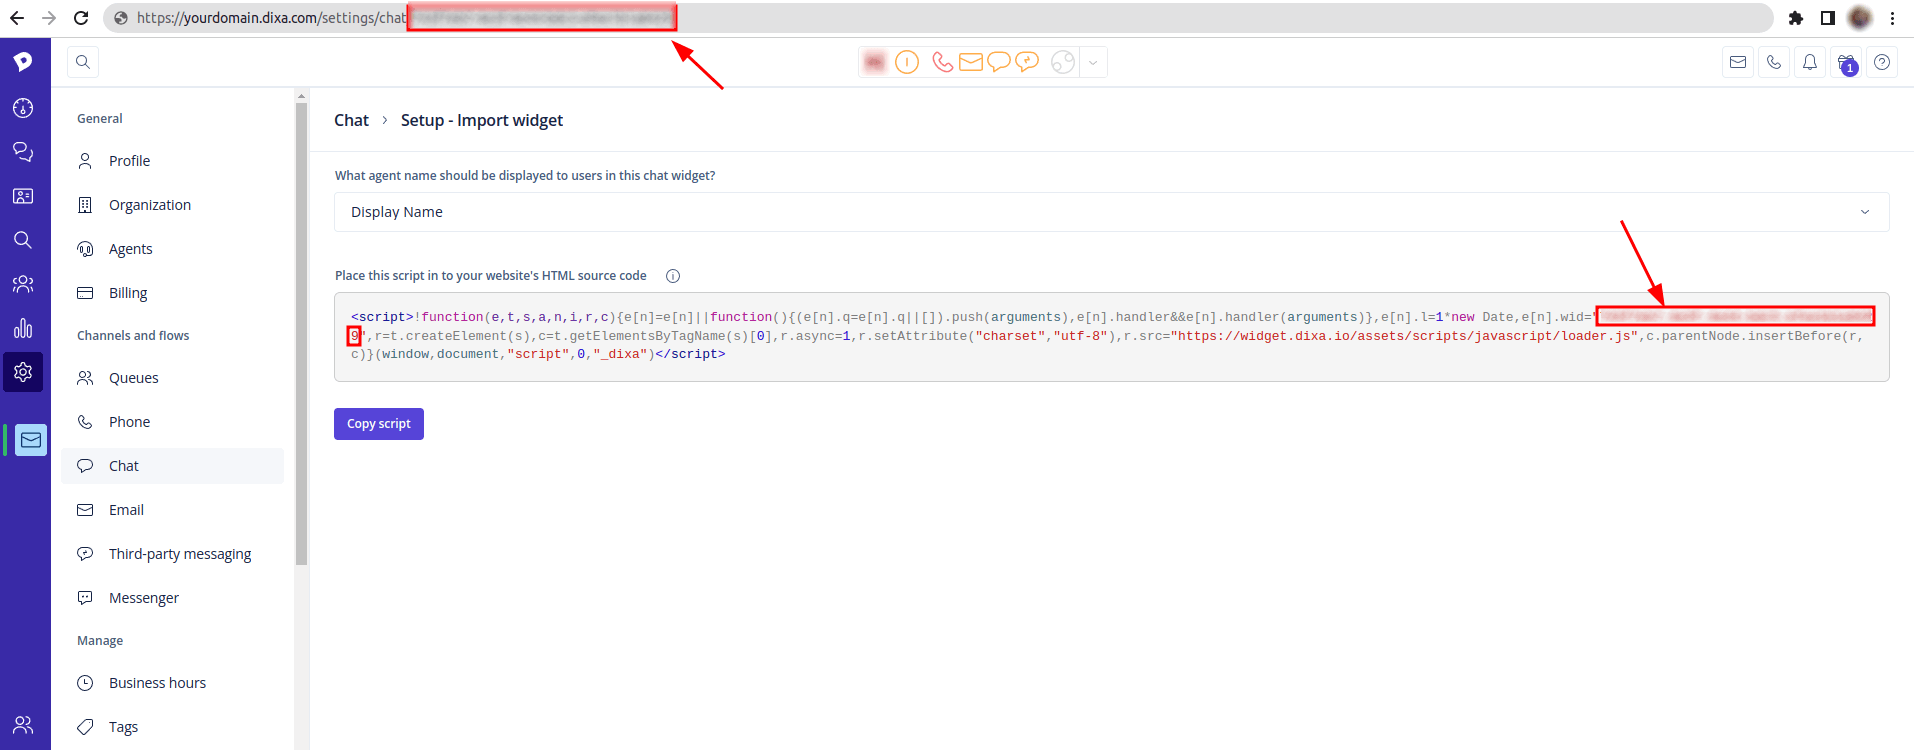
8. Return to Migration Wizard and fill in the widget ID.
How to filter tickets in Dixa?
To filter tickets in Dixa, follow these steps:
1. Click on the Filters button beneath the Search bar on the right-hand side to open the Filters interface.

2. In the Filters interface, you can select filter values and set conditions for each filter. Most filters default to the 'Is one of' condition, which includes all conversations that match one of the selected values.
3. There are time-based filters that allow you to set a range for parameters such as the creation date of conversations. The available conditional options for time-based filters include:
- Between: Includes all conversations between the start and end date selected (including selected dates).
- Since: Includes all conversations since the selected date.
- Until: Includes all conversations up until the selected date.
