Halo Service Solutions Migration Guides
How to generate client secret and client ID in Halo Service Solutions?
To facilitate a smooth data migration from or to Halo ITSM, you require Authorization Server, Client ID, and Client Secret. This way, you can connect your Halo ITSM account to Migration Wizard.
Here’s a simple guide to generate Сlient Secret and Client ID:
1. Go to your Halo ITSM account.
2. Click on Configuration in the left sidebar.

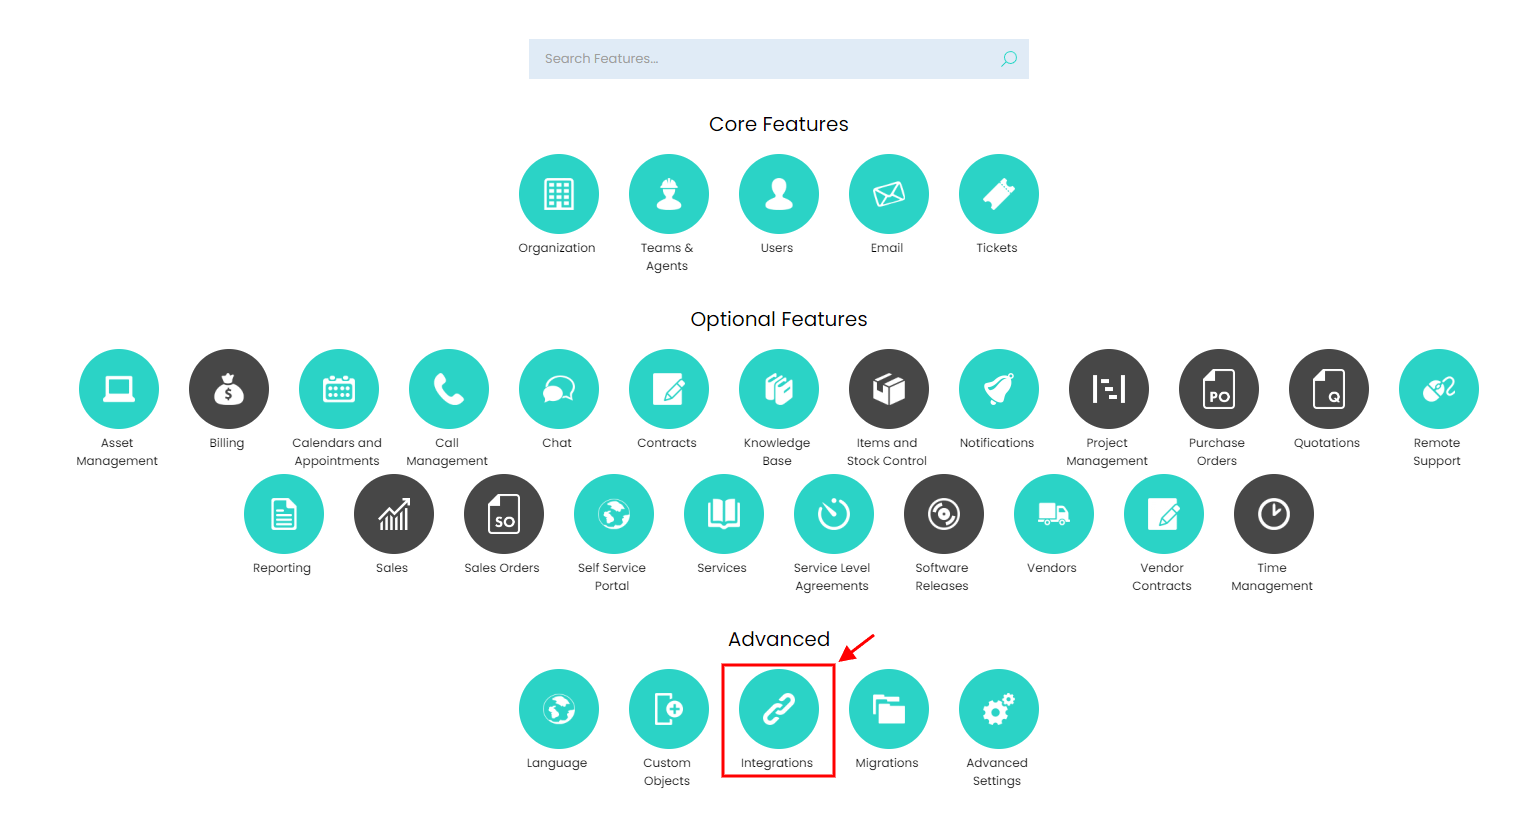
3. Select Integrations under Advanced.
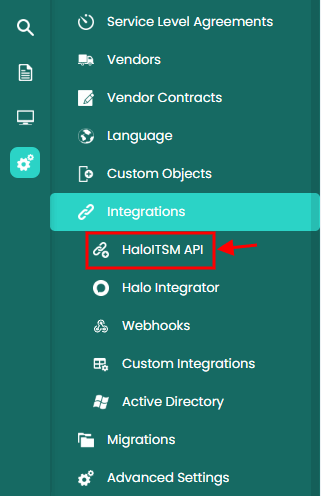
4. Choose Halo ITSM API from a drop-down.
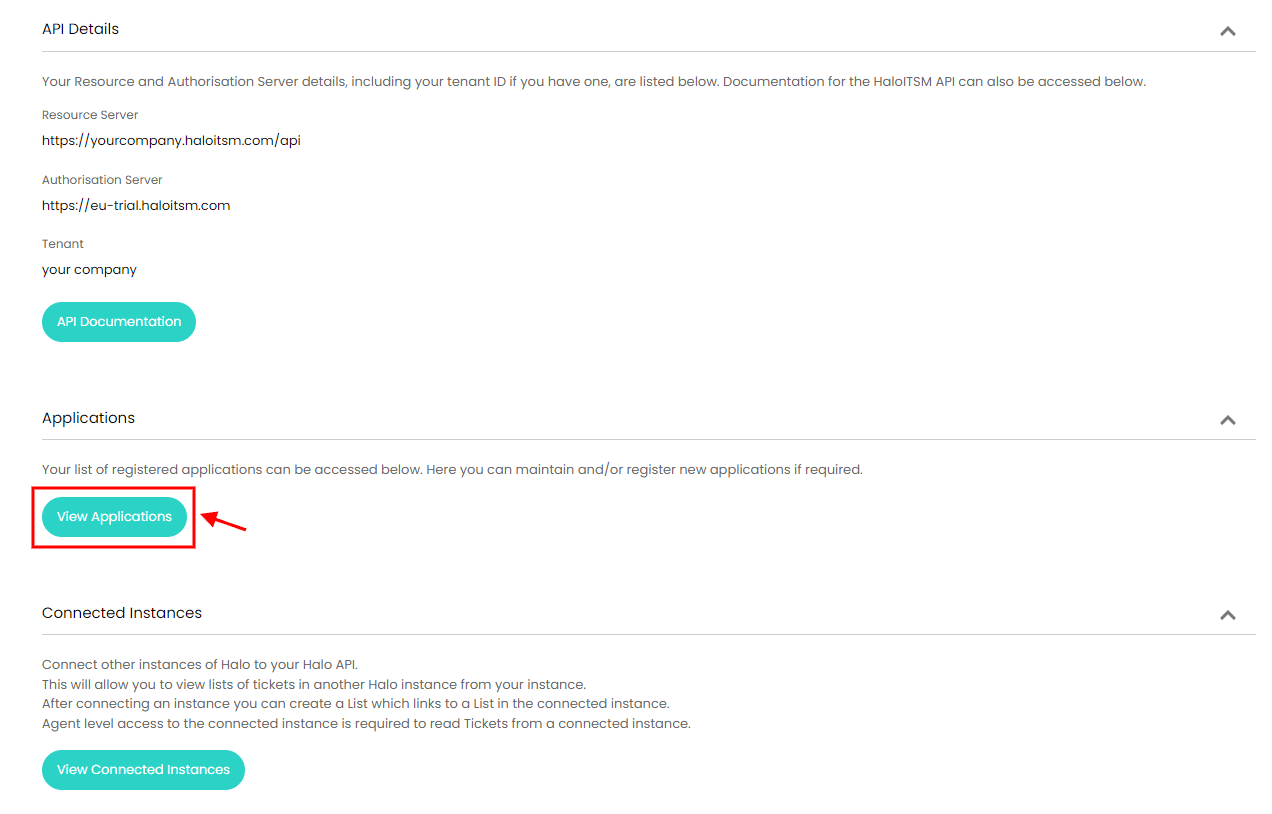
5. Click on View Application under Applications.
6. Click New in the right corner.

7. Apply the following settings in the tab “Details”:
- Fill in the Application name.
- Mark a checkbox next to active.
- Select Client ID and Secret (Services) under Authentication method.
- Choose Agent as login type.
- Select agent as log in as.
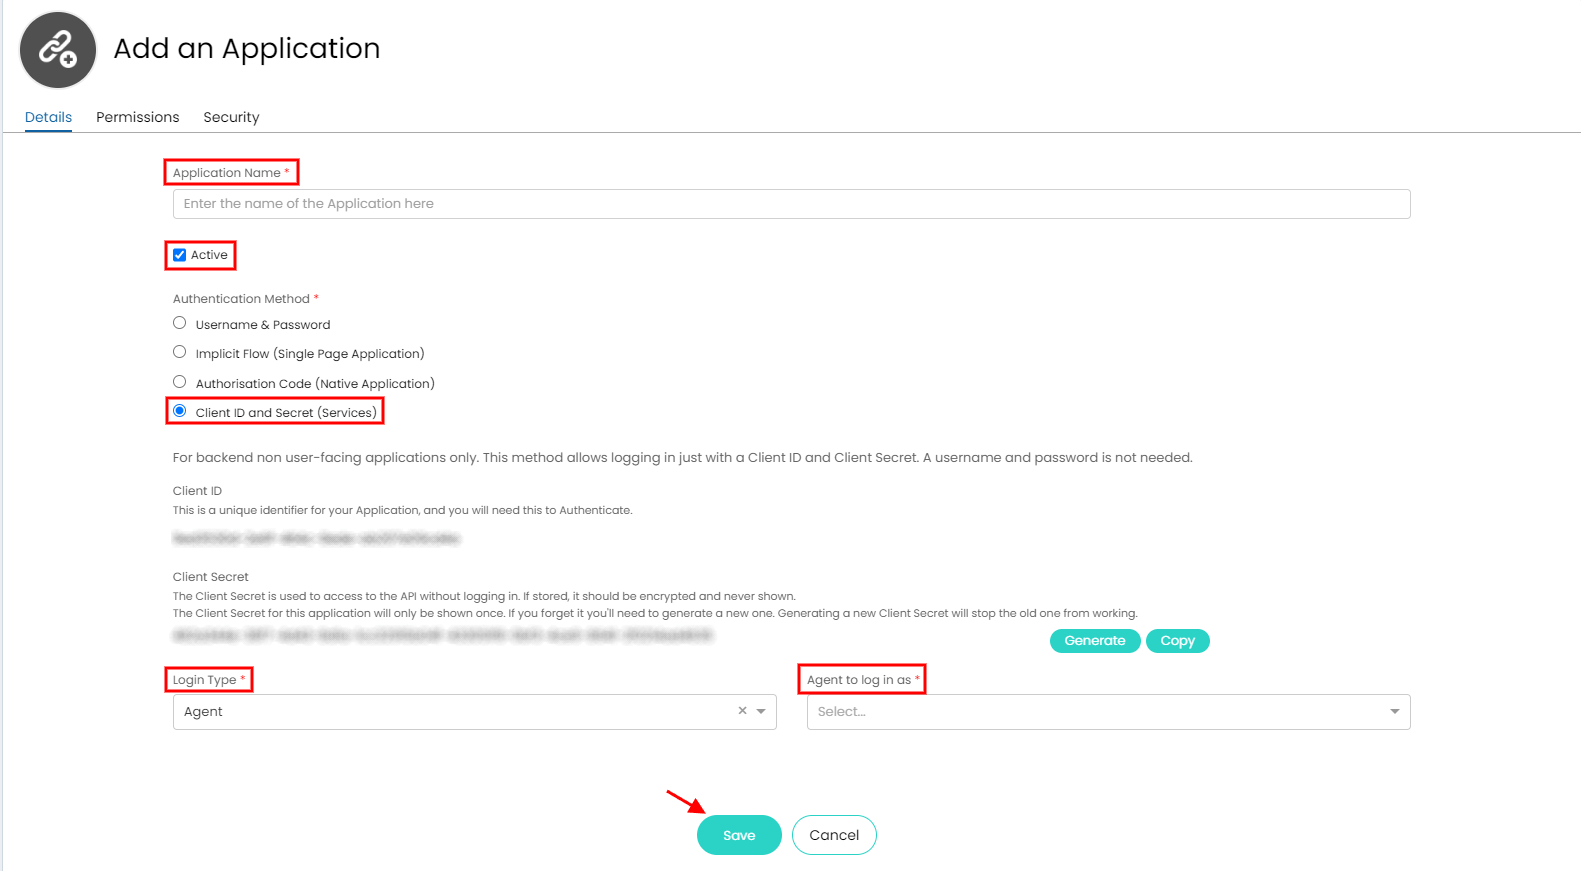
8. Copy Client ID and Client Secret.
9. Mark a checkbox next to All in the tab “Permissions”.

10. Click Save to apply settings.
How to deactivate the Approval Process in Halo Service Solutions?
To ensure ticket statuses like "Open" or "Closed" migrate correctly, disable the Approval Process before starting the migration.
How to disable it:
- Go to Configuration → Tickets → Ticket Types.
- Open a ticket type and click Edit.
- Set Start an Approval Process to No.
- Click Save.
Once the Full Data Migration is complete, you can re-enable the Approval Process as needed.
How to edit the required to non-required fields in the Halo Service Solutions?
To modify the required fields in the incidents in Halo Service Desk, you need to
1. Sign in to your Halo Service Desk account. Go to Tickets > Ticket Types and choose Incidents.
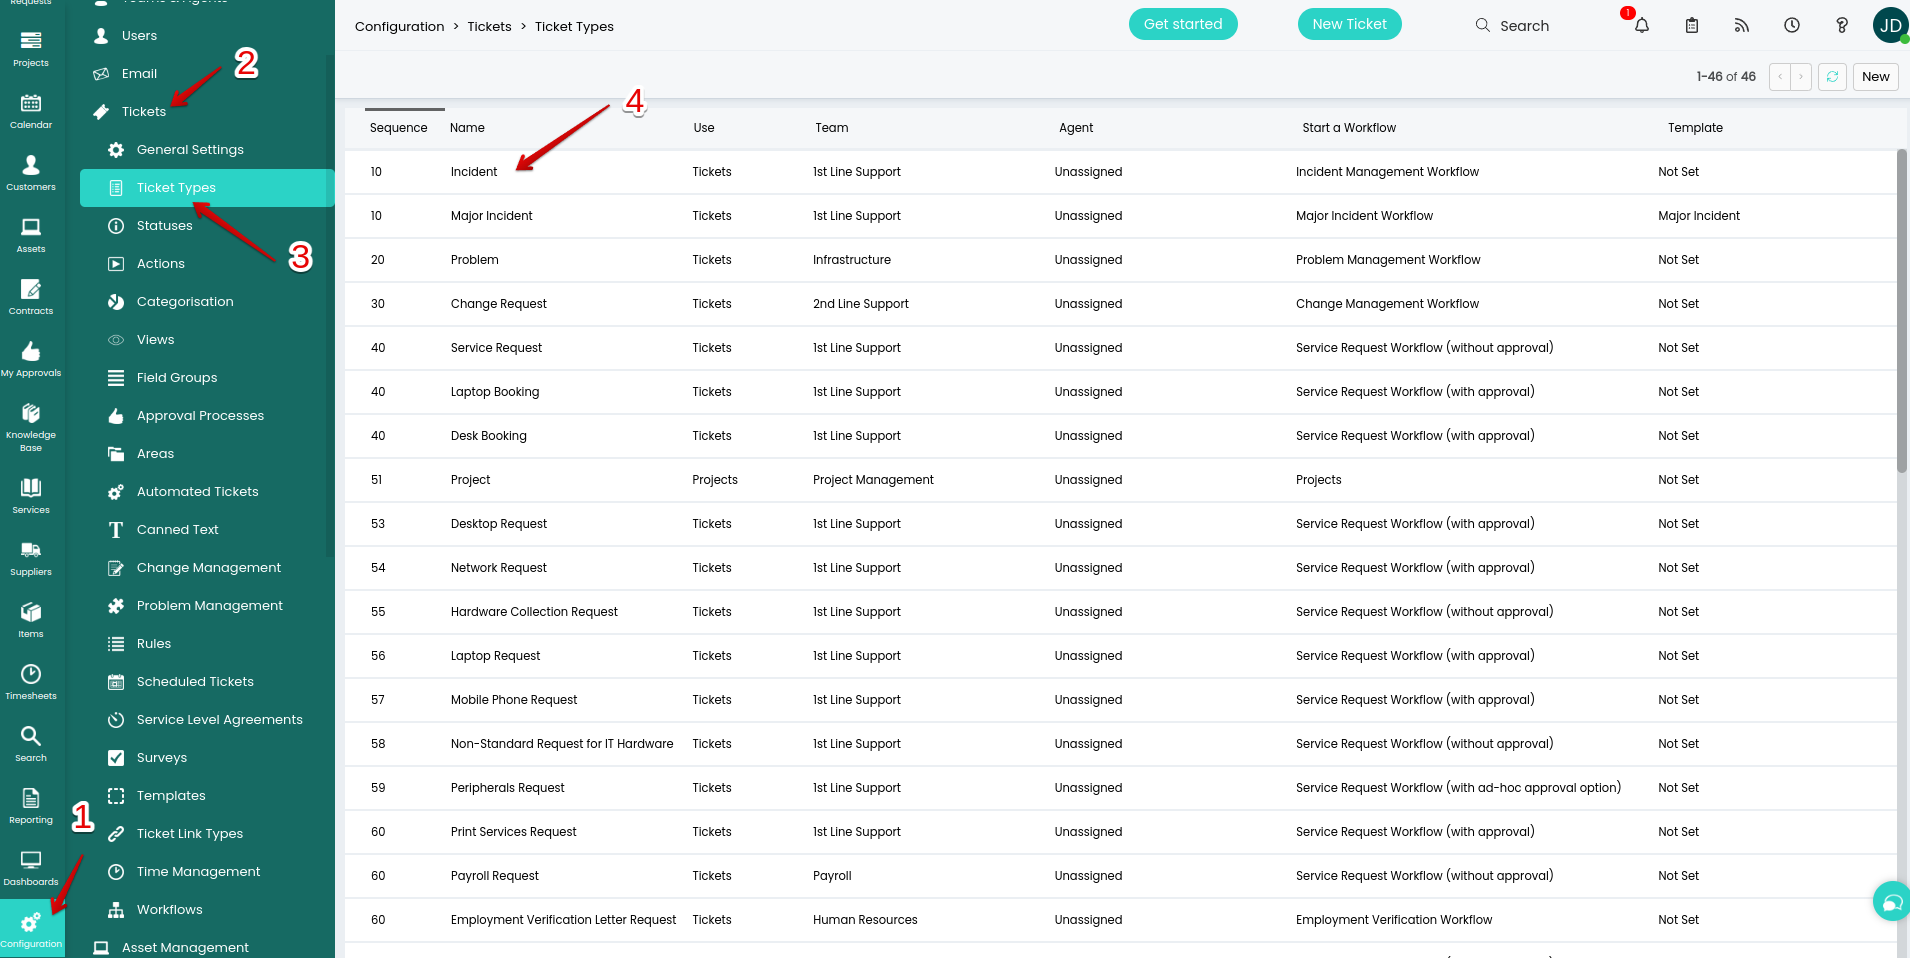
2. Go to Field List and click edit.
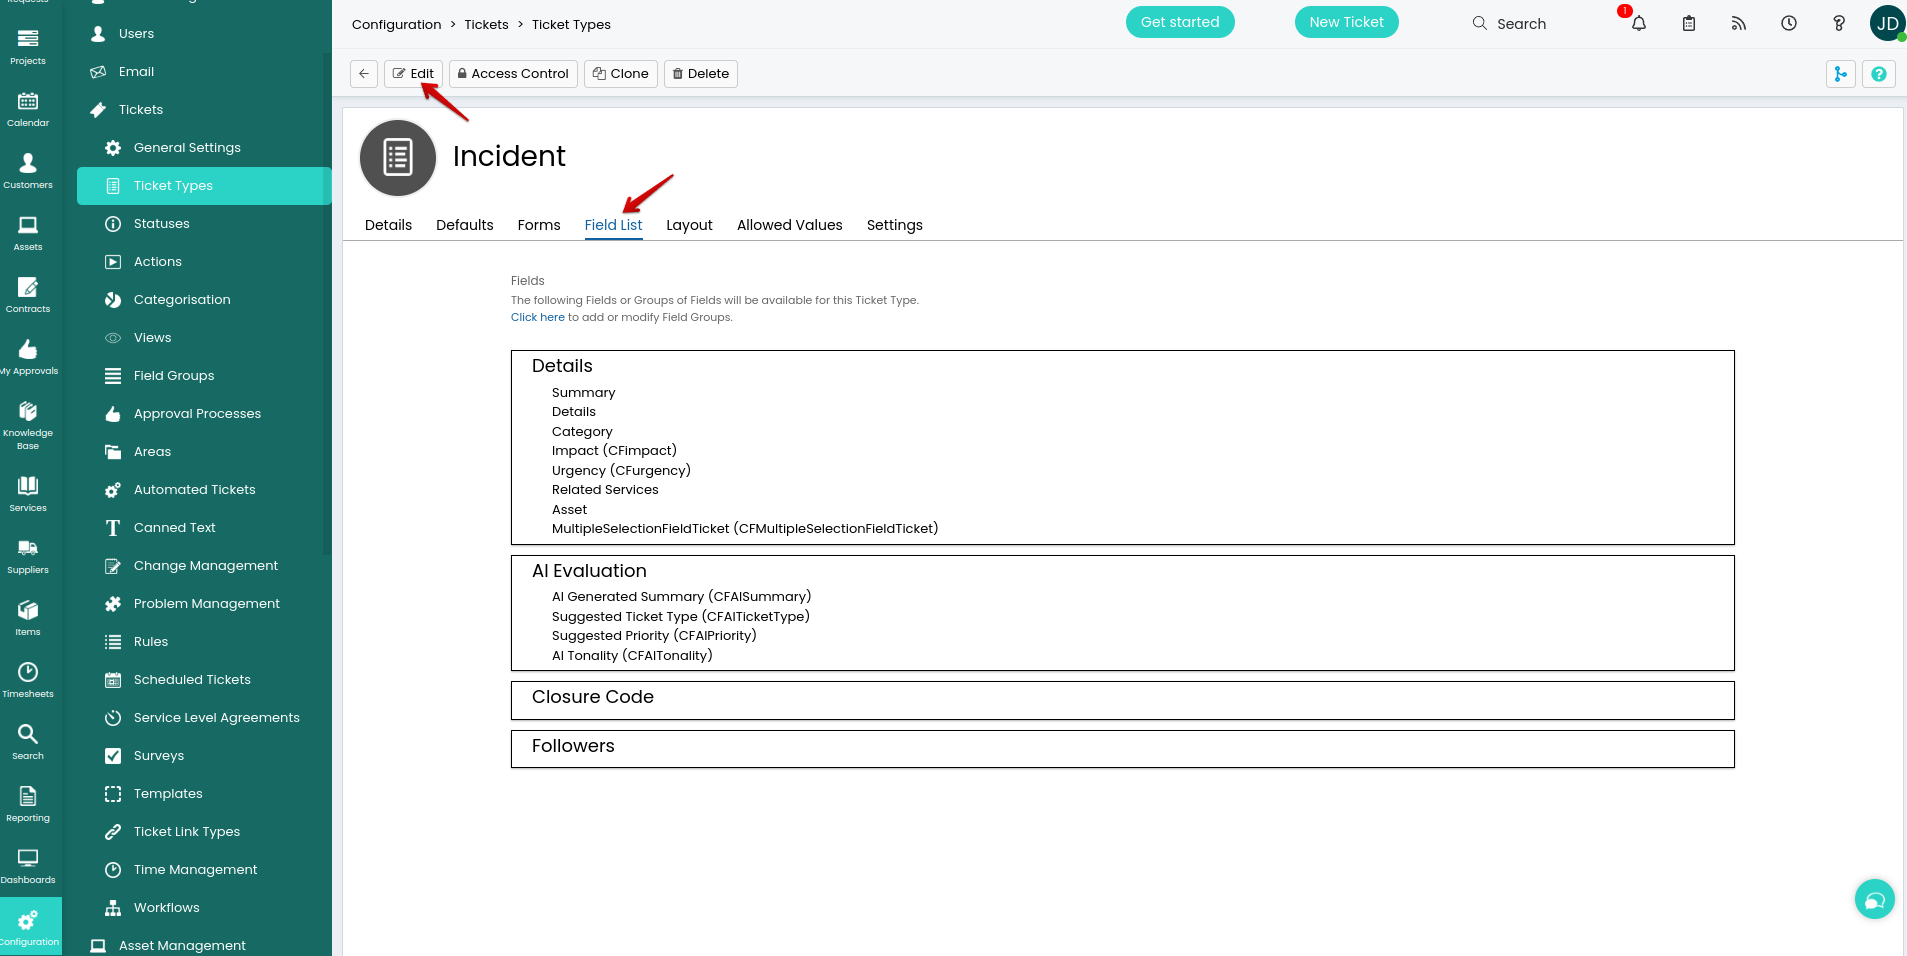
3. Then click the pencil icon to edit Incident Details.
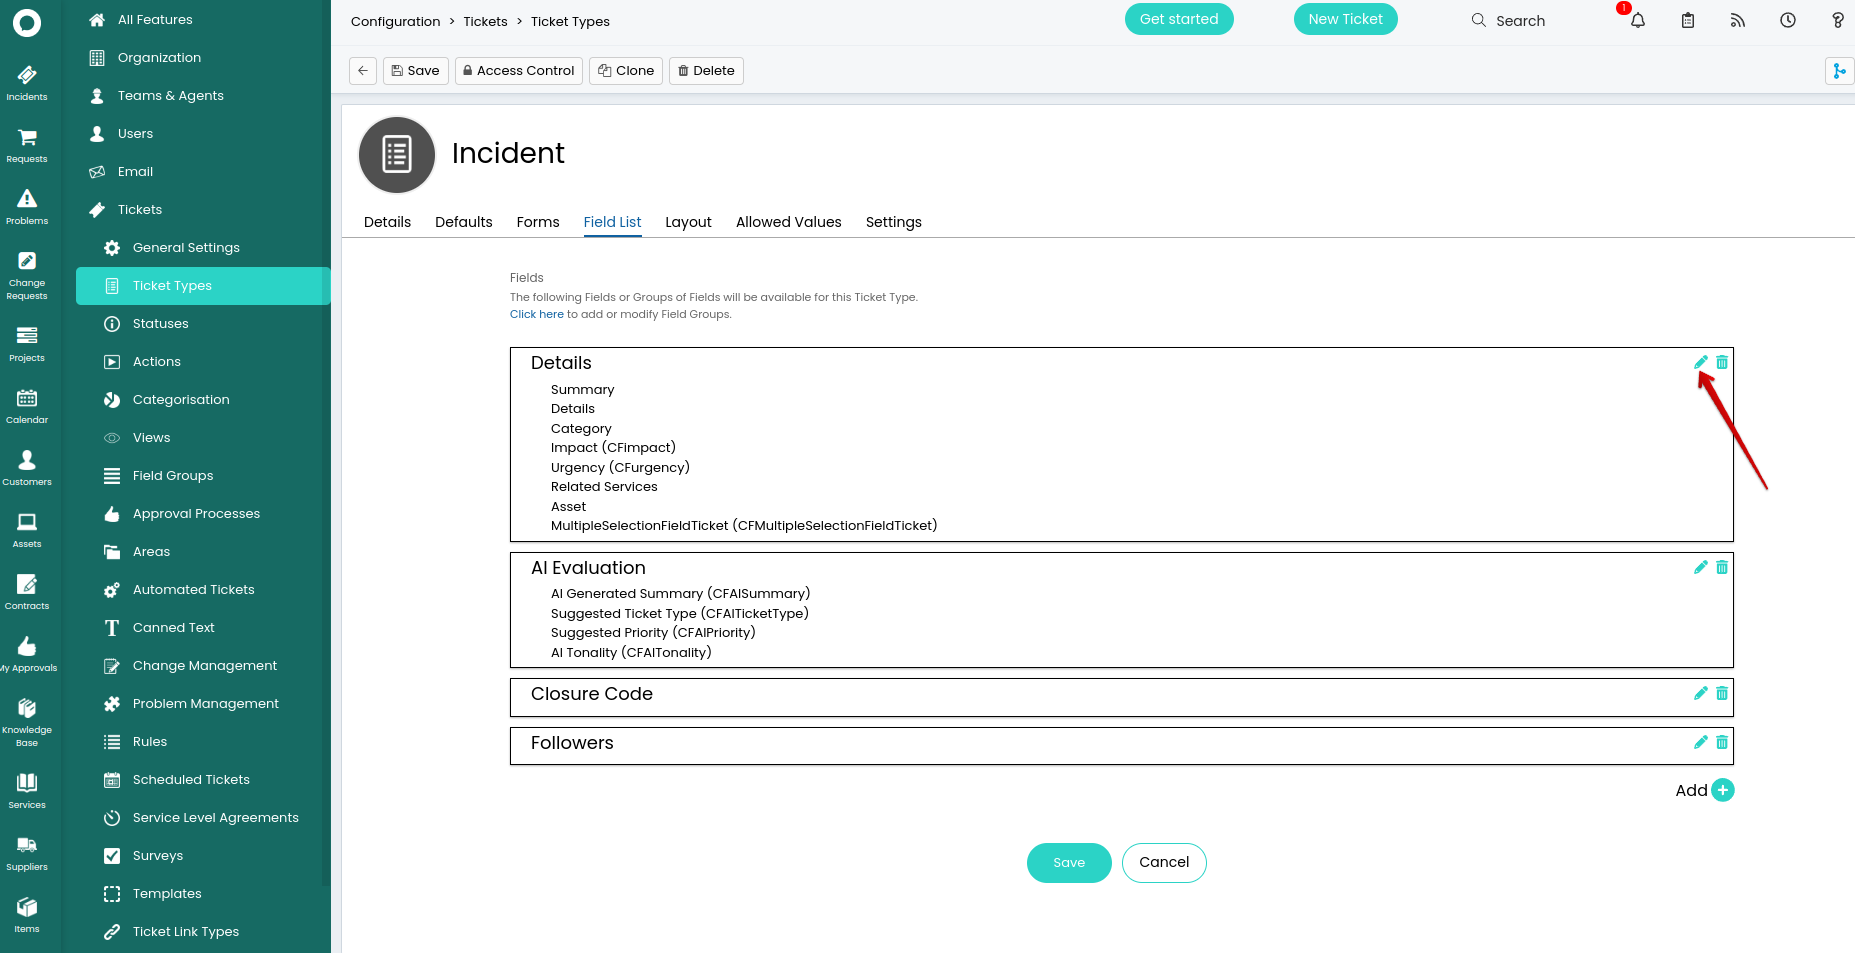
4. In Details, select Field List and click on a pencil icon next to Category to edit it.
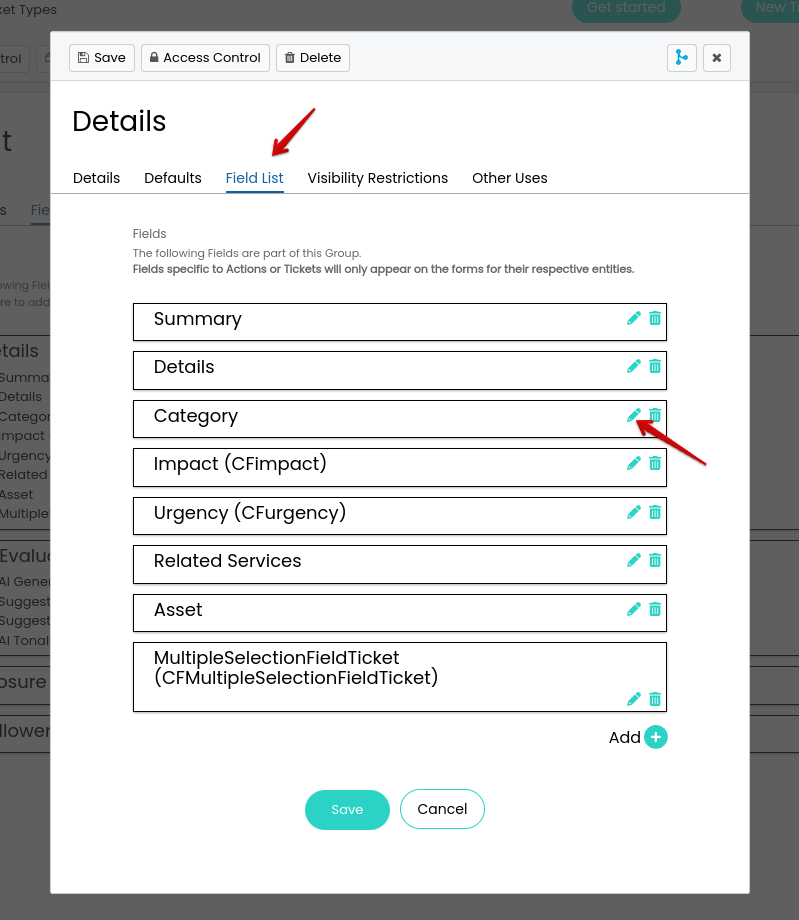
5. Modify the required fields to your specific migration needs.
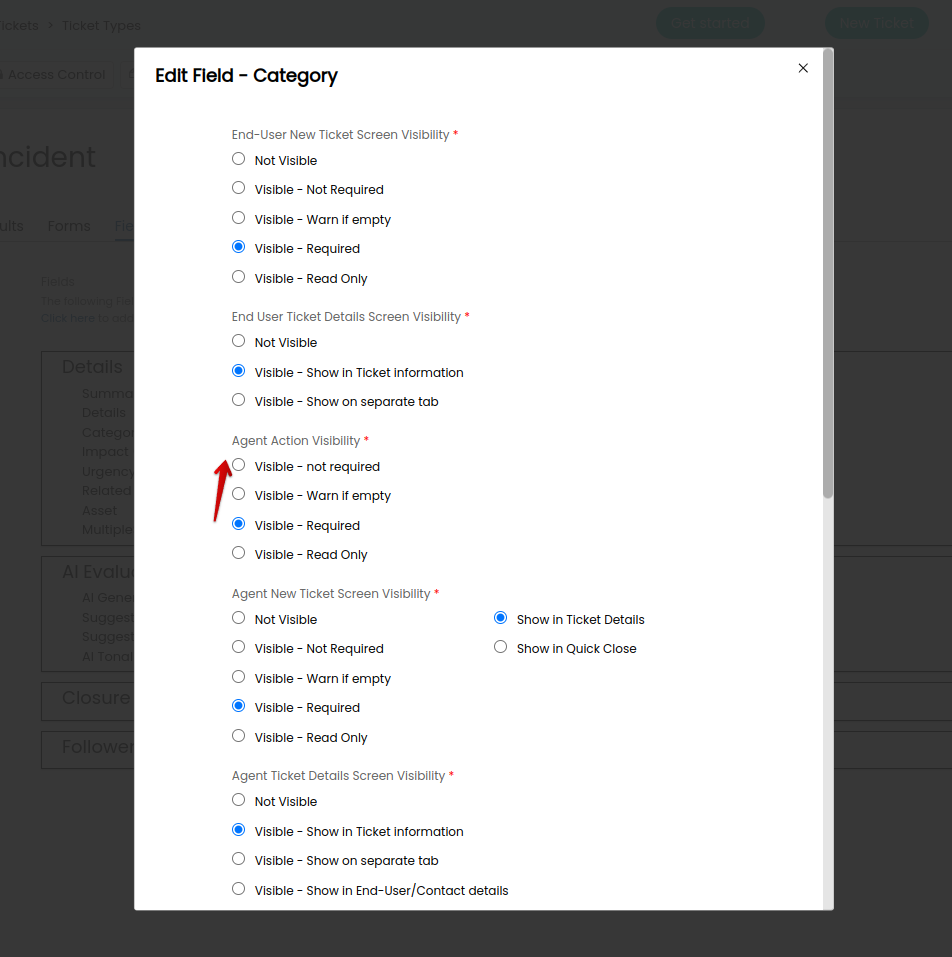
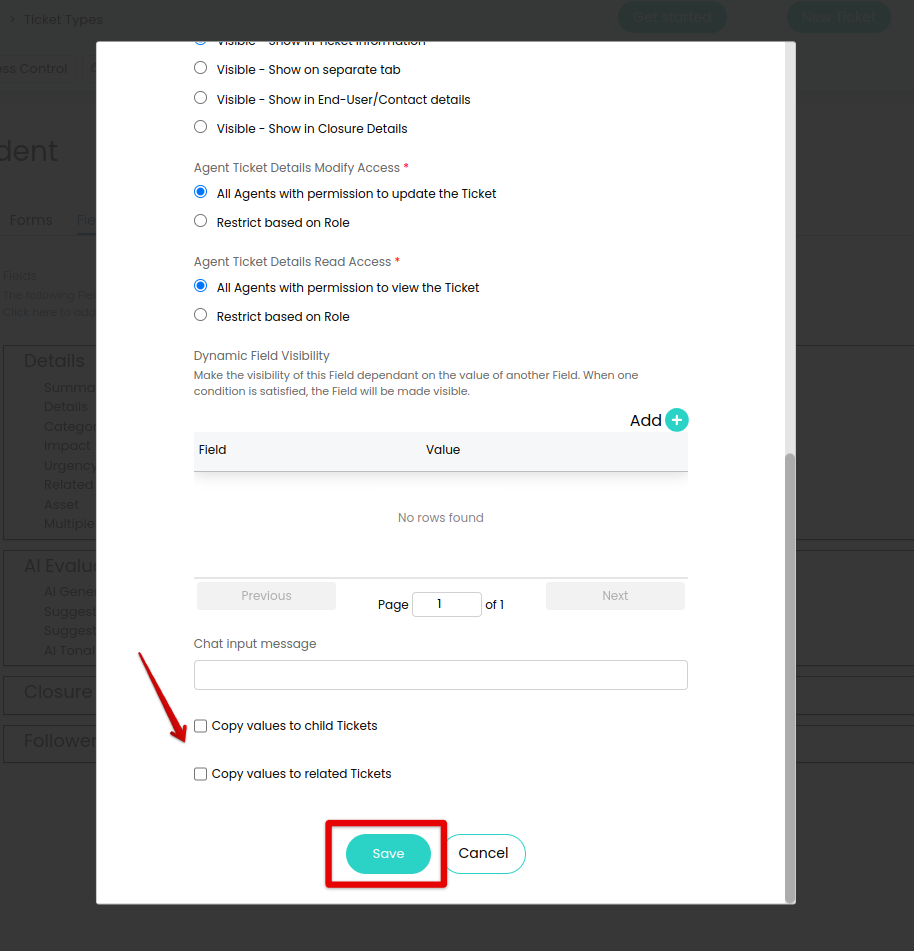
6. You can apply this setting to related tickets as well. Once done, click the Save button at the bottom of this window.
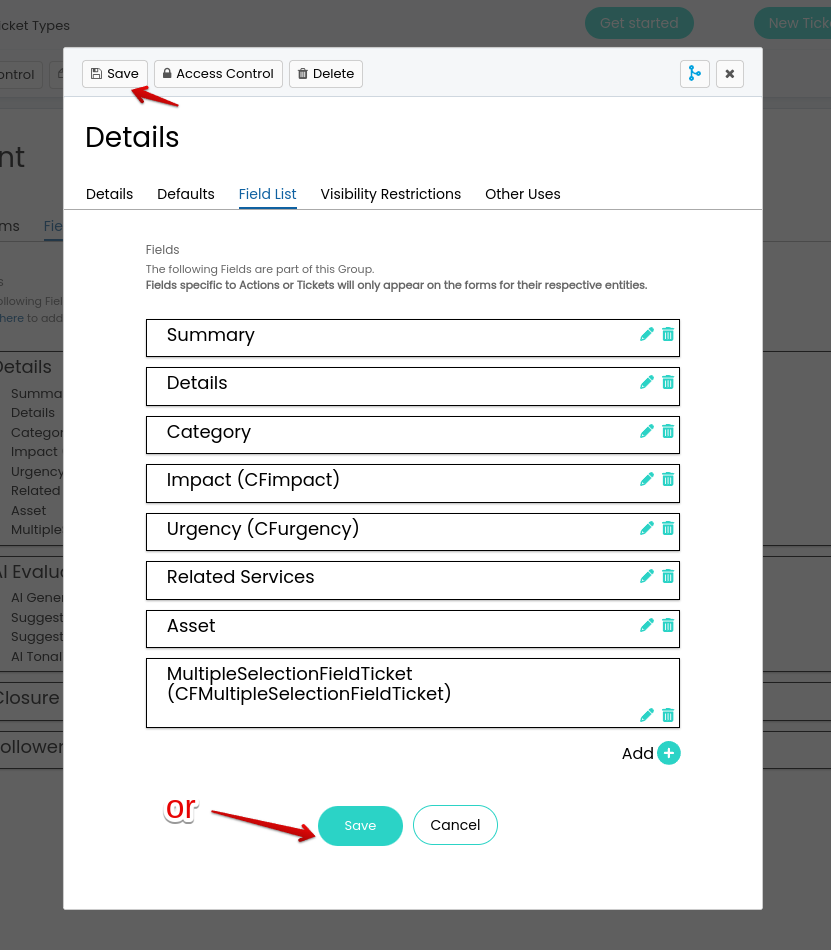
7. Save the Details changes.
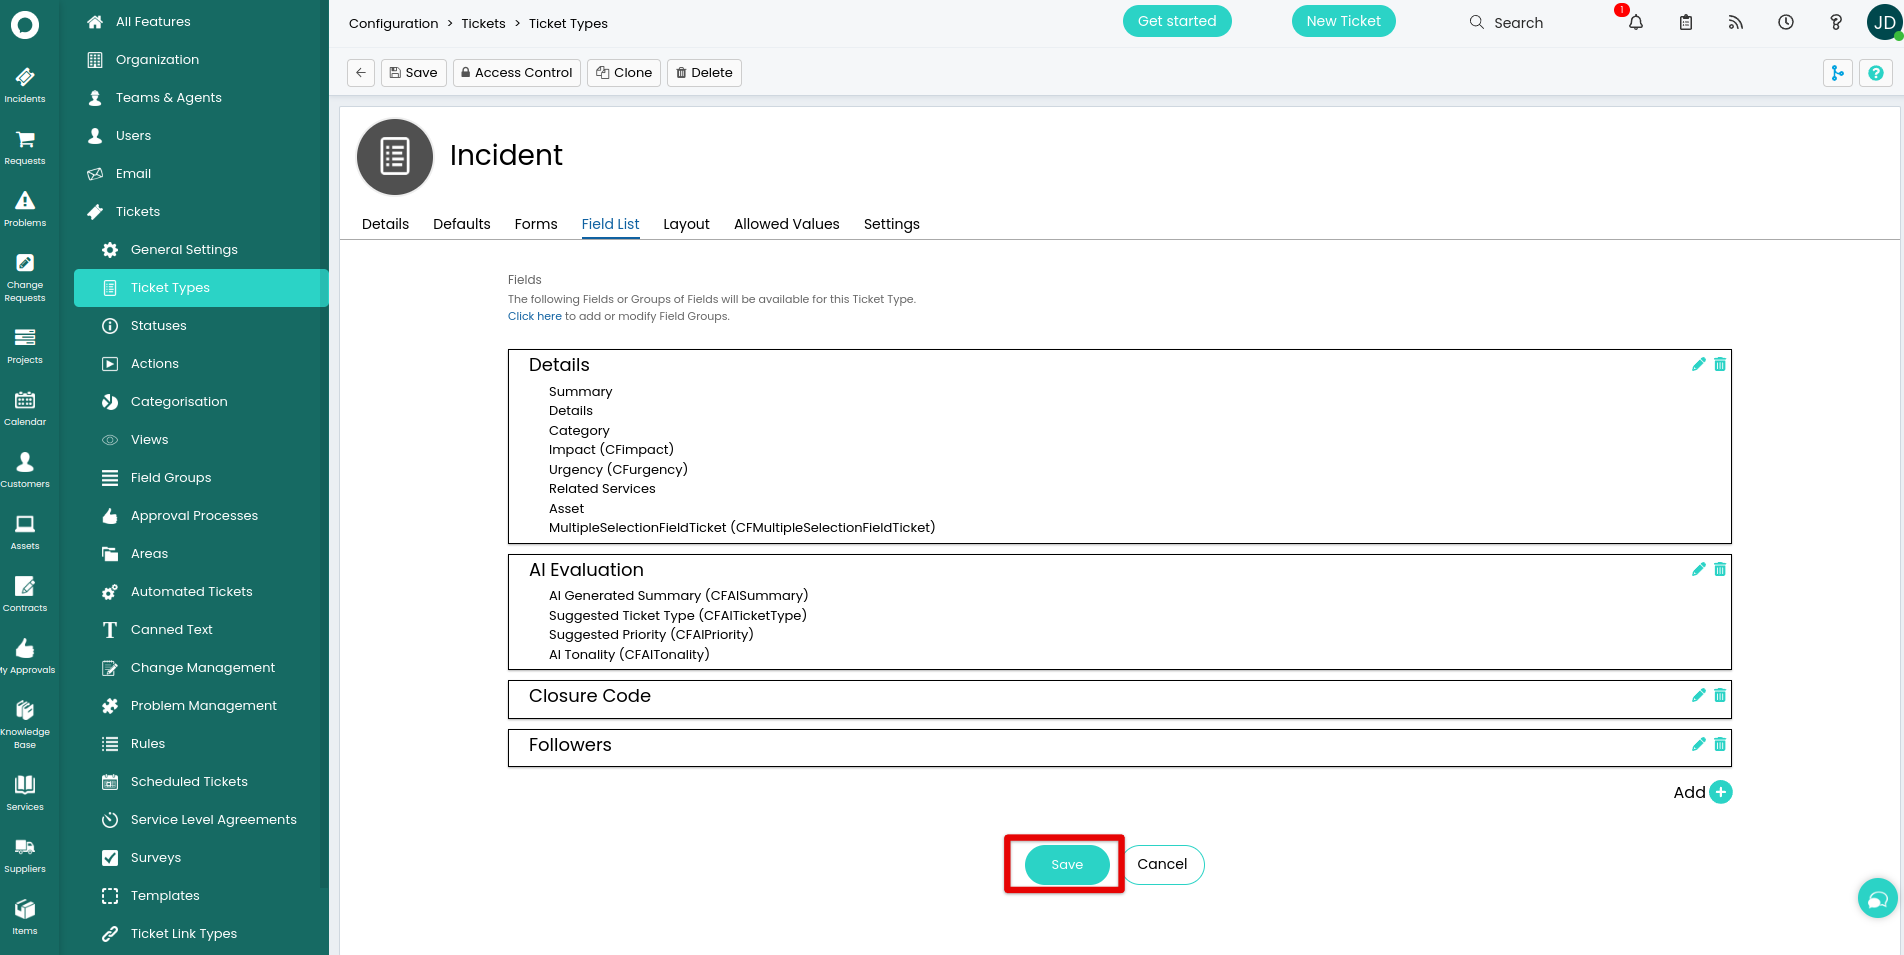
8. And save the changes in the Incident.
How to disable AI in Halo Service Solutions?
Just like with automations and notifications, you should turn off AI in Halo before starting your migration. The built-in AI can automatically change migrated data, which can affect data accuracy.
To turn off AI in Halo:
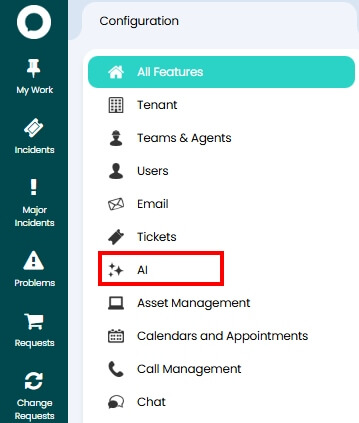
1. Go to Configuration > AI.
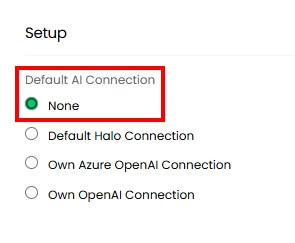
2. Scroll to Setup. Under Default AI Connection, choose None.
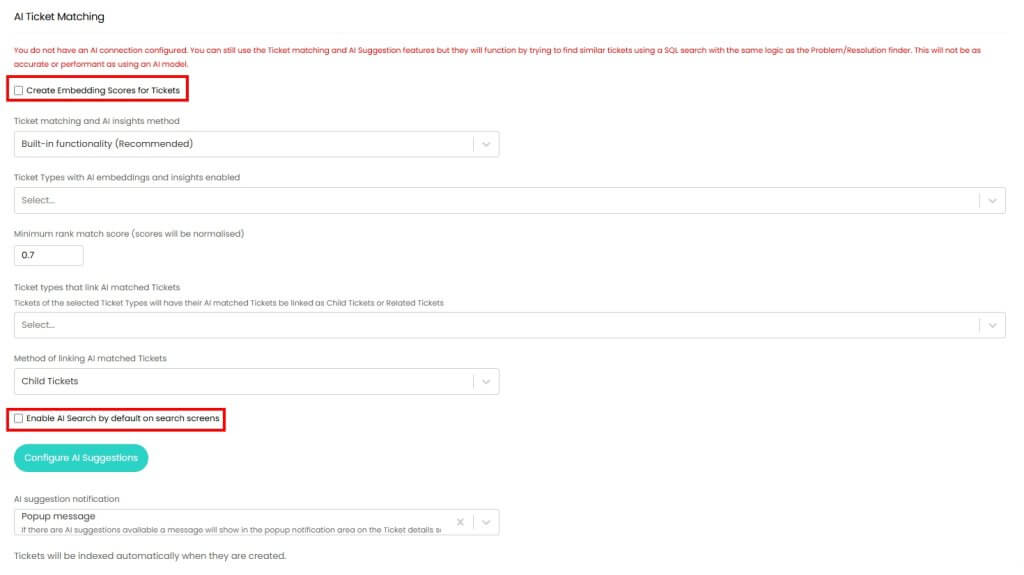
3. Open AI Ticket Matching and switch off all other AI features temporarily.
Once your Full Migration is complete and you’ve verified your data, you can safely turn AI back on.